Table of Contents
Advertisement
Quick Links
Operating Instructions
Air Cooled Heating Press
AIR 1200 P
Müssel Maschinenbau GmbH
Reichelsweiherstraße 8
95615 Marktredwitz
GERMANY
Tel.: +49 9231 9980-0
Fax: +49 9231 9980-80
E-Mail: kontakt@muessel.com
1
Operating instruction: O003 / 5759
Edition: 04/2019
Reproduction, duplication of this document - even a partial form –
are subject to our permission. All rights reserved.
In this data sheet any liability for changes, errors or misprints is excluded.
Advertisement
Table of Contents

Related Manuals for Mussel AIR 1200 P


Summary of Contents for Mussel AIR 1200 P
- Page 1 Operating Instructions Air Cooled Heating Press AIR 1200 P Müssel Maschinenbau GmbH Reichelsweiherstraße 8 95615 Marktredwitz GERMANY Tel.: +49 9231 9980-0 Fax: +49 9231 9980-80 E-Mail: kontakt@muessel.com Operating instruction: O003 / 5759 Edition: 04/2019 Reproduction, duplication of this document - even a partial form –...
- Page 2 This operating instruction provides you with important information for the proper and safe use of the air cooled heating press, AIR 1200 P. Owing to our experience over decades in the development and the fabrication of finishing tools for conveyor...
- Page 3 Contents General information Name and address of the manufacturer Identification of the device CE-Declaration Conformity General safety instructions Usage in accordance with regulations Organisational measures Personnel selection and qualification Safety instructions for specific operating phases Mobile devices Safety instructions Product description Components How it works Technical data...
- Page 4 Operating instruction: O003 / 5759 Edition: 04/2019 Reproduction, duplication of this document - even a partial form – are subject to our permission. All rights reserved. In this data sheet any liability for changes, errors or misprints is excluded.
-
Page 5: General Information
Reichelsweiherstraße 8 95615 Marktredwitz GERMANY Identification of the device Product designation: Air cooled heating press Serial/Type designation: AIR 1200 P Serial number: see type label Year of construction: see type label CE-Declaration see fixed label Operating instruction: O003 / 5759 Edition: 04/2019 Reproduction, duplication of this document - even a partial form –... -
Page 6: Conformity
Conformity Operating instruction: O003 / 5759 Edition: 04/2019 Reproduction, duplication of this document - even a partial form – are subject to our permission. All rights reserved. In this data sheet any liability for changes, errors or misprints is excluded. -
Page 7: General Safety Instructions
General safety instructions The following document contains important information on serious risks when operating the tool de- scribed or important technical information on the tool or processes used. Symbols are used to high- light this important information and indicate as follows: This symbol is always to be found in connection with an endangerment and its respective signal word. -
Page 8: Personnel Selection And Qualification
Never make any modifications, additions or conversions which might affect safety without the sup- plier´s approval. Additional mountings or modifications have as consequence that the responsibility for the accord- ance with the EU-directive has to be assured by the person who carries out the mountings and the modifications. -
Page 9: Product Description
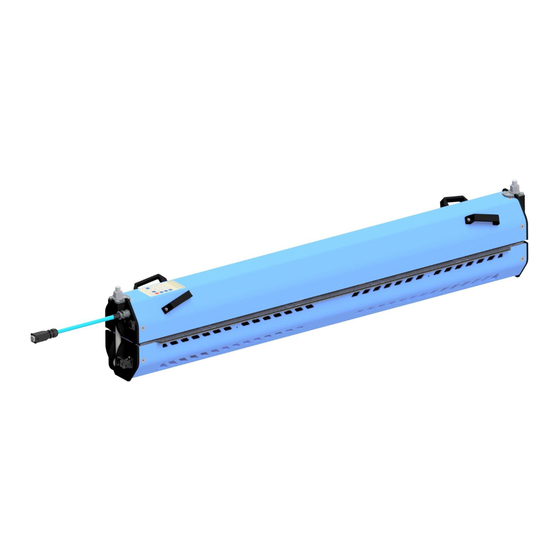
Product description Components Heating presses are electrical heating devices for use in fabricating (splicing) belting material that can withstand maximum temperatures of 210°C. Heating presses are used to splice endlessly belting material using pressure and temperature. Depending on the requirement we differentiate between different designs and types. -
Page 10: Technical Data
°C Ventilator Material number Designation 720477 AIR 1200 P (230V) Operating instruction: O003 / 5759 Edition: 04/2019 Reproduction, duplication of this document - even a partial form – are subject to our permission. All rights reserved. In this data sheet any liability for changes, errors or misprints is excluded. -
Page 11: Wiring Diagram
Wiring diagram Operating instruction: O003 / 5759 Edition: 04/2019 Reproduction, duplication of this document - even a partial form – are subject to our permission. All rights reserved. In this data sheet any liability for changes, errors or misprints is excluded. -
Page 12: Accessories
Accessories Accessories are not included in the scope of delivery and must be ordered separately! Material number Designation 720478 Hold-down bar 730088 Handling case 7870174 Separating paper glossy 50 m x 330 mm 7870620 Separating paper matt 50 m x 400 mm 7872163 Separating paper VEZ 50 m x 330 mm Textured fabric Standard, width 220 mm (yard goods) -
Page 13: Preparing The Product For Usage
Preparing the product for usage Before starting the operation of the tool, the following steps must be carried out each time to ensure that the tool works properly. Check the following points: Transport The transport / the relocation / the use of the device should be carried out by an appropriate lifting appliance (regarding the minimum lifting force, please look at chapter “3.3 Technical data“). -
Page 14: Control And Limitation Of Temperature
Pressure generation and control The heating press is equipped with an integrated pneumatic system for generating and controlling pressure. The pressure hose is filled at the beginning of heating process by pushing the “start-button” and is discharged again at the end of heating process. The air pressure level can be read from the display of the pressure controller. -
Page 15: Air Cooling System
Air cooling system The heating plates together with the belting material are cooled down with air. For this purpose some ventilators located at the bottom part of the heating press are blowing cooling air over the heating plates following to the preheating and holding-down processes in order to cool down the press. -
Page 16: Handling
Handling General Heating presses are electrical heating devices for use in fabricating (splicing) belting material that can withstand maximum temperatures of 210°C. Note: When making melting splices always observe the splicing instructions for the belt type to be spliced. Attention Before every heating process check the heating press for signs of damage. -
Page 17: Closing The Heating Press
Warning Risk of crushing when closing the heating press! Closing the heating press Collar Flap the eye bolt with collar nut from the bottom Slightly tighten nut by hand. Centering bore Centering pin Eye bolt Connecting the heating press to the mains Connect the top heating plate with the bottom heating plate, so that the latching gets closed. -
Page 18: Adjusting The Temperature Control Unit And Heating The Splice
Note: The compress air supply gets automatically regulated by an integrated compressor. The permissible air pressure of 2 bar is factory adjusted and may be changed to a max- imum of 2,5 bar in exceptional cases! During the heating process the pressing power can in- crease owing to the thermal expansion of the air. - Page 19 Function Designation Standard Parameter Set-up Press Process Backlit LCD display with 2x16 characters No function Value input No function (numerical keys) No function Selection of set-up function/ No function Selection of press type No function Selection of set-up function/ No function Selection of press type No function Leaving the set-up function...
- Page 20 Handling The temperature control unit is switched on in connecting the heating press to the mains. A greeting and the current firmware version of the device will appear on the display. Please wait ..2.08 The temperature control unit is ready for operation when the following screen appears: <Belt-type>...
-
Page 21: Configuration Program
Selection of belt-type, press-type or belt type new The appropriate menu is opened by pressing key (M). The menu layout is shown in the following figure. < Belt-type > < Press-type > This menu point can be switched off with the HPS 2- configuration program. - Page 22 Belt-type list: <Item-No> <Belt-type> <AdV-0> <Soll-HPT> <Soll-HPB> <Press time> 100000 Belt1/140°/2min 200000 Belt2/150°/2min 300000 Belt3/160°/2min 400000 Belt4/170°/2min 500000 Belt5/180°/2min 600000 Belt6/190°/2min Set-up of the splice type (AdV) After selecting the belt-type, the splice type can be selected using this function. The potential splice types for the belt-types set up are selected by the function that uses keys (9) and (7).
- Page 23 Set-up a new belt-type The HPS 2 can store up to 2048 different belt-types. To select a new belt-type the appropriate menu must be opened. < Belt-type > < Press-type > This menu point can be switched off with the HPS 2- configuration program.
- Page 24 Note: Implemented modifications of the set temperature or the hold-down time on the device are saved permanently in splice type “99” at the recent selected belt-type of the HPS 2 belt-type list. The additional splice type „99“ will be applied if this splice type is not yet available at the current se- lected belt-type.
- Page 25 Temperatures The set-up menu is opened by pressing the button ( ). The set-up function name appears in the first line of the display and the set-up function number appears in the second line. Using keys (9) or (7) will switch between set-up functions. Key (OK) starts the set-up function. The set-up menu is ex- ited by pressing (ESC) and the standard display appears.
- Page 26 Set temperature of heating plate 1 (top) This function is used to adjust the set temperature of heating plate 1. The valid input range is be- tween 50°C and 210°C. The value input is done using numerical keys. Input entries are to be done where the screen flashes.
- Page 27 Starting the pressing process After the ready message appears, key (Start/Stop) is to be activated The pressing process is now working automatically as follows: Phase 1: Both heating plates are heated up to the desired set temperature. Heating up ..The set and actual temperature of both heating plates can be displayed using key ( ) instead of the marquee text in the second line.
- Page 28 Phase 3: The "cooling" output remains activated until the temperature of the two heating plates is below the programmed cooling temperature. Cooling The set and actual temperatures of the two heating plates can be displayed using key ( ) instead of the marquee text in the second line.
- Page 29 Error messages When switching the unit on: When switching on, a checking of the stored parameters is performed by the unit on the basis of a checksum. If the parameter set is invalid, the following message appears approximately 2 seconds after having switched on: Furthermore, in this case the respective data set of the press-types and belt-types is also invalid and must be reloaded using the HPS 2 configuration program.
- Page 30 Removing the belt from the heating press Pressure hose is emptied automatically after completion of the heating process. Remove the connection cables. Please open the heating press and take off the belt. If necessary, clean the edges and the surface of the belt from excess material.
- Page 31 Configuration program The configuration program makes any communication possible between a personal computer (PC) and the integrated control unit, or the press and is used for loading the belt type lists and for select- ing and saving the device protocol memory. For using the program please connect the PC with the control unit via USB cable.
- Page 32 In this case the user can select the option to replace completely the list (complete list) or to add an (single input) individual input into the list stored in the device. When using “Searching” the type list (which is stored on a USB stick) can be loaded. I. A. it is ques- *.txt *.csv tion here of files dealing with upgrading (extension)
- Page 33 bzw. The successful programming will be confirmed by the PC-program. A2 format of the belt-type list <Art-Nr.> <Band-Typ> <AdV-0> <Soll-HPO> <Soll-HPU> <Presszeit> 100000 Band1/140°/2min 200000 Band2/150°/2min 300000 Band3/160°/2min 400000 Band4/170°/2min 500000 Band5/180°/2min 600000 Band6/190°/2min The list on the belt types can be generated using optionally a spreadsheet program according to the figure above.
- Page 34 Creating the belt-type list on your own You can open or apply the file „belt-type list“ as a txt-file in any editor. Note: For this kind the chart is a little bit confusing in vertical direction. You can open or create the file with Excel “all files (*.*) and the text converting assistant”. This en- ables a better overview of the chart in vertical direction.
- Page 35 Configuration It is possible to read different parameter of the control unit with this function. The window will be „HPS2->Configuration“ opened with the menu “Lesen”. The current configuration of the connected HPS 2 can be opened with In the headline of the window will appear the name of the control unit and the firmware-version. Operating instruction: O003 / 5759 Edition: 04/2019 Reproduction, duplication of this document - even a partial form –...
- Page 36 Meaning of the fields Band/Pressen-Typ (Belt/Press-type) Indicates the current adjusted press- or belt-type and the current configurated splice type. Furthermore there are shown various nominal values. Temporary modifications of the indicated nominal values are not taken into consideration. Protokollierung (Logging) Wert Protokollzeiger (Value log indicator): Index for the next log entry Protokolleinträge (log entry):...
- Page 37 Date and time With this function you can adjust the internal timer of the control unit. An adjustment on the device itself is only possible after switching it and having an invalid internal time register at the same time. You can open the adjustment window with the menu „HPS2->Uhrzeit-Datum“...
- Page 38 Device-Log (Protokoll)-Store Reading and saving The control device HPS 2 registers various parameters of every press process into the log store. The log store is organized as a ring buffer with a maximum of 2048 entries. If the store is filled up the oldest entry will be overwritten. With the menu “Protokoll”...
- Page 39 Content of the log file Meaning of the columns: <Start> Time and date of the beginning of the press process <Ende> Time and date of the end of the press process <A-Zeit> Duration of the heating up process in seconds <Bandtyp>...
- Page 40 <Kuehltemperatur> Adjusted cooling temperature for the current press process <Max-T-Device> maximum internal temperature of the control unit during the press process <Info> Information if the press process has been completely executed or has been prema- turely aborted by the user and also if there has been carried out a cooling process. Format: <Info1>...
- Page 41 Maintenance work Before operating the tool, the following maintenance work must be carried out each time to ensure that the tool works properly. If damage is detected during maintenance the tool must no longer be used and has to be sent for repair to the manufacturer. Check the following each time before use: ...
-
Page 42: Disassembling And Disposal
Disassembling and disposal The disassembling in individual components can only be effected by competent staff with a good knowledge of machine building. Please sort out the device according to the respective materials (metal, plastics, electronic) and recy- cle them. 9 Error notes The following operating mistakes are possible: If not the full heating surface of the bottom part of the press is covered with material, there is the danger of overheating or not merging.
Need help?
Do you have a question about the AIR 1200 P and is the answer not in the manual?
Questions and answers