
Related Manuals for Skiller SGS2

Summary of Contents for Skiller SGS2
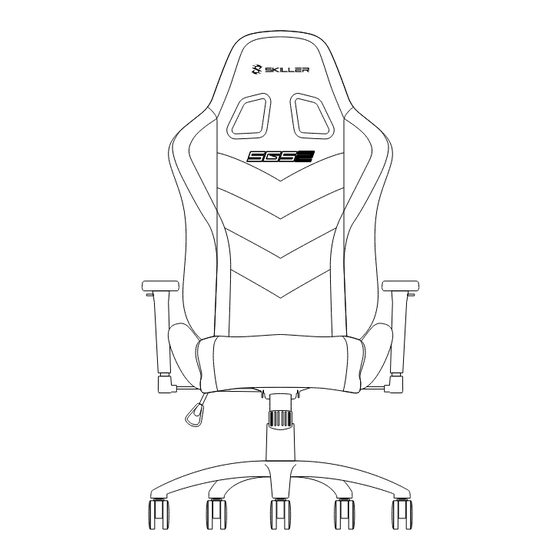
- Page 1 Manual Anleitung Manuale dell‘utente Handleiding Instrukcja Руководство пользователя 使用說明 マニ ュ ア ル...
- Page 2 1 Dimensions 寸法 Dimensions Dimensiones Wymiary Размеры Abmessungen Dimensões 尺寸 Dimensioni Afmetingen 57 cm 128.5 - 138 cm 9 cm 48 cm 55 cm 39.5 cm...
- Page 3 25 cm 50 cm 28.5 - 35.5 cm 49 - 58.5 cm 59 cm...
-
Page 4: Package Contents
2 Package Contents... - Page 5 Package Contents Verpackungsinhalt Contenuto della Confezione Contenidos del paquete A) 1x Respaldo A) 1x Backrest A) 1x Rückenlehne A) 1x Schienale B) 1x Base del asiento con reposabrazos B) 1x Seatbase with armrests B) 1x Sitzfläche mit Armlehnen B) 1x Base della sedia con braccioli C) 1x Cojín reposacabezas C) 1x Headrest cushion C) 1x Kopfkissen...
-
Page 6: Safety Instructions
H) Não utilizar agentes de limpeza agressivos para limpar a cadeira. S) O fabricante não assume qualquer responsabilidade por danos diretos. Uso indevido ou não obser- I) A cadeira gamer SKILLER SGS2 pode ser usada tanto para trabalhar como descansar. O encosto mais vância das instruções de segurança. - Page 7 изменять высоту стула, чтобы она соответсвовала высоте офисного и/или компьютерного стола. T) Кресло выдерживает вес до 110 кг. J) Игровое кресло классифицируется как офисное кресло типа C. 用者可透過座椅調節機構和氣桿, 根據使用的辦公桌或電腦桌來改變椅子的高度。 安全守則 J) SKILLER SGS2 是一款歸類於 Type C 型的辦公椅。 K) 注意! 座椅調整零件的更換與相關作業應由受培訓人員執行。 L) 建議於一般室內地板使用座椅。 A) 建議您在第二個人的協助下組裝椅子。 M) 請確保所有零件的完整性並正確地安裝。 不正確的安裝可能導致人員受傷, 有缺損的零...
- Page 8 4 Five-Star Base and Gas Lift Piston Five-Star Base and Gas Lift Piston Vijf-sterren basis en gasveer Insert the wheels into the five-star base until they Plaats de wielen in de vijfsterren basis totdat ze click into place. op zijn plaats klikken. Pięcoramienna podstawa oraz tłok gazowy do podnoszenia Fußkreuz und Gasdruckfeder Włóż...
- Page 9 Five-Star Base and Gas Lift Piston Insert the gas lift piston into the five-star base and then slide the piston cover over the gas lift. Fußkreuz und Gasdruckfeder Stecken Sie die Gasdruckfeder in das Fußkreuz und ziehen Sie anschließend die Teleskopabdeckung über die Gasdruckfeder. Base a stella e pistone di sollevamento a gas Inserire il pistone di sollevamento a gas nella base a stella, quindi far scorrere il coperchio del pistone sul sollevamento a gas.
- Page 10 5 Optional Lumbar Cushion Optional Lumbar Cushion If desired, the provided lumbar cushion can be used. To attach, pull the lumbar cushion straps through the backrest openings from front to back. This can also be done after the chair is assembled. Optionales Lendenkissen Bei Bedarf kann das mitgelieferte Lendenkissen genutzt werden.
- Page 11 Optional Lumbar Cushion Optionele onderrug kussen To secure the cushion, connect both buckles from Om het kussen te bevestigen, verbind beide gespen van de the bottom and top of the backrest. onderkant en de bovenkant van de rugleuning met elkaar. Opcjonalna poduszka lędźwiowa Optionales Lendenkissen Aby zabezpieczyć...
- Page 12 6 Connect Seat Back with Seat Base Connect Seat Back with Seat Base To connect the backrest with the seatbase first prepare the necessary screws. Afterwards attach a spring washer followed by a washer onto the four M8 screws (25 mm). Align the backrest and the rear of the seat base carefully according to the picture.
- Page 13 Connect Seat Back with Seat Base Afterwards use the allen wrench to attach two of the previously prepared M8 screws (25 mm) with the backrest and the support brackets on each side of the chair. Attention! To avoid damage to property or personal injury, ensure all screws are screwed together tightly! Tighten the screws in regular intervals! Rückenlehne und Sitzfläche verbinden...
-
Page 14: Side Covers
7 Side Covers Side Covers Attach the side covers to the support brackets on the chair. Afterwards tighten both side covers with help of the allen wrench and the M5 screws (10 mm). Seitenabdeckungen Stecken Sie die Seitenabdeckungen anhand der dafür vorgesehenen Aussparungen auf die Gelenkhalterungen des Stuhls. - Page 15 Side Covers Finally attach both cover caps to the screw hole of the side covers. Seitenabdeckungen Stecken Sie abschließend die Abdeckkappe über das Schraubenloch der jeweiligen Seitenabdeckung. Coperchi laterali Infine, fissare entrambi i coperchi al foro per vite dei coperchi laterali. Cubiertas laterales Finalmente, adjunte ambas tapas de cubierta al orificio del tornillo de las cubiertas laterales.
- Page 16 8 Mechanism Mounting Mechanism Mounting Align the chair mechanism according to the posted directions on the bottom of the seat base. Place both a spring washer and washer onto the M8 (18 mm) screw, and then tighten the chair mechanism to the understand of the seat base.
- Page 17 9 Linking the Parts Linking the Parts Lastly, connect the base and chair by inserting the gas lift piston into the opening on the chair mechanism. The chair is now successfully assembled. Attention! To avoid damage to property or personal injury, ensure that the gas lift piston and chair mechanism are mounted correctly! Teile zusammenführen Stecken Sie abschließend die auf dem Fußkreuz montierte...
- Page 18 14 Adjustment of Armrests 10 Optional Headrest Cushion Optional Headrest Cushion Optioneel hoofdsteunkussen If desired, the provided headrest cushion can be used. Indien gewenst kan het meegeleverde hoofdsteunkussen worden gebruikt. To do this, attach the cushion behind the backrest at the desired height. Om dit te doen, bevestig het kussen achter de rugleuning op de gewenste hoogte.
- Page 19 11 Seat Backrest Adjustment Seat Backrest Adjustment To adjust the backrest, first pull the handle on the right-side of the seat base. Lean forwards or backwards to tilt the backrest into the desired position. Once the backrest is in the desired position, release the handle to lock the backrest into place.
- Page 20 14 Adjustment of Armrests 12 Seat Height Adjustment Seat Height Adjustment The seat height can be adjusted via the right handle underneath the seat base. The chair will move into a lower position if simultaneous pressure is placed on the seat base surface while the handle is pulled. The chair will move into a higher position if no simultaneous pressure is placed on the seat base surface while the handle is pulled.
- Page 21 13 Tilt Mechanism Adjustment Tilt Mechanism Adjustment The tilt mechanism can be adjusted via the handle underneath the seat base. The tilt mechanism is unlocked when the handle is pulled outwards. The tilt mechanism is locked when the handle is pushed inwards. Tilt mechanism resistance can also be adjusted via means of the rotary knob located underneath the seat.
- Page 22 14 Adjustment of Armrests 14 Adjustment of Armrests Adjustment of Armrests To adjust the armrest height, pull the handle upwards. While holding the handle, the armrest can be moved upwards and downwards to the desired position. Once the armrest is in the desired position, release the handle to lock the armrest into place.
- Page 23 Adjustment of Armrests The armrest can be moved back and forth without the use of a button. The armrest can be tilted inwards and outwards without the use of a button. Einstellen der Armlehnen Die Armlehne kann ohne die Betätigung eines Knopfes mit leichtem Druck jederzeit vor und zurück bewegt werden.
- Page 24 Sharkoon Technologies GmbH Grüninger Weg 48 35415 Pohlheim Germany © Sharkoon Technologies 2019...
Need help?
Do you have a question about the SGS2 and is the answer not in the manual?
Questions and answers