Table of Contents
Advertisement
Advertisement
Table of Contents

Subscribe to Our Youtube Channel
Related Manuals for Tanox ADF-206S

Summary of Contents for Tanox ADF-206S
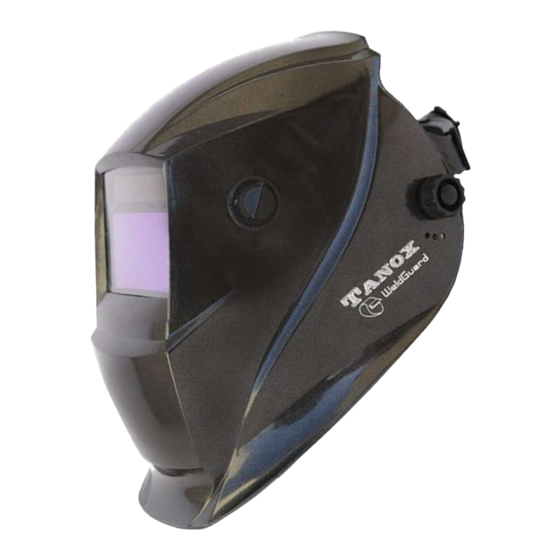
- Page 1 Auto-Darkening Helmet User’s Manual ADF-206S...
-
Page 2: Table Of Contents
TABLE OF CONTENT SECTION 1 – SAFETY WARNING-READ BEFORE USING…………………………....2 SECTION 2 – PRODUCT SPECIFICATION………………………………………………….…..3 SECTION 3 – AUTO-DARKENING FILTER OPERATION..………………………….…...………..4 SECTION 4 – HEADGEAR ADJUSTMENT…………………………………………………………..7 SECTION 5 – REMOVING AND INSTALLING THE ADF CARTRIDGE……………………… .…..8 SECTION 6 – REPLACEMENT OF COVER LENSES………………..…………………………..9 SECTION 7 –... -
Page 3: Section 1 - Safety Warning-Read Before Using
SECTION 1 - SAFETY WARNINGS – READ BEFORE USING ARC RAY FROM WELDING CAN BURN EYES AND SKIN. A damaged helmet or auto-darkening filter (ADF) can reduce the protection against harmful rays (intense visible light, ultraviolet and infrared) and result in serious injury. •... -
Page 4: Section 2 - Product Specification
SECTION 2 – PRODUCT SPECIFICATION 98mm X 44mm / 3. ” X 1.73” Viewing Area Optic class 1/1/1/2 Cartridge Size 110mm X 90mm X 9mm /4.33"x3.54"x0.354" Switching Index (s) 1/25,000 (Second) Light Shade DIN 4 Dark Shade DIN 5-9/9-13 Sensitivity Control Dial Dark to Light Delay 0.2-1 Second... -
Page 5: Section 3- Auto-Darkening Filter Operation
SECTION 3- AUTO-DARKENING FILTER OPERATION DELAY ADJUSTER: Delay is used to slow the switching time from dark state ① to clear state after welding. It is particularly useful in eliminating bright after-rays present in high amperage applications where the molten puddle remains bright momentarily after welding. - Page 6 Sensitivity Adjuster: Sensitivity is for adjusting the filter to different light levels in various ④ welding process We recommend a Mid-range sensitivity setting for most applications. When adjusting do the following: • Turn sensitivity level to the lowest setting; • Increase the sensitivity until the lens darkens, and then lower it down until reaching the level where the lens is clear.
- Page 7 Shade Adjuster: Use the Shade Guide below to select proper shade based on your welding application. We recommend starting at Shade 13 and adjust it down according to the welding process and personal preference. SHADE GUIDE TABLE Welding Process Arc Current (Amperes) Shade No.
-
Page 8: Section 4 - Headgear Adjustment
SECTION 4 – HEADGEAR ADJUSTMENT 1、Nuts 2、Spring 3、Locating Piece 4、Adjustable Buckle 5、Adjustable Parts 6、Locating Balance Sheet... -
Page 9: Section 5 - Removing And Installing The Adf Cartridge
SECTION 5 – REMOVING AND INSTALLING ADF CARTRIDGE The cartridge is secured to the helmet by a cartridge holder with two tabs at bottom and retainers on the top of the holder Sensitivty knob Removing the Cartridge: pull the external sensitivity knob out of its base and unscrew the holding nut, then use 2 fingers to pinch the tabs at the same time and lift the cartridge from the bottom side, next, release the cartridge from the retainers in the upper side. -
Page 10: Section 6 - Replacement Of Cover Lenses
SECTION 6 – REPLACEMENT OF COVER LENSES Front and back cover lenses are for the protection of the auto-darkening filter. Never use the ADF without these cover lenses properly installed. Welding spatter will damage the auto-darkening filter and void the warranty. Inspect the cover lenses frequently and change the damaged one (cracked, pitted, spattered etc.) immediately. - Page 11 Replacing the Back-Cover Lens: Bend the safety lens and take it out as shown in the figure below, then slide a new lens back in.
-
Page 12: Section 7 - Replacement Of Battery
SECTION 7 – REPLACMENT OF BATTERY When upon pressing the TEST button no flashing of the filter is visible, the lithium battery power is too low and needs to be replaced immediately LITHIUM BATTERY CR2032 AUTO DARKENING FILTER EN379 9-13 TEST SENSITIVITY DELAY... -
Page 13: Section 8 - Installing Magnifying Lens
SECTION 8 – INSTALLING THE MAGNIFYING LENS Simply insert the magnifying lens from top down as shown in the figure below, and then slide it into the desired position in the retaining brackets. To prevent lens fogging, install flat side of magnifying lens toward the auto-darkening filter SECTION 9 –... -
Page 14: Section 11 - Troubleshooting
SECTION 11 – TROUBLESHOOTING Symptom Possible Causes Solution Check the battery; Check and Battery contact may not be good, clean the battery contact; Filter not responsive and/or the battery may be empty. Press the test button to make sure the filter is functioning 1. - Page 15 Symptom Possible Causes Solution The auto-darkening filter uses liquid crystal which exhibits an angle of view effect. In the dark state, it is normal for welder to notice slightly lighter shaded areas Lighter shaded areas at the edge and corners of the filter at the edge and corner No corrective action is needed lens.
- Page 16 NOTES:...
Need help?
Do you have a question about the ADF-206S and is the answer not in the manual?
Questions and answers