
Related Manuals for ADPRO iFT Series

Summary of Contents for ADPRO iFT Series
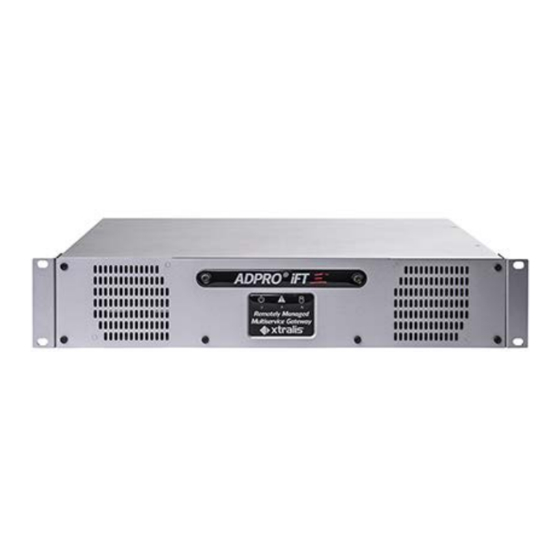
- Page 1 ADPRO iFT Series Hardware Installation Manual February 2019 Doc. 27817_08 Firmware version XO 4.03...
- Page 3 ADPRO iFT Series Hardware Installation Manual Disclaimer The contents of this document are provided on an "as is" basis. No representation or warranty (either express or implied) is made as to the completeness, accuracy or reliability of the contents of this document. The manufacturer reserves the right to change designs or specifications without obligation and without further notice. Except as otherwise provided, all warranties, express or implied, including without limitation any implied warranties of merchantability and fitness for a particular purpose are expressly excluded. Intellectual Property and Copyright This document includes registered and unregistered trademarks. All trademarks displayed are the trademarks of their respective owners. Your use of this document does not constitute or create a license or any other right to use the name and/or trademark and/or label. This document is subject to copyright owned by Honeywell. You agree not to copy, communicate to the public, adapt, distribute, transfer, sell, modify, or publish any contents of this document without the express prior written consent of Honeywell. Trade Name Statement ADPRO, FastTrace, iFT, iFT-E, iFT Gateway, IntrusionTrace, LoiterTrace, XO, iTrace, iCommand, iCommission, iPIR, and FMST are trademarks and/or registered trademarks of Honeywell and/or its subsidiaries in the United States and/or other countries. Other brand names mentioned herein are for identification purposes only and may be trademarks of their respective holder(s). Your use of this document does not constitute or create a licence or any other right to use the name and/or trademark and/or label. General Warning This product must only be installed, configured and used strictly in accordance with the General Terms and Conditions, User Manual and product documents available from Honeywell. All proper health and safety precautions must be taken during the installation, commissioning, and maintenance of the product. The system should not be connected to a power source until all the components have been installed. Proper safety precautions must be taken during tests and maintenance of the products when these are still connected to the power source. Failure to do so or tampering with the electronics inside the products can result in an electric shock causing injury or death and may cause equipment damage. Honeywell is not responsible and cannot be held accountable for any liability that may arise due to improper use of the equipment and/or failure to take proper precautions. Only persons trained through an Honeywell accredited training course can install, test and maintain the system. Liability You agree to install, configure, and use the products strictly in accordance with the User Manual and product documents available from Honeywell. Honeywell is not liable to you or any other person for incidental, indirect, or consequential loss, expense or damages of any kind including without limitation, loss of business, loss of profits, or loss of data arising out of your use of the products. Without limiting this general disclaimer the following specific warnings and disclaimers also apply: Fitness for Purpose You agree that you have been provided with a reasonable opportunity to appraise the products and have made your own independent assessment of the fitness ...
- Page 4 Series Hardware Installation Manual ADPRO Contact Us UK and Europe +44 1442 242 330 D-A-CH +49 431 23284 1 The Americas +1 781 740 2223 Middle East +962 6 588 5622 Asia +86 21 5240 0077 Australia and New Zealand +61 3 9936 7000 www.security.honeywell.com Environmental Information The crossed-out wheeled bin means that within the European Union the product must be taken to separate collection at the product end of life. This applies to the device but also to any accessories marked with this symbol. Do not dispose of these products as unsorted municipal waste. If you need more information on the collection, reuse, and recycling systems please contact your local waste administration. You can also contact us for more information on the environmental specifications of our products. 27817_08...
-
Page 5: Table Of Contents
ADPRO iFT Series Hardware Installation Manual Contents Technical Specifications About the iFT Series Models Licenses 2.2.1 Overview 2.2.2 System License Software Parts Information Hard Disks Required Hard Disk Capacity Adding/Replacing a Hard Disk Reusing Used Hard Disks Retrieving Hard Disk Information 3.4.1 Using the ta,smart Command 3.4.2 Using the XO Client Software Installing the First Hard Disk Installing a Second Hard Disk Installing a Third Disk in an iFT Device Installing a Third and Fourth Disk in an iFT-E Device RAID 1 Support 3.9.1 About RAID 1 3.9.2 Activating RAID 1 3.9.3... - Page 6 Series Hardware Installation Manual ADPRO Network I/O Units (Net I/O) 10 Monitor 11 Modem 12 4G Via Wingle 13 Audio 13.1 Audio IN 13.2 Audio OUT (Talkback) 13.2.1 Options 13.2.2 Setup for VM22A 13.2.3 Setup for VM22E 13.2.4 Troubleshooting Talkback 13.3 Using IP Audio Devices 14 Connecting PIR Detectors 14.1 Required PIR Firmware...
-
Page 7: Technical Specifications
ADPRO iFT Series Hardware Installation Manual Technical Specifications ® Operating system ADPRO XO™ Security Operating System, Linux based Video input iFT: 1–32 IP cameras iFT-E: 1–32 IP cameras Video output XGA – Multiple matrix type views Physical output: DVI-I or DP (DisplayPort), DVI-I-to-VGA adapter included Video compression H.264/H.265 (H.265 supported with Hikvision, Honeywell, ONVIF, and generic driver) Video resolution Up to HD/MP resolution Note For optimal performance: if you are using 12 (or higher) megapixel (MP) cameras on your XO device, then you can use max. 12 cameras @ 12 MP and max. 12 analytic applications (IntrusionTrace and/or LoiterTrace). Frames/second Full HD @25/30 fps – MPixel: fps is camera dependent. Bandwidth capacity (video) 32 x 5 Mbps Bandwidth management Configurable variable or constant bitrate / Configurable bandwidth limiter Audio input Built-in audio input supported Audio output Standard 1 line level output. Optional: up to 1 per camera via audio switcher(s). - Page 8 Series Hardware Installation Manual ADPRO Power supply 100–240 VAC, 50/60 Hz, 2.5–1.5 A Note You must connect the video system to a 100–240 VAC/16 A mains outlet with proper earthing, applying a separate, locally approved power cord. Operating temperature 5–40 °C Humidity 20–93 % RH (non-condensing); indoor use only Disk capacity iFT: max. 3 x 10 TB SATA hard disks. iFT-E: max. 4 x 10 TB SATA hard disks. RAID 1 support (requires min. 2 equal HDDs). Warranty 2 years Dimensions (W x H x D) 441 x 88 x 305 mm (17.36" x 3.46" x 12.00") Analytics Basic motion detection (VMD), camera sabotage detection. Up to 16 (iFT) or 32 (iFT-E) analytics channels for IntrusionTrace™ and LoiterTrace™ Mobile apps iTrace, iPIR, and iCommission Ordering information Please contact your local ADPRO provider for detailed product information. 27817_08...
-
Page 9: About The Ift Series
ADPRO iFT Series Hardware Installation Manual About the iFT Series Note You can find the latest versions of this document and any referenced document on the Security Solutions Support site www.xtralissecurity.com (logon may be required). If a document number is indicated (between parentheses), you can enter it in the Keywords box on the site, and search for the document. Models The iFT Series currently consists of the following models: iFT: up to 32 IP channels and up to 16 analytics channels via trade-off iFT-E: up to 32 IP channels and 32 analytics channels. On the iFT model, you trade in 1 video channel for 1 analytic channel. This means, for example, that if you need 1 analytic channel, you can use maximum 31 (= 32 – 1) video channels. If you need 2 analytic channels, you can use 30 video channels, and so on. A fully equipped iFT can use maximum 16 analytic channels with 16 (= 32 - 16) video channels. For optimal performance, disable the monitor output when using more than 16 IP channels on an iFT. Note The most recent iFT models come with a system license that supports 32 IP channels. The system license in older systems supports only 16 IP channels. You can upgrade your system license, free of charge, using Xchange. For instructions, see Field Alert #7 – Upgrading to 32 Channels (29477). Note Wherever XO device is mentioned in this document, it applies to all the devices above, unless ... -
Page 10: System License
Series Hardware Installation Manual ADPRO 2.2.2 System License The system license defines the maximum number of video channels allowed, and the maximum number of analytic channels allowed on your system. Note The system license is locked on the XO device’s motherboard and is therefore system specific: the license has to include the correct MAC address. You cannot transfer a system license from one device to another. For more information on licenses, see the XO Client Software User Manual (21796) and the Xchange Tool User Manual (27816). Software Honeywell regularly provides software updates for your XO device, which you can easily download and install via the Xchange tool. For more information, see the Xchange Tool User Manual (27816). Caution! Honeywell issues upgrade information with every major software upgrade. Upgrade information may consist of system requirements, special upgrade instructions, etc. Before installing new software, make sure that you read and understand the upgrade information first. Always follow the instructions in the upgrade documentation. If in any doubt, do not install the new software. -
Page 11: Hard Disks
maximum 3 hard disks in models with two extra mounting holes in the rear. The labels on the suitable iFT devices indicate ‘3 HDD Ready’. In the iFT-E model: Model numbers 61xxxxxx: maximum 2 hard disks. Model numbers 63xxxxxx: maximum 4 hard disks. Adding/Replacing a Hard Disk If the system is running out of disk space, you can add a new hard disk without removing any of the hard disks in use. If you receive error messages from your hard disk in the Status screen of the XO client, you may need to replace the faulty hard disk. Use these reference numbers to place your order with Honeywell: Reference number HDD capacity Disk only Disk with mounting kit for ADPRO device 1 TB 19150240 39544250 2 TB 19150250 39544260 27817_08... -
Page 12: Reusing Used Hard Disks
Series Hardware Installation Manual ADPRO Reference number HDD capacity Disk only Disk with mounting kit for ADPRO device 4 TB 19150270 39544262 6 TB 19150280 39544263 8 TB 19150290 39544264 10 TB 19150300 39544266 Note Not all hard disks are compatible with all firmware versions. Upgrade your device to firmware version XOa 3.02.0033 or above for full compatibility. Reusing Used Hard Disks It is possible to mount a hard disk coming from another device into a new device. However, you must format the used hard disk to erase all data on the disk to prevent any conflicts or data damage. In addition, if you install a ... -
Page 13: Using The Xo Client Software
ADPRO iFT Series Hardware Installation Manual The screen displays the following information: Item Description Device Device name of the hard disk (Linux). Power status The power status column displays one of the following statuses: ERROR: there is a problem retrieving the power status of the drive ACTIVE/IDLE: drive operates normally STANDBY: drive is in low power mode (drive is in spin-down status) SLEEPING: drive is in lowest power mode (drive is completely shut down). Smart status The smart status column displays one of the following statutes: ERROR: drive is failing ALERT: there is a problem retrieving SMART info from the drive, or the drive may be in the process of failing NORMAL: no problems found with the drive. Temperature The temperature column displays from left to right: the minimum temperature of the disk the current temperature of the disk the maximum temperature of the disk. - Page 14 Series Hardware Installation Manual ADPRO Caution! Before installing hard disks, stop the device. Switch it off and unplug the power cord. Take all necessary precautions to prevent static discharges that may damage the device: use an anti-static wristband, an anti-static mat… The procedure below assumes that you are using a new disk, or, in case of a used disk, that you will format the used disk and erase all recordings on it. If you want to install a used hard disk while keeping the recordings on it, follow the instructions in the Tech Tip Recovering Recordings from Used HDDs (29160). To install the first hard disk, proceed as follows: 1. Stop the device, switch off the power supply, and then remove the top cover: unscrew 2 screws at the front, 4 at the top, and 3 at the back. 2. Fix the hard disk to the bottom of the casing. Caution! If you tilt the casing, rest it carefully on the sides, but not on the back. You may damage the connectors if you do. Depending on the available holes in the casing and the hard disk, the following options exist: Casing with 6 screw holes in the bottom: use the first 4 holes, or the outer 4 holes with 4 disk screws ...
- Page 15 ADPRO iFT Series Hardware Installation Manual 3. Connect the hard disk to the power supply. 4. Connect the disk to the SATA1 connector on the motherboard with the SATA cable (#16520877). Caution! Do not bend the SATA cables too sharply to prevent cable damage. 27817_08...
-
Page 16: Installing A Second Hard Disk
Series Hardware Installation Manual ADPRO 5. If the SATA cables do not have a locking mechanism, use tie-wraps to secure the cables on the disk(s) in the following way: 6. If there are unused cables left, bundle them with tie-wraps. 7. Place the top cover back: fix it with 2 screws at the front, 4 at the top, and 3 at the back. 8. Connect a monitor/screen and keyboard to the device. Switch on the power supply and wait for the boot window to appear. 9. Select XO Installer and press Enter. Note The boot window only appears for a few seconds, then the device continues booting. To make sure that you do not miss it, press the arrow keys on the keyboard repeatedly while the device is booting. The device will then stop at the boot window, and this gives you time to select and open the XO Installer menu. 10. Choose Update current system > Manage recording disks. 11. Select the newly installed hard disk in the list and press Enter. 12. Choose Format and use selected disks (using the tab key). The system formats the selected hard disk. - Page 17 ADPRO iFT Series Hardware Installation Manual To install a second hard disk, proceed as follows: 1. Stop the device, switch off the power supply, and then remove the top cover: unscrew 2 screws at the front, 4 at the top, and 3 at the back. 2. If the first disk is already installed, you have to remove it first: unplug its power and data cables, and unscrew it from the bottom of the casing. Caution! If you tilt the casing, rest it carefully on the sides, but not on the back. You may damage the connectors if you do. 3. Fix the first and second hard disk together using the 2 hard disk brackets (#17011890 and #17011895) and 8 screws (#17434080) as shown below. Make sure that the mounting screw holes on hard disk 1 are on the outside. A: bracket #17011890; B: L-shaped bracket #17011895 4. Fix hard disk 1 to the bottom of the casing. For instructions depending on the model and hard disk capacity, see Installing the First Hard Disk, step 2 on page 14. 5. Connect hard disk 1 to the power supply, and to the SATA1 connector on the motherboard with the SATA cable (#16520877). 27817_08...
- Page 18 Series Hardware Installation Manual ADPRO 6. Connect hard disk 2 to the power supply, and to the SATA2 connector on the motherboard with the SATA cable (#16520877). Caution! Do not bend the SATA cables too sharply to prevent cable damage. The table below lists the correct devices and SATA connectors: Device SATA connector SATA0 HDD1 SATA1 HDD2 SATA2 7. If the SATA cables do not have a locking mechanism, use tie-wraps to secure the cables on the disk(s) in the following way: 8. If there are unused cables left, bundle them with tie-wraps. 27817_08...
-
Page 19: Installing A Third Disk In An Ift Device
ADPRO iFT Series Hardware Installation Manual 9. Place the top cover back: fix it with 2 screws at the front, 4 at the top, and 3 at the back. 10. Connect a monitor/screen and keyboard to the device. Switch on the power supply and wait for the boot window to appear. 11. Select XO Installer and press Enter. Note The boot window only appears for a few seconds, then the device continues booting. To make sure that you do not miss it, press the arrow keys on the keyboard repeatedly while the device is booting. The device will then stop at the boot window, and this gives you time to select and open the XO Installer menu. 12. Choose Update current system > Manage recording disks. 13. Select the newly installed hard disk(s) in the list and press Enter. 14. Choose Format and use selected disks (using the tab key). The system formats the selected hard disks. 15. When formatting is finished, choose Main Menu, and then choose Reboot. - Page 20 Series Hardware Installation Manual ADPRO Caution! Before installing hard disks, stop the device. Switch it off and unplug the power cord. Take all necessary precautions to prevent static discharges that may damage the device: use an anti-static wristband, an anti-static mat… The procedure below assumes that you are using a new disk, or, in case of a used disk, that you will format the used disk and erase all recordings on it. If you want to install a used hard disk while keeping the recordings on it, follow the instructions in the Tech Tip Recovering Recordings from Used HDDs (29160). To install a third hard disk in an iFT device, proceed as follows: 1. Stop the device, switch off the power supply, and then remove the top cover: unscrew 2 screws at the front, 4 at the top, and 3 at the back. 2. Fix the third disk on the mounting bracket (#17011920) using 4 disk screws (#17434080). Make sure that the disk is on the correct side as shown in the image below. 3. Before mounting the bracket with the disk in the XO device, arrange the required SATA power and data cables so that you can access them when the bracket is in place. 27817_08...
- Page 21 ADPRO iFT Series Hardware Installation Manual 4. Mount the bracket using 3 self-tapping screws (#17362010): use 2 screws to fix the bracket to the rear of the device, and use the third screw to fix the bracket to the L-shaped bracket of the already installed second disk. 5. Disconnect the power SATA cable from the second disk, and plug in the Y cable (#16520795). This provides power supply connections for all three disks. 6. Connect disk 2 to one end of the Y cable, and disk 3 to the other end. 7. Connect hard disk 3 to the SATA3 connector on the motherboard with the SATA cable (#16520877). Caution! Do not bend the SATA cables too sharply to prevent cable damage. The table below lists the correct devices and SATA connectors: Device SATA connector SATA0 HDD1 SATA1 HDD2 SATA2 HDD3 SATA3 27817_08...
-
Page 22: Installing A Third And Fourth Disk In An Ift-E Device
Series Hardware Installation Manual ADPRO 8. If the SATA cables do not have a locking mechanism, use tie-wraps to secure the cables on the disk(s) in the following way: 9. If there are unused cables left, bundle them with tie-wraps. 10. Place the top cover back: fix it with 2 screws at the front, 4 at the top, and 3 at the back. 11. Connect a monitor/screen and keyboard to the device. Switch on the power supply and wait for the boot window to appear. 12. Select XO Installer and press Enter. Note The boot window only appears for a few seconds, then the device continues booting. To make sure that you do not miss it, press the arrow keys on the keyboard repeatedly while the device is booting. The device will then stop at the boot window, and this gives you time to select and open the XO Installer menu. 13. Choose Update current system > Manage recording disks. 14. Select the newly installed hard disk(s) in the list and press Enter. 15. Choose Format and use selected disks (using the tab key). The system formats the selected hard disks. - Page 23 ADPRO iFT Series Hardware Installation Manual Caution! Before installing hard disks, stop the device. Switch it off and unplug the power cord. Take all necessary precautions to prevent static discharges that may damage the device: use an anti-static wristband, an anti-static mat… The procedure below assumes that you are using a new disk, or, in case of a used disk, that you will format the used disk and erase all recordings on it. If you want to install a used hard disk while keeping the recordings on it, follow the instructions in the Tech Tip Recovering Recordings from Used HDDs (29160). To install a third and fourth hard disk in an iFT-E device, proceed as follows: 1. Stop the device, switch off the power supply, and then remove the top cover: unscrew 2 screws at the front, 4 at the top, and 3 at the back. 2. Fix disks 3 and 4 on the mounting bracket (#17011920) using 8 disk screws (#17434080). Disk 3 Disk 3 and 4 3. Before mounting the bracket with the disk in the XO device, arrange the required SATA power and data cables so that you can access them when the bracket is in place. 4. Mount the bracket using 3 self-tapping screws (#17362010): use 2 screws to fix the bracket to the rear of the device, and use the third screw to fix the bracket to the L-shaped bracket of the already installed second ...
- Page 24 Series Hardware Installation Manual ADPRO 5. Connect hard disk 3 to the power supply, and to the SATA3 connector on the motherboard with the SATA cable (#16520877). 6. Connect hard disk 4 to the power supply, and to the SATA4 connector on the motherboard with the SATA cable (#16520877). Caution! Do not bend the SATA cables too sharply to prevent cable damage. 27817_08...
- Page 25 ADPRO iFT Series Hardware Installation Manual The table below lists the correct devices and SATA connectors: Device SATA connector SATA0 HDD1 SATA1 HDD2 SATA2 HDD3 SATA3 HDD4 SATA4 7. If the SATA cables do not have a locking mechanism, use tie-wraps to secure the cables on the disk(s) in the following way: 8. If there are unused cables left, bundle them with tie-wraps. 9. Place the top cover back: fix it with 2 screws at the front, 4 at the top, and 3 at the back. 10. Connect a monitor/screen and keyboard to the device. Switch on the power supply and wait for the boot window to appear. 11. Select XO Installer and press Enter. Note The boot window only appears for a few seconds, then the device continues booting. To make sure that you do not miss it, press the arrow keys on the keyboard repeatedly while the device is booting. The device will then stop at the boot window, and this gives you time to select and open the XO Installer menu.
-
Page 26: Raid 1 Support
Series Hardware Installation Manual ADPRO RAID 1 Support 3.9.1 About RAID 1 RAID stands for Redundant Array of Independent Disks (originally Redundant Array of Inexpensive Disks). It is a storage technology that combines multiple disk drive components into a logical unit. Data is distributed across the drives in one of several ways called RAID levels, depending on the level of redundancy and performance required. RAID has become an umbrella term for computer data storage schemes that can divide and replicate data among multiple physical drives, while the operating system can still access the data as being on one single drive. RAID 1 is about mirroring without parity or striping. Data is written identically to two drives, thereby producing a “mirrored set”: the read request is serviced by either of the two drives containing the requested data, whichever one has the shortest search time plus rotational latency. 3.9.2 Activating RAID 1 RAID 1 requires minimum 2 hard disks. The size of the RAID 1 recording combination is the smaller of the 2 disks installed in your device. For example: if you have a 1 TB disk and a 2 TB disk, the RAID 1 recording disk has a 1 TB capacity. Caution! When you apply RAID 1, the system formats the selected disks and erases the data on the disks. You will lose all the data on the disks. Back up your recordings first. To activate RAID 1, proceed as follows: 1. Stop the device, and switch off the power supply. 2. Connect a monitor/screen and keyboard to the XO device. 3. Switch on the power supply and wait for the boot window to appear. 4. ... -
Page 27: Retrieving Raid 1 Information
ADPRO iFT Series Hardware Installation Manual Note Select only two disks, not three or four. If you do, the system will configure the third and fourth disk as spare disks within the RAID 1 configuration. If you want to put disk 1 and 2 in RAID 1, and also disk 3 and 4, execute this step twice: once for disk 1 and 2, and once for disk 3 and 4. 8. Choose Make RAID 1 (mirror) from selected disks. 9. When mirroring has finished, choose Main menu, and then choose Reboot. 3.9.3 Retrieving RAID 1 Information You can retrieve RAID 1 information using the Telnet ta,hd,raid command, or using the XO client software. To check if disks are in RAID 1 mode in the XO client software, proceed as follows: 1. Launch the XO client software. 2. Choose System > Maintenance > Harddisks. The following screen appears: The MountPoints pane displays the mount points (= writing disks). The Type column indicates whether the mount point is a normal disk (disk) or a RAID 1 disk (raid1). The State column will indicate degraded when one of the RAID disks is faulty, and recovering when the system ... - Page 28 Series Hardware Installation Manual ADPRO 3. In the top menu, click the Format HDD tab. 4. Click Format all recording disks. The following message appears: 5. Click Yes to confirm. The device will restart, format the hard disks, and then continue restarting. 6. Close the hardware configuration tool and wait for the process to finish. 27817_08...
-
Page 29: Front Led Indicators
ADPRO iFT Series Hardware Installation Manual Front LED Indicators There are 3 LEDs on the front of the device: Icon Description Green LED Indicates that power is on. The green LED periodically blinks (goes out briefly). This is normal behaviour. Yellow LED Indicates a fault. If the yellow LED lights up, check the status of your device. For more information, see the XO Client Software User Manual (21796). Blue LED Indicates storage media activity. Caution! When the 3 LEDs are flashing simultaneously, the system is servicing the recording disks (upgrading, formatting…). In that case, do not turn off power. 27817_08... -
Page 30: Motherboards
Series Hardware Installation Manual ADPRO Motherboards Overview The iFT Series operates with a PH10LU motherboard. PH10LU motherboard BIOS Settings Choose Main > System Time to set the system time. Choose Main > System Date to set the system date. Choose Chipset > PCH-IO Configuration > Front Panel Audio and select Legacy Front Panel. Choose Boot > CSM parameters > Launch PXE OPROM policy and select Legacy only. Choose Save & Exit > Exit and Reset and press Enter. -
Page 31: Replacing The Motherboard
ADPRO iFT Series Hardware Installation Manual PS/2: keyboard or mouse /dev/ttyU4 (USB) DVI-I: monitor /dev/ttyU3 (USB) eth0: network for XO device DisplayPort: monitor eth1: network for IP cameras /dev/ttyU1 (USB): modem Audio line in /dev/ttyU2 (USB) Audio line out Note The XO device does not support the USB 3 ports on the PH10LU motherboard. Replacing the Motherboard Do not replace the motherboard in the field. If the motherboard needs replacing, send the device back to your supplier. Remember that the system licenses is linked to the motherboard. If you replace the motherboard, the system may not recognise the system license and will not be functional. Replacing the Motherboard Battery It may be necessary to replace the motherboard battery after some time. For further instructions, see the technical documentation of the motherboard. 27817_08... -
Page 32: Connecting Ip Cameras
Series Hardware Installation Manual ADPRO Connecting IP Cameras An XO device that uses IP cameras requires separate IP network connections for: The network for communicating with the client PC, CMS, Net I/O units, S3100 panels… The primary Ethernet connector (eth0) on the motherboard provides the physical interface for this network. The network for the IP cameras. The secondary Ethernet connector (eth1) on the motherboard provides the physical interface for this network. Note It is not possible to have overlapping IP address ranges in eth0 and eth1; these must be separate. With software version XO 4 and above, the system will check and issue a warning if the IP addresses of eth0 and eth1 are in the same range. 27817_08... - Page 33 ADPRO iFT Series Hardware Installation Manual All IP cameras connected to eth1 need an IP address in the same range (same network segment). However, in larger buildings it may happen that the IP cameras are on multiple network segments using multiple IP address ranges. As of firmware version XO 4.0, you can use static routes to extend the eth1 camera network to these other network segments. For the configuration of the static routes, see the XO Client Software User Manual (21796). The PH10LU motherboard has two LAN connectors on board. Just connect the IP camera network to the eth1 port using an Ethernet cable. You must set the Ethernet connection of your XO device (eth0) and the Ethernet connection of the camera network (eth1) to different IP ranges. 27817_08...
-
Page 34: Main I/O Card
Series Hardware Installation Manual ADPRO Main I/O Card Features The Main I/O (MIO) Next Generation card is an internal I/O card, pre-installed inside the iFT Series device. It is also called OTB (on-the-box) card. The MIO card offers: 8 tamper-protected inputs and 4 relay outputs (rated 14 VDC @ 1 A) GND for every input driver for audio module/VM22 audio switcher; with improved audio quality driver for the front LED indicators. If you need to replace the MIO card, you can find detailed installation instructions in the document Main I/O and Extension I/O Cards – Next Generation (27820). Connection of Inputs and Outputs 7.2.1 Overview of Inputs and Outputs IN1–8 are voltage-free contact inputs. -
Page 35: Connecting Inputs And Outputs
ADPRO iFT Series Hardware Installation Manual Normally open – NEOL Normally open – SEOL Short circuit = alarm Short circuit = alarm Open circuit = idle 1K1 = idle (Default setting) Open circuit = tamper Normally closed – NEOL Normally closed – SEOL Short circuit = idle Short circuit = tamper Open circuit = alarm 1K1 = idle Open circuit = alarm Normally open – DEOL Short circuit = tamper 1K1 = alarm 3K3 = idle Open circuit = tamper Normally closed – DEOL Short circuit = tamper 1K1 = idle 3K3 = alarm Open circuit = tamper 7.2.3 Connecting Inputs and Outputs Depending on the type, the I/O card can be equipped with Dinkle (standard) or Phoenix spring insertion ... -
Page 36: Cable Strain Relief
Series Hardware Installation Manual ADPRO 7.2.4 Cable Strain Relief After connecting all the wires, use a tie-wrap to attach the cables to the XO device’s chassis. Run the tie-wrap through the slots in the chassis as shown below. The tie-wrap serves as a strain relief and makes sure that the wiring stays in place when handling the XO device. Configuring the MIO Card To configure the inputs and outputs, or to update the MIO card firmware, see the XO Client Software User Manual (21796). 27817_08... -
Page 37: Xo I/O Interface Usb Modules
ADPRO iFT Series Hardware Installation Manual XO I/O Interface USB Modules About the XO I/O Interface USB Modules Firmware version XO 4.0 and above supports the XO I/O Interface USB modules for extra inputs and outputs. These modules contain sets of Main I/O and Extension I/O cards (Next Generation) that you can connect to your XO device via USB. XO I/O Interface USB module: Rear view, single module: The XO I/O Interface USB modules function just like internal MIO/EIO Next Generation cards, but with the following restrictions: There are no AUDIO OUT and AUDIO GND outputs: if you want to use a VM22A audio switcher, you have to connect it to the built-in MIO card instead. It is possible to use a VM22E switcher. You can add only one set of MIO/EIO cards to your device = a single XO I/O Interface USB module. You then have two MIO cards and one EIO card in total. You cannot use the double module. You have to map the modules to the correct card set (MIO-1 or MIO-2) using the hardware configuration tool. If not, the XO device will not discover the cards and you will not be able to use the inputs/outputs. Furthermore, if you are using adapters on the USB ports of your XO device (to connect to PIR detectors or for PTZ control of analogue cameras), you also have to map these 'devices' using the hardware configuration tool. If the system detects a mismatch between the items configured in the hardware configuration tool and the hardware that the system has detected (either more or less than configured), the system will activate system input 0002 – [SYST] – HW CFG MISMATCH. -
Page 38: Logging On To The Hardware Configuration Tool
Series Hardware Installation Manual ADPRO Logging on to the Hardware Configuration Tool You need to log on to the hardware configuration tool using the XO Technician user. For this, you need to: 1. Enable the Technician user using the XO client software. 2. Generate a special, temporary access code (PIN of the day) for the Technician user. The PIN limits the time that the Technician user has access to the configuration tool. Note You cannot log on to the hardware configuration tool while the XO device is restarting. To log on to the hardware configuration tool, proceed as follows: 1. Open the XO client, and log on to the desired XO device as an Administrator. 2. Choose System > General > Users. 3. Under Technician grant, click Enable. 4. Under Technician pin of the day code, click Pin of the day. The following window appears: 5. ... - Page 39 ADPRO iFT Series Hardware Installation Manual 6. Click Create. A new PIN appears under Current pin of the day. The counter in the Remaining Validity (min) box displays for how long (in minutes) the new code is still valid. 7. Write down the code (including the dashes), or keep the window open and move it to where you will be able to see it while logging on to the hardware configuration tool. 8. Open Internet Explorer, and type the following url in the address bar: http://ipaddress:controlport/login where ipaddress is the XO device’s IP address and controlport is the control port number. For example, with the default IP address and control port: http://10.0.0.10:2000/login The following screen appears: 9. Type the username (15) and password (default is 666777) for the Technician user, and click Login. The following screen appears: Note If the Login window appears again, check in the XO client software if the Technician user is enabled. 27817_08...
-
Page 40: Mapping The Xo I/O Interface Usb Modules
Series Hardware Installation Manual ADPRO 10. In the Pin of the day box, type the code that you noted down in step 7. Include the dashes. 11. Click Enter. The hardware configuration screen appears: Note If the Pin of the day window appears again, you have entered an invalid PIN code. The Usb ports list shows the currently configured USB ports (Device node column): MIO-1 is the first MIO card (or set of MIO+EIO card). You can now connect the XO I/O Interface USB module and map it. Mapping the XO I/O Interface USB Modules To connect and map the XO I/O Interface USB modules, proceed as follows: 1. If you have not done so already, log on to the hardware configuration tool. 2. Connect the XO I/O Interface USB module to the XO device using the provided USB cable: insert one end into the module, and the other end into a free USB port on the XO device. - Page 41 ADPRO iFT Series Hardware Installation Manual 3. In the hardware configuration tool, click Refresh. The module will now appear in the list, with the Device Node column empty. The example below shows a device that already has a first set of MIO/EIO cards: MIO-1 is already configured. The row above (- - -) indicates the newly connected module that needs to be mapped. 4. Select the desired set number for the module in the Device Node column. 5. Click Apply Configuration. The message Are you sure to apply your configuration? appears. 6. Click Apply. The Waiting to apply… message appears. 7. Wait for the message to disappear. 27817_08...
-
Page 42: Resetting The Hardware Mapping
Series Hardware Installation Manual ADPRO 8. If you are mapping a double module, repeat for the second module: connect it to the XO device using the USB cable, click Refresh in the configuration tool, and map the module to the correct set number. 9. If the Product columns shows any other devices (in the example screen above, the FT232 USB Serial = an RS-485-to-USB converter), make sure that these devices are also mapped to a suitable USB port. 10. Click Logout. 11. Restart the XO device. The XO client will not discover the I/O cards until you have restarted the device. 12. Open the XO client and check if the added module is visible in the I/O window: choose System > Connections > I/O. For example, if you have added a single module to serve as a second set of I/O cards, you will see a second line indicating 2-I/O card + ext. 13. If there were other devices in the hardware mapping list, then: Check their serial ports settings (System > Connections > Serial Ports / PTZ). Test all related functionality (PIR detectors, analogue PTZ camera, modem…). -
Page 43: Network I/O Units (Net I/O)
ADPRO iFT Series Hardware Installation Manual Network I/O Units (Net I/O) The Network (Net) I/O units provide extra inputs and outputs for your XO device. You mount the units on a DIN rail and connect them to the local network. To power the units: use PoE, a PoE injector, or a local power adapter (12 VDC; min. 350 mA). Each base unit offers 4 inputs and 4 outputs, and LED indicators and a buzzer controlled by the XO device. You can extend each base unit with 1 to 3 extension units, to obtain up to 16 inputs and outputs. As you can link your XO device to up to 8 units (8 base units, each with up to 3 extension units), you can obtain a total of 128 extra inputs and 128 extra outputs. The latest Net I/O units offer monitored inputs (requires V2 hardware and firmware, and min. firmware version XO 4.02 running on the controlling XO device. For details on monitored inputs, see the ADPRO Network I/O Units Technical Manual (33355). Caution! Before plugging or unplugging any extension units, switch off the power to the base unit. -
Page 44: Monitor
Series Hardware Installation Manual ADPRO Monitor You can connect a monitor directly to the XO device, and use it for: Live viewing in a matrix view Consulting basic system information in the XO welcome screen Accessing the XO Installer menu for advanced hardware setup. Connect the monitor to the DVI-I port or the DisplayPort. Use the included DVI-I-to-VGA adapter to connect a VGA monitor. Note that 4K monitors may not work. Note For a video monitor, you can use an external VGA-to-PAL/NTSC converter. To set up live viewing on the monitor, see the XO Client Software User Manual (21796). Note For the iFT model with 32 IP video channels: for optimal performance, disable the monitor output if you are using more than 16 IP channels on your iFT device. This restriction does not apply to the iFT-E model. If you want to view more than 16 cameras on a monitor, or if you want to combine camera images from different XO devices in one matrix view, then use the Video Manager tool instead. 27817_08... -
Page 45: Modem
ADPRO iFT Series Hardware Installation Manual Modem You can connect one modem to the XO device, to the /dev/ttyU1 USB port. You can use either a PSTN/ISDN or a 3G/4G modem. PSTN or ISDN modem: you connect a classic PSTN (ISDN) modem with serial port to the device by means of a USB-to-RS-232 converter. This USB-to-RS-232 converter needs a specific FTDI chip. The Stollman TA+USBA is the only ISDN modem with USB interface that you can use without a converter. 3G/4G modem: the XO device supports only the Sierra Wireless Airlink Raven XE modem. Honeywell does not guarantee that any other 3G/4G modem will work properly. With firmware version XO 4.02 and above, you can also use the 4G Huawei E8372 wingle. For details, see 4G Via Wingle on page 46. Connect the modem to USB input 1 (/dev/ttyU1). Restart the XO client software before configuring the modem. For more information, see the XO Client Software User Manual (21796). 27817_08... -
Page 46: Via Wingle
Series Hardware Installation Manual ADPRO 4G Via Wingle The Huawei E8372 wingle offers a 4G connection on your XO device. Before you can use the wingle, you need to prepare it on your PC. Then you can insert it into your XO device and specify the PPP settings in the XO client. For details, see the XO Client Software User Manual (21796). 27817_08... -
Page 47: Audio
ADPRO iFT Series Hardware Installation Manual Audio You can use not only video images on the XO device, but also audio – both in and out. 13.1 Audio IN Audio input is available from the cameras' audio inputs, or from IP audio devices such as the Axis horn speaker. The iFT Series does not support analogue audio in. You can choose to record audio, and listen to audio in the live view. For an overview of IP cameras that support audio in, see the Supported IP Camera List (26742). Usage of IP audio modules is similar to IP cameras with audio in capabilities. For details, see Using IP Audio Devices on page 52. Note If the connection bandwidth is low, it is recommended to disable live audio streaming. Audio IN is unbalanced audio. Changing the audio settings requires a system restart. In the XO client, you have to enable the audio inputs for recording and listening in the live view. For more information, see the XO Client Software User Manual (21796). 13.2 Audio OUT (Talkback) 13.2.1 Options Talkback to the site works via the Live Video window in the XO client software. You select a camera, and then ... -
Page 48: Setup For Vm22A
Series Hardware Installation Manual ADPRO If you need more than one speaker (audio zoning) on your site, you have the following options: Use VM22A audio units (with built-in MIO card only) to connect up to 20 loudspeakers. Install one or two VM22A units connected in cascade: Unit 0 is controlled by the MIO card, and drives loudspeakers 1 to 10. Unit 1 connects to unit 0 via the loop connector on the VM22A, and drives loudspeakers 11 to 20. Use VM22E audio units to connect up to 32 loudspeakers. Install up to 8 VM22E units in cascade: Unit 0 drives speakers 1 to 4. Unit 1 drives speakers 5 to 8… Use the IP audio outputs on your IP cameras with (built-in) speakers. This feature is available with firmware version XOa 3.02 and above; and for specific camera models only. For more information, see the Supported IP Camera List (26742). Use an IP audio device such as the Axis Network Horn Speaker (C3003-E). Usage is similar to IP cameras with audio out capabilities. For details, see Using IP Audio Devices on page 52. You use the XO client software to assign the different speakers to the cameras. For each camera, you can choose: ... - Page 49 ADPRO iFT Series Hardware Installation Manual The diagram below shows a typical setup that allows talkback on the monitored site: it provides 20 audio outputs (loudspeakers) via two VM22A units in cascade. A headset connected to the client PC serves as the audio input (microphone). For more information, see the VM22A Audio Switcher – Installation and User Manual. 27817_08...
-
Page 50: Setup For Vm22E
Series Hardware Installation Manual ADPRO 13.2.3 Setup for VM22E For the hardware installation of the VM22E, see the connection scheme below. The illustrations below show connections to the built-in MIO card, but you can also connect to a MIO card in an XO I/O Interface USB module. The table below lists the correct connections between the VM22E module and the MIO card (built-in or external): MIO card Next Generation VM22E terminal Name STROBE CLOCK DATA For more information, see the VM22E Technical Manual (29541). 13.2.4 Troubleshooting Talkback You can test talkback using the XO client (as of firmware version XO 4.3). The audio out setup screen provides a test button to play a sound clip. For details, see the XO Client Software User Manual (21796). If talkback does not work, check the following: In the XO client software, check the access rights of the user: Audio talk must be allowed. - Page 51 ADPRO iFT Series Hardware Installation Manual To configure the microphone on your computer in Windows Vista/Windows 7, proceed as follows: 1. Click Start, and then click Control Panel. 2. Click Sound, and then click the Recording tab. 3. If you have more than one sound device, check if the device you want to use with the XO device is the default device. If not, right-click the desired device, and click Set as Default Device. 4. To test if the microphone works, tap it with your finger a few times. The blue lines next to the default microphone light up in green, indicating the volume. 5. Click OK, and close Control Panel. 27817_08...
-
Page 52: Using Ip Audio Devices
Series Hardware Installation Manual ADPRO 13.3 Using IP Audio Devices There are several IP audio devices that you can use for audio in/out, such as the Axis Network Horn Speaker (C3003-E) and the Axis P8221 I/O Audio Module. For details on the supported features of the IP audio devices, see the Supported IP Camera List (26742). You manage an IP audio device on the XO device as if it were an IP camera with audio in and audio out capabilities: You connect the IP audio device to the IP camera network, and enable it in the XO client as an IP camera. The audio device occupies one IP channel. As there is no video from the device, the system will display a speaker icon in the live/recorded video windows. You enable audio in and audio out just like for an IP camera. You select it for talkback in the Live Video window just like a camera with audio out. You can set up recording for the device. When you play back the recording, the system will display a speaker icon instead of video, but you will hear the recorded sound (audio in from the built-in microphone and audio out from talkback). 27817_08... -
Page 53: Connecting Pir Detectors
The maximum number of PIR detectors on an XO device is 34 (requires minimum firmware version XOa 3.02.0001). The XO client will indicate how each PIR detector is connected: over RS-485 (SER) or over IP (ETH). You can connect a PIR detector to only one XO device. Note You need a PIR-HLI application license to enable the PIR detectors. Use Xchange to install the license on the XO device. For more information, see the Xchange Tool User Manual (27816). 14.3 PIR Address Range Regardless of the connection method, PIR detector addresses must be in the following ranges: Firmware version XOa 3.02.0001 and above: 1–34. The XO device will not discover PIR detectors with addresses above 34. Firmware versions below XOa 3.02.0001: 1–32. The XO device will not discover PIR detectors with addresses above 32. Furthermore, each PIR detector must have a unique address, regardless of the connection method (RS-485 or IP). For instructions on setting PIR detector addresses, see the ADPRO PRO E PIR System Setup Manual (26571). 14.4 Direct Connection to the MIO Card Connect the PIR detector(s) to the XO device by connecting the RS-485 cable of the PIR closest to the XO device to the MIO card of the XO device. You can connect up to 32 PIR detectors in cascade on the RS-485 bus. 27817_08... - Page 54 Series Hardware Installation Manual ADPRO On the internal MIO card, set the RS-485 jumper to the 2-wire position (A). MIO card Next Generation RS-485 PTZ jumper: 2-wire setting (default setting – see Note below) RS-485 PTZ jumper: 4-wire setting Note On systems produced from the end of April 2015, the default setting of the RS-485 PTZ jumper is 2-wire. On older systems, the 4-wire setting was default. If you experience any problems when connecting devices to the MIO card, check the RS-485 PTZ jumper setting. Change it if necessary. Connect the wires as shown below: (*) Some PIR models have separate 0V terminals for data and power; on other models there is only one common 0V terminal. Make sure to bridge the following connections: TX+ with RX+ TX– with RX– The PIR detectors are powered locally by a power adapter. You can place locally powered PIR detectors at the maximum distance of 1200 m for RS-485 cables. Make sure that there is no difference in earth potential between the XO device and the PIR detector. 27817_08...
-
Page 55: Connection Via The Usb-To-Rs-485 8-Channel Distribution Unit
ADPRO iFT Series Hardware Installation Manual 14.5 Connection via the USB-to-RS-485 8-Channel Distribution Unit The USB-to-RS-485 distribution unit provides 8 channels to easily connect and configure the PIR detectors on the XO device. Each PIR detector needs a unique address. For the appropriate address ranges, see PIR Address Range on page 53. You can use the unit, together with the ADPRO PIR software on your PC, to assign a unique address to the PIR detector. In this case, connect the distribution unit to your PC, and connect only 1 PIR detector per channel on the distribution unit. For details, see datasheet USB-RS-485 distribution unit (19532060). Once you have assigned unique addresses to the PIR detectors, you can connect multiple PIR detectors to the same channel on the distribution unit, allowing you to connect 32 PIR detectors to an XO device using only 1 distribution unit. Depending on the existing installation (see the restrictions on distances and cable lengths further below), you can determine which PIR detectors you connect to which channel. If necessary, you can connect up to 4 distribution units in cascade. In that case, you connect only one of the 4 distribution units directly to the XO device. Keep the following in mind: Before connecting multiple PIR detectors to the same channel, you have to assign a unique address to each PIR detector. Connect the distribution unit to the /dev/ttyU2 USB port on the XO device. Do not use any other ports. Restart the XO software after connecting the PIR detectors to the USB port. - Page 56 Series Hardware Installation Manual ADPRO An example of distribution units in cascade: A detailed view of a connected distribution unit: The maximum length of the USB cable between the XO device and the distribution unit is 1 m. Four wires connect the PIR detector to the distribution unit (power supply and communication). The maximum distance between distribution unit and PIR detector is 200 m. If the distance is longer than 200 m, then the PIR detector needs a separate local power supply. 27817_08...
-
Page 57: Connection Via The Usb-To-Serial-Port Rs-485 Converter
14.6 Connection via the USB-to-Serial-Port RS-485 Converter Connect the PIR detector to the converter and plug the USB cable of the converter in the /dev/ttyU2 USB port of the XO device. Restart the XO client software after connecting the PIR detectors to the USB port. You can place locally powered PIR detectors at a maximum distance of 1200 m with RS-485 cables. Make sure that there is no difference in earth potential between the XO device and the PIR detector. You need to order the USB to serial port RS-485 converter separately (reference number 20415490). 14.7 Connection via the IFM-485-ST Interface Module The IFM-485-ST is an interface module which allows to conveniently connect the RS-485 bus of the PIR detector to the /dev/ttyU2 USB port of your XO device. For detailed installation instructions, see the ADPRO IFM-485-ST Legal Disclaimer & Intended Use of Product (27178), and the ADPRO PRO E PIR System Setup Manual (26571). 27817_08... -
Page 58: Connection Via Ip Modules (Pro E-Ipm)
Series Hardware Installation Manual ADPRO 14.8 Connection via IP Modules (PRO E-IPM) 14.8.1 Summary IP modules allow you to connect PIR detectors via the local network, instead of via an RS-485 bus. The modules convert the signals from network to RS-485. They are powered via PoE. You need to set up the IP modules so that they can communicate with the XO device: assign an IP address, and specify the correct communication settings. For this, you will use the Lantronix DeviceInstaller program. Honeywell recommends to use IP addresses in the same range as the local network of the XO device (eth0; not in eth1 which is the range of the IP camera network). After the configuration, you can connect the IP modules to the PIR detectors, and finally add the IP modules to the XO client. 14.8.2 Setting up the IP Modules The IP modules only work with the XO client software if they have a static IP address and use the UDP communication protocol. Furthermore, you must set up the serial ports of the IP modules. To set up the IP modules, proceed as follows: 1. Connect the IP modules to the network, and make sure that your PC is in the same network. 2. Download and install the Lantronix DeviceInstaller program (available from www.lantronix.com/products/deviceinstaller). 3. Launch DeviceInstaller. It automatically starts searching for the IP modules (xPico devices) on the network. If the search does not start automatically, click Search. - Page 59 ADPRO iFT Series Hardware Installation Manual 5. Click the Web Configuration tab, and then click the button to connect to the module. 6. Leave the username and password blank; just click OK to continue. Next, you will make sure that the module uses a static IP address. 27817_08...
- Page 60 Series Hardware Installation Manual ADPRO 7. Click Network, and provide the correct network settings. The example screen above shows the settings for an IP module with IP address 192.168.10.192. Honeywell recommends to use IP addresses in the same range as the local network of the XO device (eth0; not in eth1 which is the range of the IP camera network). 8. Click OK to save the settings. Next, you will set up the serial port communication. 27817_08...
- Page 61 ADPRO iFT Series Hardware Installation Manual 9. Click Serial Settings, and set the parameters as shown in the screen below. Make sure that the Port Settings are as follows: Item Description Protocol RS485 - 2 wire Flow control None Baud rate 9600 Data Bits Parity Even Stop Bits 10. Click OK to save the settings. Next, you will set up the module to use UDP communication. 27817_08...
- Page 62 Series Hardware Installation Manual ADPRO 11. Click Connection, and set the parameters as shown in the screen below: Make sure to set the following parameters correctly: Item Description Protocol Datagram Type Local Port 5555 12. Click OK to save the settings. Next, you will apply all the settings to the module. 27817_08...
-
Page 63: Connecting The Ip Modules To The Pir Detectors
ADPRO iFT Series Hardware Installation Manual 13. Click Apply Settings. The module will restart, and will then become available with the new IP settings. You can change the IP address in the address bar, or you can use the search function as before. 14. Repeat steps 4 to 13 for other IP modules. Now you can connect the IP modules to the PIR detectors. 14.8.3 Connecting the IP Modules to the PIR Detectors For details on connecting the IP modules to the PIR detectors, see the document ADPRO PRO E-IPM Legal Disclaimer & Intended Use of Product (27556). Take into account that the wire colours may be different: Blue Black Orange Brown Yellow Green After connecting the IP modules to the PIR detectors, you can add the IP modules in the XO client. For details, ... -
Page 64: Power Consumption
Series Hardware Installation Manual ADPRO Power Consumption The estimated power consumption depends on the installed components and on the system load: Motherboard 12 W Processor 65 W max. Seagate 10 TB hard disk 7 W MIO card 1 W Example for a 2-disk device (with maximum values): Motherboard 13 W Processor 65 W (PH10LU with Core i7/4770-S microprocessor) 2 Seagate hard disks 14 W MIO card 1 W TOTAL on secondary circuit: 93 W on primary circuit: 119 W (0.56 A / 230 VAC) (total power consumption divided by 0.78 – this is the efficiency of the power supply) Note Measurement on an iFT-E* device (with PH10LU motherboard and i7 microprocessor) produced the following results: 0.2 A at 230 VAC → 46 W (idle state). (*) configuration = iFT-E with 2 hard disks (4 TB per disk). 27817_08... -
Page 65: Retrieving The Ip Address
ADPRO iFT Series Hardware Installation Manual Retrieving the IP Address The XO client displays the XO device’s IP address in the title bar. However, if you cannot connect to the XO device, you can find the IP address as follows: 1. Connect a monitor/screen and a keyboard to the XO device. 2. If the monitor displays the video matrix, press Ctrl+Alt+F1. The XO welcome screen appears: ADPRO XO 04.03.0006 : 10.0.0.10 Subnet : 255.255.255.0 Gateway: 10.0.0.1 Port [HTTP]: 80 Port [CTRL]: 2000 Port [RTSP]: 554 The XO welcome screen displays the following information: XO device (server) software version IP address, subnet mask, and gateway ... -
Page 66: Diagnostics
Series Hardware Installation Manual ADPRO Diagnostics 17.1 Log Files and Reports In case of major troubles with the XO device, the system allows to generate a number of log files and reports. In some cases, the Honeywell Support Division may ask you to activate and capture some log files and reports that can be helpful to resolve technical issues. 17.2 Retrieving Log Files The XO device can output its internal trace buffer to hard disk to allow logging for longer periods without losing the data. You need to enable logging first. To enable logging and retrieve log files, proceed as follows: 1. Type the device’s IP address in the address bar of your internet browser, and add /log.php to the address. For example: http://10.0.0.10/log.php. The Internal Logging page appears. It displays instructions to enable logging. If logging is not yet enabled, the Log list at the bottom of the page is empty. 27817_08... - Page 67 ADPRO iFT Series Hardware Installation Manual 2. To enable logging, connect to the device via Telnet and enter the following Telnet commands: tr,1 tr,output,file After you have enabled logging, links to the log files appear on the web page in the Log list: 3. To retrieve a log file, click the link on the web page. Depending on your system settings, the system will open the file in the browser, or will (ask to) download the file. 27817_08...
-
Page 68: Retrieving Reports
Series Hardware Installation Manual ADPRO 4. If you have downloaded the file, double-click it to open it. If the following message appears, choose Select a program from a list of installed programs, and then set Notepad as default application. 17.3 Retrieving Reports The XO device also generates reports. You can view these reports via the internet browser. Type the IP address of the XO device in the address bar of the browser and add /report.php to the IP address. Example: http://10.0.0.10/report.php The Server Report contains the following information: General Memory usage Time + zone Processes Uptime Performance Vmstat I/O stat PID stat MP stat 27817_08... - Page 69 ADPRO iFT Series Hardware Installation Manual Network Interfaces – available Interfaces – enabled Routes Listen ports Netstat – all DEV stats Sockstat ARP cache Filesystem Mounts S.M.A.R.T Fsck Open files Free disk space Hardware Memory Mainboard Udev database Server Server version Server process memory usage Files Active config 27817_08...
-
Page 70: Web
Series Hardware Installation Manual ADPRO Web Pages There are several web pages to consult with the XO device. To open these web pages in your internet browser: type the IP address in the address bar, followed by the extensions as described in the table below. Web page Description index.php This is the main page of the XO device. If the XO client has been installed, this page automatically opens the XO client application. If the application has not yet been installed, you will be redirected to the setup page (setup.php). setup.php On this page you can download the XO client application. tools.php This page contains the links to the internal logging, the core dump and the network trace: log.php Here you can download the log files (see Retrieving Log Files on page 66). report.php Here you can consult essential information on the configuration (see Retrieving Reports on page 68). core.php Here you can download the core dump (crash info) and watch dump (hang info) when you encounter these specific problems. The Honeywell Support Division may ask you to send these files to them for further investigation. Always mention the version when providing a core dump! phpshell.php This is a Linux console through a web browser. You need a username and password to use this tool. This is by default only accessible for the Honeywell Development Team. net.php Here you find a network sniffer for network tracing. You can use it for checking why a certain client cannot connect to the XO device. -
Page 71: Maintenance
ADPRO iFT Series Hardware Installation Manual Maintenance An iFT Series device requires almost no maintenance. Keep the device dust-free. Make sure to clean the ventilation grids at the front and back, to assure proper airflow in the device. Caution! Do NOT clean the device with water or any corrosive products. Use only dust cloths and wipes to clean the outside. 27817_08... -
Page 72: Full Reset By Flashing The Dom
Series Hardware Installation Manual ADPRO Full Reset by Flashing the DOM 20.1 Flashing the Image File to the DOM You can perform a full reset of the device by flashing the iFT image file straight to the DOM (disk-on-a-module) using the ImageFlash tool. When you perform a full reset using the ImageFlash tool, the system: Resets the IP address to 10.0.0.10. Deletes all configurations and restores the default values in all configurations. Restores the default values for the configuration of MIO card and Net I/O units (NO/NC, failsafe, and watchdog). Deletes all users and restores the default users. Deletes the calibration pictures. Deletes all licenses: system license and application licenses. There are other options for full or partial resets. For more information, see Tech Tip #06 Resetting to Defaults ... - Page 73 ADPRO iFT Series Hardware Installation Manual 7. Click System halt. 8. Click Yes to confirm. The system shuts down all processes and connections. This may take a minute. 9. Wait for all the LEDs on the front panel to go out. 10. Switch off the power using the on/off switch at the back of the device. Note You have 20 seconds to switch off the device. After 20 seconds the device restarts again automatically. 11. Unplug the power cord, and open the cover. The DOM is located at the back of the front panel: 12. Unplug the SATA cable that connects the DOM to the motherboard. 13. Unplug the DOM’s power cable. 14. Insert the SATA-to-USB cable into the DOM, and plug the other end into your PC. Note If you are using a new, unused DOM, you must format it first. When you connect the DOM to your PC, the system will display a message, asking to format the DOM: click Yes or OK to format the DOM. 15. On your PC, double-click the FastTrace2ImageFlash.exe file to start the ImageFlash tool. The following screen appears: 16. Click Browse and browse to the folder where the iFT image file is located.
-
Page 74: After A Full Reset
Series Hardware Installation Manual ADPRO 22. Re-insert the SATA cable to connect the DOM to the motherboard. 23. Re-insert the DOM’s power cable. 24. Put the cover back in place and switch on the power supply. The XO device restarts. 25. Reconnect the XO client to the XO device using the default IP address (10.0.0.10) and the username/password of a default user. 20.2 After a Full Reset After a full reset, the system contains no more licenses. The system license is no longer available either. An XO device running without system license will inform the user of the license error via the event message 0013 – [SYST] – SYSTEM LICENSE ERROR, and via a popup window at each connection with the XO client. You have to restore the system license immediately to have access to full functionality. You can restore your system license via the Transfer function in the XO client. In some cases, you can also try to restore the system license using Xchange. For details, see the Xchange Tool User Manual (27816). You can restore: the system license: via the XO client from the backup that you made before resetting, or via Xchange (if available). the application licenses: via Xchange. other files (configurations, calibration pictures…): via the XO client from the backup that you made before resetting. You will need to reconfigure the MIO card and Net I/O units manually. -
Page 75: Product Labelling
ADPRO iFT Series Hardware Installation Manual Product Labelling 21.1 Product Number Structure Each ADPRO device has an 8-digit product number, indicating the installed options. The product number layout for iFT Series devices is as follows: PP CC HH 1 D PP The iFT model number: 60 = iFT model 61 = iFT-E model (max. 2 HDDs) 63 = iFT-E model 4 HDD ready CC The number of included IP channels: 01 = 4 IP 05 = 20 IP 02 = 8 IP 06 = 24 IP 03 = 12 IP 07 = 28 IP 04 = 16 IP 08 = 32 IP HH The hard disk size:... -
Page 76: Declaration Of Conformity
Series Hardware Installation Manual ADPRO Note Honeywell provides a broad range of iFT Series configurations, suitable for a wide variety of security system requirements. For an overview of the available configurations, and for advice on selecting the one that best suits your needs, please contact your Honeywell Sales Representative. 21.2 Declaration of Conformity 27817_08... -
Page 77: Appendix A - Abbreviations
ADPRO iFT Series Hardware Installation Manual Appendix A – Abbreviations 3G: third generation DVI-I: Digital Visual Interface (digital and analogue) 4G: fourth generation EIO: Extension I/O A: ampere EMS: Event Management System AGC: automatic gain control eth: Ethernet interface AHCI: Advanced Host Controller Interface fps: frames per second APN: Access Point Name ft: foot/feet ATD: adaptive threshold determination FTDI: Future Technology Devices International A/V card: audio/video card FTP: file transfer protocol AWG: American wire gauge GB: gigabyte BIOS: basic input output system GDI: Graphics Device Interface BNC: Bayonet Neill–Concelman GHz: gigahertz Cam: camera GND: ground CBR: constant bitrate GUI: graphical user interface CD: compact disk HD: high definition CHAP: Challenge-Handshake Authentication ... - Page 78 Series Hardware Installation Manual ADPRO MB: megabyte SDK: software development kit Mbps: megabits per second SEOL: single end of line MIC: microphone SIF: source input format MIO: Main I/O SIM: subscriber identity module mm: millimetre SMART: Self-Monitoring, Analysis, and Reporting Technology MS-CHAPv1/MS-CHAPv2: Microsoft Challenge- Handshake Authentication Protocol, version 1/2 SMTP: Simple Mail Transfer Protocol NAT: network address translation SP: Service Pack NC: normally closed SPDT: single pole double throw NEOL: no end of line SPK: speaker NO: normally open SVGA: Super Video Graphics Array NTFS: new technology file system SXGA: Super Extended Graphics Array NTP: network time protocol Sync: synchronisation NTSC: National Television System Committee TB: terabyte OS: operating system TCP: transmission control protocol OSD: on screen display TLS: transport layer security OTB: on the box TX: transmission PAL: Phase Alternating Line...
- Page 80 www.security.honeywell.com UK and Europe +44 1442 242 330 D-A-CH +49 431 23284 1 The Americas +1 781 740 2223 Middle East +962 6 588 5622 Asia +86 21 5240 0077 Australia and New Zealand +61 3 9936 7000 A Disclaimer about this document, statements about Intellectual Property, Copyrights, and Liability, as well as a General Warning are available in an earlier section of this document. Document No: 27817_08 P/N 19532170...
Need help?
Do you have a question about the iFT Series and is the answer not in the manual?
Questions and answers