
Related Manuals for Trebs Comfortcam 22127

Summary of Contents for Trebs Comfortcam 22127
- Page 1 Comfortcam 22127 Handleiding USB Endoscoop Mode demploi Endoscope de USB Bedienungsanleitung USB Endoskop Manual USB Endoscope...
-
Page 2: Table Of Contents
Inhoudsopgave Voorzorgsmaatregelen en garantie..........6 Uw nieuwe endoscoop................7 Functies......................7 Systeemvereisten..................7 Inhoud van de verpakking................7 Specificaties....................8 Installatie van de software................9 Installatie en aansluiten van de hardware..........10 Bediening................... 11 Snapshot-functie................. 11 Focus-functie ................... 12 Applicatie.................. 12... -
Page 3: Voorzorgsmaatregelen En Garantie
Voorzorgsmaatregelen en garantie Deze handleiding helpt u om vertrouwd te raken met de functies van het product. Bewaar de handleiding op een veilige locatie voor toekomstige referentie. U ontvangt, bij juist gebruik, 2 jaar garantie op dit product. Let op de algemene voorwaarden! Gebruik het product niet voor andere doeleinden dan het beoogde gebruik. -
Page 4: Functies
Beste klant Dank u voor de aanschaf van deze digitale endoscoop met flexibele zwaanhals. De endoscoop helpt bij het maken van foto’s van moeilijk bereikbare plaatsen. U kunt de endoscoop ook gebruiken om verloren dingen terug vinden of gewoon als webcam. Lees deze instructies zorgvuldig door om ervoor te zorgen dat u de endoscoop juist gebruikt. -
Page 5: Specificaties
Specificaties • Lengte USB-kabel (USB 1.1): 2 m • Draaiende zwaanhals: 88 cm • Resolutie: 640 x 480 pixels • Framerate: 30 fps • Bedrijfstemperatuur: 0°C - 45°C • Opslagtemperatuur: -10°C – 60°C... -
Page 6: Installatie Van De Software
Installatie van de software Voordat u begint met de installatie van uw endoscoop, raden wij u aan om altijd dezelfde USB-poort op uw computer te gebruiken. 1. Plaats de CD in het CD- of DVD-station van uw PC. Als de setup-wizard niet automatisch start, dan kunt u het „Telescope DRIVER“... -
Page 7: Installatie En Aansluiten Van De Hardware
4. Wacht een paar seconden tot het bericht “AIT Driver Installation finished“ op het scherm verschijnt en klik vervolgens op “Voltooien“. De software is nu geïnstalleerd op uw computer en klaar voor gebruik. Installatie en aansluiten van de hardware 1. Laat de CD in het CD-of DVD-station van uw computer zitten. 2. - Page 8 4. Uw computer opent de “Nieuwe Hardware Wizard“. Kies “Software automatisch installeren” en klik op “Volgende”. 5. Windows toont een bericht dat het programma niet voldoet aan de Windows logo-test. U kunt het installatieproces vervolgen door op “Toch doorgaan” te klikken. 6.
-
Page 9: Bediening
Bediening U kunt de endoscoop nu na het aansluiten op de USB-poort van uw computer gebruiken als een normale Klik op “Start” “Alle programma’s” “Telescope Driver’’ ‘’ Amcap” om een webcam. venster te openen – u kunt de opnamen in dit venster zien. Andere applicaties, zoals instant messengers herkennen de endoscoop ook. -
Page 10: Focus-Functie
• Help Klik op “About Snapshot Reader (A)...“ om Naam, Copyright en Serienummer van de applicatie te bekijken. Focus-functie U kunt de focus bedienen met behulp van de regelingsknop op de endoscoop. Start de applicatie voor toegang tot nog meer opties. (zie hieronder). Applicatie Start de “AMCAP“... - Page 11 • Options Preview Gebruik deze optie om binnen het applicatievenster een preview van de foto weer te geven. Audio Capture Gebruik deze optie om de audio-opties aan te passen. Filter… Video Capture Gebruik deze optie om de helderheid, het contrast, enz. aan te passen. Klik op Filter…...
- Page 12 The Netherlands Website: www.trebs.nl email: info@trebs.nl Trebs Comfortcam is a registered brand of Trebs BV. All other brands in this manual and/ or packaging do not belong to Trebs BV and have another justified holder. EU Environmental Protection Waste electrical products should not be disposed of with household waste. Please recycle where...
- Page 13 Comfortcam 22127 Handleiding USB Endoscoop Mode demploi Endoscope de USB Bedienungsanleitung USB Endoskop Manual USB Endoscope...
- Page 14 Sommaire Consignes de sécurité et recyclage........... 18 Votre nouvelle caméra flexible............19 Caractéristiques....................19 Système requis....................19 Contenu....................... 19 Données techniques..................20 Installation logicielle................21 Branchement et installation matérielle........... 22 Utilisation.................... 23 Fonction capture d’écran................23 Netteté......................... 24 Programm......................24...
-
Page 15: Consignes De Sécurité Et Recyclage
consignes de sécurité et recyclage • Ce mode d’emploi vous permet de vous servir correctement du produit. Gardez-le précieusement afin de pouvoir le consulter à tout moment. • Ne démontez pas l‘appareil, sous peine de perdre toute garantie (excepté pour changer les piles). •... -
Page 16: Votre Nouvelle Caméra Flexible
Chère cliente, Cher client, Nous vous remercions pour l’achat de cet article. Cette caméra flexible permet des enregistrements dans des endroits difficiles d’accès et peut faire office de webcam. Afin d’utiliser au mieux votre nouvel appareil, veuillez lire attentivement ce mode d’emploi et respecter les consignes et astuces suivantes. -
Page 17: Installation Logicielle
Installation logicielle Avant de démarrer l’installation de votre endoscope, nous vous conseillons d’utiliser toujours le même port USB. Insérez le CD fourni dans le lecteur de votre ordinateur. Si l’assistant d’installation ne démarre pas tout seul, explorez le CD et ouvrez le fichier „Telescope Driver“ en double cliquant dessus. Vérifiez que la caméra ne soit pas branchée à... -
Page 18: Branchement Et Installation Matérielle
Attendez que le message „L’installation de AIT DRIVER est terminée.“ Apparaisse puis cliquez sur „Terminer“. Le logiciel est alors installé. Branchement et installation matérielle Chargez le CD dans le lecteur CD ou DVD de votre ordinateur. Branchez le connecteur USB de la caméra à un port libre de votre ordinateur. Votre ordinateur démarre l’«... - Page 19 Windows affiche un rapport indiquant que le logiciel ne passe pas le test du logo Windows. Continuez l'installation en cliquant sur « Ignorer et continuer ». Une fois l’installation terminée, cliquez sur „Terminer“. La caméra est installée et prête à l’emploi.
-
Page 20: Utilisation
utilisation Branchez le connecteur USB de la caméra à un port USB libre de votre ordinateur. Vous pouvez aussi l’utiliser comme une webcam classique. Cliquez sur„Démarrer“ „Poste de travail“ „VGA SoC PC- Camera“ pour ouvrir une fenêtre affichant l’image capturée. Vous pouvez aussi utiliser la caméra avec d’autres programmes ayant détecté... -
Page 21: Netteté
Netteté Faites tourner le bouton sur la caméra pour régler manuellement la netteté. Démarrez le programme AMCAP pour effectuer plus de réglages (voir ci-dessous). Programm Pour des réglages de précision et des enregistrements, démarrez le logiciel „AMCAP“. Un raccourci vers ce programme a été... - Page 22 • Options Afficher l’image de la caméra dans la fenêtre du programme. Preview Audio Capture Ouvre la fenêtre des options audio. Filter… Ouvre la fenêtre des options vidéo: luminosité, contraste etc. Cliquez sur „Paramètres avancés“ pour des Video Capture Filter… filtres ou arrière-plans spéciaux.
- Page 23 The Netherlands Website: www.trebs.nl email: info@trebs.nl Trebs Comfortcam is a registered brand of Trebs BV. All other brands in this manual and/ or packaging do not belong to Trebs BV and have another justified holder. EU Environmental Protection Waste electrical products should not be disposed of with household waste. Please recycle where...
- Page 24 Comfortcam 22127 Handleiding USB Endoscoop Mode demploi Endoscope de USB Bedienungsanleitung USB Endoskop Manual USB Endoscope...
- Page 25 Inhaltsverzeichnis Sicherheitshinweise und Gewährleistung..........6 Ihr neues Endoskop................7 Eigenschaften......................7 Systemvoraussetzungen..................7 Lieferumfang......................7 Technische Daten....................8 Software-Installation................9 Anschluss und Hardware-Installation..........10 Bedienung................... 11 Schnappschuss-Funktion................. 11 Bildschärfe-Funktion..................12 Anwendungs-Programm.................. 12...
-
Page 26: Sicherheitshinweise Und Gewährleistung
Sicherheitshinweise & Gewährleistung Diese Bedienungsanleitung dient dazu, Sie mit der Funktionsweise dieses Produktes vertraut zu machen. Bewahren Sie diese Anleitung daher stets gut auf, damit Sie jederzeit darauf zugreifen können. • Sie erhalten bei Kauf dieses Produktes zwei Jahre Gewährleistung auf Defekt bei sachgemäßem Gebrauch. -
Page 27: Ihr Neues Endoskop
Sehr geehrte Kunden, wir danken Ihnen für den Kauf des digitalen Endoskop mit Schwanenhals . Dieses praktische Endoskop ermöglicht ihnen Aufnahmen an schwer zu erreichenden Orten und dient so zum Wiederfinden verlorener Gegenstände und als Webcam. Bitte lesen Sie die folgenden Anwendungshinweise aufmerksam durch, damit Sie Ihr neues Endoskop optimal einsetzen können. -
Page 28: Technische Daten
8DEU8 DEU Technische Daten • Länge des USB 1.1-Verbidnungskabel: 2 m • schwenkbarer Schwanenhals: 88 cm • Auflösung: 640 x 480 Pixel • Bildrate: 30 fps • Umgebungs-Temperatur: 0°C bis 45°C • Lager-Temperatur: -10°C bis 60°C... -
Page 29: Software-Installation
Software Installation Bevor Sie mit der Installation Ihres Endoskops beginnen, empfehlen wir die Benutzung des jeweils gleichen USB-Ports. 1. Legen Sie die mitgelieferte CD in ein freies CD- oder DVD-Laufwerk Ihres Computers. Sollte der Setup- Assistent nicht von alleine starten, klicken Sie auf das Laufwerk und öffnen Sie die Datei „Telescope DRIVER“... -
Page 30: Anschluss Und Hardware-Installation
4. Warten Sie einige Sekunden, bis die Meldung „Die Installation von AIT DRIVER auf Ihrem Computer ist abgeschlossen.“ erscheint und klicken Sie auf „Fertigstellen“. Die Software ist jetzt erfolgreich auf Ihrem Computer installiert. Anschluss und hardware-installation 1. Laden Sie die CD in das CD- oder DVD-Laufwerk Ihres Computers. 2. - Page 31 4. Ihr Computer öffnet den „Neue Hardware“ Assistenten. Wählen Sie „Software automatisch installieren“ und klicken Sie „Weiter“. 5. Windows zeigt einen Bericht, dass die Software nicht den Anforderungen des Windows Logo-Tests entspricht. Setzen Sie die Installation fort, indem Sie „Trotzdem weitermachen“ klicken. 6.
-
Page 32: Bedienung
Bedienung Schließen Sie den USB-Stecker des Endoskops an einen freien USB-Port Ihres Computers an. Sie können das Endoskop jetzt wie eine gewöhnliche Webcam nutzen. Klicken Sie auf „Start“ „Alle Programme“ “Telescope Driver‘‘„Amcap“ um ein Fenster mit dem Kamerabild zu öffnen. Andere Programme, die auf angeschlossene Kameras zugreifen können, wie z.B. -
Page 33: Bildschärfe-Funktion
• Help Klicken Sie auf „About Snapshot Reader (A)…“ um sich Namen, Copyright und Seriennummer des Programms anzeigen zu lassen. Bildschärfe-Funktion Mit dem Regler auf dem Endoskop können Sie die Bildschärfe per Hand einstellen. Starten Sie das Anwendungsprogramm um weitere Einstellungen vorzunehmen (siehe unten). Anwendungsprogramm Um Feineinstellungen vorzunehmen und Aufnahmen zu machen, starten Sie die „AMCAP“-Software. - Page 34 • Devices Wählen Sie hier, welches angeschlossene Video-Aufnahmegerät vom Programm angezeigt werden soll. Wählen Sie die „Telescope Driver“, um das Programm auf das Endoskop einzustellen. • Options Preview Stellen Sie ein, ob das aktuelle Bild der Kamera im Fenster des Programms angezeigt werden soll.
- Page 35 The Netherlands Website: www.trebs.nl email: info@trebs.nl Trebs Comfortcam is a registered brand of Trebs BV. All other brands in this manual and/ or packaging do not belong to Trebs BV and have another justified holder. EU Environmental Protection Waste electrical products should not be disposed of with household waste. Please recycle where...
- Page 36 Comfortcam 22127 Handleiding USB Endoscoop Mode demploi Endoscope de USB Bedienungsanleitung USB Endoskop Manual USB Endoscope...
- Page 37 Contents Safety Precautions and Warranty..........6 Your new endoscope................7 Features......................7 System Requirements..................7 Package Contents....................7 Specifications....................8 Software Installation................9 Connection and Hardware Installation..........10 Operation................... 11 Snapshot Function................. 11 Focus Function ................... 12 User Application.................. 12...
-
Page 38: Safety Precautions And Warranty
Safety Precautions and Warranty This user manual helps you to familiarize with the functions of the product. Please store it in a safe location for future reference. You receive a 2 year warranty on this product at proper use. Please note the general terms and conditions! Do not use the product for any purpose other than its intended use. -
Page 39: Features
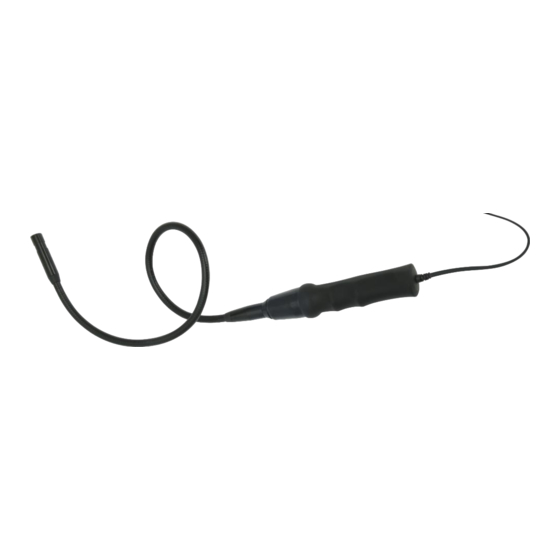
Dear Customer Thank you for buying this digital endoscope with flexible swan's neck. It helps you to take pictures from places that are difficult to reach. You can also find lost things again or simply use it as a webcam. Please read these instructions very carefully to make sure that you use your endoscope correctly. -
Page 40: Specifications
Specifications • USB cable length (USB 1.1): 2 m • Swiveling swan's neck: 88 cm • Resolution: 640 x 480 pixel • Frame rate: 30 fps • Operating temperature: 0°C - 45°C • Storage temperature: -10°C – 60°C... -
Page 41: Software Installation
Software Installation Before starting the installation of your endoscope we suggest to always use the same USB port. 1. Put the CD into the CD or DVD drive of your PC. If the setup assistant does not start automatically please open the file “Telescope DRIVER“ manually. 2. -
Page 42: Connection And Hardware Installation
4. Wait a few seconds until the message “AIT Driver Installation finished“ appears on the screen and click on “Finish“. The software is now installed on your computer and ready for use. Connection and Hardware Installation Load the CD in the CD or DVD drive of your computer. 2. - Page 43 4. Your computer opens the “New hardware wizard”. Select “Install s oftware automatically” and click “Next”. Windows shows a report that the software does not satisfy the Windows logo test. Continue installation by clicking “Continue anyway”. 6. Click on “Finish“ to finish the installation. Your endoscope is now ready to use. 7.
-
Page 44: Operation
Operation After you connect the endsocope to the USB port of your computer, you can use it as a normal webcam. Click on “Start” “All Programmes” “Telescope Driver‘‘ ‘‘Amcap” to open a window – you can see the shootings within this window. Other applications like instant messengers recognise the endoscope as well. -
Page 45: Focus Function
Focus Function You can control the focus with the control button on the endoscope. Start the user application to access even more options. (see below). User Application To change options and to take recordings please start the “AMCAP“ application. You will find a link to the program on your desktop after finishing the installation. - Page 46 • Devices Choose a connected device for the application. Choose “ Telescope Driver“, if you intend to use the endoscope. • Options Preview Use this option to see a preview of the picture within the application window. Audio Capture Use this option to adjust the audio options. Filter…...
- Page 47 The Netherlands Website: www.trebs.nl email: info@trebs.nl Trebs Comfortcam is a registered brand of Trebs BV. All other brands in this manual and/ or packaging do not belong to Trebs BV and have another justified holder. EU Environmental Protection Waste electrical products should not be disposed of with household waste. Please recycle where...
Need help?
Do you have a question about the Comfortcam 22127 and is the answer not in the manual?
Questions and answers