
Related Manuals for Drogen LOBIT 100F

Summary of Contents for Drogen LOBIT 100F
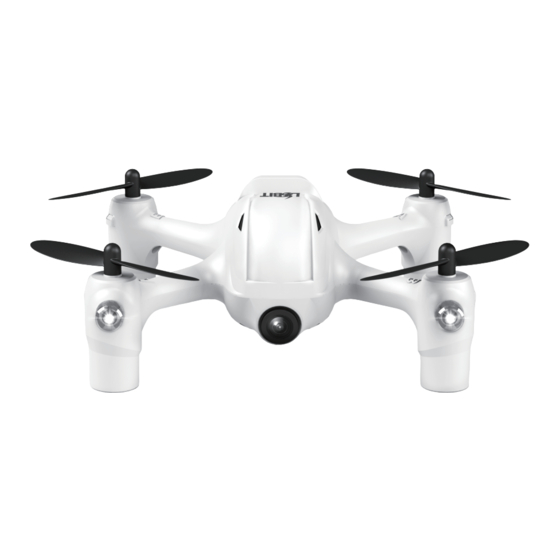
- Page 1 Vol 1.0 Ages 14+ Mini FPV LOBIT 100F Please read the instruction manual carefully before use.
- Page 2 Safety checks before flying Carefully check all the parts of LOBIT 100F. Broken parts will pose a risk of injury and hazard. If any problem is found before flight, do not fly LOBIT 100F. Check with call centers and local agencies.
- Page 3 Safety advisory notice for Lithium-Polymer(Lipo)Batteries Lipo batteries are different from conventional batteries in that their chemical contents are encased in a relatively lightweight foil packaging. This has the advantage of significantly reducing their weight but it does make them more susceptible to damage if roughly or inappropriately handled.
- Page 4 6 mins. · Take out the battery with the battery compartment when you storage it. · Always power off LOBIT 100F when you charge the battery. Safety Advisory Notice for storing Lipo battery Always partially charge your Lipo battery before storage.
- Page 5 Move the stick left or right to make LOBIT 100F roll left or right. Move the stick forward or backward to make LOBIT 100F move forward and Elevator move backward. Move the stick left or right to make LOBIT 100F yaw left or right. / Rudder Stick Aileron Trim Aileron trim adjusts for left and right drift.
- Page 6 Move the stick left or right to yaw LOBIT 100F. Move the stick forward or backward to make LOBIT 100F move forward and Elavator move backward. Move the stick left or right to make LOBIT 100F roll left or right. / Aileron Stick Aileron Trim Aileron trim adjusts for left and right drift.
- Page 7 Changing mode and transmitter stick calibration You can change the mode as you like by following the instructions below. STEP MODE 2 MODE 1 Push both sticks to the upper Push the left stick to the upper left position left position and hold. and right stick to the upper right position Then power on the transmitter.
- Page 8 · When the power on the transmitter is low, the red LED will blink quickly and the LCD screen will turn black. The transmitter and LOBIT 100F will not bind if the batteries are low. Please replace with new batteries.
- Page 9 Exit ▶ 0:08:49 M2 5.8G FREQUENCE Exit ▶ 5.8 10MHz ◀ ▶ Play Record · Set Real Time · Format SD Card These three functions will not work on LOBIT 100F as they are for other drones. - 8 -...
- Page 10 Press the button on the side of the LOBIT 100F(near the SD card slot) to start recording. A red light inside the SD card slot will blink and the two red LEDs on the LOBIT 100F will blink alternately when recording starts.
- Page 11 Notice · Power off both the transmitter and the LOBIT 100F before inserting or removing the SD card. · lf you don’t want to save the video, just power off the LOBIT 100F before you press the button again. Play the Record You can play the videos or review the photos by connecting LOBIT 100F to computer with the USB cable or use SD card reader.
- Page 12 LED lights on the LOBIT 100F turn steadily, indicating successful pairing. Low Battery Alarm : The two red LEDs will blink at the same time and the LOBIT 100F will descend and land down automatically to 5 meters or lower from the take off point when the LOBIT 100F battery is low.
- Page 13 * Please be cautious! Pushing the throttle stick all the way up for about 1~2 seconds will start motors and LOBIT ascends. * You can also use the throttle stick to start / stop the motors. The LOBIT 100F will ascend or descend.
- Page 14 < MODE 2 > < MODE 1 > Push the throttle stick up and the LOBIT 100F will rise; Release the stick to the central position, the LOBIT 100F will hover automatically and hold its altitude. Pull the stick down and the LOBIT 100F will fall. However, the changes of barometer sensors as well as earth magnetic field sensors may influence your Lobit's altitude.
- Page 15 Backward Aileron moves LOBIT 100F left and right. Right Left < MODE 2 > < MODE 1 > * When you exit the headless mode, controls will appear reversed if the LOBIT 100F is flying towards you! - 14 -...
- Page 16 Advanced performance setup Reversing Channel Setup If you would like to reverse any of the stick functions due to personal preference then follow the instructions below. Be aware that this will change the controls back to front. Pull the throttle stick to the lowest position. Press and hold the elevator stick for 1 second to enter setting status, move the stick up/down to choose Set Reverse, push or exit.
- Page 17 Expert Mode In expert mode, the sensitivity can be adjusted even further (up to 100) to give the user even more ability to maneuver the aircraft. Follow instructions below to switch this on/off. Pull the throttle stick to the lowest position. Press and hold the elevator stick for 1 second to enter setting status, move the stick up / down to choose Set Sensitive, push the elevator stick to the right, choose Normal mode, push the elevator stick to the right to enter into the expert mode, press the elevator/ aileron...
- Page 18 - Backward Flip - Push the elevator stick backward. Release the stick to the center after the flip. < MODE 2 > < MODE 1 > * When the LOBIT 100F battery is low, performing flip is not possible. - 17 -...
- Page 19 When installing replacement propellers, be sure to install as shown below. The LOBIT 100F will not fly but will flip and crash If the propellers are not installed correctly. Remove Propellers : Hold the propeller, insert the U wrench under the propeller, pull up and the propeller will easily come off the motor shaft.
- Page 20 Exploded View - 19 -...
- Page 21 Part Name PCBA Receiver board 5.8GHz TX camera module 720P camera module 820motors(clockwise) 820motors(counterclockwise) Lipo battery (3.7V 529mAh) FFC video cable RedLED light cable Blue LED light cable 5.8GHz antenna Upper shell Lower shell Black Propeller A Black Propeller B Barometer sponge Battery compartment cover Battery compartment...
- Page 22 ( 1 ) Battery voltage is too low. ( 2 ) Pair the LOBIT 100F with the transmitter again. ( 3 ) Land the LOBIT 100F with the throttle stick in the fully down position for 3 seconds and then take off again.
- Page 23 ( 1 ) Before calibrating the accelerometer, make sure that the propellers, motors and body are in good condition with the battery fully charged. Ensure that the battery compartment installed correctly. Pair the LOBIT 100F and transmitter, then put the LOBIT 100F in expert mode. - 22 -...
- Page 24 < MODE 2 > ( 4 ) If the LOBIT 100F still drifts to one side, add a few sheets of paper(the number of sheets will vary depending on the amount of drift)to the side of the LOBIT 100F that drifts.
- Page 25 For those just starting FPV with the LOBIT 100F, please start slowly and use the following guidance. 1. Learn how to fly the LOBIT 100F and maintain control both indoors and outdoors at an altitude no higher than 10 feet before you advance to FPV flight and higher altitudes.
- Page 26 Spare part Chart Body Shell Propellers Motor Battery set Product Code : TO1F01 Product Code : TO1A01 Product Code : TO1A02 Product Code : TO1F02 Blue LED Red LED Receiver PCBA board Transmitter Product Code : TO1A03 Product Code : TO1A04 Product Code : TO1A05 Product Code : TO1F07 5.8GHz Transmitter...
- Page 27 If any problem is found during use, refer to the instruction manual or please make an inquiry to agencies, vendors and service centers. If LOBIT 100F is broken while it is being used properly as the instruction manual states, free repair will be provided under product warranty period which lasts for 3 months.
- Page 28 WWW.LOBIT.CO.KR Serial Number - 27 -...
Need help?
Do you have a question about the LOBIT 100F and is the answer not in the manual?
Questions and answers