Advertisement
Advertisement
Table of Contents

Summary of Contents for E&P HYDRAULICS LEVEL SYSTEM
- Page 1 › English - Electronic Levelling System Assembly Manual...
-
Page 2: Table Of Contents
› Contents Foreword Page 71 Scope of delivery Page 72 Assembly is carried out in eight stages 1. Fitting the corner supports Page 73 2. Fitting the axle supports Page 75 3. Installing the pump Page 77 4. Laying the pipework Page 78 5. -
Page 3: Foreword
› Foreword “Products must be 100% user-friendly and reliable”: that is the strategic vision of E&P Hydraulics, who designed this levelling system. But this philosophy doesn’t apply just to the customer; the fitters who install the system at our dealers are of extreme importance to us as well. -
Page 4: Scope Of Delivery
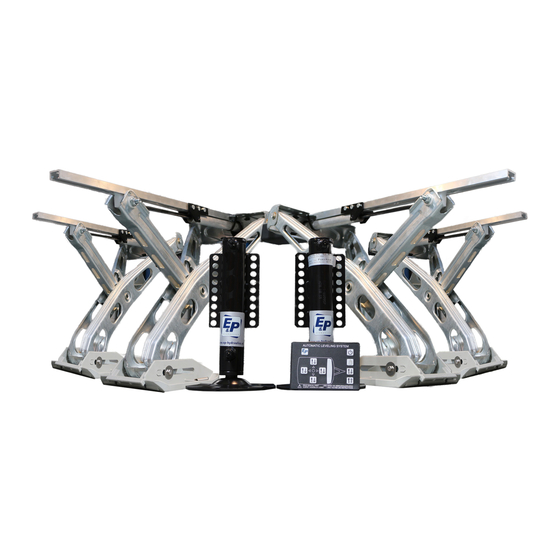
› Scope of delivery Every set comprises three separate cartons, in which all the components are contained: Pump including control unit (black box) Four different corner supports Two axle supports Two adapters for the axle supports (including container with the corresponding fixing materials) Fuse-holder for battery and fuse (container 3) Electric cable with four-pin plug Nine numbered hydraulic pipes... -
Page 5: Fitting The Corner Supports
› STEP 1 Fitting the corner supports First of all, remove the corner supports already fitted. Identify the type of the old corner supports. If the corner supports are of the AL-KO brand, then the new supports can be fitted in the same place in the same way, and the chassis will not affect the fitting greatly. - Page 6 Schritt 1 › STEP 1 Fitting the corner supports 1. Demontage der alten Eckstützen 1. Removal of the old corner supports 2. Entfetten des Bodens und der neuen Eckstützen 2. Degreasing the floor and the new corner supports 3. K leber (z.B.: Sika 221) an der Oberseite der Aluminium-Laufschiene der 3. Apply adhesive (e.g. Sika 221) to the top surface of the aluminium guide-rails for the new corner neuen Eckstützen auftragen. Dabei dürfen die beiden Füllplatten aus supports.
-
Page 7: Fitting The Axle Supports
› 2. Montage der Achsstützen STEP 2 Fitting the axle supports When the system was ordered, you advised us of the make and type of caravan chassis to which our SCHRITT 2 system was to be fitted. Messrs. E&P Hydraulics have suitable adapters available for different caravan Bei der Bestellung hatten Sie uns die Marke und den Typ des Chassis des Caravans types, and the correct adapter for your purposes was correspondingly supplied. - Page 8 › STEP 2 Fitting the axle supports Now clamp the adapter to the axle, but do not tighten the screws completely just yet, as you can still adjust the position of the adapter by the amount that the axle supports are out of place due to the bolts being too far apart.
-
Page 9: Installing The Pump
› 3. Montage der Pumpe 3. Montage der Pumpe STEP 3 Laying the pipework Take the pump unit and unscrew the cap. Seek a suitable position for the pump with its cap removed SCHRITT 3 SCHRITT 3 under the caravan floor. Make sure that the pipework connections point towards the rear and that the Nehmen Sie die Pumpeneinheit und schrauben den Deckel ab. Suchen Sie nach einer fitting is mounted at a right-angle (parallel to the axle). -
Page 10: Laying The Pipework
› STEP 4 Laying the pipework Now all components are fixed in place and the pipework can be laid. Use the nine separate pieces of hose, the six distributors, and the fixing materials supplied for fitting the hoses in their appointed places. - Page 11 (4. Verlegen der Leitungen) › (4. Verlegen der Leitungen) STEP 4 Laying the pipework Überschüssige Leitungslängen Montage der T-Stücke in den müssen in Form einer großen Schleife Leitungen Montage der T-Stücke in den Überschüssige Leitungslängen Fitting the T-pieces in the pipes. Surplus lengths of pipe must be tied together in the form of zusammengebunden werden. müssen in Form einer großen Schleife Leitungen a large loop. zusammengebunden werden. Die Leitungen müssen zudem gegenüber Die Leitungen sind mit dem The pipes must furthermore be protected against sharp edges The pipes must be firmly attached to the floor with the material...
- Page 12 aneinander haken. Berücksichtigen Sie auch, dass sich die Leitungen an e › wenn sie plötzlich unter Druck stehen. Die Leitungen STEP 4 Laying the pipework müssen entsprechend geschützt werden. An allen Stell Metallteile und über scharfe Ränder verlaufen, müssen Please also bear in mind that in places the hoses can move when they are suddenly put under einer Schutzhülle versehen werden. pressure. The hoses must not be allowed to coil, and must be suitably protected. In all places where the hoses penetrate metal parts or run over sharp edges they must always be fitted with a protective sleeve.
-
Page 13: Installing The Electronics
5. Installation der Elektronik › STEP 5 Installing the electronics SCHRITT 5 Setting up the operating panel This can be installed in a number of places, but the A - Montage der Bedientafel container may in no circumstances be exposed to Die Montage ist an verschiedenen Orten moisture. A further condition is naturally that the möglich, allerdings darf der Behälter in keinem wiring can be installed without any problem. -
Page 14: Taking The System Into Service
6. Inbetriebnahme des Sy › 6. Inbetriebnahme des Sy 6. Inbetriebnahme des Sy STEP 6 Taking the system into service SCHRI When commissioning the system, no pressure Bei der must be exerted on the supports. Make sure that SCHRI SCHRI they supports are fully extended without being in Kraft a Bei der Bei der contact with the ground. -
Page 15: Programming The Zero Point
7. Programmierung des Nullpu › STEP 7 Programming the zero point SCHRITT 7 Set the caravan on level ground. Make sure that the caravan tow bar is inclined downwards and that Setzen Sie den Caravan an eine ebene Stelle. Sorgen Sie dafür, d the front of the caravan is thus slightly lower than the back. Press button 5 on the control unit and set vans nach unten geneigt ist und somit die vordere Seite niedriger it for manual operation (button 6). -
Page 16: Finishing And Maintenance Of The Installation
› STEP 8 Finishing and maintenance Make sure that all lead-throughs (cables, hydraulic hoses etc.) have been laid with all due care and secured. We recommend that the axle supports including their hose connections are treated with a rustproofer such as Tectyl. Such a protective layer will protect the system from wear and corrosion. The level of oil in the oil tank must be checked as part of the annual maintenance. -
Page 17: Layout Of The Hydraulic Pipework
Schema der Hydraulikleitungen › Hydraulic pipework... -
Page 18: General Terms And Conditions Of Trade
› General Terms and Conditions of Trade For the levelling system you have acquired we offer a full guarantee for a period of two years from the date of purchase with respect to the proper functioning of the unit. This guarantee offered by E&P Hydraulics covers the entire system as well as the corresponding components. -
Page 19: Order List For The Axle Brackets
Bestelliste der Achsbügel › Bestelliste der Achsbügel Bestelliste der Achsbügel Order list for the axle brackets □ □ □ □ Al-Ko 1000 kg Montage Al-Ko 1000 kg Montage Al-Ko 1500 kg Montage Al-Ko 1500 kg Montage Al-Ko 1000 kg in front of Al-Ko 1000 kg behind the Al-Ko 1500 kg in front of Al-Ko 1500 kg behind the Al-Ko 1000 kg Montage... - Page 20 › Order list for the axle brackets Company info Company: Contact: Postal address: Delivery address: Postcode & city: Country: Phone: E-Mail: VAT number: E&P Hydraulics United Kingdom Mr. Oliver Drinkwater unit 13, Elder Court, Lions Drive Shadsworth Business Park, Blackburn, Lancashire, BB1 2EQ Phone: +44 (0)1245 297785 Fax:...
- Page 21 › Notes...
- Page 22 › Notes...
Need help?
Do you have a question about the LEVEL SYSTEM and is the answer not in the manual?
Questions and answers