Table of Contents
Advertisement
Available languages
Available languages
Advertisement
Table of Contents

Related Manuals for Totally Wicked ARC GTI


Summary of Contents for Totally Wicked ARC GTI
- Page 1 USER MANUAL / BENUTZERHANDBUCH...
- Page 2 CONGRATULATIONS ON PURCHASING YOUR TOTALLY WICKED ARC GTI ELECTRONIC CIGARETTE KIT.
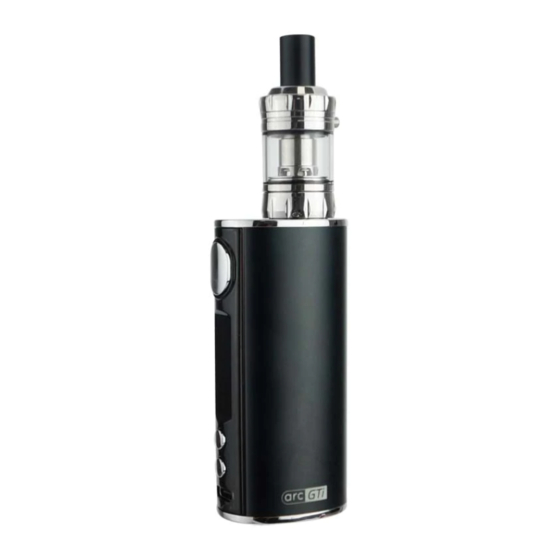
- Page 3 YOUR ARC GTI Mouthpiece Tank Airflow adjuster Power button LED Screen Adjustment buttons USB-C charging port...
- Page 4 • Fill the tank • Switch the arc GTi on (5 rapid clicks of the power button) • Check the arc GTi is set to 10 watts • Press the power button and inhale • Charge the battery (it will possibly not...
- Page 5 USING YOUR ARC GTI Priming the Atomizer Head It is important to “prime” a new atomizer head before first use. Failure to do so can damage the atomizer head. Grip the airflow adjuster and unscrew the tank from the battery. Holding the tank’s glass tube, unscrew the base from the tank.
- Page 6 USING YOUR ARC GTI Filling the Tank Press the button on the side of the tank to unlock, and slide the tank top in the direction indicated by the arrow symbol. Insert the filling nozzle of your e-liquid bottle into the filling port, and fill the tank, being careful not to overfill.
- Page 7 USING YOUR ARC GTI Changing the Atomizer Head Grip the airflow adjuster and unscrew the tank from the battery. Holding the tank’s glass tube, unscrew the base from the tank and remove the atomizer head by pulling straight out. Prime a new atomizer head following the steps found in Priming the Atomizer Head, and push into the tank.
- Page 8 Switching On and Off Press the power button 5 times in quick succession to turn the arc GTi on. To turn the device off again, press the power button 5 times quickly. Vaping Press and hold the power button as you inhale the vapour.
- Page 9 The arc GTi’s wattage adjustment can be locked to prevent the wattage from accidentally being altered during use. While the arc GTi is powered on, press the up and down adjustment buttons simultaneously for 3 seconds. The screen will display “Key Lock”. Repeating this process will return the device to normal operation, and the screen will display “Key UnLock”.
- Page 10 USING YOUR ARC GTI Rotating the display Pressing the power button and up adjustment button simultaneously for 3 seconds when the arc GTi is powered off will rotate the screen display through 180°. This can be helpful if you are left-handed.
- Page 11 ADVANCED FUNCTIONS The arc GTi has a number of advanced functions that can be activated, adjusted or turned off entirely. They are functions that you do not necessarily need, and are consequently held in a hidden menu. If you are not the sort of person that wants to worry about this sort of detail, you can ignore them and use the standard factory settings.
- Page 12 The first function shown is the Return symbol. Pressing the power button with this symbol highlighted, or simply waiting 10 seconds while taking no action, will exit the menu and return the arc GTi to normal operation. Display information...
- Page 13 ADVANCED FUNCTIONS Stealth mode The arc GTi is equipped with provision for “stealth mode”, where normal use will not activate the screen, but a short press of the power button will allow the display to function normally. Pressing the power button when the Stealth icon...
- Page 14 Ni, Ti, SS, M1, M2, M3, Bypass, Variable Wattage. Press the power button once to confirm the selection. Note: the atomizer heads supplied with the arc GTi kit are compatible with wattage mode only, and will not work in...
- Page 15 The arc GTi allows 3 different coil materials to be pre-set as M1, M2 and M3. To set the temperature coefficient of resistance to match a particular coil material, quickly press the power button 3 times and select either M1, M2 or M3.
- Page 16 ADVANCED FUNCTIONS Material TCR Value Range Nickel 600 - 700 NiFe 300 - 400 Titanium 300 - 400 SS (303, 304, 316, 317) 80 - 200 Note: The TCR value displayed is 10 (100,000) times greater than the actual TCR value in standard units of K Adjusting Wattage in Temperature Control/TCR Modes The maximum wattage that is applied in Temperature Control or TCR modes can be adjusted.
- Page 17 ADVANCED FUNCTIONS Temperature Adjustment When in temperature control or TCR mode, use the up or down adjustment buttons to adjust the temperature from 100°C – 315°C (200°F – 600°F). Lower temperature settings give a cooler and less dense vapour. Higher temperature settings produce hotter vapour and larger clouds of vapour, but can lead to poor flavour or even a burnt taste.
- Page 18 ADVANCED FUNCTIONS Atomizer Head Resistance Lock Locking an atomizer head’s resistance in a temperature control mode is necessary, as the device measures the change in resistance to calculate the temperature. To lock the resistance of your atomizer head, in a temperature control mode, press the power button and up adjustment button, select the Resistance Lock setting from the menu and turn on.
- Page 19 KIT CONTENTS / SPECIFICATIONS Kit contents 1 x arc GTi battery 1 x GT Air tank 2 x GT 1.2ohm atomizer heads 1 x USB-C cable 1 x User manual Spare parts Specifications Dimensions: 120mm (length) x 35mm (width) x 28mm (depth)
- Page 20 • Do not charge the battery when temperatures are outside the range 0 - 45°C. • Do not attempt to repair a faulty arc GTi as these are sealed units with no serviceable parts. Attempted repairs will void the warranty.
- Page 21 WARRANTY The arc GTi kit has a 6 months parts warranty, with the exception of Atomizer Heads, which are consumable items and covered by “dead on arrival” warranty only. The USB cable supplied has a 12-month warranty. If any parts...
- Page 22 HERZLICHEN GLÜCKWUNSCH ZUM KAUF DEINES TOTALLY WICKED ARC GTI E-ZIGARETTEN-SETS.
- Page 23 DEIN ARC GTI Mundstück Tank Luftzufuhr-Anpasser Startknopf LED-Bildschirm Einstellungsknöpfe USB-C-Ladeanschluss...
- Page 24 • Den Verdampferkopf vorbereiten • Den Tank befüllen • Den arc GTi einschalten (5 schnelle Klicks des Startknopfes) • Sicherstellen, dass der arc GTi auf 10 Watt eingestellt ist • Auf den Startknopf drücken und einatmen • Den Akku aufladen (ist möglicherweise nicht von...
- Page 25 SO NUTZT DU DEINEN ARC GTI Den Verdampferkopf vorbereiten Vor der ersten Verwendung ist es wichtig, einen neuen Verdampferkopf „vorzubereiten“. Wenn du dies nicht tust, kann der Verdampferkopf beschädigt werden. Halte den Luftzufuhr-Einsteller fest und schraube den Tank vom Akku ab.
- Page 26 SO NUTZT DU DEINEN ARC GTI Den Tank befüllen Drücke den Knopf an der Seite des Tanks um ich zu entsperren und schiebe die Oberseite des Tanks in die von den Pfeilen angezeigte Richtung. Führe die Fülldüse deiner E-Flüssigkeitsflasche in eine der Füllöffnungen ein und befülle den Tank;...
- Page 27 SO NUTZT DU DEINEN ARC GTI Den Verdampferkopf wechseln Halte den Luftzufuhr-Einsteller fest und schraube den Tank vom Akku ab. Halte die Glasröhre des Tanks fest und schraube die Unterseite vom Tank ab. Bereite einen neuen Verdampferkopf wie unter Den Verdampferkopf vorbereiten beschrieben vor und drücke ihn in den Tank.
- Page 28 Geschmacksintensität können alles Anzeichen dafür sein, dass der Verdampferkopf ersetzt werden muss. An- und Ausschalten Drücke den Startknopf schnell fünfmal hintereinander, um den arc GTi einzuschalten. Um das Gerät wieder auszuschalten, drückst du fünfmal schnell auf den Startknopf. Vapen Drücke und halte den Startknopf, während du den Dampf einatmest.
- Page 29 Blitzsymbol, bis der Akku vollständig aufgeladen ist. Nutze einen USB-C-kompatiblen Adapter, um den Akku möglichst schnell aufzuladen. Wattstärke einstellen Der arc GTi hat eine anpassbare Wattstärke, die von 1-80 Watt eingestellt werden kann. Erhöhe oder verringere die Wattstärke des Akkus mit den Einstellknöpfen. Wattstärke-Einstellungssperre Um eine versehentliche Veränderung der Wattstärke...
- Page 30 SO NUTZT DU DEINEN ARC GTI Bildschirm drehen Drücke bei ausgeschaltetem arc GTi den Startknopf und den “Nach oben” Einstellungsknopf gleichzeitig für 3 Sekunden, um den Bildschirm um 180° zu drehen. Dies kann vor allem für Linkshänder hilfreich sein. Kurzschlussschutz Sollte ein Kurzschluss auftreten, während der Startknopf...
- Page 31 FORTGESCHRITTENE FUNKTIONEN Der arc GTi hat eine Reihe von fortgeschrittenen Funktionen, die aktiviert, angepasst oder komplett abgeschaltet werden können. Auf diese Funktionen, die du nicht unbedingt benötigst, kannst du über ein verstecktes Menü zugreifen. Wenn dir solche Details nicht wichtig erscheinen, kannst du diese Funktionen getrost ignorieren und einfach die Werkseinstellungen nutzen.
- Page 32 Funktion ist das Zurück-Symbol. Drücke den Startknopf, während dieses Symbol ausgewählt ist, oder warte einfach 10 Sekunden lang, um das Menü zu verlassen und den normalen Betrieb des arc GTi wieder aufzunehmen. Informationen anzeigen Unter der Anzeige des Verdampferwiderstands kann der arc GTi wahlweise einen Zug-Zähler, die gesamte Vape-Zeit...
- Page 33 FORTGESCHRITTENE FUNKTIONEN Stealth-Modus Der arc GTi verfügt über einen „Stealth-Modus“, bei dem der Bildschirm bei normalem Betrieb nicht aktiviert wird. Durch einen kurzen Klick auf den Startknopf kann der Bildschirm allerdings ganz normal verwendet werden. Drücke den Startknopf während das Stealth-Symbol ausgewählt ist, um den Stealth-Modus an- oder auszuschalten.
- Page 34 Einstellknöpfe, um zwischen den Modi Ni, Ti, SS, M1, M2, M3, Bypass, variable Wattstärke zu wechseln. Drücke den Startknopf einmal, um die Auswahl zu bestätigen. Hinweis: die im arc GTi-Kit enthaltenen Verdampferköpfe sind nur mit dem Wattstärke-Modus kompatibel und funktionieren im temperaturgeführten Modus nicht.
- Page 35 Widerstandsbeiwert) können Verdampferköpfe aus geeigneten alternativen Spulenmaterialien mit effektiver Temperaturführung verwendet werden. Mit dem arc GTi kannst du 3 verschiedene Spulenmaterialien als M1, M2 und M3 voreinstellen. Um den Temperatur- Widerstandsbeiwert an ein bestimmtes Spulenmaterial anzupassen, drücke den Startknopf dreimal schnell hintereinander und wähle dann entweder M1, M2 oder M3...
- Page 36 FORTGESCHRITTENE FUNKTIONEN Material TCR Wertebereich Nickel 600 - 700 NiFe 300 - 400 Titan 300 - 400 SS (303, 304, 316, 317) 80 - 200 Hinweis: Der angezeigte TCR-Wert ist 10 (100,000) x größer als der tatsächliche TCR-Wert in standardmäßigen Einheiten Anpassen der Wattstärke im Temperaturgeführten/ TCR-Modus...
- Page 37 FORTGESCHRITTENE FUNKTIONEN du den Startknopf viermal schnell hintereinander, wodurch sich der Watt-Anpassungsbildschirm öffnet. Erhöhe oder verringere die Wattstärke, bis die gewünschte Wattstärke erreicht ist und drücke dann den Startknopf, um die Auswahl zu bestätigen. Temperaturanpassung Im temperaturgeführten oder TCR-Modus kannst die die Temperatur mit den „Nach oben“...
- Page 38 FORTGESCHRITTENE FUNKTIONEN Zwischen °C und °F wechseln Drücke und halte den „Nach oben“ Knopf um die maximale Temperatur auf 315°C bzw. 600°F zu erhöhen und drücke dann den „Nach oben“ Knopf erneut. Die Maßeinheit ändert sich in Fahrenheit, wenn sie zuvor in Celsius war, bzw. in Celsius, wenn sie zuvor in Fahrenheit war.
- Page 39 KIT-INHALT / SPEZIFIKATIONEN Kit-Inhalt 1 x arc GTi Akku 1 x GT AirTank 2 x GT 1,2 Ohm Verdampferkopf 1 x USB-C-Ladekabel 1 x Bedienungsanleitung 1 x Gebrauchsinformation Ersatzteile Spezifikationen Abmessungen: 120mm (Länge) x 35mm (Breite) x 28mm (Tiefe) Gewicht: 159g Akkukapazität: 3000mAh...
- Page 40 Produkts vor. Wenn du glaubst, Nebenwirkungen festzustellen, kontaktiere bitte den Hersteller. Produktlagerung und Akku-Vorsichtsmaßnahmen • Bewahre den arc GTi und sein Zubehör außerhalb der Reichweite von Kindern auf, wenn er nicht benutzt wird. • Stelle sicher, dass der arc GTi bei Nichtbenutzung ausgeschaltet ist.
- Page 41 GEWÄHR Auf die Teile des arc GTi Kits gewähren wir mit Ausnahme der Verdampferköpfe, bei denen es sich um Verbrauchsgüter handelt und für die lediglich eine DOA-Garantie gilt, eine Garantie von 6 Monaten. Für das mitgelieferte USB-Kabel besteht eine Garantie von 12 Monaten.
- Page 44 Manufactured in China under the authority of Pillbox38 UK Ltd, Stancliffe Street, Blackburn, Lancashire, BB2 2QR. Tel 01254 692244 www.totallywicked.co.uk Tel 0941-78447082 www.totallywicked.de...
Need help?
Do you have a question about the ARC GTI and is the answer not in the manual?
Questions and answers
Took apart arc hit and have white rubber part left over that I don’t know where goes
The white rubber part (likely the rubber O-ring) in the Totally Wicked ARC GTI is used to secure the glass tube to the metal parts of the tank. It helps create a tight seal to prevent leaking.
This answer is automatically generated