Table of Contents
Advertisement
Quick Links
Advertisement
Table of Contents

Subscribe to Our Youtube Channel
Related Manuals for Monster Digital Monster Vision


Summary of Contents for Monster Digital Monster Vision
- Page 1 HD Quick Start Guide...
- Page 2 English v1.04 THANK YOU Thank you for purchasing the Monster Vision™ HD Action Sport Camera by Monster Digital! This Quick Start Guide will help get you started using your camera in no time. We hope you will be able to take awesome videos and amazing photos with your camera. Feel free to share them with us and we might post them on our website, YouTube™...
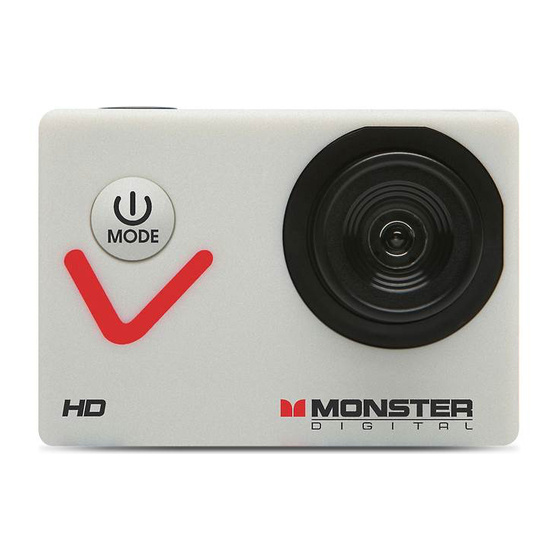
- Page 3 Physical Features 1. Power/Mode/Back Button 5. Charging Indicator (blue) 2. Lens 6. OK/Shutter/Menu Button 3. Display Screen 7. Battery Cover 4. Activity Indicator (red) 8. Battery Cover Release...
- Page 4 Physical Features 9. Microphone 12. Mini HDMI output (type C) 10. USB Port 13. + Zoom in 11. microSD Card Slot 14. – Zoom out...
- Page 5 1. Install and Charge the Battery USB Cable 1a. Slide the battery door switch to release the battery door. Insert the battery with the contacts up, facing you when looking at the display screen. 1b. Connect the camera with the included USB cable to a USB power source like a computer or phone charger.
- Page 6 2. Memory Card Installation 2a. MICRO SD CARD INSTALLATION AND REMOVAL Find the included microSD card and remove it from the case. With the display screen toward you and the label of the memory card facing you, insert the card into the slot. Push it all the way in with your finger or thumbnail until it clicks.
- Page 7 If possible, connect the camera to a charger right away. When the icon flashes red, the camera is about to shut down. The camera will record for approximately 2.5 hours based on Monster Digital engineering testing. Actual performance may vary based on settings, environmental conditions and other factors.
- Page 8 4. Videos, Photos and Playback The Monster Vision HD camera has 3 modes, Video, Photo and Playback. Press the Mode button on the front of the camera to cycle through modes. 4a. VIDEO MODE When the camera is turned on it will be in video mode.
- Page 9 4b. PHOTO MODE Press OK to take a photo. PHOTO DISPLAY SCREEN 1. Photo Mode Icon 2. Photo size icon (Options 1.3, 3 or 5 Mega Pixels) 3. Number of photos available 4. microSD card is installed (X if no card) 5.
- Page 10 4c. PLAYBACK MODE Press the MODE button one or two times to enter Playback Mode. Press the – or + buttons to review files. The file type (AVI – video or JPG – photo) is shown in the bottom left corner of the display screen.
- Page 11 5. Menus There are different menus for each mode Video Menu Photo Menu Settings Menu Playback Menu Press the OK button for 2 seconds to open the menu Press - or + button to change tabs Press OK to select the tab Press - or + to move up or down Press OK to select Press the Mode button to go back and exit...
- Page 12 6. Effects There are 20 in-camera photo and video effects to chose from. To access effects from either photo or video mode Press the OK button for 3 seconds to open the menu Press OK then use the –, + buttons to highlight “Effect” and press OK Select the effect you would like to use then press OK.
- Page 13 8. Connecting to a PC or Mac When connected to a computer via USB, the camera can function as a card reader or a USB camera. 8a. Card Reader Mode PC - When the camera is connected with a micro USB cable (included) the memory card will appear in My Computer.
-
Page 14: Specifications
Specifications* Image Sensor 1.3 MP CMOS Function Modes Video, Photo and Playback Lens F2.4 f=3.0mm, 120° wide angle Display 1.77 inches LCD Photo Resolution 1.3MP, 3MP 5MP (3MP Default) Video Resolution HD: 1280x720 at 30 frames per second Video File Formats Picture Storage Medium microSD Card (up to 32GB) - Page 15 System Requirements Operating PC Camera Mode PC: Microsoft Windows XP (SP3), Vista, 7, 8 System MAC: OS X v10.8.0 or later Storage Device Mode PC: Microsoft Windows 2000, XP, Vista, 7, 8 (MSDC) MAC: OS X v10.0.0 or later CPU Intel Pentium equivalent or better Internal Memory More than 1GB Sound card and Graphic card Direct X8 or better Hard Disk More than 2GB memory space...
- Page 16 FCC STATEMENT This device complies with Part 15 of the FCC Rules. Operation is subject to the following two conditions: (1) This device may not cause harmful interference, and (2) This device must accept any interference received, including interference that may cause undesired operation.
- Page 17 INDUSTRY CANADA STATEMENT IC Notice to Users English/French in accordance with RSS GEN Issue 4: This device complies with Industry Canada license exempt RSSs. Operation is subject to the following two conditions: This device may not cause interference; and This device must accept any interference, including interference that may cause undesired operation of the device Cet appareil est conforme avec Industrie Canada RSS standard exempts de licence (s).
- Page 18 To see the complete list of country certifications, visit http://www.monsterdigital.com/ Monster, the MC logo, the Monster logo, Monster Vision and Monster Digital, are trademarks or registered trademarks of Monster Products, Inc., or its subsidiaries in the U.S. and other countries. Mac is a trademark of Apple Inc., registered in the U.S.
Need help?
Do you have a question about the Monster Vision and is the answer not in the manual?
Questions and answers