
Related Manuals for Axor ShowerHeaven 720


Summary of Contents for Axor ShowerHeaven 720
- Page 1 EN ⁄ Installation / User Instructions / Warranty FR ⁄ Instructions de montage / Mode d'emploi / Garantie ES ⁄ Instrucciones de montaje / Manejo / Garantía AXOR ShowerHeaven 720 10625xx1 I N S T A L L A T I O N...
- Page 2 E N G L I S H F R A N A I S I N STALL ATI ON CO N SI DE R AT I ON S À P RE N DR E EN CON SID ÉRATION PO UR L’...
- Page 3 E S P A Ñ O L CO NS I D ER AC IONE S PA RA L A TO OLS R EQUIR ED / O UTIL ES UTIL ES / I N STAL AC I ÓN HER RA M IEN TA S ÚTIL ES ⁄...
- Page 4 S Y M B O L D E S C R I P T I O N / D E S C R I P T I O N D U S Y M B O L E / D E S C R I P C I Ó N D E L S Í M B O L O S Hot water Eau chaude Agua caliente...
- Page 5 28⅜" (720 mm) AXOR ShowerHeaven 720 20⅝" (525 mm) 10625xx1 12⅜" (314 mm) 9⅝" (245 mm) ⅛" (2 mm) 3⅛" (78 mm) 28⅜" (720 mm) 27½" (700 mm) 18⅞" (480 mm) ½ NPT ½ NPT 10¼" (260 mm) 12½" (316 mm) 13⅜"...
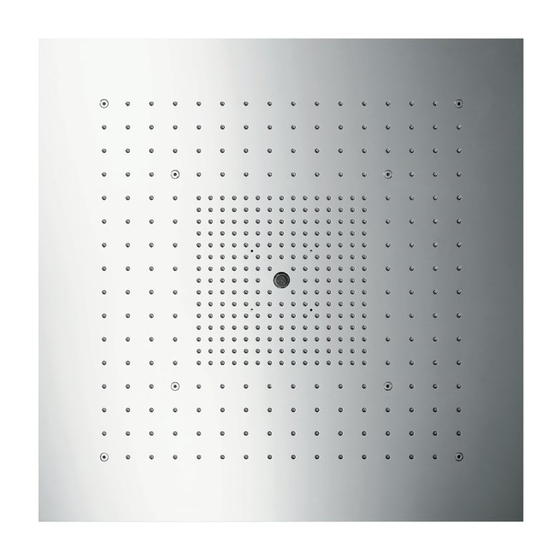
- Page 6 Quattro Green 15936181 3½" (90 mm) 2⅜" 1⅛" (60 mm) (28 mm) 2⅛" (54 mm) ¾ NPT ¾ NPT S PR AY F U N C T IONS / FON C TI ON S D E JE T / FUN CIO NES DE ROCIA DO Rain Laminar Body...
- Page 7 I N S T A L L A T I O N S U G G E S T I O N S / S U G G E S T I O N S D ' I N S T A L L A T I O N / S U G E R E N C I A S P A R A L A I N S T A L A C I Ó N Body Laminar Rain...
- Page 8 Body Laminar Rain ½" NPT ITE MS USED: ½" NPT 1 ShowerHeaven 10625xx1 1 Starck Thermostat Module 10750181 ½" NPT 1 Trim for Thermostat Module 10751xx1 2 Volume control rough 10971181 2 Volume control trim 10972xx1 2 Shower module rough 28486181 2 Shower module 28491xx1...
- Page 9 Decide where the hinges are to Décidez de l’endroit où vous Decida dónde se ubicarán las be positioned. souhaitez positionner les bisagras. charnières.
- Page 10 R O U G H I N G - I N / P I È C E I N T É R I E U R E / P I E Z A S I N T E R I O R E S min.
- Page 11 I N S T A L L A T I O N / I N S T A L L A T I O N / I N S T A L A C I Ó N 5 mm E N G L I S H F R A N ...
- Page 12 Ø 10 mm E N G L I S H F R A N A I S E S P A Ñ O L Have a helper hold the frame Demandez à quelqu’un de Haga que un ayudante sosten- against the mounting surface.
- Page 13 13 mm ~1³⁄₁₆" E N G L I S H F R A N A I S E S P A Ñ O L Install the screws. Installez les vis. Instale los tornillos. The end of the screw should Une partie de 1³⁄₁₆...
- Page 14 E N G L I S H F R A N A I S E S P A Ñ O L Wrap the threads on the supply Enveloppez les filetages du Envuelva las roscas en el codo elbow and tees using plumber's coude d’alimentation et des incluido y los tubos en “T”...
- Page 15 5 mm E N G L I S H F R A N A I S E S P A Ñ O L Install two hinge pins. Installez deux broches de Instale dos pasadores de charnière. bisagra. Install the screws. Installez les vis.
- Page 16 24 mm E N G L I S H F R A N A I S E S P A Ñ O L Lightly lubricate the hose con- Lubrifiez légèrement les rac- Lubrique ligeramente los conec- nectors using the enclosed cords de tuyau à...
- Page 17 Body Laminar Body Rain Rain Body Laminar Rain 24 mm E N G L I S H F R A N A I S E S P A Ñ O L Install the longer safety strap Installez la courroie de sûreté Instale el fleje de seguridad onto the snap hook on the la plus longue sur le crochet de...
- Page 18 E N G L I S H F R A N A I S E S P A Ñ O L Connect the shorter safety strap Connectez la courroie de Conecte el fleje de seguri- to the snap hook. sûreté...
- Page 19 5 mm E N G L I S H F R A N A I S E S P A Ñ O L Position the body against the Placez la plaque contre le Coloque el cuerpo contra el frame. cadre.
- Page 20 4 mm E N G L I S H F R A N A I S E S P A Ñ O L Connect the remaining three Connectez les trois crochets Conecte los tres ganchos de safety snap hooks to the face de sûreté...
- Page 21 4 mm E N G L I S H F R A N A I S E S P A Ñ O L Remove the four studs. Retirez les quatre goujons. Retire los cuatro espárragos. Install the screws and tighten Installez les vis et serrez-les à...
- Page 22 R E P L A C E M E N T P A R T S / P I È C E S D É T A C H É E S / R E P U E S T O S AXOR ShowerHeaven 720...
- Page 23 C L E A N I N G / N E T T O Y A G E / L I M P I E Z A S cale R e m ov e r S cale R e mov e r scale remover Wear eye protection détartrant...
- Page 24 C L E A N I N G / N E T T O Y A G E / L I M P I E Z A...
- Page 25 24 mm 97973000...
- Page 26 CLEAN IN G RECOM ME N DATI ON FOR HANSG ROHE PRODUCTS Modern bathroom faucets, kitchen faucets and shower products are made from different materials to comply with the needs of the market with regard to design and functionality. To avoid damage to the product, it is necessary to take proper care of it. FOR BEST RESULTS: •...
- Page 27 IMPORTANT • • Les residus de produits pour le corps comme les savons liquides, shampooings, gels de douche, teintures pour cheveux, parfums, apres-rasage et vernis a ongles peuvent causer des deteriorations. Rincez le produit avec de l’eau propre après chaque utilisation. •...
- Page 28 Hansgrohe and Commercial products, and (ii) for 5 Hansgrohe, Inc. years, with respect to Axor products. The Rubbed Bronze finish is 1492 Bluegrass Lakes Parkway subject to a 3-year limited warranty starting on the date of purchase.
Need help?
Do you have a question about the ShowerHeaven 720 and is the answer not in the manual?
Questions and answers