Table of Contents
Advertisement
Quick Links
Advertisement
Table of Contents

Related Manuals for Ryobi BT-256


Summary of Contents for Ryobi BT-256
- Page 1 BT-256 6986614(STD) 11-12...
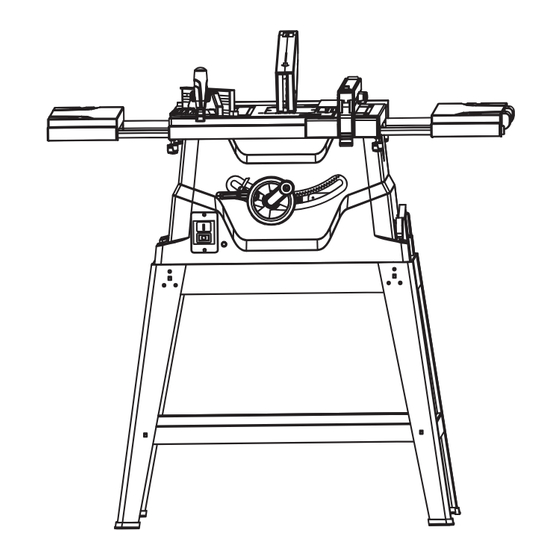
- Page 2 Table saw assembly Left extension Right extension Rear extension table assembly table assembly table assembly Rip fence Auxiliary rip Miter gauge assembly Blade guard and fence assembly riving knife assembly Push sticker Battery Blade wrench Locking knob Short upper Short bottom support Long top leg Long bottom...
- Page 3 Rubber foot Rubber foot...
- Page 4 Triangle Square 90° 45° 11-1 11-2 12-1...
- Page 5 12-2 16-2 17-1 15-1 17-2 15-2 16-1...
- Page 6 Screw pole Fixed part Taper gear Fixed part Pole Screw pole 28-1 Inner blade flange 28-2 28-3...
-
Page 7: Push Stick Construction
PUSH STICK CONSTRUCTION This is a full-size drawing (actual size) Use good quality plywood or solid wood Use 13mm or 10mm material The push stick MUST be thinner than the width of the material that is being cut Drill Hole For Hanging Notch 0 Prevent the Operator’s... -
Page 8: Additional Safety Instructions For Lasers
5mm hex key (supplied). (Fig. 4-4&4-5) Never remove the cutting piece if the machine is still OR DAMAGED PARTS. CALL YOUR DEALER OR RYOBI 39. 45° stop screw 5. Insert the riving knife (3) between the two metal plates (34) that switched on or running! Danger of cutting yourself! SERVICE CERTRE. -
Page 9: Operation
bracket using the 5 mm hex key (supplied). cause eye damage. Do not look directly into the laser beam. 1. Place the rip fence (4) on the saw table, lowering the rear of the • Failure to adhere to these safety rules will greatly increase the 3. -
Page 10: Maintenance
If excessive looseness COMPOUND MITER CROSSCUTTING 0°~45° BLADE BEVEL is observed in any other part of the blade raising or tilting mechanisms, & 0°-45° MITER ANGLE (Fig. 24) contact your dealer or RYOBI service centre.
Need help?
Do you have a question about the BT-256 and is the answer not in the manual?
Questions and answers