Advertisement
Quick Links
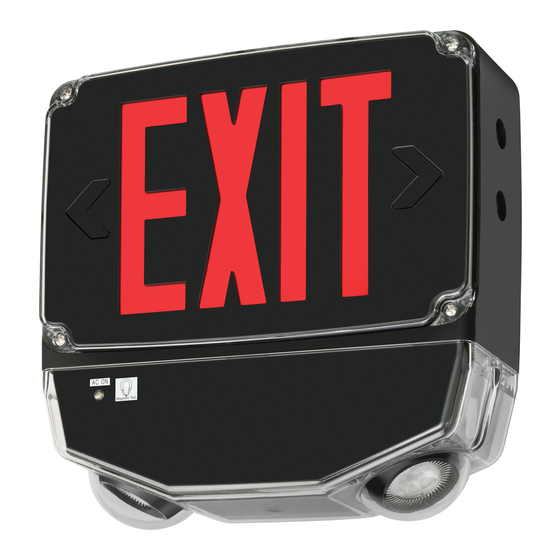
INSTALLATION INSTRUCTIONS for Lithonia Lighting WLTC models
WET LOCATION LED COMBO EXIT & EMERGENCY LIGHT
WARNING: RISK OF ELECTRIC SHOCK- NEVER CONNECT TO, DISCONNECT FROM, OR SERVICE WHILE EQUIPMENT IS ENERGIZED.
WARNING: FAILURE TO FOLLOW THESE INSTRUCTIONS AND WARNINGS MAY RESULT IN DEATH, SERIOUS INJURY OR SIGNIFICANT
PROPERTY DAMAGE - For your protection, read and follow these warnings and instructions carefully before installing or maintaining this
equipment. These instructions do not attempt to cover all installation and maintenance situations. If you do not understand these instructions or
additional information is required, contact Lithonia Lighting or your local Lithonia Lighting distributor.
• All service shall be performed by qualifi ed service personnel. This product must be in-
stalled and maintained in accordance with the applicable installation codes by a person
familiar with the construction operation of the product and the hazards involved.
• This product must be installed in accordance with the applicable installation codes and
ordinances.
• Before wiring to power supply, turn off electricity at fuse or circuit breaker.
• Disconnect A. C. power and unplug battery before servicing.
• Consult your local building code for approved wiring and installation.
• UL listed for wet locations (-20°C-50°C)
• Do not let power supply cord touch hot surfaces.
• Do not mount near gas or electric heater.
• Equipment should be mounted in locations and at heights where it will not readily be subjected to tampering by unauthorized personnel.
• The use of accessory equipment not recommended by the manufacturer may cause an unsafe condition.
• Do not use this equipment for other than intended use.
• The AC voltage rating of this equipment is specifi ed on the product label. Do not connect equipment to any other voltage.
NOTE: Max mounting height is 20 ft to achieve at least 1 ft-candle of illuminance in emergency mode.
CONDUIT ENTRY
1.
Drill a ¾" hole through the desired conduit entry knock out located on the top or side of the frame of the sign.
2.
Route the AC input conduit into housing.
3.
All conduit connections must use UL LISTED and SUITABLE FOR WET LOCATION parts.
4.
To finish installation of fixture, reference Wall, Ceiling or End Mount instructions.
WALL MOUNT INSTALLATION
1.
Use fl at he ad screwdriver to loosen the screws on the LENSES (A).
2.
Remove lens, from sign, set aside.
3.
Remove EXIT STENCIL (B) from FIXTURE FRAME (C), set aside.
4.
Drill or knockout appropriate knockouts on BACK PLATE (M) to fi t junction box mounting points.
5.
Drill or knockout holes in back plate for fi xture supply wire leads.
6.
Remove backing from self-adhesive JUNCTION BOX GASKET (F) and adhere to back plate.
7.
Route fixture input wires through center hole of the back plate and make wiring connection. For 120V, use black and white wires and for 277V,
use red and white wires. WARNING: Properly insulate the unused lead with a wire nut (provided) or other approved means.
8.
Secure back plate to JUNCTION BOX (J) (junction box and hardware not included).
9.
Remove proper chevron(s) from the face plate as required. When removing chevrons it may be helpful to remove the color diffuser panel to
allow easier access to the chevrons. If removing color diffuser panel it is important to remember to reinstall the diffuser panel once chevron(s)
have been removed.
10. Connect battery to lamp board (see wiring diagrams on page 3).
11. Secure face plate and back plate to the fi xture frame.
12. Secure lens to fi xture and securely torque screws.
13. Apply continuous AC power. Unit can be tested by holding the magnet (provided) near the LED indicator (where it's marked as "Magnetic Test Switch").
14. Magnet needs to be retained by building owner (or maintenance personnel) to perform monthly/annual inspections.
PAGE: 1 of 3
SAVE THESE INSTRUCTIONS
and deliver to owner after installation
Advertisement

Related Manuals for Lithonia Lighting WLTC Series


Summary of Contents for Lithonia Lighting WLTC Series
- Page 1 These instructions do not attempt to cover all installation and maintenance situations. If you do not understand these instructions or additional information is required, contact Lithonia Lighting or your local Lithonia Lighting distributor. • All service shall be performed by qualifi ed service personnel. This product must be in- stalled and maintained in accordance with the applicable installation codes by a person familiar with the construction operation of the product and the hazards involved.
- Page 2 INSTALLATION INSTRUCTIONS CEILING OR END MOUNT INSTALLATION Use flat head screwdriver to loosen the screws on the LENSES (A). Remove lens, from sign, set aside. Remove EXIT STENCIL (B) from FIXTURE FRAME (C), set aside. Drill ¾” holes through the desired mounting knockouts located on the fixture frame. For ceiling mount, knockouts will be located on the top of the fixture frame.
- Page 3 INSTALLATION INSTRUCTIONS OPERATION Apply AC power to the unit. The LED indicator will be GREEN. After the battery has been left to charge for 2 hours, test the unit using the magnetic test switch. The LED indicator turns OFF, the LED board stays ON and the lampheads should turn ON at this time.
Need help?
Do you have a question about the WLTC Series and is the answer not in the manual?
Questions and answers