Advertisement
Quick Links
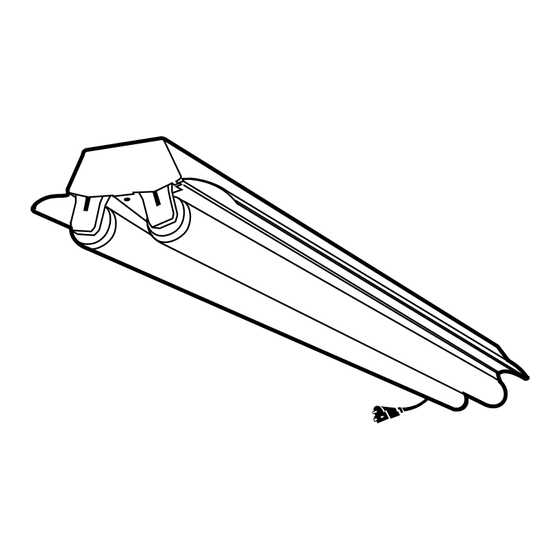
Shoplight
*Model number on carton label
SAVE THESE INSTRUCTIONS
CAUTION: For your safety and proper operation of fixture, read
instructions carefully before installation.
PACKING LIST
Description
1) Fixture Assembly ................ 1
* Parts Pack contains: 2) "S" Hooks, (2) Chains
IMPORTANT SAFETY INFORMATION
(For your protection, read carefully)
1. WARNING: RISK OF SHOCK
House electric current can cause painful shock or serious injury unless
handled properly. For your safety, always remember to:
• Turn off the power supply at the fuse or circuit breaker box before
you install the fixture.
• Turn off the power supply again when you change lamps or perform
other maintenance.
• Ground the fixture to avoid potential electric shocks and to ensure
reliable starting.
• Double-check all connections to be sure they are tight and correct.
• Wear rubber-soled shoes and work on a sturdy wooden ladder.
2. This fixture is designed for use in a circuit protected by a fuse or circuit
breaker. It is also designed to be installed in accordance with local
electrical codes. If you are unsure about your wiring, consult a qualified
electrician or local electrical inspector, and check your local electrical
code.
3. WARNING: RISK OF CUTS
Some metal parts in the fixture may have sharp edges. To prevent cuts
and scrapes, wear gloves when handling the parts.
4. Account for small parts and destroy packing material, as these may be
hazardous to children.
Fig. 1
INSTALLATION
1. Install two hooks (not supplied) in ceiling. Attach "S" hooks to chain.
Slide hook through opening on top of channel and crimp both ends of
hook. Note: Maximum distance to electrical outlet is determined by
the length of the cord provided. See Fig. 1.
2. Prior to inserting bulbs, install each bulb socket by pulling until snaps into
place.
3. Install fluorescent bulbs into sockets. See Fig. 2.
4. Plug into a three-prong electrical outlet or extension cord.
Note: Suspended installation ONLY- Do not flush mount- See Fig.3
INSTALLATION INSTRUCTIONS
Quantity
CONSERVE ESTAS INSTRUCCIONES
PRECAUCION: Para su seguridad y funcionamiento adecuado de
esta luminaria lea cuidadosamente las instrucciones antes de la
instalación.
LISTA DE EMBALAJE
Descripción
1) Ensamble de la luminaria .......... 1
* Paquete de partes Contiene: (2) "S" Ganchos, (2)
INFORMACION IMPORTANTE DE SEGURIDAD
(Para su protección, lea cuidadosamente)
1. ADVERTENCIA: PELIGRO DE ELECTROCHOQUE
La corriente eléctrica de su casa puede causarle una sacudida dolorosa
o una lesión seria a menos que se use adecuadamente. Para su
seguridad, siempre recuerde lo siguiente:
• Desconecte la corriente eléctrica en la caja de fusibles antes de
instalar la luminaria.
• Desconecte la corriente eléctrica cada vez que cambie las lámparas o
para dar mantenimiento en el futuro.
• Conecte a tierra la luminaria para evitar posibles electrochoques y
asegurarse que funciona adecuadamente.
• Revise dos veces todas las conexiones para asegurarse que estan
bien apretadas y correctamente instaladas.
• Use zapatos con suela de goma y trabaje en una escalera de Madera
reforzada.
2. Esta luminaria esta diseñada para ser usada en un circuito protegido
por un fusible o un cortacircuitos. También está diseñada para ser
instalada de acuerdo con los códigos locales de electricidad. Si no está
seguro de su instalación, consulte a un electricista calificado o al
inspector local de electricidad y verifique su código local de electricidad.
3. ADVERTENCIA: PELIGRO DE CORTADURAS
Algunas partes de metal de esta luminaria pueden tener bordes muy
afilados. Para evitar cortaduras y raspaduras, use guantes cuando
instale las piezas.
4. Recoja todas las piezas pequeñas y destruya el material de embalaje ya
que puede ser muy peligroso para los niños.
Fig. 2
1. Instalar dos ganchos (no incluidos) en el techo. Anexar el gancho 'S' a
la cadena. Deslizar el gancho por la entrada en la parte superior del
canal y cierre los dos extremos del gancho. Nota: La distancia máxima
a una salida eléctrica es determinada por la longitud del cordón
proporcionado. Ver fig. 1.
2. Antes de insertar las lámparas, instale cada enchufe de lámpara tirándolo
hasta que cierre ensu lugar.
3. Instalar lámparas fluorescentes en los sockets. Ver fig. 2.
4. Enchufe a un tomacorriente de tres dientes o cable de extensión.
Para instalación colgante SOLAMENTE- No monte embutido.
Ver fig. 3.
This product comes with a:
ONE YEAR LIMITED WARRANTY
Register your warranty on
www.lightahome.com/warranty
Your prompt product registration confirms your right to the protection available
under the terms and conditions of your Lithonia Lighting warranty.
Cantidad
Cadenas
Fig. 3
INSTALACION
U21231T Rev C 07/08
Advertisement

Summary of Contents for Lithonia Lighting Shoplight
- Page 1 Register your warranty on www.lightahome.com/warranty Your prompt product registration confirms your right to the protection available under the terms and conditions of your Lithonia Lighting warranty. CONSERVE ESTAS INSTRUCCIONES SAVE THESE INSTRUCTIONS PRECAUCION: Para su seguridad y funcionamiento adecuado de...
- Page 2 FLUORESCENT LIGHTING GUÍA DE AYUDA PARA TROUBLESHOOTING GUIDE ILUMINACIÓN FLUORESCENTE Fluorescent lighting installations provide service for many years with little La instalación de iluminación fluorescente provee de servicio por muchos or no maintenance except for routine cleaning and re-lamping. If a mal- años con poco o ningún mantenimiento excepto por la limpieza rutinaria y function does occur, use the guide below to diagnose and correct the cambio de lámparas.


Need help?
Do you have a question about the Shoplight and is the answer not in the manual?
Questions and answers