Table of Contents
Advertisement
Quick Links
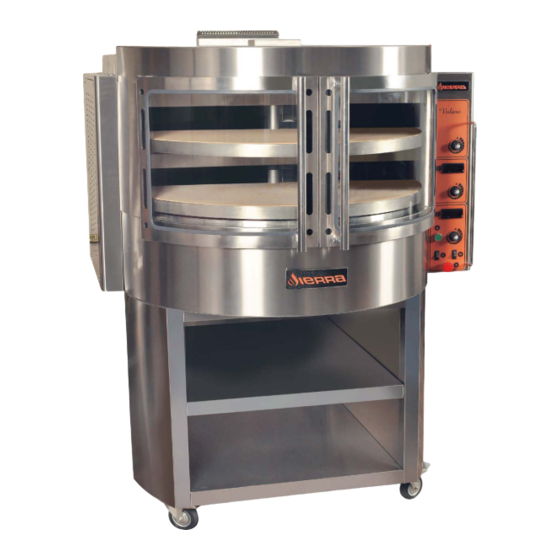
Volare Gas-fired pizza oven
5659 Royalmount Ave.
Montreal,QC,Canada H4P2P9
Telephone:514-737-9701/Toll free:888-275-4538
Fax:514-342-3854/Toll free:877-453-8832
Installation
operation
and
maintenance
manual
12000 Biscayne Blvd. Ste#108
Miami,FL,United States 33181
Telephone:786-600-4687/Toll free:844-218-8477
Fax:786-661-4100
Document
UM082219
Advertisement
Table of Contents

Related Manuals for Sierra Volare

Summary of Contents for Sierra Volare
- Page 1 Volare Gas-fired pizza oven Installation operation maintenance manual 5659 Royalmount Ave. 12000 Biscayne Blvd. Ste#108 Montreal,QC,Canada H4P2P9 Miami,FL,United States 33181 Telephone:514-737-9701/Toll free:888-275-4538 Telephone:786-600-4687/Toll free:844-218-8477 Fax:514-342-3854/Toll free:877-453-8832 Fax:786-661-4100 Document UM082219...
- Page 2 READ THESE SAFETY PRECAUTIONS FIRST WARNING: POST IN A PROMINENT LOCATION INSTRUCTIONS TO BE FOLLOWED IN THE EVENT YOU SMELL GAS. THIS INFORMATION SHALL BE OBTAINED BY CONSULTING YOUR LOCAL GAS SUPPLIER. WARNING: This appliance is only for professional use and shall be used only by qualified people.
- Page 3 Customer Information MODEL NUMBER: ________________________ SERIAL NUMBER: _________________________ PURCHASE DATE: _________________________ DISTRIBUTOR: ____________________________________________________...
-
Page 4: Table Of Contents
Safety …………………………………………………………………………. 9 Location and description of controls ………………………………………. Before first use ………………………………………………………………. Starting the oven …………………………………………………………….. 11 Turning oven off ……………………………………………………………… 11 Using Volare oven ……………………………………………………………... 12 Baking ………………………………………………………………………… Maintenance Safety ………………………………………………………………………… 13 Daily maintenance …………………………………………………………… 13 Weekly maintenance ………………………………………………………... 14 Monthly maintenance ……………………………………………………….. - Page 5 TABLE OF CONTENTS Trouble Causes and corrective measures Appendix 1 - Parts List Appendix 2 - Electrical wiring diagram...
-
Page 6: Description And Specifications
1.1. About this manual This manual includes all the information, advises and warnings for the correct use of Volare gas ovens with rotating deck and is supplied with every product. The manual is a part of the machine. Before any action of installation, use or maintenance, read the corresponding chapters carefully. -
Page 7: Dimensions
Description and specifications 1.4. Dimensions... -
Page 8: Gas Ratings
Description and specifications 1.5. Gas ratings Natural Gas Propane Gas LP Input Manifold Pilot Input Manifold Pilot Burner Burner Rate Pressure Burner Rate Pressure Burner Orifice Orifice (BTU/hr) (iwc) Orifice (BTU/hr) (iwc) Orifice Bottom 0.0925 in 0.0114 in 0.059 in 0.00945 in 30000 30000... -
Page 9: Installation
2.2 Unpacking All Volare ovens with rotating deck are delivered together with a wheeled base. The oven is packed in a wooden container and the base is fixed on the top, wrapped in cardboard. When you have all the crates unloaded, unpack and remove all packing material. -
Page 10: Location - Clearances
Installation 2.4 Location - Clearances This appliance must be installed with a restraint cable to guard against transmission of strain to the gas connector. The restraint should be attached without damaging the building. DO NOT use the gas piping or electrical conduit for the attachment of the permanent end of the restraint! Use anchor bolts in concrete or cement block. -
Page 11: Gas Connection
Installation Do not obstruct the flow of combustion and ventilation air. Adequate clearance for air opening into the combustion chamber must be provided. Do not permit fans to blow directly at the pizza oven. Wherever possible, avoid open windows next to the pizza oven. -
Page 12: Air Supply
Installation 2.6 Air supply WARNING: Failure to properly vent the oven can be hazardous to the health of the operator and may result in operational problems, unsatisfactory baking and possible damage to the equipment. Damage sustained as a direct result of improper ventilation will not be covered by the Manufacturer’s warranty. -
Page 13: Adjustments
Installation 2.8 Adjustments ADJUSTMENTS ASSOCIATED WITH INITIAL INSTALLATION Each oven, and its component parts, have been thoroughly tested and inspected prior to shipment. However, it is often necessary to further test or adjust the oven as part of a normal and proper installation. These adjustments are the responsibility of the installer, or dealer. -
Page 14: Operation
Operation 3.1 Safety The information contained in this section is provided for the use of qualified operating personnel. Qualified operating personnel are those who have carefully read the information contained in this manual, are familiar with the functions of the oven and/or have had previous experience with the operation of the equipment described. -
Page 15: Location And Description Of Controls
Operation 3.2 Location and description of controls All operations for loading/unloading and controlling baking procedure are executed from the front side. 1) Thermostatic gas valve 2) Igniter 3) Motor switch 4) Lighting switch 5) Emergency stop 6) Thermometer Control Board 3.3 Before first use Installation should be reviewed by properly qualified personnel prior to turning on appliance for first time. -
Page 16: Starting The Oven
Operation 3.4 Starting the oven The bottom gas valve controls the operation of the burner underneath the bottom deck. The middle valve controls the burner between the two decks. The top valve controls the burner above the top deck. To light-up each burner: •... -
Page 17: Using Volare Oven
Operation 3.6 Using the Volare oven Preheating Alter lighting the burners, allow the oven to preheat to the desired temperature. An additional 10-15 minutes is helpful, before starting to bake, to allow temperature to stabilize throughout the oven. Selecting a value between 1 and 7 on each valve the corresponding burner can reach a temperature close enough to the values given on the following board. -
Page 18: Maintenance
Maintenance 4.1. Safety WARNING: Electrical Grounding Instructions This appliance is equipped with a three-prong (grounding) plug for your protection against shock hazard and should be plugged directly into a properly grounded three-prong receptacle. Do not cut or remove the grounding prong from this plug. CONTACT THE FACTORY, THE FACTORY REPRESENTATIVE, OR A LOCAL SERVICE COMPANY TO PERFORM MAINTENANCE AND REPAIRS. -
Page 19: Weekly Maintenance
Maintenance 4.3 Weekly maintenance After routine/every day's maintenance, clean the interior stainless-steel surfaces using the sponge mop with telescopic handle supplied with the oven. As in the exterior surfaces use a mild household detergent solution with clean warm water. Drain the sponge well before putting it inside the oven to avoid excessive humidity on the side walls, the lamps or on the baking stone. -
Page 20: Service And Conversions
Service and conversions CAUTION: All following works must be carried out by qualified installation or service personnel ONLY. CAUTION: Disconnect Power Supply Before Attempting Cleaning or Servicing 5.1 Pressure control The gas control flow rates have been pre-set at the factory and no adjustment should be necessary. If you need to check the inlet and outlet pressures do it by means of the pressure test points. -
Page 21: Adjustment To A Different Type Of Gas
Service and conversions 5.2 Adjustment to a different type of gas To adjust the appliance for different type of gas than the one it is prepared in the factory, you have to replace orifices and adjust the pressure for the new type of gas. The necessary orifices are supplied with the appliance. -
Page 22: Adjustment Of The Pressure Regulator
Service and conversions 5.3 Adjustment of the pressure regulator To adjust the pressure regulator unplug from mains to cut electric power supply and remove the back cover to have access to the internal gas piping. Shut off the supply/external gas valve to unit. Loosen the large nut (A) in the center of the regulator. - Page 23 Trouble Causes and corrective measures Trouble Causes Corrective measures Pizza Bottom too Dark Bedplate Thermostat improper setting Decrease bottom temperature Shorten cook time Pizza Top too Dark Top Thermostat improper setting Decrease top temperature Shorten cook time Pizza Bottom Too Dark and Unbalanced temperature distribution Decrease bottom temperature Top too Light...
- Page 24 Appendix 1 - Parts List ITEM PART NAME Door’s frame Door’s glass Door’s handle Rolling bearing Electric motor Lamp Burner Cable gland Door’s magnet Door’s stop Rotated wheel Burner’s pilot Telescopic sponge mop...
- Page 25 Appendix 2 - Electrical wiring diagram...
Need help?
Do you have a question about the Volare and is the answer not in the manual?
Questions and answers