Advertisement
Quick Links
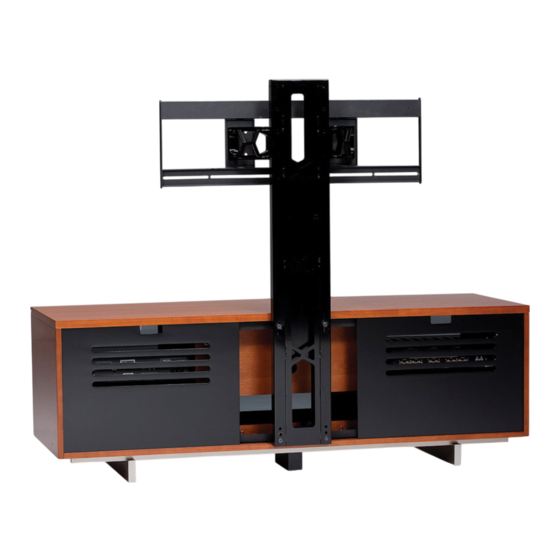
ARENA
CABINET MOUNT
Your Arena Flat Panel Mount is engineered for easy assembly.
Carefully follow this procedure to prevent any damage.
Placement and Maintenance
Arena Flat Panel Mount is designed for indoor use and only on BDI
cabinets. Clean steel parts with a moist cloth.
Step 1
Unpack and identify the components at left. The assembly
workspace should be a non-marring surface such as carpet. For
missing hardware pieces, please contact BDI Customer Service at
customerservice@bdiusa.com.
For all other concerns, please contact your BDI Retailer.
Step 2
Measure the height of your BDI AV cabinet (not including
the base) to determine if the mount riser N is needed.
If your cabinet height is:
•
16-18.5" (less than 47cm) then proceed to Step 3A
(Avion, Nora, Marina, and Mirage)
•
18.5-21" (more than 47cm) then proceed to Step 3B
(Corridor, Elements)
Measure
Here
Designed by BDI Design Studio.
These distinctive product configurations are protected by US and international patents,
trade dress, and/or copyright laws. Arena and BDI are trademarks of Becker Designed, Inc.
All Rights reserved. ©2018, BDI Made in Taiwan. 06.20.2019 v9
9970
TM
bdiusa.com
customerservice@bdiusa.com
A - 5mm Allen Wrench x 1
B - 5 / 16 x 5 / 8 in Screws x 10
C - Spine x 1
D - Swiveling Bracket
Assembly x 2
E - 5 / 16 x 1- 3 / 4 in Screws x 4
F - Horizontal Mounting
Bracket x 1
G - 5 / 16 x 3 / 8 in Screws x 4
H - Washer x 4
I - Vertical Mounting
Bracket x 2
J - TV Mounting Kit x 1
K - Leveling Disc x 2
L - Nut x 2
M - Cabinet Mount
Brackets x 2
N - Mount Riser x 1
O - 5/16 x 2-3/8" Screws x 3
Advertisement

Summary of Contents for BDI ARENA 9970
- Page 1 Designed by BDI Design Studio. These distinctive product configurations are protected by US and international patents, trade dress, and/or copyright laws. Arena and BDI are trademarks of Becker Designed, Inc. O - 5/16 x 2-3/8” Screws x 3 All Rights reserved. ©2018, BDI Made in Taiwan. 06.20.2019 v9...
- Page 2 Step 3 A (for compatible Avion, Nora, Marina, Mirage, Novia, and Signal cabinets) Attach two cabinet mount brackets M to rear-center edge of cabinet’s Top and Bottom Panels using 5 / 16 x 5 / 8 “ screws B and provided allen wrench A. Proceed to step 4. B x 6 bdiusa.com AREANA 9970...
- Page 3 Step 3 B (for compatible Corridor, Elements and other new cabinets) Position mount riser N on the middle back edge of the cabinet’s bottom panel aligning with the 3 holes. Position cabinet mount bracket M directly on top of it and secure with 5/16” x 2-3/8” screws O and provided allen wrench A.
- Page 4 Step 4 Attach spine C onto the 4 posts of the cabinet mount brackets M then fasten securely into place using four (4) 5 / 16 x 5 / 8 in screws B and provided allen wrench A. Note: If you are using the mount riser, tilt the spine C forward and hang the spine on the 2 upper posts. The posts will enter the slots on the front of the spine C.
- Page 5 Step 5 Attach each swiveling bracket assemby D to top of spine C with 5 / 16 x 1- 3 / 4 ” screws E using allen wrench A. NOTE: There are several mounting-height positions to choose from on 3” increments. In general, for larger TV’s (54”...
- Page 6 Step 6 Attach horizontal mounting bracket F to installed swiveling bracket assemblies D using 5 / 16 x 3 /8” screws G and washers H with the provided allen wrench A. NOTE: Slots along horizontal mounting bracket F must be at BOTTOM. Be sure to position each swiveling bracket assembly D so that each sits within recessed portion of the Horizontal Mounting Bracket F (Circled below).
- Page 7 NOTE: Various mounting screws are provided in TV mounting kit J, but some TVs may require specific hardware not provided by BDI. In such cases, please contact your TV manufacturer to identify and source your hardware.
- Page 8 Step 8 (continue) Level the TV using the leveling discs K near the slots in the lower horizontal mounting bracket F. Then secure into place using provided nut L on exposed mounting stud until finger-tight. Step 9 Use the open channel inside spine C to organize and route cabling to and from the TV. bdiusa.com AREANA 9970 customerservice@bdiusa.com...


Need help?
Do you have a question about the ARENA 9970 and is the answer not in the manual?
Questions and answers