Advertisement
Quick Links
Finished wall mount
Components
Please make sure to use the components and parts supplied with the product.
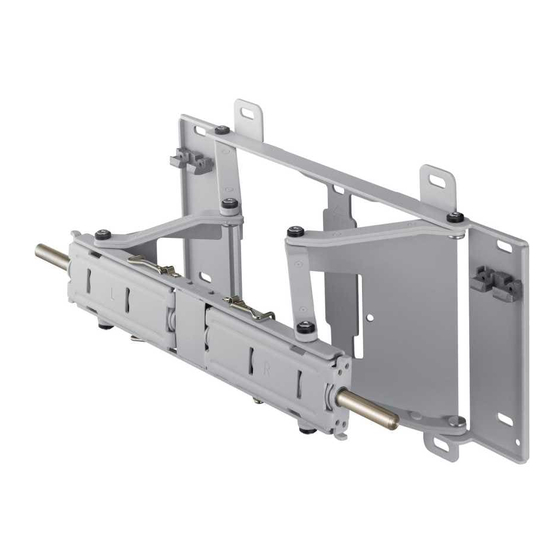
Adjustable mount
Safety precautions
Make sure that an installation engineer specified by your dealer installs the product.
Make sure that an installation engineer specified by your
dealer moves or replaces the product after the installation.
1. Do not let children play underneath the product when it is installed. Children may hit their heads against the edge of the product.
2. Take care when you adjust the angle or rotate the product because the back of the product may make contact with the wall.
(You can prevent damage to the product and the wall by attaching sponges to the 4 edges of the product.)
3. Do not install the product in a hot, humid location or on a weak wall that is unable to sustain the weight of the product.
4. Do not insert your hand into the groove at the bottom of the TV while installing the TV onto the wall mount as this may result in an electric shock.
5. Make sure to cover the groove at the bottom of the TV that becomes visible after removing the stand using the separate cover supplied with the TV.
Wall Mount Guide-WMN4270S-03.indb 1
Adjustable Wall Mount User Guide
WMN4270S
Bracket
1 EA
Left: 1 EA Right: 1 EA
Parts
Screws ⓒ: 4 EA
M8X35
M8X40
Plastic hangers
: 4 EA
Screws ⓐ: 8 EA Anchors: 8 EA
Screws ⓑ: 8 EA
Do not hang onto the installed product and avoid
impacts to the product.
Washers
M8X47
Cable tie: 1 EA
2012-12-18
11:11:16
Advertisement

Subscribe to Our Youtube Channel
Related Manuals for Samsung WMN4270S


Summary of Contents for Samsung WMN4270S
-
Page 1: Safety Precautions
Bracket Parts Screws ⓒ: 4 EA Washers M8X35 M8X40 M8X47 Plastic hangers : 4 EA 1 EA Left: 1 EA Right: 1 EA Screws ⓐ: 8 EA Anchors: 8 EA Screws ⓑ: 8 EA Cable tie: 1 EA Safety precautions Make sure that an installation engineer specified by your dealer installs the product. Make sure that an installation engineer specified by your Do not hang onto the installed product and avoid dealer moves or replaces the product after the installation. impacts to the product. 1. Do not let children play underneath the product when it is installed. Children may hit their heads against the edge of the product. 2. Take care when you adjust the angle or rotate the product because the back of the product may make contact with the wall. (You can prevent damage to the product and the wall by attaching sponges to the 4 edges of the product.) 3. Do not install the product in a hot, humid location or on a weak wall that is unable to sustain the weight of the product. 4. Do not insert your hand into the groove at the bottom of the TV while installing the TV onto the wall mount as this may result in an electric shock. 5. Make sure to cover the groove at the bottom of the TV that becomes visible after removing the stand using the separate cover supplied with the TV. Wall Mount Guide-WMN4270S-03.indb 1 2012-12-18 11:11:16... - Page 2 Fix the adjustable mount onto the wall as shown by the figure. Fixing the anchors and screws ⓐ Drill a hole using a 6X50 drill bit. Clean the inside of the hole. Insert the enclosed anchor into the hole. Align the adjustable mount with the hole ⓐ and fasten the screw Fix the adjustable mount onto the wall with anchors and When you drill a hole in the wall, make sure to use a drill screws ⓐ from ① to ⑦ in this order. bit with the specified diameter. failing to do so may result If you cannot fasten the anchors and screws at the specified in a safety issue. positions, fasten them at the nearest possible positions. C heck the strength of the wall, and if the wall is insufficiently strong, reinforce the wall before installing the product on the wall. The screws and anchors supplied with the product are to fix the product onto wood or concrete. Check the material of the wall and use appropriate fixing screws depending on the type of material such as plaster board, marble or iron plate. After firmly fixing the adjustable mount onto the wall as shown by the figure, pull the adjustable part forward, assemble the brackets with the adjustable mount as shown by the figure and fix them by fastening the 8 screws ⓑ supplied with the product. (The same for left and right) 4 screws ⓑ 4 screws ⓑ Wall Mount Guide-WMN4270S-03.indb 2 2012-12-18 11:11:17...
- Page 3 [Models before 2013] [2013 F-series models] Refer to the separate sheet ⓒ Use M8X35 and M8X40 screws H ang the TV onto the wall mount and make sure to check if the TV has been installed properly onto the wall mount by observing the assembled TV as you move the wall mount from left to right. Take care not to hurt your fingers when you install the TV or adjust the wall mount. Make sure to fix the wall mount onto the wall firmly. If the TV falls, it may result in injury or damage to the product. Pull the wall mount brackets as far forward as possible and hang the TV onto the wall mount at the specified positions as shown by the figure while 2 persons are holding the TV. F ix the TV onto the wall mount firmly and turn the 2 safety catches at the top of the wall mount brackets to the lock position as shown by the figure, so that the TV and the wall mount do not become separated. [For normal models] [For slim models] Tie the power cord and the other cables with the enclosed cable tie as shown by the figure and make sure that the cables do not come loose when the wall mount is adjusted. A fter connecting the cables and pulling the adjustable mount as far forward as possible, arrange the cables using the cable tie that has been passed through the specified hole in the adjustable mount as shown by the figure. The cable will then not interfere with the wall mount. Check the operation 2 or 3 times and if there is no problem, fix the wall molding. Wall Mount Guide-WMN4270S-03.indb 3 2012-12-18 11:11:18...
-
Page 4: Product Specifications
Adjusting the wall mount angle This product has adopted a Smooth Moving Mechanism so that it always moves very smoothly. Adjust the angle of the product carefully. Using excessive force may result in the product hitting the wall and becoming damaged. Adjust the horizontal angle by holding both sides of the product. When you adjust the vertical angle, hold the top center of the product. Then you can smoothly adjust the angle. Y ou can adjust the angle up to -20° ~ 20° horizontally and up to 10° ~ 15° vertically. The allowed adjustable angle may differ depending on the model. Product specifications 240.5 24.5 Specifications Width (mm) Height (mm) Depth (mm) 24.5 Weight (Kg) Wall mount VESA specifications 400 X 400 T he product appearance and specifications are subject to change for product improvement purposes without prior notice. Wall Mount Guide-WMN4270S-03.indb 4 2012-12-18 11:11:19...
Need help?
Do you have a question about the WMN4270S and is the answer not in the manual?
Questions and answers