BIXOLON SLP-TX220 Service Manual
Hide thumbs
Also See for SLP-TX220:
- Reference manual (64 pages) ,
- Reference manual (53 pages) ,
- User manual (37 pages)

Related Manuals for BIXOLON SLP-TX220


Summary of Contents for BIXOLON SLP-TX220
- Page 1 Service Manual Label Printer SLP-TX220 / TX220E Ver. 1.01 SLP-TX223 / TX223E http://www.bixolon.com...
-
Page 2: Table Of Contents
SLP-TX220x/TX223x ■ Table of Contents 1. Precaution Statements ..........................5 1-1 Safety Precautions ..........................5 1-2 Servicing Precaution ..........................6 1-3 Precaution for Electrostatically Sensitive Devices (ESDs) ..............7 1-4 Operational Precautions ........................7 2. Operating Instruction and Installation ..................... 8 2-1 Installation .............................. - Page 3 SLP-TX220x/TX223x 3-6 SMPS Specification ..........................37 3-6-1 SMPS(Switching Mode Power Supply) Specification ..............37 3-6-2 SMPS Output Connector ......................37 3-7 Interface Specification ......................... 38 3-7-1 RS-232C Serial Interface ......................38 3-7-2 USB Interface ..........................40 3-7-3 Ethernet I/F ........................... 41 3-7-4 WLAN ............................
- Page 4 About ■ About this Manual This Service Manual describes how to perform hardware service maintenance for the BIXOLON SLP-TX220, SLP-TX220E, SLP-TX223, SLP-TX223E Label Printer. Notes Notes may appear anywhere in the manual. They draw your attention to additional information about the item.
-
Page 5: Precaution Statements
SLP-TX220x/TX223x 1. Precaution Statements 1-1 Safety Precautions 1. Be sure that all of the built-in protective devices are replaced. Restore any missing protective shields. 2. When reinstalling the chassis and its assemblies, be sure to restore all protective devices including: nonmetallic control knobs and compartment covers. -
Page 6: Servicing Precaution
SLP-TX220x/TX223x 1-2 Servicing Precaution WARNING 1: First read the Safety Precaution section of this manual. If some unforeseen circumstance creates a conflict between the servicing and safety precautions, always follow the safety precaution. WARNING 2: An electrolytic capacitor installed with the wrong polarity might explode. 1. -
Page 7: Precaution For Electrostatically Sensitive Devices (Esds)
SLP-TX220x/TX223x 1-3 Precaution for Electrostatically Sensitive Devices (ESDs) 1. Some semiconductor (solid state) devices are easily damaged by static electricity. Such components are called Electrostatically Sensitive Devices (ESDs); examples include integrated circuits and some field- effect transistors. The following techniques will reduce the occurrence of component damaged caused by static electricity. -
Page 8: Operating Instruction And Installation
SLP-TX220x/TX223x 2. Operating Instruction and Installation 2-1 Installation 2-1-1 SMPS Installation 1) Turn off the printer power switch. 2) Check to see that the AC adapter voltage matches that of the power source. 3) Connect the AC adapter jack to the printer power connector. -
Page 9: Paper Roll Installation
SLP-TX220x/TX223x 2-1-4 Paper Roll Installation 1) Open the Paper Cover. 2) Spread the Paper Holder and insert paper roll. Paper Cover Paper Holder 3) Whether the paper label is wound 4) Adjust the paper guide to the width of inwards or outwards, its printing the paper. -
Page 10: Ribbon Installation
SLP-TX220x/TX223x 2-1-5 Ribbon Installation 1) Type of Ribbon (1) Type by Film Coating Location - Take note before ribbon purchase that only ribbons facing outward can be used. Coated Area (Surface ( O ) ( X ) to be printed) Coated Area (Surface to be printed) Outside Ribbon... - Page 11 SLP-TX220x/TX223x 2) Inserting Ribbon (1) Open the Paper Cover and insert the ribbon. (2) Open the Ribbon Cover and insert the core. Ribbon Cover Paper Cover (3) Apply tape to the coiling portion of the ribbon. Tape (4) Close the Paper Cover until a click sound is heard. (5) Close the Ribbon Cover - 11 - Ver.
- Page 12 SLP-TX220x/TX223x 3) Ribbon Removal (1) When you need to separate the current ribbon, Open the Ribbon Cover and cut it by knife or similar tool. (Take care not to injure hands) Cutting (2) Open the Paper Cover and remove the ribbon and core by pushing from left to right. 4) Ribbon Sensor Activation Ribbon detection sensor is enabled by default factory settings.
-
Page 13: Operations
SLP-TX220x/TX223x 2-2 Operations 2-2-1 Using the operation panel Most of the functions of this printer are governed by software, but you can monitor the printer s status by looking at the lights on the control panel and for some procedures you will use the buttons. 2-2-2 Button Operations Button Printer state... -
Page 14: Led Indicator For Various Printer Statuses
Please refer to the manual to install the Windows Driver and print a test page. 2. Printing using label design program Label Design Program installation files and manuals are provided on the BIXOLON official website. (http://www.bixolon.com) Please refer to the manual to install the Label Design Program and print a test page. -
Page 15: Self-Test
SLP-TX220x/TX223x 2-2-5 Self-Test The self-test checks whether the printer has any problems. (Users cannot perform this procedure if using the printer’s label peel-off option) - Firmware version, printer configuration information, printing quality checking pattern, and peripheral configuration information, etc. If there is no problem according to self-test result, please check other device(s) or software(s). This function is operated independently with other device(s) or software(s). -
Page 16: Printer Setting Using Utility Program
Refer to 2-2-13 Manual Calibration Mode for more details. 5) Other functions for printer test are also provided. Unified Label Utility-II installation files and manuals are provided on the BIXOLON official website. (http://www.bixolon.com) Please refer to Unified Label Utility-II manual for details. - 16 -... -
Page 17: Stand-Alone Configuration Mode
SLP-TX220x/TX223x 2-2-7 Stand-alone Configuration Mode Various modes can be executed using buttons and LED only. 1. How to start stand-alone configuration mode 1) The printer mode is set to Printer Setting Mode when the Pause button is depressed for two seconds while in Print Standby Mode. 2) Both LEDs will change to orange color and the printer will be set to Stand-alone Configuration Mode. -
Page 18: Pause/Cancel
SLP-TX220x/TX223x 2-2-8 Pause/Cancel During multiple-page print jobs, the Pause and Cancel button can be used to temporarily cease printing and cancel the print job altogether, respectively. Print Pause/Resume Print Cancel/Stand by 1. Pause/Resume Function 1) When printing labels, depressing the Pause button 2) The printer will pause after finishing the current label printing and the status of LED will be as follows. -
Page 19: Media Calibration
In this case, run Auto Calibration function so that the printer can recognize the gap. BIXOLON printer provides various media calibration methods in order to accommodate various special paper types. -
Page 20: Smart Media Detection
SLP-TX220x/TX223x 2-2-10 Smart Media Detection 1. Printer executes this function when necessary without user input and media configuration can be completed with Smart Media Detection function for most print papers. 2. Papers with gap and black mark can be identified without separate settings. 3. -
Page 21: Manual Calibration Mode
Users can calibrate sensor parameters in detail by using the utility program provided by the manufacturer. The installation files and manuals are provided on the BIXOLON official website. (http://www.bixolon.com) Please make sure the printer is connected and execute the utility program. -
Page 22: Cover Closing Mode
SLP-TX220x/TX223x 2-2-14 Cover Closing Mode 1. About Cover Closing Mode 1) The printed area may become out of range of paper if the paper is not in the accurate printing position when the cover is opened and closed. 2) The printer is put to Cover Closing Mode instead of Print Standby Mode when the cover is closed in order to prevent this problem, and it waits for user input. -
Page 23: Peel-Off (Option)
SLP-TX220x/TX223x 2-2-17 Peel-Off (Option) As a function that is used to peel-off labels, it is used only with label paper. 1. Open the paper cover. 2. Open the label peel-off cover and set the peeler switch to the ON position. - Check to see that the LED has turned on. -
Page 24: Using Fan-Fold Paper
SLP-TX220x/TX223x 2-2-18 Using Fan-Fold Paper Supplying paper to the printer externally is done as follows. 1. Printer Preparation Remove the rear paper supply cover on the back side of the printer with a knife or other cutting instrument. ※ CAUTION - Take care not to injure the hands and/or any other part of the body when performing this step. -
Page 25: Auto Cutter (Option)
SLP-TX220x/TX223x 2-2-19 Auto Cutter (Option) For auto paper cutting, products equipped with auto cutter are available. Auto-Cutter can be controlled by command. And default setting can be changed by Unified Label Utility-II. ※ The paper installation method is the same as paper with no auto cutter. 2-2-20 Real-Time Clock (Option) The function of the Real-Time Clock option is to print the time and date onto the label. -
Page 26: Specification
SLP-TX220x/TX223x 3. Specification 3-1 SET Identification number application method After Mar 2008 S T D Q 5 K A 0 9 0 8 0 0 0 1 Product serial number Manufacture month Manufacture year Production Line Factory Model code Customer 3-2 Printer Classification S L P –... - Page 27 SLP-TX220x/TX223x Model Name Color Resolution Option Remark SLP-TX220 Standard SLP-TX220C Auto-Cutter SLP-TX220D Peeler 203dpi SLP-TX220E Ethernet SLP-TX220CE Auto-Cutter, Ethernet SLP-TX220DE Peeler, Ethernet Ivory SLP-TX223 Standard SLP-TX223C Auto-Cutter SLP-TX223D Peeler 300dpi SLP-TX223E Ethernet SLP-TX223CE Auto-Cutter, Ethernet SLP-TX223DE Peeler, Ethernet SLP-TX220G Standard...
-
Page 28: Appearance
SLP-TX220x/TX223x 3-3 Appearance 3-3-1 Printer Dimensions (mm) Figure3-1 Printer Dimension 3-3-2 AC/DC Adapter Dimension (mm) 1500±50 30.6 115.6 55.5 Figure3-2 AC/DC Adapter Dimension - 28 - Ver. 1.01... -
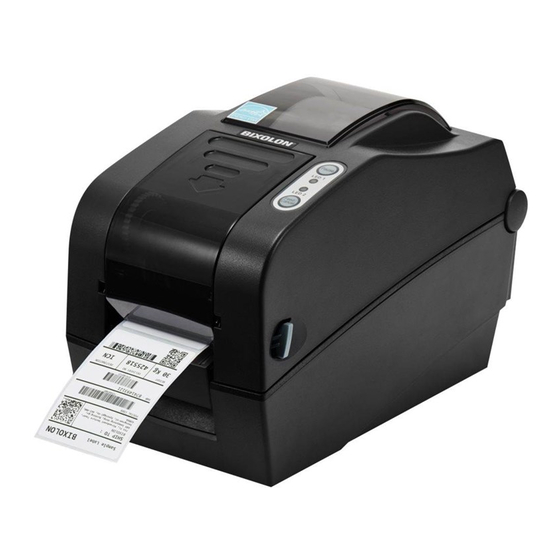
Page 29: Feature Locations
SLP-TX220x/TX223x 3-3-3 Feature Locations Pause Button Ribbon Cover Feed Button Cover Lever Printer Head Paper Guide Paper Cover Black-Mark & Notch Sensor Paper Holder Paper Fix Tool Paper Guide & Gap Sensor Cover STD Roller - 29 - Ver. 1.01... - Page 30 SLP-TX220x/TX223x Fan-Fold or External Paper Cover Power Switch Power Jack RS-232C (Serial) Cover Peel-off Auto Cutter (Option) (Option) External Paper Supplier (Option) Figure3-3 Feature Location - 30 - Ver. 1.01...
-
Page 31: General Specifications
Auto Cutter Cutting Method : Full Cut (0.3 Million Cut_Max. 0.18mm) Option Printing Method Thermal Transfer Printing SLP-TX220 : Max. 152.4 mm/sec (Max. 6ips) Printing Speed SLP-TX223 : Max. 101.6 mm/sec (Max. 4ips) Operation : Max.128W (100% duty ) Power Consumption Operation : Max. -
Page 32: Function Spec
SLP-TX220x/TX223x 3-4-2 Function Spec Function Description Remarks Text Printing Multiply, Bold, Reverse and Rotation functions Various barcodes supported 1D Barcode Printing Rotation, HRI supported. Various barcodes supported 2D Barcode Printing Rotation. HRI supported Line, Box, Slope and Circle printing supported Block Printing Overwrite, Exclusive OR, Delete mode supported PCX. -
Page 33: Thermal Printer Specification
SLP-TX220x/TX223x 3-5 Thermal Printer Specification 3-5-1 Printer Specification Item Description Remark SLP-TX220x (TPH : KRC-54-8TAO1, Kyocera) Model SLP-TX223x (TPH : KRC-57-12TAO1, Kyocera) Printing Method Thermal Transfer Printing SLP-TX220x : 203dpi (8dots/mm) Resolution SLP-TX223x : 300dpi (11.8dots/mm) Printing Direction Unidirectional with friction feed SLP-TX220x : Max. -
Page 34: Paper Specification
SLP-TX220x/TX223x 3-5-4 Paper Specification Item Description Remark Top Coated Thermal Paper Paper Kind (Basis Weight : Max. 180g/m - Face stock + Liner ) Paper Type Roll, Fan-fold Paper Form Gap, Black Mark, Notch, Continuous Wound Type Outside & Inside Max Φ130mm(5.1 inch), Paper Roll Size Max Φ220mm(8.6 inch) : External Supply_option... -
Page 35: Ribbon Specification
SLP-TX220x/TX223x 3-5-5 Ribbon Specification Item Description Remark Ribbon Type Wax, Wax/Resin, Resin Wound Type Ink Outside Ribbon Width 58mm (2.28inch) Ribbon Length Max. 74m Max. Φ35mm (1.36inch) Ribbon Roll Size Core ID. 12.5mm (0.5inch) 3-5-6 Warranty and Environment Specification Item Description Remark Printer Unit... -
Page 36: Auto Cutter Specification
SLP-TX220x/TX223x 3-5-9 Auto Cutter Specification Item Description Remark Model ORC-RZBG63-B-F (Full Cut) Type Guillotine Type DC Brush Motor Motor FK-180SH-10400(MABUCHI) with D/V, Insulation Coating (Class A) Voltage 24Vdc +/-5% Current Peak : 1.5A 3-5-10 Media Sensor Item Description Remark Transmission Sensor Model : KPED-3820-BIX01+KPED-3820-BIX02 Gap sensor Reflective Sensor... -
Page 37: Smps Specification
SLP-TX220x/TX223x 3-6 SMPS Specification 3-6-1 SMPS(Switching Mode Power Supply) Specification Item Description Remark Typical : 100V/240V AC Input Voltage : 90V AC : 264V AC Input Current 1.5A Max.@90~264V voltage with max.load Output Voltage +24V ± 5% Initial Tolerance with no load Output Current +24V ±... -
Page 38: Interface Specification
SLP-TX220x/TX223x 3-7 Interface Specification 3-7-1 RS-232C Serial Interface 1) Specification Item Description Remark Data Transmission Serial Synchronization Asynchronous Hand Shaking H/W : RTS/CTS (Flow Control) S/W : Xon/Xoff Logic 1(Mark) : -3V~-15V Signal Level Logic 0(Space) : +3V~+15V Baud Rate 9,600 / 19,200 / 38,400 / 57,600 / 115,200 bps Data bits length 7 bits / 8 bits... - Page 39 SLP-TX220x/TX223x 4) Signal Description Signal Name Signal Direction Function Frame GND Frame Ground Output Transmit Data Input Receive Data Ready To Send Output Ready to exchange data Input Clear To Send Output Data Terminal Ready (Almost same function as RTS) Input Data Set Ready (Almost same function as CTS) Signal GND...
-
Page 40: Usb Interface
SLP-TX220x/TX223x 3-7-2 USB Interface 1) Specification Item Description Remark Transfer Type BULK Bidirection, Half-Duplex Data Signal Differential Signal Pair (D+ / D-) NRZI Format Data Format Zero Bit Stuffing after 6 ones Differential Receive Sensitivity : 200 mV Transceiver Differential Common Mode Range : 0.8 ~ 2.5 V Single-End Receiver Threshold : 0.8 ~ 2.0 V Speed... -
Page 41: Ethernet I/F
Function White Orange Transmit + Orange Transmit - White Green Receive + Blue White Blue Green Receive - White Brown Brown * For more information, refer to the Ethernet User Manual in Bixolon Web Site. - 41 - Ver. 1.01... -
Page 42: Wlan
BIXOLON printers require WLAN USB adapter to use the wireless LAN function. WLAN USB Adapter for BIXOLON printers should be available from BIXOLON. USB Adapter from market not BIXOLON is not guaranteed to be working properly with BIXOLON printers. - 42 -... -
Page 43: Hardware
SLP-TX220x/TX223x 4. Hardware 4-1 Wiring Diagram 4-1-1 SLP-TX22x Board Wiring Diagram HOST HOST POWER SYSTEM SYSTEM (SMPS) (USB) (SERIAL) POWER SWITCH LED & FEED S/W RIBBON STEP MOTOR COVER BLACK AUTO PEELER MARK CUTTER - 43 - Ver. 1.01... -
Page 44: Slp-Tx22Xe Board Wiring Diagram
SLP-TX220x/TX223x 4-1-2 SLP-TX22xE Board Wiring Diagram HOST HOST POWER SYSTEM SYSTEM DONGLE (SMPS) (ETHERNET) (USB) (WLAN) POWER SWITCH LED & FEED S/W RIBBON STEP MOTOR COVER BLACK AUTO PEELER MARK CUTTER - 44 - Ver. 1.01... -
Page 45: Block Diagram
SLP-TX220x/TX223x 4-2 Block Diagram - 45 - Ver. 1.01... -
Page 46: Special Circuit Description
SLP-TX220x/TX223x 4-3 Special Circuit Description 4-3-1 Power Circuit This system is operated under 100Vac or 240Vac. The power circuit supplies the three differential DC voltage sources. VOLTAGE DESCRIPTION VDD_24V (+24VDC) Step Motor & Auto Cutter Voltage TPH_24V (+24VDC) Thermal Printer Head (TPH) Voltage VDD_5V (+5VDC) Logic IC Voltage VDD_3V3 (+3.3VDC) -
Page 47: Reset Circuit
SLP-TX220x/TX223x 4-3-2 Reset Circuit Reset signal is a signal in order to start-up CPU under Power-On. Reset circuit uses a reset IC (XC6127N27C, U24). When +3.3Vdc is fallen under +2.7Vdc by Power-Off, reset signal prohibits the system from misoperating by lowering down to 0V. RESET J-TAG CHIP... -
Page 48: Rs232C Communication Block Diagram
SLP-TX220x/TX223x 4-3-3 RS232C Communication Block Diagram The CPU and RS-232C driver(ST3232) are used for serial communication. 1) RS232C Communication block diagram ST3232 D-SUB9 Driver Female 2) RS232C Communication waveform Figure 4-2 RS232C Communication Block 2) RS232C Communication waveform Transmit(Printer to Host) Host Busy Host not Busy Host Busy... -
Page 49: Usb Communication Block Diagram
SLP-TX220x/TX223x 4-3-4 USB Communication Block Diagram The printer support the USB(Universal Serial Bus). The transfer type is the BULK A type D+, D- HOST Conn. B type D+, D- DEVICE Conn. Figure 4-5 USB 2.0 Communication Block Diagram 4-3-5 Ethernet Communication Block Diagram The printer support the Ethernet. -
Page 50: Thermal Pinter Circuit
SLP-TX220x/TX223x 4-3-6 Thermal Pinter Circuit First, the CPU sends a serial clock and serial data 432bits (144x3Chips, 54bytes) to the shift register of the TPH. Second, the CPU sends a Latch signal to the TPH. Then the Data of shift register are moved to the Latch register. -
Page 51: Disassembly And Assembly
SLP-TX220x/TX223x 5. Disassembly and Assembly 5-1 CASE-LOWER disassembly 1) Remove the one screws① 2) Separate the Cover-Bottom③ from the Case-lower⑤ 3) Remove the four screws② 4) Separate the Case-Lower⑤ and the Foot-Rubber④ from the printer. 5) Separate the Cover-Hinge⑥ from the Case-Lower⑤. Figure 5-1 CASE-LOWER disassembly - 51 - Ver. -
Page 52: Main-Pcb Disassembly
SLP-TX220x/TX223x 5-2 MAIN-PCB disassembly 1) Remove the two screws①. 2) Remove the connector wires②~⑧ from the PCB-Main⑩. 3) Separate the PCB-Main⑩ from the Printer. 4) Separate the Sheet-PCB⑨ from the Printer. Figure 5-2 MAIN-PCB disassembly - 52 - Ver. 1.01... -
Page 53: Ass'y Upper Disassembly
SLP-TX220x/TX223x 5-3 ASS’Y UPPER disassembly 1) Separate the Cover Hinge-L① and the Cover Hinge-R② from the Frame-Lower Assembly③. 2) Separate the Upper Assembly④ from the Frame-Lower Assembly③ Figure 5-3 ASS’Y UPPER disassembly - 53 - Ver. 1.01... -
Page 54: Case-Upper Disassembly
SLP-TX220x/TX223x 5-4 CASE-UPPER disassembly 1) Remove the six screws①. 2) Separate the Case-Upper② from the Frame-Upper Assembly③. 3) Remove the three screws④. 4) Separate the Cover-Top⑤ from the Case-Upper②. 5) Separate the parts⑥~⑪ from the Case-Upper②. Figure 5-4 CASE-UPPER disassembly - 54 - Ver. -
Page 55: Ass'y Tph & Ass'y Supply & Etc Disassembly
SLP-TX220x/TX223x 5-5 ASS’Y TPH & ASS’Y SUPPLY & ETC disassembly 1) Separate the TPH Assembly① from the Frame-Upper Assembly②. 2) Remove the two screws③ and separate the ④Supply Assembly from the Frame-Upper Assembly②. 3) Remove the four screws⑤ and one screw⑥ and one screw⑦ 4) Separate the parts⑧~⑨... -
Page 56: Clutch & Tph-Wire & Etc Disassembly
SLP-TX220x/TX223x 5-6 CLUTCH & TPH-Wire & ETC disassembly 1) Remove the one screw○ 2) Separate the parts①~④ from the Frame-Upper Assembly⑤. 3) Remove the two E-Rings⑥. 4) Separate the Parts⑦~○ from the Frame-Upper Assembly⑤. 5) Remove the two screws ○ Figure 5-6 CLUTCH &... -
Page 57: Ass'y Brk't-Sp-Tph & Door-Lock & Etc Disassembly
SLP-TX220x/TX223x 5-7 ASS’Y BRK’T-SP-TPH & DOOR-LOCK & ETC disassembly 1) Separate the BRKT-SP-TPH Assembly① from the Frame-Upper Assembly②. 2) Remove the four E-Rings③. 3) Separate the Parts④~⑬ from the Frame-Upper Assembly②. * Disassembly BRKT-SP-TPH Assembly (1) Remove the two Screws①. (2) Separate the parts②~④. -
Page 58: Ass'y Gear-C & Metal & Etc Disassembly
SLP-TX220x/TX223x 5-8 ASS’Y GEAR-C & METAL & ETC disassembly 1) Remove the three screw① and one e-ring②. 2) Separate the Parts③~⑨ from the Frame-Upper⑩. * Disassembly GEAR-C Assembly (1) Remove the three e-ring①. (2) Separate the parts②~③. Figure 5-8 ASS’Y GEAR-C & METAL & ETC disassembly - 58 - Ver. -
Page 59: Holder-Paper-L&R Disassembly
SLP-TX220x/TX223x 5-9 HOLDER-PAPER-L&R disassembly 1) Remove the four Screw⑤ and one Screw②. 2) Separate the Link-T③, the Spring Link④ and the Assy-Link LR⑥ from the Frame Lower①. 3) Separate the Holder-Paper⑦ from the Frame Lower①. 4) Separate the Holder-Paper-Fixed⑧ from the Holder-Paper⑦. Figure 5-9 HOLDER-PAPER-L&R disassembly - 59 - Ver. -
Page 60: Ass'y Motor Disassembly
SLP-TX220x/TX223x 5-10 ASS’Y MOTOR disassembly 1) Remove the Screws②~③. 2) Separate the Motor-GND④ and Assy-BRKT Motor⑤ from the Frame-Lower①. 3) Remove the two Screws⑥ and separate the MOTOR⑦ from the Assy-BRKT Motor⑤. 4) Remove the two WASHER-PLAIN⑧ and separate the parts⑨~⑩ from the Assy-BRKT Motor⑤. Figure 5-10 ASS’Y MOTOR disassembly - 60 - Ver. -
Page 61: Ass'y Guide-Paper(Gap-Sensor) Disassembly
SLP-TX220x/TX223x 5-11 ASS’Y GUIDE-PAPER(GAP-SENSOR) disassembly 1) Remove the two Screws① and separate the parts②~④ form the FRAME-LOWER⑫. 2) Remove the two Screws⑤ and separate the parts⑥~⑦ form the FRAME-LOWER⑫. 3) Remove the five Screws⑧ and separate the parts⑨~⑪ form the GUIDE-PAPER⑦. Figure 5-11 ASS’Y GUIDE-PAPER(GAP-SENSOR) disassembly - 61 - Ver. -
Page 62: Bm Sensor & Ass'y-Roller-Platen & Etc Disassembly
SLP-TX220x/TX223x 5-12 BM SENSOR & ASS’Y-ROLLER-PLATEN & ETC disassembly 1) Remove the four Screws① and separate the Cover-BM-Down② form the Frame-Lower ○ 2) Remove the two E-ring③ and separate the parts④~⑤ form the COVER-BM-DOWN②. 3) Remove the two Screws⑥ and separate the ASSY-PCB-BM-Down ⑦ from the Case-BM-Sensor④. 4) Remove the one Screws⑧... -
Page 63: Cleaning Head
SLP-TX220x/TX223x 6. Cleaning Head Printing quality might be degraded by dust, foreign substance, adhesive substance, or other pollution materials stuck in the printer head or inside the printer. When dirty, clean the print head as follows: ※ CAUTION - Make sure to turn the printer power off prior to cleaning. - As the print head gets very hot during printing, if intending to clean the print head, turn the printer power off and wait approximately 2~3 minute before commencement. -
Page 64: Cleaning Sensors, Roller Or/And Paper Path
SLP-TX220x/TX223x 6-2 Cleaning Sensors, Roller or/and Paper Path 1) Open the paper cover and the Ribbon Assembly, and remove the paper and ribbon. 2) Remove any dust or foreign substance using dry cloth or cotton swab. 3) Soak the cloth or cotton swab in alcohol for medical use and use it to remove adhesive foreign substances or other pollution materials. -
Page 65: Troubleshooting
SLP-TX220x/TX223x 7. Troubleshooting This character describes the methods for troubleshooting in this Label Printer. • Troubleshooting flow chart When the source of the problem is not clear, use the flowchart to find and replace a defective component. • Troubleshooting tables Follow the steps outlined in these tables to repair a defect whose symptoms are known. -
Page 66: Led 1 Dose Not Light
SLP-TX220x/TX223x 7-1-1 LED 1 dose not light - 66 - Ver. 1.01... -
Page 67: Led 2 Is Red Blink
SLP-TX220x/TX223x 7-1-2 LED 2 is red blink Turn off the power, then turn on the power Is label roll(paper) not insert? Replace or insert label(paper) roll Replace gap sensor ass’y Replace black mark sensor ass’y Replace PCB-main ass’y - 67 - Ver. -
Page 68: Led 2 Is Orange Blink
SLP-TX220x/TX223x 7-1-3 LED 2 is orange blink Turn off the power, then turn on the power Is Upper Assy opened? Close Upper Assembly Replace cover s/w ass’y Replace PCB-main ass’y - 68 - Ver. 1.01... -
Page 69: Self Test Is Not Normal
SLP-TX220x/TX223x 7-1-4 Self test is not normal - 69 - Ver. 1.01... -
Page 70: Data From Host Is Not Printed Normal
SLP-TX220x/TX223x 7-1-5 Data from host is not printed normal - 70 - Ver. 1.01... -
Page 71: Power Problem
SLP-TX220x/TX223x 7-2 Power Problem - 71 - Ver. 1.01... -
Page 72: System Problem
SLP-TX220x/TX223x 7-3 System Problem - 72 - Ver. 1.01... -
Page 73: Panel Pba And Media Sensor Problem
SLP-TX220x/TX223x 7-4 Panel PBA and Media Sensor Problem - 73 - Ver. 1.01... -
Page 74: Thermal Printer Head And Step Motor Problem
SLP-TX220x/TX223x 7-5 Thermal Printer Head and Step Motor Problem - 74 - Ver. 1.01... -
Page 75: Rs-232C Serial Communication Problem
SLP-TX220x/TX223x 7-6 RS-232C Serial Communication Problem - 75 - Ver. 1.01... -
Page 76: Usb Communication Problem
SLP-TX220x/TX223x 7-7 USB Communication Problem - 76 - Ver. 1.01... -
Page 77: Ethernet Communication Problem
SLP-TX220x/TX223x 7-8 Ethernet Communication Problem - 77 - Ver. 1.01... - Page 78 It is strictly prohibited to copy, store, and transmit the whole or any part of the manual and any property of the product without the prior written approval of BIXOLON Co., Ltd. The information contained herein is designed only for use with this BIXOLON product.
Need help?
Do you have a question about the SLP-TX220 and is the answer not in the manual?
Questions and answers