Table of Contents
Advertisement
Quick Links
A KÉSZÜLÉK HASZNÁLATA – ELŐKÉSZITÉS
TÁVOLITSA EL A VÉDŐ ELMEKET
A Robot használata előtt, távolitsa el a védő csikkot a Robot-on. (Lásd a 1. ábrát)
A KÉSZÜLÉK FELTÖLTÉSE
1. Elhelyezés és töltés:
A töltőülést a falmellett, egy sik felületre kell beszerelni. A
távolságtartási követelmények olyanok, hogy a töltőülés jobb és bal oldalától számitott 0.5
méterre illetve az elülső oldalától számitott 1.5 méterre ne helyezenek bármilyen tárgyat
sem. (Lásd a 2. ábrát)
2. Tápegység:
Csatlakoztassa a hálozati adaptert az egyenáramú csatlakozóhóz.
3. Oldalsó kefe szerelése:
Szerelje be az oldalsókefét a bal és a jobb oldalnak megfelelően
(Lásd a 3. ábrát)
4. Töltés:
Helyezze el a Robot-ot a töltőülésre feltöltődni (töltés alatt a jelzőlámpa villog és
amikor a töltés befejeződött, a lámpa átválik folyamatos világitásra. A feltöltési idő k.b. 5 óra.
(Lásd a 4. ábrát)
A tisztitás során a Robot érzékeli a hátramaradó teljesitmény szintjét és amikor ezt nem
elegndőnek itéli, akkor automatikuson elinditja az újratöltési módot, azaz automatikuson
megkeresi a töltőülést és elkezdi az újratöltödését. A Robot házigazdája is elindithatja az
újratöltési módot, a távirányitón lévő és ezt a célt szolgáló gomb megérintésével.
TÖLTÉSI ÓVINTÉZKEDÉSEK:
1. Biztositsa, hogy a töltőülés ne legyen kitéve a napsugárzásra, sőt a visszareflektált
napfényre sem. Ha olyan tárgyak vannak a lakásban, amelyek a fényt visszaverik a
Robot-ra, sziveskedjék ezeket eltakarni, eltávolitani vagy megfelelően áthelyezni.
2. Ahhóz, hogy biztositsák az előretervezett munkaidőt a Robot-nak, gondoskodjanak, hogy
használat előtt a Robot teljesen fel legyen töltődve. A feltöltési idő k.b. 5 óra.
3. A töltési folyamat közben ne kezdeményezzék a viztartály ki/be szerelését. Ezzel
biztositják a töltés biztonságát és nem teszik lehetővé, hogy a nedves mosópárna
megrongálja a padlót.
A TISZTITÁSIMÓD KIVÁLASZTÁSA
A különbőző tisztitási igényeknek megfelelően, a készülék számos tisztitási módja közül
választhat. Ön különböző tisztitási módot indithat el a Robot-on, a távvezérlő-n vagy a
V-TAC Smart Light Applikáción keresztül.
Automatikus tisztitás:
Használati javaslat: A leggyakrabban használt tisztitási módszer az, hogy a főmotor egy
ijalakú mozgást megtervez és el kezdi végezni – igy az egyész területet kitisztitja, az aktuális
otthoni környezetnek megfelelően.
Beallitasi modszer:
A leállitott állapotban hosszan nyomja meg a gombot és amikor a
Robot jellzőlámpája mutat ON – ez azt jelenti, hogy a Robot be van kapcsolva.
Ha a gombot rövid időre megnyomja (vagy megnyomja az automatikus tisztitás gombját a
távirányitón), a Robot elkezdi az automatikus tisztitást. Ahhóz hogy a Robot felvegye a
szuper műkődési módot, nyomja meg még egyszer a gombot. (Lásd a 5. ábrát)
EGY SZÓBÁNAK A TISZTITÁSA:
Használati javaslat:
egyszobás tisztitási mód
Beallitasi modszer:
Addig nyomkodja a tisztitásimódot kiválasztó gombot a távirányitón,
amig kiválasztotta az egy szóba tisztitási módot .
Figyelmeztetés:
Ha csak egy szobát kell tisztítani, kérjük zárja be a szba ajtóját és a Robot
központosított takarítást végez ebben a szobában.
Ha ez a szoba nem rendelkezik töltőüléssel, a készülék visszatér a kiindulási ponthoz.
Az egyágyas szoba tisztítási mód mindig a szuperfunkciós tisztítási mód.
ÉLTISZTÍTÁS:
Használati javaslat:
A beltéri saroktisztításnál a Robot megtisztítja a rögzített tárgyak
(például falak) kerületét és a éltisztítás befejezése után visszatér a töltőüléshez.
Beállítási módszer:
Addig nyomkodja a tisztitásimódot kiválasztó gombot a távirányitón,
amig kiválasztotta az éltisztítási módot az éltisztítás elindításához.
MANUÁLIS (KÉZI) VEZÉRLÉS:
Használati javaslat:
Kézi vezérlésű tisztításhóz alkalmas.
Beállítási módszer:
A távirányító gombjára kattintva vezérelheti a Robotot, hogy előre és
hátra mozduljon el és forduljon.
FUNKCIÓK - SZÜNET, FELÉBRESZTÉS ÉS KIKAPCSOLÁS
Szünet:
A robot működése közben nyomja meg a Roboton lévő vagy a távvezérlőn lévő
szünet gombot, a robot működésének szüneteltetéséhez.
Félébresztés:
Ha a Robot műkődését megállitjük több mint 10 percre, a készülék
automatikuson át fog váltani alvó üzemmódba. (Ekkor a jelzőfénye kialszik)
A Robot-ot felébresztheti a rajta található Start / Szünet gomb (Robot key) megnyomásával,
majd kattintson a Robot key-re vagy a távvezérlőn és az alkalmazáson lévő bármelyik
gombra, hogy újraindítsa a Robotot.
Kikapcsolás:
Miután a robot leállt, hosszan nyomja meg a Roboton a Start / Szünet gombot
és a Robot jelzőfénye kialszik, jelezve hogy a gép ki van kapcsolva.
* Miután a robot befejezte a munkáját, ajánljük hogy ne kapcsoljuk ki, ahhóz hogy maradjon
a töltöttségi állapotban, hogy a következő alkalomra jó teljesitőképes legyen.
Advertisement
Table of Contents

Related Manuals for V-TAC VT-5555


Summary of Contents for V-TAC VT-5555
- Page 1 A Robot-ot felébresztheti a rajta található Start / Szünet gomb (Robot key) megnyomásával, választhat. Ön különböző tisztitási módot indithat el a Robot-on, a távvezérlő-n vagy a majd kattintson a Robot key-re vagy a távvezérlőn és az alkalmazáson lévő bármelyik V-TAC Smart Light Applikáción keresztül. gombra, hogy újraindítsa a Robotot. Kikapcsolás: Miután a robot leállt, hosszan nyomja meg a Roboton a Start / Szünet gombot...
- Page 2 FUNKCIÓ – ÜTEMEZÉS (A ROBOT INDITÁSA AZ ELŐRE J. Zárja le a porkonténer fedelét, és szerelje fel a porkonténert a Robot-ra Megjegyzés: Amikor a készüléket tisztítja ne engedje, hogy víz kerüljön bele a ventilator BEPROGRAMOZOTT IDŐPONTBAN - AZ U.N. KÉSLELTETETT térségébe.
- Page 3 UTASITÁSOK AZ APPLIKÁCIÓ LETELEPITÉSÉHEZ 12. lépés: Módok és Funkciók 1. Tisztítási módok: A tisztítási mód elindításáhóz érintse meg az „Automatikus üzemmód” (vagy) „Rögzítési pont üzemmód” (vagy) „Egyágyas szoba üzemmód” (vagy) „Él üzemmód” 1. lépés: Kapcsolja az ON (BE) gombot a készüléken (vagy) „Töltési üzemmód”...
- Page 4 INSTRUCTION MANUAL INTRODUCTION & WARRANTY ROBOT VACUUM CLEANER (VT-5555) Thank you for selecting and buying V-TAC product. V-TAC will serve you the best. Please read these instructions carefully before starting the installing and keep this manual handy for future reference. If you have any another query, please contact our dealer or local vendor from whom you have purchased the product.
-
Page 5: Package Contents
Package Contents Romote Control (with battery x2) Charging dock Water Tank Robot Dust Box Mopping Pad Cleaning Brush Side Brush x2 Instruction manual Adapter Hepa filter... -
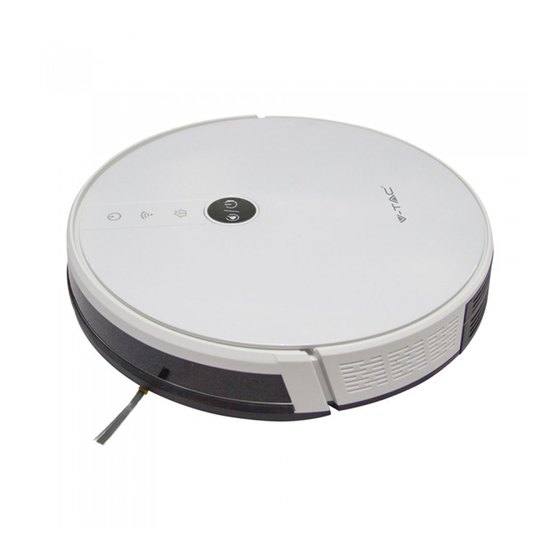
Page 6: Product Composition / Part Name
Product Composition / Part Name Front Robot Back Robot Down view Sensor Side Brush Start/Pause Key Drive Wheel Surface Dust Box Cover Charging Pole Piece Dust Box/ Water Tank Universal Wheel Button Omnidirectional Battery Lens Main Brush Assembly... - Page 7 Product Composition / Part Name Charging Dock Dust box Signal Indicator High Efficiency Strainer High Efficiency Net Cover Primary Filter Strainer DC Plug Dust Box Dust Box Side Cover Metal Sheet Dust Box / Water Tank/ Conductive Sheet Charging Dock Pins Remote Control Water Tank and Mopping Pad Screen Display...
-
Page 8: Product Usage - Preparation
Product Usage - Preparation Remove Protection Before using the Robot, remove the protective strip on the Robot. Remove the protective strip FIG 1... -
Page 9: Charging The Product
Charging The Product Placing and charging: The charging seat is placed against the 4. Charging: Place the Robot on the charging seat to wall and is to beplaced on a flat ground. Do not place articles charge (during charging, the indicator light flashes and once within the range of 0.5m left and right and 1.5m ahead. -
Page 10: Cleaning The Product
You can start various cleaning Applicable scenario: Cleaning single room mode through Robot, remote control or V-TAC Smart Light App. Setting method:Click the remote control mode switch button select the single room cleaning mode to start the single room cleaning. - Page 11 Functions - Pause, Wakeup & shutdown Pause: During the operation of the Robot, press the pause key or the remote control pause key to pause the operation of the Robot. Awaken: If the Robot stops working for more than ten minutes, it will automatically enter sleep mode (The Robot lights will turn off).You can wake up the Robot by clicking the Start/Pause Key(Robot key) on the device, then click the Robot key or any key of the remote controller and app to restart Shutdown: After the Robot stops working, press the Start/Pause Key(Robot key) for a long time, and the indicator light of the Robot machine goes switches off to indicate that the machine has been shut down.
- Page 12 Using The Water Tank *Do not use the floor mopping function on carpets. Note:After mopping the floor, please empty the water tank and remove the mopping pad. Add water Install the Water Tank FIG 6 FIG 7 Start Mopping the Floor Install Mopping Pad FIG 8 FIG 9...
- Page 13 Maintenance - Dust Box A.Press the dust box button to take out the dust box C. Dumping garbage FIG 10 FIG 12 B.Open the dust box side cover Open the high efficiency filter FIG 13 FIG 11...
- Page 14 Maintenance - Dust Box F.Rinse the primary filter screen E. Open the high-efficiency screen cover and take out the high-efficiency screen and the primary-efficiency screen. High-efficiency screen is not recommend for water washing. Tap gently to remove dust. FIG 15 G.The dust box is to be scrubbed clean with dishcloth.
- Page 15 Maintenance - Dust Box H.Dry the dust box and assemble the filter, and keep it dry to ensure its service life. Note: It is recommended to wash the primary strainer with water 15 - 30 days after it is used. The maximum service life of the high efficiency filter screen is 3 months.
- Page 16 Maintenance - Water Tank & Mopping Pad 1.Remove the water tank. 4.Clean the mopping pad. FIG 18 FIG 21 2.Remove the mopping pad. 5. Dry the mopping pad. FIG 19 FIG 22 3.Empty/Drain the Water Tank. 6. Dry or naturally dry the water tank FIG 20 FIG 23...
- Page 17 Maintenance - Main Brush & Side Brush 1. Open the main brush cover assembly 3. Use the utility tool for cleaning tangled hair (Cleaning main brush) FIG 24 FIG 26 2. Remove the main brush shaft(as shown below) 4. FIG 25 FIG 27...
- Page 18 Maintenance - Charging dock pins, Down view sensor, Drive & universal wheel Warm Tip: The interior of the charging pole piece, the down-view sensor and the striking plate all contain sensitive electronic components, please use dry dishcloth when cleaning, and do not use wet dishcloth to prevent damage caused by water inflow. Clean up charging dock pins Clean drive wheels and universal wheel FIG 28...
-
Page 19: Troubleshooting
Troubleshooting Prompt Tone Cause of Failure Solution Please put the Robot back to the ground and press the Wheels off the ground Robot suspended cleaning button again. Install the dust box to the Robot and press the cleaning Dust box not installed Dust box removed and not installed key again. -
Page 20: Technical Specifications
Technical Specifications Classification Projects Parameter Diameter 330 mm Height 76mm Structural class Net weight 2.7 kg Voltage 14.4 volts Battery Battery 2500 mah rechargeable lithium battery pack Dust box capacity 600 ml 350 ml Water tank capacity Charging type Automatic charging / manual charging parameter Cleaning mode Auto / single room / edge / mop floor... - Page 21 Step 2: Scan the given QR code, or download “V-TAC Smart Light’ from the App Store (iOS) or the Google Play Store (Android). Step 3: Open the V-TAC Smart Light app and tap on register for creating a new account. If you already have an existing account, please proceed to please proceed to logging in.(Ref Fig 1)
- Page 22 Step 5: Enter the verification code which will be sent to your mobile number/emai id, then assign a new password to your account and tap on “Confirm” to complete the registration process. (Ref Fig 3). Once done you will be redirected to V-TAC Smart Light Home page.
- Page 23 Step 7: To select the device, tap on Home appliances, and then choose ‘Robot Vaccum’ to start Pairing process of the device to the app.(Ref Fig 5) Step 8: A) To start pairing the device make sure the light on the device is blinking rapidly. B) Power on , long press power button for 5 seconds till the indicator flashes rapidly.
- Page 24 Step 9: Once you have successfully completed step 8, you will be redirected to “Connecting Now” page, where the App searches, registers and initializes the device (ref Fig 8). Once it is completed your device will be successfully paired. Step10: Once your device is successfully paired, rename the device to your preference. And then tap on completed. (Ref Fig 9) Step11: You can now start controlling your device with the App.
- Page 25 Step 12: Modes And Features 1. Cleaning Modes: To start cleaning mode Tap on “Auto Mode” (OR) “Fix point mode” (OR) “Single room mode” (OR) “Edge mode” (OR) “Charging mode Choose ”Cleaning strength” to set the suction power setting (Ref Fig 11) 2.
- Page 26 3. Standby/Sleeping/Pause Mode: to pause the device (OR) press Idle mode, the device will pause.(Ref Fig 15) Tap ON/OFF to make the device enter sleeping mode (or) Standy.(Ref Fig 15) Note: When in sleep mode the App page will turn into darker shade(Ref Fig 16). When the device is in sleeping mode, tap ON/OFF button in order to wake the device to standby mode.
- Page 27 6. Device Sharing: To Share device please tap on the top right corner of the screen , then select Shared Devices on the page and add the registered phone number or email id of the person you want to share the device with. (Ref Fig19 and 20) Fig 19 Fig 20 7.
- Page 28 INTRODUCCIÓN Le agradecemos que ha elegido y adquirido la V-TAC. V-TAC le servirá del mejor modo posible. Pedimos que antes de comenzar la instalación lea atentamente las presentes instrucciones y las guarde en un lugar adecuado para consultas próximas. En caso de dudas o preguntas, póngase, por favor, en contacto con el representante o suministrador más cercano de quien ha comprado el...
Need help?
Do you have a question about the VT-5555 and is the answer not in the manual?
Questions and answers