Advertisement
Quick Links
Download this manual
See also:
User Manual
Simple Media Platform Quick Installation Guide
V1.0-N
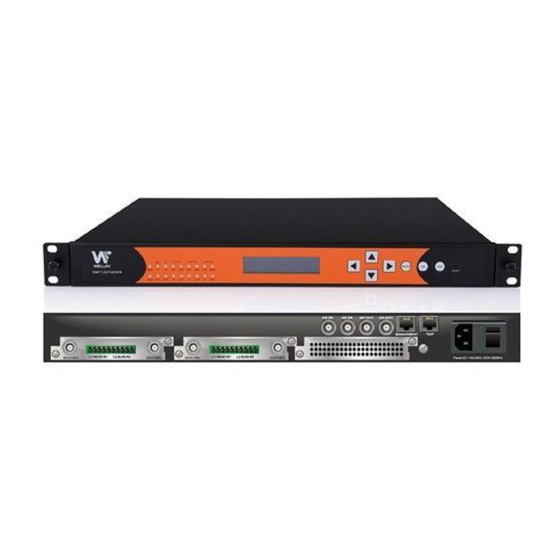
Simple Media Platform
Quick Installation Guide
Advertisement

Related Manuals for Wellav SMP100


Summary of Contents for Wellav SMP100
- Page 1 Simple Media Platform Quick Installation Guide V1.0-N Simple Media Platform Quick Installation Guide...
-
Page 2: Installation Instruction
Simple Media Platform Quick Installation Guide V1.0-N 1. Installation Instruction 1.1 Mounting unit to a 19” rack When selecting the installation site, try to comply with the following: Protective Ground - The protective ground lead of the building's electrical installation should comply with national and local requirements. -
Page 3: Wiring Connection
Simple Media Platform Quick Installation Guide V1.0-N 5.2 Wiring Connection Before setting up the connection, please turn off the equipment and all other connected external devices. The equipment and all connected external devices are required grounded. Turn on the devices only after the wiring connection is completed. Otherwise the device may be damaged. - Page 4 Simple Media Platform Quick Installation Guide V1.0-N can use two RF cable to connect the module with cable source at the two signal input ports. And if necessary, you can loop out the signal for other usage. 3. DVB-T/ISDB-T module: The DVB-T / ISDB-T module supports receiving programs compliant with DVB-T / ISDB-T standard from 4 different frequencies simultaneously.
- Page 5 Simple Media Platform Quick Installation Guide V1.0-N application. If you need to use the IP board for both receiving and transmitting data, you can connect the left port to a signal source, and the right to a IP stream receiving device. ...
- Page 6 Simple Media Platform Quick Installation Guide V1.0-N program from AV source, a specified AV cable, which is packed in your package, is needed to connect the source to the CVBS/SDI port and the L-Audio-R port next to it. To encode a program from SDI source, one common SDI cable is needed to connected the source to the CVBS/SDI interface.
- Page 7 Simple Media Platform Quick Installation Guide V1.0-N encoding 2 HDMI channels simultaneously. You can use a HDMI cable to connect the HDMI source to the HDMI port of the module. 12. DVB Scrambler Module: Connect the RJ45 port with crossover Ethernet cable to the CAS server.
- Page 8 Simple Media Platform Quick Installation Guide V1.0-N system is highly recommended. 15. Management Port Connection: Connect the Management Port on the rear Panel to a switch, and then connect the switch to a Monitor computer with crossover Ethernet Cable.
- Page 9 Simple Media Platform Quick Installation Guide V1.0-N 6. Operation Instructions 6.1 Powering Up & Initializations Before powering-up the device, make sure that all cabling is correctly connected. The device is correctly connected to the power inlet and grounded. When you have finished the wiring, power up the device, you can see the booting information through the LCD screen on the front panel, the initialization will take about one or two minutes.
- Page 10 Simple Media Platform Quick Installation Guide V1.0-N 1. Setup a connection between the media platform and monitor PC. Note: Step 1 to Step 2 is operated from the front panel. There are six buttons on the front panel: Up / Down / Left / Right / Menu / OK / Esc for you to manually configure the basic parameters of the device.
- Page 11 Simple Media Platform Quick Installation Guide V1.0-N Step 2: For first time log on, User Name and Password are required. Default User Name and Password are “admin”. Select “Remember Me” if you want to log on without inputting the User Name/Password next time.
- Page 12 Simple Media Platform Quick Installation Guide V1.0-N Note: If the equipment is not shown on the list, please try to Reset the Ethernet through the navigate key on the front panel to active the IP connection. (Ethernet Reset Steps: Menu>System>Eth Control, Press OK Twice) Main Interface Introduction Click on the target equipment in the list, the following screen will display: (PIC-6.2-3) PIC-6.2-3...
- Page 13 Simple Media Platform Quick Installation Guide V1.0-N 6.3 Quick Configuration on key parameters In the Parameter setting and configuration area, Total 12 tabs are listed at the top, “Status”, “Program Info”, “System”, “License”, “Upgrade” and “Log” are fixed for mother board configuration or status monitor for both mother board and sub modules.
- Page 14 Simple Media Platform Quick Installation Guide V1.0-N In this page, status information of mother board and all the sub modules are compliant with below rules: 1. Different colors in the Bitrate Info indicate different meaning: Orange: the total input bit rate; Blue: the effective input bit rate;...
- Page 15 Simple Media Platform Quick Installation Guide V1.0-N ① Input Program Configuration area ② Output Program Configuration area ③ Operation Buttons PIC-6.3-2 ① Input Program Configuration Area: the “Input Program Configuration” is on the left side of the “Program Info” window. It displays all the inserted modules information and the received input streams.
-
Page 16: Basic Program Setting
Simple Media Platform Quick Installation Guide V1.0-N Transfer button: to transfer the selected stream/PID from the “Input Program Info window” to the “Output Program Info window”. Set button: to apply the changes to the NMS. The setting will lose if the equipment is powered off. - Page 17 Simple Media Platform Quick Installation Guide V1.0-N Program Info”, Select the “Board#[4XDVB-S2]”, click + beside it to expand the port list, there are four ports under the DVB-S2 module, representing the corresponding four physical RF ports. Under each port there’s a TS1 sub tree. Right click it, in the new menu, click “Scan TS”, all the programs delivered from the source will display.
- Page 18 Simple Media Platform Quick Installation Guide V1.0-N If a module in the “Output Program Info window” is intended to receive a program or TS for further processing, the first step you need to do is Add TS, which is to set up a logical TS channel for receiving program or TS.
- Page 19 Simple Media Platform Quick Installation Guide V1.0-N PIC‐6.3‐5 6.3.2 Configuration parameters of sub modules Module parameters should be set correctly to ensure it will work according to your application. In this document, only key parameters are introduced for you to quickly install and configure the devices, follow the steps and keep the default value of the other parameters, you can setup the device for basic function, if you need to know the specified parameter beyond this document, please refer to the User Manual.
- Page 20 Simple Media Platform Quick Installation Guide V1.0-N 6.3.2.1 DVB-S/S2 Receiving Module Key Parameters: Parameters Description Port Indicates which input port the channels comes from Input the frequency of transponder which you want to receive Sat Frequency programs. The unit is MHz Symbol Rate Input the symbol rate of the transponder. The unit is KS/s Select the voltage provided to LNB (13V for vertical or 18V for Polarization ...
- Page 21 Simple Media Platform Quick Installation Guide V1.0-N 6.3.2.2 DVB-C Receiver configuration Key parameters: Parameters Description Port Indicates which input port the channel comes from. Frequency Frequency on which the channel is transmitted. The unit is in KHz. Symbol Rate Symbol rate of the input channel. The unit is in KS/s. QAM Mode Select the actual QAM mode of the input channel. Note: the input signals of Port 1&2 are from the ‘RF‐IN 1/2’ port of tuner 1, and the input signals of Port 3&4 are from the ‘RF‐IN 3/4’ port of tuner 2. Please contact your program provider for the parameters details of the channel if you are not clear about. Receive Program DVB-C is a receiver module. If the parameters of the module are correctly configured, it is ready to receive programs (or TS) from cable source.
- Page 22 Simple Media Platform Quick Installation Guide V1.0-N 6.3.2.3 DVB-T / ISDB-T Receiving Module Key Parameters: Parameters Description Port Indicates which input port the channels comes from Input the frequency of being used by the content provider which you Frequency want to receive programs. The unit is MHz Bandwidth depends upon the current standards on different countries, Bandwidth but it is variable at 6 MHz, 7 MHz, and 8MHz. Mode Indicates which signal you want to received ( ISDB‐T / DVB‐T) Please contact your program provider for the parameters details of the channel if you are not clear about. Receive Program DVB-T/ISDB-T is a receiver module. If the parameters of the module are correctly configured, it is ready to receive programs (or TS).
- Page 23 Simple Media Platform Quick Installation Guide V1.0-N 6.3.2.4 ASI I/O Module Key Parameters: Parameters Description Type Set each ASI port to be Input or Output. PacketSize Set 188 or 204 packet size for outputs. ConstantRate(Mbit) Set constant bitrate for ASI output. Program Input & Output Setting ASI module is a stream I/O module. Its four posts can be configured as either Input or output according to your application: ASI Input program setting: If certain ports of ASI module are set as Input, the ASI module will appear in the “Input...
- Page 24 Simple Media Platform Quick Installation Guide V1.0-N 6.3.2.5 GbE IP I/O Module IP Module Setting Interface By selecting the ‘IP’ tab on the NMS operation interface, the IP module setting interface will be displayed. The settings on the IP module include the settings on the ‘Input’, ‘Output’ and ‘Setup’. ...
- Page 25 Simple Media Platform Quick Installation Guide V1.0-N Gateway Set Gateway of the IP module MAC Address MAC address of the IP module ‘Input’ Setting of the IP I/O Module The ‘Input’ setting menu is to set the IP input function for receiving multicast or unicast IP stream. Key Parameters: Parameters Description IP I/O module support up to 64 channels input and 32 channels...
- Page 26 Simple Media Platform Quick Installation Guide V1.0-N Receive program If certain channels of the IP module are set as Input type, the IP module with the assigned channels will appear in the Input Program List, you can Scan TS to receive the input programs (IP stream).
- Page 27 Simple Media Platform Quick Installation Guide V1.0-N Note: this parameter setting applies to all channels. Channel configuration EnableChannel Enable or disable corresponding output channel SourcePort Set port of multicast/unicast DestIPAddress Set IP address of the multicast/unicast. Protocol Select UDP/RTP for multicast/unicast Program setting If certain of the IP channels are set as output, the IP module with the assigned ports will appear in the Output Program List.
- Page 28 Simple Media Platform Quick Installation Guide V1.0-N Enable Switch ‘Enable’ or ‘Disable’ for the selected channel output Set the carrier frequency for the first modulation frequency. Note: for the RF frequencies of port 2~8, they will be set RF Frequency (KHz) automatically by the NMS base on the frequency of port 1 and the ‘Bandwidth’ setting. Set modulation type of each modulators port. The modulation Mode mode can be QAM16, QAM32, QAM64, QAM128, QAM256. Program setting ...
- Page 29 Simple Media Platform Quick Installation Guide V1.0-N 90dBuV~112dBuV. Enable Switch ‘Enable’ or ‘Disable’ for the selected channel output Set the carrier frequency for the first modulation frequency. Note: for the RF frequencies of port 2~4, they will be set Frequency (KHz) automatically by the NMS base on the frequency of port 1 and the ‘Bandwidth’ setting. Program setting OFDM module is to receive the programs, then modulate them for transmitting, the program setting, please refer to chapter 6.3.1.2 Transfer a program. 6.3.2.8 CI Descrambling Module Parameter Setting The CI descrambling module is for descrambling the input scrambled stream via CAM module.
- Page 30 Simple Media Platform Quick Installation Guide V1.0-N Key Parameters: Parameters Description CAM No. Indicates which CAM the user is operating. Enable--turn on the CI module and enable the input stream to pass through the CI module and get descrambled. Disable--Disable any input stream to pass through the CI Enable/Disable switch module and thus the CI module will not be functional.
- Page 31 Simple Media Platform Quick Installation Guide V1.0-N Descramble Setting Select a scrambling program of a receiving module in the input window and transfer it to the corresponding CI module port (port 1 or 2) in the output window. The EMM data of the scrambling program must be transferred at the same time.
- Page 32 Simple Media Platform Quick Installation Guide V1.0-N After the program is scrambled, the button indicators of the program name will turn to black color. Back to the “Input Program Info window”, the descrambled programs have already been automatically transferred to the corresponding port of the CI module and is ready for further process.
- Page 33 Simple Media Platform Quick Installation Guide V1.0-N Parameters Description Channel Indicates which input port the channel comes from. Video Source To select the correct video source for the input. Audio Source To select the correct audio source for the input. Program Processing After you have finished above parameter setting, the encoder module is ready to receive program source and encode it into the corresponding format (depending on the encoder...
- Page 34 Simple Media Platform Quick Installation Guide V1.0-N 6.3.2.10 DVB Scrambler Module Scrambler module setting refers to the operation of conditional access system you use to scramble the program, please refer to the user manual for detail. 6.3.2.11 MPEG2 to MPEG4 / MPEG4 to MPEG2 Transcoder Module Parameters Description The channel quantity represents the supported max.
- Page 35 Simple Media Platform Quick Installation Guide V1.0-N Program setting Transcoder module will display in both the “Input Program Info window” and the “Output Program Info window”. If you want to transcode a program received from a certain module in the Input Program Info window, you can transfer it to the transcoder module in the Output program Info window.
Need help?
Do you have a question about the SMP100 and is the answer not in the manual?
Questions and answers