Table of Contents
Troubleshooting

Related Manuals for Artel PCS3

Summary of Contents for Artel PCS3
- Page 1 ® Procedure Guide ® 25 Bradley Drive Westbrook, Maine USA 04092-2013 tel: 207-854-0860, toll free: 1-888-406-3463 fax: 207-854-0867 email: orders@artel-usa.com email: support@artel-usa.com web: www.artel-usa.com 15A3356O...
- Page 2 Copyright © 2017 Artel, Inc. Products are intended for use with the Artel PCS as applicable. The Artel PCS and its components are covered by patents listed at www.artel- usa.com/patents. All Artel product Safety Data Sheets are available at www.artel-usa.com/support- ordering.
-
Page 3: Table Of Contents
TABLE OF CONTENTS (Sections 1-5) INTRODUCTION ……………………………………………………………………….1 INSTRUMENT PREPARATION Location ..................... 3 Set-up and Cabling Illustration ..............3 Cabling Procedures ................... 4 Seiko Printer ....................4 RS232 Port ....................5 REAGENT KIT Contents of Standard Reagent Kit ............. 7 Cleaning of PCS Vials ................8 Storage ...................... - Page 4 TABLE OF CONTENTS (Sections 6-App. F) INSTRUMENT SETUP Instrument Setup Menu................29 Setting Date ..................... 30 Setting Time ..................... 30 Choosing Date Format ................31 Customizing the Printout Header ............. 31 Computer Link Flags ................32 Serial Data Output (Data Collect Flag) ............. 33 Choose Nomenclature ................
-
Page 5: Introduction
(from 0.1 μL to 5000 μL). Measurements ® made with the Artel Pipette Calibration System (PCS ) are traceable to the International System of Units (SI) through reference standards developed and maintained by the National Institute of Standards and Technology, USA (NIST). - Page 6 This Page Intentionally Left Blank 15A3356O...
-
Page 7: Instrument Preparation
INSTRUMENT PREPARATION Location The Instrument should be located in an area that is out of direct sunlight and away from local heat sources (e.g. an oven or heat vent). Set-up and Cabling Illustration 15A3356O... -
Page 8: Cabling Procedures
Cabling Procedures 2.3.1 Connecting the Instrument to Power The Instrument requires a three-prong electrical receptacle supplying single-phase power from 100-250 VAC, 50/60 Hz in which to plug the Power Supply. The same power source should be used for the Instrument and the Printer. This power line should be free from transients or voltage variations caused by other equipment such as water baths or refrigerators. -
Page 9: Rs232 Port
Paper Feed Switch. Pressing this switch feeds the paper continuously. Paper feed will work only when the OFF LINE indicator illuminates or flashes. On Line/Off Line/Paper End Switch. Pressing this switch shifts the Printer from ON LINE to OFF LINE and vice versa. When ON LINE, the Printer is ready to receive instructions from the Instrument. - Page 10 This Page Intentionally Left Blank 15A3356O...
-
Page 11: Reagent Kit
REAGENT KIT Contents of Standard Reagent Kit Blank Reagent Vials: (12) Prefilled with Blank Reagent. Sample Solutions: Range 1: For pipette volumes 200 to 5000 μL Range 2: For pipette volumes 50 to 199 μL Range 3: For pipette volumes 10 to 49 μL Range 4: For pipette volumes 2 to 9 μL... -
Page 12: Cleaning Of Pcs Vials
Refer to Safety Data Sheet (SDS) for proper disposal. All PCS Reagents are non-hazardous and aqueous-based. Ordering To place an order or request a product list, please contact Customer Service at: Email: orders@artel-usa.com Local: 207-854-0860 Toll Free: 888-406-3463 Fax: 207-854-0867 15A3356O... -
Page 13: Operation
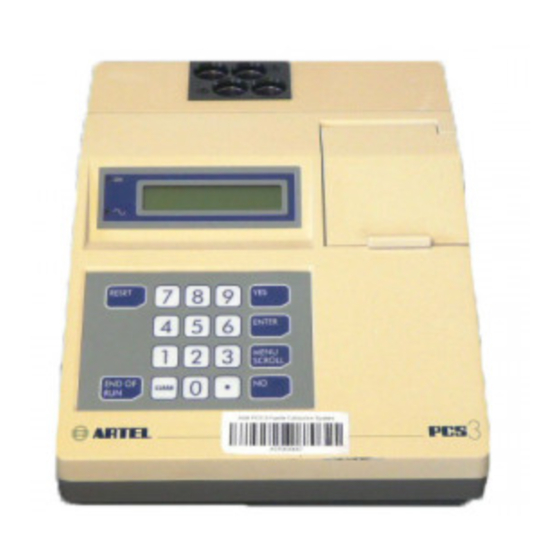
OPERATION Instrument Keys and Operating Functions Starts a procedure or is used as a positive response to a question. Enters a numerical value such as the pipette ID number or volume. It also can be used when checking adjustable ENTER volume pipettes to signify a change to a new volume. -
Page 14: Initial Power-On Sequence
Initial Power-On Sequence 4.2.1 Turn on the Instrument and the Printer. Be sure the Printer is ON LINE. 4.2.2 Before performing this procedure ensure that the Reagent Kit is at the same temperature as the Instrument. NOTE: If the kit has been moved from another location, depending on the difference in temperature between the two locations, allow time for equilibration. - Page 15 If NO is pressed, the following prompt will be displayed: Main Menu Pipette Calibration? If YES is pressed to continue with the calibration, there is no certainty that the results the PCS obtains will meet the system specifications. The display will prompt to enter the Lot Code: Enter Reagent Lot Code: 4.3.2 Enter the Lot Code.
- Page 16 4.3.3 The Instrument will perform a brief self-calibration. The following prompt will be displayed: Self-Calibration Please Wait Followed by: Insert CAL A Vial IMPORTANT Use the CAL A from the Reagent Kit in use, not the CAL A from the Instrument Calibrator Kit.
-
Page 17: Inserting The Blank Vial
The following prompt will be displayed: Remove Cap and Insert Blank Inserting the Blank Vial IMPORTANT Blank Reagent Vials must be handled with care. Each vial contains a predetermined amount of liquid and spillage will reduce accuracy. The lower portion of the Blank Vial is a part of the optical path and smudges will decrease the accuracy of the results. -
Page 18: Entering Pipette Id Number
Enter the Operator ID (not exceeding 20 digits or characters) for this calibration and press ENTER. This ID appears on the Printout. For alphabetic character entry, see Appendix E. If the ID is entered incorrectly, press CLEAR and enter the correct ID. Entering Pipette ID Number At the prompt: Enter Pipette ID:... -
Page 19: Pipetting Sample Solution
Range Pipette Sample # 1 Pipetting Sample Solution NOTE: The number of data points that are collected to calibrate a pipette depends on the requirements of the laboratory and its calibration policy. Additionally, the technique used to check the pipettes should coincide with the method for its general use. 4.7.1 Locate the appropriate Sample Solution in the Reagent Kit. - Page 20 For additional technique instructions, contact ARTEL Technical Support, and refer to the information included in the back of the Procedure Guide. 4.7.3 Aspirate the Sample Solution from the Sample Aliquot Container with the pipette to be calibrated, using standard pipetting technique.
-
Page 21: Pipetting Additional Samples
Followed by: Reading Sample # 1 Please Wait Pipetting Additional Samples After reading Sample #1, the Instrument will display the results of the reading, and will prompt to dispense the next sample: Result #1 XXX.X Pipette Sample # 2 Follow the same procedure (steps 4.7.3 through 4.7.5) for Sample #2 and for each subsequent sample addition. -
Page 22: Performing Additional Calibrations In One Vial
Press NO. If a given data point from the statistical summary needs to be deleted, press YES. At the prompt: Enter Pt # to Delete Enter the Sample # of the data point to be deleted. At the prompt: Delete More Points? (Yes/No) Press YES to continue to delete data points. - Page 23 Another Cal w/ Vial? (Yes/No) Press YES to continue. The next prompt will instruct to enter an Operator ID: Enter Operator ID: Enter the Operator ID (not exceeding 20 digits or characters) for this calibration and press ENTER. This ID appears on the Printout. For alphabetic character entry, see Appendix E. If the ID is entered incorrectly, press CLEAR and enter the correct ID.
-
Page 24: Continuing A Calibration Run With Another Vial
4.11 Continuing a Calibration Run with Another Vial When the vial's maximum capacity is reached and additional data points are needed for the current pipette, answer YES to the Use New Vial? (Y/N) prompt. The Instrument will prompt to remove the current vial and insert another one. -
Page 25: Suggested Initial Tolerance Limits
Suggested Initial Tolerance Limits Based on our experience with many different makes and models of pipettes, Artel recommends the values in Table 1 as a starting point for developing achievable tolerance limits. Refer to Artel Lab Report, Issue 5, “Setting Tolerance for pipettes in the laboratory” for additional information. - Page 26 Table 1: Artel’s suggested initial tolerance limits at common calibration volumes. Pipette Volume, µL Relative Error Absolute Error Inaccuracy ±% Inaccuracy ± µL STD µL Nominal Setting 0.04 0.02 20.0 10.0 0.05 0.025 10.0 0.25 20.0 10.0 0.20 0.10 10.0 20.0...
-
Page 27: Instrument Cal A And Calibration
INSTRUMENT CAL A AND CALIBRATION Instrument CAL A IMPORTANT Never remove the caps of the Calibration Standards. The CAL A from the Reagent Kit is used to zero the Instrument. Since a small amount of drift will occur due to temperature variations, it is important to compensate for this effect by using the CAL A. - Page 28 Main Menu Pipette Calibration? Press NO or MENU SCROLL. Main Menu Instr. Calibration? Press YES. The following prompt will be displayed: Instrument Cal. Menu Perform Instr. Cal.? Press YES to continue with an instrument calibration. The instrument will then check the temperature, and if it is outside the specified range for proper operation (18 °C to 28 °C), the following prompt will be displayed: Temp.
- Page 29 The display will prompt the user to enter the Calibrator Lot Code: Enter Calibrator Lot Code: The Calibrator Lot Code is found on the label on the inside of the box lid in the Calibrator Kit. It will be a four or five digit number. After entering the Calibrator Lot Code, press ENTER.
- Page 30 IMPORTANT The vials in the Instrument Calibrator Kit should always be inserted into the Vial Holder in the same orientation. The labels for these vials should face toward the front of the Instrument, with the vertical lines on the vials facing forward. Use the CAL A provided in the Instrument Calibrator Kit.
-
Page 31: Instrument Calibration Summary
Instrument Accuracy The ratio of the CAL sample absorbance at 520 nm to the absorbance at 730 nm for each of the CAL vials B, C, and D The correct value of that ratio as provided by the Calibrator Code The percentage error of the measured ratio A Pass/Fail rating at each absorbance. - Page 32 Main Menu Instr. Calibration? Press YES. Instrument Cal. Menu Perform Instr. Cal.? Press NO. Instrument Cal. Menu Print Cal. Summary? Press YES. The calibration summary will be printed out. See Appendix B for an example Printout. 15A3356O...
-
Page 33: Instrument Setup
INSTRUMENT SETUP Instrument Setup Menu The Instrument Setup Menu is used to access specific setup options. 6.1.1 To access the Setup Menu, respond to the Instrument prompt at the Main Menu with NO or MENU SCROLL, until the following prompt appears: Main Menu Instrument Setup? Press YES. -
Page 34: Setting Date
Setting Date Access this option using the Setup Menu. (Refer to Section 6.1, “Instrument Setup Menu.”) Press YES at the prompt: Setup Menu Check/Set Date? The following prompt will be displayed: Correct Date? (Y/N) mm/dd/yy If the date displayed is correct, press YES. If the date is incorrect, press NO and enter correct date. -
Page 35: Choosing Date Format
Access this option using the Setup Menu. (Refer to Section 6.1, “Instrument Setup Menu.”) Press YES at the prompt: Setup Menu Edit Report Hdr 1? The following prompt will be displayed: Hdr 1 Edit? (Y/N) ARTEL 15A3356O... -
Page 36: Computer Link Flags
The Computer Link Flags only have effect when the PCS is operating in the “Linked” mode – that is, when it is controlled by the software in a host PC, such as with Artel Pipette Tracker™ or PCS Software. Access this option using the Setup Menu. (Refer to Section 6.1, “Instrument Setup Menu.”) -
Page 37: Serial Data Output (Data Collect Flag)
This option effectively gives control of the PCS to the host PC, and requires that the PC run software capable of controlling the PCS, such as ARTEL Pipette Tracker™ software. The Serial Data Output provides an alternative method for those users who wish to capture calibration data in a PC, but don’t want the PC to control the process. -
Page 38: Choose Nomenclature
IMPORTANT The Data Collection setting should be turned on only if calibration results are being sent to a PC via the RS232 port. Contact ARTEL for more information about this feature. Choose Nomenclature The summary statistics shown near the end of a PCS pipette calibration can be labeled with one of two different (but equivalent) nomenclatures. -
Page 39: Display Uncertainty
Access this option using the Setup Menu. (Refer to Section 6.1, “Instrument Setup Menu.”) See Appendix C for formulas. Press YES at the prompt: Setup Menu Choose Nomenclature? The following prompt will be displayed: Nomenclature: Change? (Yes/No) Press NO to keep the nomenclature as displayed. Press YES to change the nomenclature to the alternative selection. -
Page 40: Signature Block
6.10 Signature Block (available in version 7A2.1XX or newer firmware) The Signature Block menu entry allows the display “Performed By:” and “Reviewed By:” signature lines to appear on the Printout. Each line will also contain a “Date:” section for recording the date. Access this option using the Setup Menu. -
Page 41: Troubleshooting
These diagnostics are useful when performed in conjunction with the corrective action outlined in the Troubleshooting Guide, or when working with Artel Technical Support. Contact Technical Support at 888- 406-3463. 7.1.1 Access the Diagnostics Menu at the Main Menu by pressing NO or... - Page 42 If both lamp voltages are stable and below 3.5 volts, the lamp is operating properly. If a problem with the filters is suspected, Artel Technical Support can provide assistance through this diagnostic function. Test Mixer? This entry determines if the mixer is clear of obstructions and operating properly.
- Page 43 MENU SCROLL until the following prompt appears: Diagnostics Menu Go to Main Menu? 7.1.4 Press YES. The instrument will return to the following prompt: Main Menu Pipette Calibration? 15A3356O...
-
Page 44: Troubleshooting Guide
PCS, understanding probable causes, and suggesting corrective action. If a problem cannot be resolved by following these instructions, please call Artel Technical Support at 888-406-3463 option 2 for assistance. Note: symptoms are listed first, followed by displayed messages in alphabetical order. - Page 45 Refer to Section 8.3, “Removal of Rear instrument or pipette calibration. ERROR - 2 Access Cover.” Press Reset Call Artel Technical Support if this doesn’t resolve the problem. ERROR - 10 FATAL INTERNAL ERROR The instrument’s memory was Call Artel Technical Support for alternating with ...
- Page 46 The user section of EEPROM is calibration). Check that the printout Press any Key corrupted. header is correct; if not, re-enter it. Call Artel Technical Support if you need assistance with these steps. Factory calibration memory is Memory Protect Error Call Artel Technical Support for...
- Page 47 1 minute or longer, then power RETRY? (Y/N) back on. If the problem still persists, call Artel Technical Support for assistance. If calibration results do not need to be sent to a PC via the RS232 port, press CLEAR.
- Page 48 This Page Intentionally Left Blank 15A3356O...
-
Page 49: System Maintenance
SYSTEM MAINTENANCE Preventive Maintenance The PCS Instrument requires minimal operator maintenance. To maintain the PCS in top performance condition, it is recommended to keep the instrument dust free, periodically clean the exterior, and have it inspected annually by the manufacturer. The operator, depending upon the condition of the working environment, should determine the frequency of maintenance. -
Page 50: Maintenance Log Sheet
Maintenance Log Sheet ® S/N__________________________ Next Scheduled Date Maintenance Performed Signature Maintenance 15A3356O... -
Page 51: Warranty And Service
The Artel PCS Instrument is covered by a Standard Warranty This warranty provides basic coverage against defects in materials or manufacture of the PCS as set forth in the most recent version of the Artel PCS® Warranty and Software License Agreement (Artel document 19A6847). Return and Repair 9.2.1 To return products to Artel for warranty repair, non-warranty repair,... - Page 52 This Page Intentionally Left Blank 15A3356O...
-
Page 53: Specifications
Minimum of 9 months at 18 °C to 28 °C, closed box, out of direct sunlight Use only Artel certified Blank Solution Vials, Sample Solutions and Calibration Standards. The Artel PCS and its components are covered by patents listed at www.artel-usa.com/patents. 15A3356O... - Page 54 This Page Intentionally Left Blank 15A3356O...
-
Page 55: Pcs Printouts
0.00050 Pass 0.00006 0.00050 Pass OVERALL CALIBRATION RESULT: PASS Temperature: 21.2 C Instrument Cal. Number: Instrument Serial No.: 8282 Software Version: PCS 7A2.203 ARTEL PCS PIPETTE CALIBRATION SYSTEM Patents: USA: 5492673, 5298978, 7772008, 7791716 Europe: EP0711404, EP0628157 Japan: 2520852 15A3356O... - Page 56 Cal. Operator ID: Cal. Kit Lot Code: 39341 Cal. Temperature: 21.2 C Calibration Result: Pass Instrument Serial No.: 8282 Software Version: PCS 7A2.203 ARTEL PCS PIPETTE CALIBRATION SYSTEM Patents: USA: 5492673, 5298978, 7772008, 7791716 Europe: EP0711404, EP0628157 Japan: 2520852 15A3356O...
- Page 57 Last Instr. Cal. No.: Instrument Serial No.: 8282 Instrument Serial No.: 8282 Software Version: PCS 7A2.203 Software Version: PCS 7A2.203 ARTEL PCS PIPETTE CALIBRATION SYSTEM ________________________ ____________ Performed by Date Patents: USA: 5492673, 5298978, 7772008, 7791716 ________________________ ____________ Europe: EP0711404, EP0628157...
- Page 58 Temperature: 21.3 C Footer Last Instr. Cal. Date: 01 Jun 2011 Last Instr. Cal. No.: Instrument Serial No.: 8282 Software Version: PCS 7A2.203 ARTEL PCS PIPETTE CALIBRATION SYSTEM Patents: USA: 5492673, 5298978, 7772008, 7791716 Europe: EP0711404, EP0628157 Japan: 2520852 15A3356O...
-
Page 59: Formulas Used To Calculate Group Statistics
APPENDIX C FORMULAS USED TO CALCULATE GROUP STATISTICS Mean Standard Deviation Coefficient of Variation nominal volume Inaccuracy INACC nominal volume ... - Page 60 This Page Intentionally Left Blank 15A3356O...
-
Page 61: Ascii Character Set
APPENDIX D ASCII CHARACTER SET Code Character Code Character Code Character Code Character (space) “ < & > ‘ 15A3356O... - Page 62 This Page Intentionally Left Blank 15A3356O...
-
Page 63: Alphabetic Character Entry
APPENDIX E ALPHABETIC CHARACTER ENTRY To enter a letter at either the Enter Operator ID prompt or the Enter Pipette ID Number prompt press MENU SCROLL. DEFGHIJKLMNOPQRSTUVW <- 4 6 -> Letter Entry Display At the Letter Entry display, the carat (^) indicates which letter is to be entered. Using the “4”... - Page 64 This Page Intentionally Left Blank 15A3356O...
-
Page 65: Number Of Samples Per Vial
APPENDIX F NUMBER OF SAMPLES PER VIAL 7A2.103 7A2.2XX 7A2.103 7A2.2XX or earlier Approximate or earlier Approximate PCS Range Pipette Number of Number of PCS Range Pipette Number of Number of Solutions Volume Samples Samples Solutions Volume Samples Samples Range 1 Range 3 60 mL Bottle 60 mL Bottle... - Page 66 This Page Intentionally Left Blank 15A3356O...
-
Page 67: Consumables
• ISO 17025 calibration certificate PCS-700 Paper for Printer (Thermal) • 5 rolls PCS-710 Paper for Printer (Impact) • 12 rolls PCS-410 ISO 17025 Calibration Certificate • For PCS Instrument PCS-805 PCS Instrument Dust Cover • Protective Dust Cover with Artel Logo 15A3356O... - Page 68 This Page Intentionally Left Blank 15A3356O...
Need help?
Do you have a question about the PCS3 and is the answer not in the manual?
Questions and answers
When scanning a pipette for calibration i get a pipette calibration error promt saying i "cannot proceed with pipette calibration as pipette **** hs results pending for review. results need to be reviewed in order to start the calibration." Not sure what/where to review what's needed to start the calibration