Advertisement
Quick Links
Introduction
Please observe the information and warnings from the user manual.
‐
Please refer to the user manual for detailed instructions, conformity and support information.
‐
The manual can be found at http://www.odys.de/web/tablet‐pc‐wintab_de.html.
‐
Use the hyperlink at „Einstellungen – PC und Geräte – PC‐Info".
‐
There you will also find a guide on how to change the system language.
‐
Use the installation assistant to easily configure the device.
Important! Please note: In order to use all features available, a Microsoft user account must be
created and it is necessary to activate your system later on. To reset a forgotten password please visit
www.live.com.
To prevent conflicts with other systems we recommend creating a new account.
Please close unused apps to extend the battery lifetime as described on the right.
Turn off the tablet when not in use.
Turning On/Off
To turn on the device, press and hold the Power button on the unit until you see the boot‐up screen
then release. It may take a few minutes to start up the system, please wait before you proceed.
To turn off the device, press and hold the Power button until you see the option "Power Off", tap
on "Power Off" and then tap on "OK".
Tip: This device will sleep with the screen off if it stays inactive for a few seconds. You can briefly
press the Power button to turn on the screen and wake it up.
Power On and Off the Display
‐ Shortly press the [Power] button to turn off the display.
‐ Press the [Power] button again shortly turn the display on again.
Language Setting
‐ Confirm the two requests at the beginning by taping at OK.
‐ Tap on [Settings] and select [Language & Input]
‐ Select your desired language.
Getting Started
7
1
2
3
4
5
6
8
9
10
9
1.
Status Indicator
Stays red during charging and will turn orange after the battery is fully
charged.
2.
Micro HDMI
Connect to a TV or other display.
3.
Micro USB
Support for USB stick, Surf stick, Keyboard and Mouse.
Note: An OTG supporting adapter cable is required (optional)
4.
Power jack
Charge and power the tablet with the included power adapter.
5.
Microphone
6.
Headphone jack
Audio output connection for head‐phones
Note: Speaker output is automatically disabled when headphones are
connected to the player.
7.
Front Camera
Front‐facing camera for taking avatar pictures
8.
Speaker
9.
Docking clip
To align the tablet.
10.
Docking
To connect an optional available keyboard.
11.
Rear Camera
Rear‐facing camera for taking pictures
12.
Volume key + /‐
Shortly press to increase / decrease volume level.
13.
Power Button
Press and hold the power switch to turn on or off the device;
Briefly press the switch to turn the screen on or off.
Should the device stop functioning or operate abnormally, press and hold
for 15 seconds to reset the device off.
14.
Micro SD
Slot
Accommodates any standard SD/SDHC memory card.
Card
Charging Battery
The device has a built‐in rechargeable battery. No extra battery installation is required. Just charge
the device when it indicates low battery.
To charge the battery, connect the device to any standard wall outlet via the DC port using the
provided power adaptor. It takes about 5 hours to fully charge the battery.
Note:
a. We advice to use only the delivered power adapter with this tablet.
b. You can operate the device even when it is being charged. But for extended battery life, it is
suggested NOT to use the device when it is charging.
c.
It is recommended to charge the battery before you use the device for the first time.
d. For maximum performance, lithium‐ion batteries need to be used often. If you don't use the
device often, be sure to recharge the battery at least once per month.
e. Should the rechargeable battery of the device discharge completely, connect the device (using
the adapter) to the main power source for approximately 5‐10 minutes before attempting
normal operation.
f.
In some cases, devices which have been charged for longer periods of time may not be able to be
switched back on. Should this occur you have to make a Reset.
Factory reset
Should you notice unusual behavior or the device cannot be activated, we suggest restoring the
device to the factory settings. Switch off the device. While pressing the Power Button and the
Volume‐Minus key simultaneously, start the device until the Recovery Mode is started. Follow the
instructions under "Troubleshoot" or "Problem Solving". Select „Reset your PC" or "Restore"
ATTENTION! All data and settings will be erased.
ODYS Primo Win 12 – Quickstart
11
8
Connect via USB
Note: Only use a USB cable with a maximum length of 100cm.
Please make sure when connecting the USB adapter into the USB
socket that the connector alignment are correct. Incorrect insertion
may cause damage to the plug and socket.
On one side of the plug there are usually small sizes of hooks that
secure the fixation. Pay special attention to the position of the
hooks, they should show upwards when connecting the cable into
the socket while the device is lying on screen up.
In order to view or playback files, these must first be downloaded
from the internet or transferred from a computer and stored on
the device via MircoSD card or USB‐Stick.
ATTENTION: A direct connection between the Device and Computer, via USB‐Cable is not possible!
Installing Memory Card
-
To use a memory card, find the card slot at the side
of the device and then insert the memory card into
the slot in the correct orientation as shown. Check
that the Micro SD card is in the correct position with
the contact pin facing downwards directed to the
screen as illustrated. You may damage the card and
the reader if Micro SD card is not inserted in correct
position.
-
Push the Micro SD card into the card slot until it clicks.
-
To access the files stored in the memory card, enter
the Explorer mode by tapping the Explorer icon and
select the "SD Card" directory.
-
To remove Micro SD card, push the card once again
until it clicks.
Note: We recommend using only Micro SD or SDHC cards up to 128GB capacity.
12
13
‐ When a Micro SD card is inserted in or ejected from the device, it may take few seconds for the
device to update the content.
‐ Please avoid inserting or ejecting Micro SD card when other operation is running as this may cause
the system hang.
‐ Do Not remove the card if the content inside the card is being played. This will halt the
14
operation of the device and might cause a system hang.
‐ Please use your fingernails to properly insert or remove the card.
Connecting to the Internet
Swipe with your finger from the right‐hand side towards the centre and open the function
(1)
bar like this.
(2)
Touch the icon to open All settings and select „Network and Internet".
Tap on the network you wish to connect to and then tap on "Connect". Your Tablet will now
(3)
attempt to establish a connection to that 3G network. If the connection is successful, the
message "Connected" will appear below the network.
Note:
If there is no internet connection please recheck this setting and verify that you are connected to an
avilable wifi or 3G Network.
Support
On our website you will find the latest information about this product, other products of our
enterprise, our company itself and valid warranty terms. The latter you will find under Service ‐
Downloads.
Axdia International GmbH
Formerweg 9
D‐47877 Willich (Germany)
Support‐Hotline (9.00am – 2.30pm):
E‐Mail: support@odys.de
Note:
Please address any further questions directly to our Customer Service Department at the following
e‐mail address: support@axdia.de
In order to be able to process your request quickly, we ask you to have the following information
ready:
‐ Product description
‐ Purchase date
‐ Description of problem
Disposal
Do not dispose of this item with normal household waste. Please return any
defective device to your dealer or to a collection point for environmentally sound
disposal.
Tel: +49(0) 2154 / 8826‐0
Fax: +49(0) 2154 / 8826‐100
+49 (0)2154 / 8826‐101
Compliance
Axdia International GmbH hereby declares that this device is in accordance
with the essential requirements and other relevant provisions of Directive
1999/5/EC. The CE declaration of conformity for this product can be found on
the internet at: www.odys.de – Service – downloads
v1.1.0
Advertisement

Related Manuals for Odys Primo Win 12

Summary of Contents for Odys Primo Win 12
- Page 1 ODYS Primo Win 12 – Quickstart v1.1.0 Introduction Connect via USB Please observe the information and warnings from the user manual. Note: Only use a USB cable with a maximum length of 100cm. ‐ Please refer to the user manual for detailed instructions, conformity and support information. Please make sure when connecting the USB adapter into the USB ‐ The manual can be found at http://www.odys.de/web/tablet‐pc‐wintab_de.html. socket that the connector alignment are correct. Incorrect insertion ‐ Use the hyperlink at „Einstellungen – PC und Geräte – PC‐Info". may cause damage to the plug and socket. ‐ There you will also find a guide on how to change the system language. On one side of the plug there are usually small sizes of hooks that ‐ Use the installation assistant to easily configure the device. secure the fixation. Pay special attention to the position of the Important! Please note: In order to use all features available, a Microsoft user account must be hooks, they should show upwards when connecting the cable into created and it is necessary to activate your system later on. To reset a forgotten password please visit the socket while the device is lying on screen up. www.live.com. In order to view or playback files, these must first be downloaded To prevent conflicts with other systems we recommend creating a new account. from the internet or transferred from a computer and stored on Please close unused apps to extend the battery lifetime as described on the right. the device via MircoSD card or USB‐Stick. Turn off the tablet when not in use. ATTENTION: A direct connection between the Device and Computer, via USB‐Cable is not possible! Turning On/Off Installing Memory Card ...
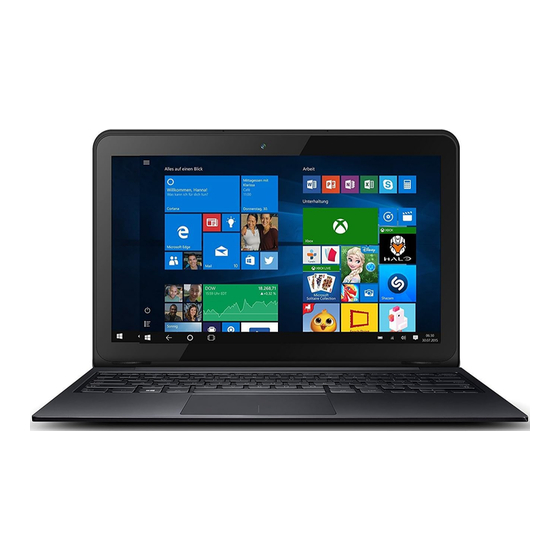
- Page 2 ODYS Primo Win 12 – Quickstart Home screen Using the keyboard Once started, the Start‐Screen will be displayed. The individual icons offer quick access to the respected For the sake of using convenience, this device is designed to be equipped with a dedicated keyboard. application. Follow these steps to connect the keyboard to your tablet: Start Screen Elements Place the dedicated keyboard on an even and stable plane (e.g. desk); Hold your tablet with two hands, align the connector and the two magnetic contacts on the Start Menu keyboard to the jack and positioning slots at the bottom of the tablet. Tapping the menu icon will open the As soon as the keyboard is connected to the tablet, it is ready for use. start menu. Here you will find user You can rotate the tablet to overlap the keyboard as you do with a laptop. information, last used documents and To remove the keyboard from the tablet, lift the combination up first. links to the file explorer and system Now push the remove button at the keyboard directely in front of the screen and pull the settings. tablet gently upwards out of the docking. Tiles Start offer quick access to its displays shutdown options corresponding APP. The ...
Need help?
Do you have a question about the Primo Win 12 and is the answer not in the manual?
Questions and answers