Advertisement
Available languages
Available languages
Quick Links
Advertisement
Chapters

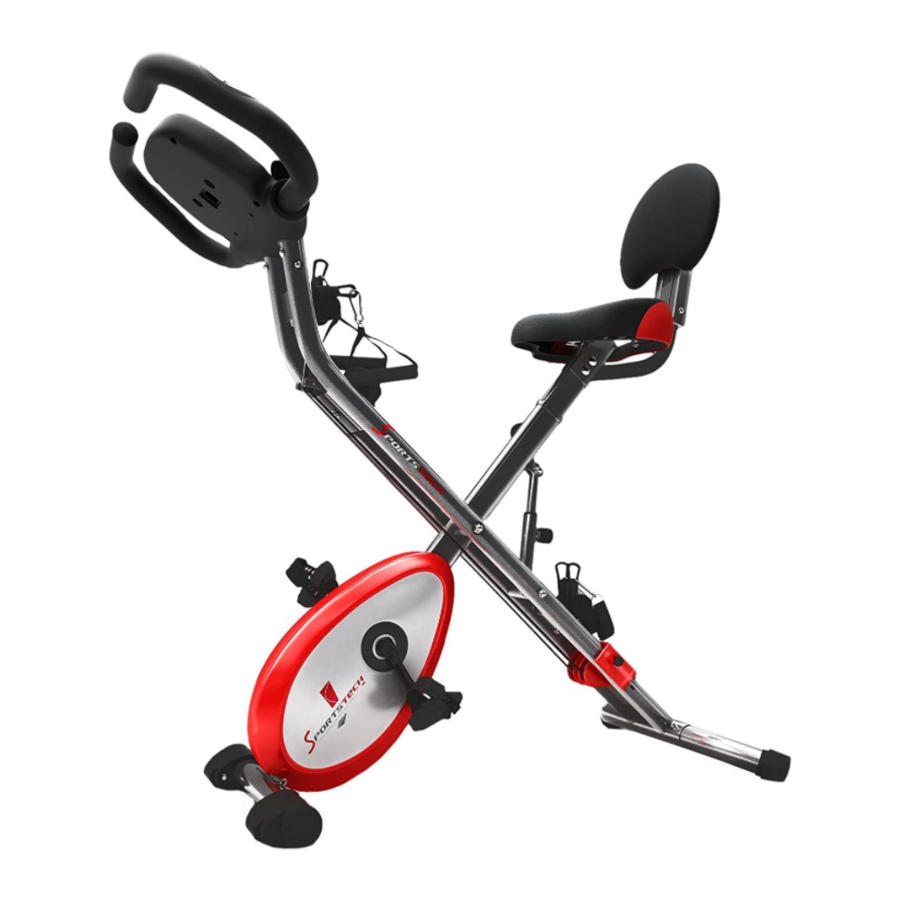
Related Manuals for SPORTSTECH X150


Summary of Contents for SPORTSTECH X150
- Page 1 X150...
- Page 3 Video Tutorials Unsere für dich! Aufbau Benutzung Abbau In 3 einfachen Schritten zum schnellen und sicheren Start: 1. QR-Code scannen 2. Videos anschauen 3. schnell und sicher starten Link zu den Videos: www.sportstech.de/qr/x150.html...
- Page 4 Sehr geehrter Kunde wir freuen uns, dass Sie sich für ein Gerät aus der SPORTSTECH Produktpalette entschieden haben. SPORTSTECH Sportgeräte bieten Ihnen höchste Qualität und neueste Technologie. Um die Leistungsfähigkeit des Gerätes voll nutzen zu können und viele Jahre Freude an Ihrem Gerät zu haben, lesen Sie bitte vor der Inbetriebnahme und dem Beginn des Trainings dieses Benutzerhandbuch sorgfältig durch und verwenden Sie das Gerät den Anweisungen entsprechend.
-
Page 5: Table Of Contents
INHALTSVERZEICHNIS 1. WICHTIGE SICHERHEITSHINWEISE ................6 2. CHECK LISTE ......................7 3. MONTAGEANLEITUNG ..................9 4. EXPLOSIONSZEICHNUNG ..................12 5. TEILELISTE ......................13 6. COMPUTER BEDIENUNGSANLEITUNG ..............15 6.1. BLUETOOTH-FUNKTIONEN ................. 15 6.2. SMARTPHONE-APP BEDIENUNGSANLEITUNG ............16 6.3. FUNKTIONEN DES COMPUTERS ................18 7. -
Page 6: Wichtige Sicherheitshinweise
1. WICHTIGE SICHERHEITSHINWEISE BITTE DIESE BEDIENUNGSANLEITUNG AN EINEM SICHEREN PLATZ AUFBEWAHREN. Es ist wichtig, vor der Montage und Nutzung des X Bikes das gesamte Handbuch zu lesen. Sichere und effiziente Nutzung kann nur erreicht werden, wenn das X Bike ordnungsgemäß montiert, gewartet und verwendet wird. Es liegt in Ihrer Verantwor- tung zu gewährleisten, dass alle Benutzer des X Bikes über alle Vorsichtsmaßnahmen und Warnungen informiert sind. -
Page 7: Check Liste
Höchstgewicht des Nutzers 100 kg. Nur für den Heimgebrauch. Das Gerät ist für den therapeutischen Einsatz nicht geeignet. Beim Heben oder Bewegen des X Bikes Vorsicht walten lassen. Verwenden Sie im- mer die richtige Hebetechnik und/oder holen Sie sich Hilfe. 2. - Page 8 Beschreibung Skizze M8 Federring M8 Hutmutter PVC Unterlegscheibe Knopf Ziehgriff Handgriff...
-
Page 9: Montageanleitung
3. MONTAGEANLEITUNG Nehmen Sie alle Teile Ihres Rades aus dem Karton und legen Sie sie vorsichtig auf dem Boden ab. Der Zusammenbau Ihres Rades ist einfach. Befolgen Sie diese An- weisungen bitte sorgfältig, und es sollte etwa 15 bis 20 Minuten dauern. Schritt 1 BEFESTIGEN SIE DIE STABILISATOREN Ziehen Sie den Auslöseknopf (45) aus dem gefalteten Hauptrahmen (1), und beginnen Sie damit, die-... - Page 10 Schritt 2 BEFESTIGEN SIE DIE PEDALE • Befestigen Sie jedes Pedal (12R & 12L) an der Kurbel. Pedal „R“ an der rechten Seite der Kurbel montieren, Pedal „L“ an der linken Seite: Beachten Sie die Markie- rung „R“ bzw. „L“ (rechts und links) auf den Pedalen (12R & 12L) und der Kurbel. HINWEIS: Das rechte Pedal „R“...
- Page 11 Schritt 4 BEFESTIGEN SIE DEN LENKER UND DEN COMPUTER • Entfernen Sie die vormontierten 4 Schrauben (87) und 2 Unterlegscheiben (75), 2 gewölbten Federscheiben (90), PVC-Unterlegscheibe (83) und Federring (88) unten vom Lenker (92). • Fügen Sie den Lenker (92) mit den zwei Handpuls-Sensoren (91) in das vordere Aufnahmerohr (55) ein, und machen Sie Schraube (87), Unterlegscheibe (75) und gewölbte Federscheibe (90), Federring (90) und PVC-Unterlegscheibe (83) fest.
-
Page 12: Explosionszeichnung
4. EXPLOSIONSZEICHNUNG... -
Page 13: Teileliste
5. TEILELISTE Beschreibung Information Anz Nr Beschreibung Information Schloss-Schraube M8X65 Verstellbare Mutter Gewölbte Ø8.5xØ18 Unterlegscheibe Ø10.5x20x2.0 Federscheibe Federring Ø8.5xØ14 Mutter M10x3.0 Kopfmutter Kleine Rolle Ø14x94 Einstellbare Mutter Ø50 Riemen 230J Stabilisator hinten Ø50x395mm Riemen 220J Stabilisator vorne Ø50x395mm Sechskantmutter M8X20 Grosse Transportrad Ø50... - Page 14 Beschreibung Information Anz Nr Beschreibung Information Abschlusskappe Ø25.4 Bolzen M8X75 Unterlegscheibe Ø8.5xØ18 Schraube M6x40 Mutter Unterlegscheibe Ø6.5xØ14 Knauf Rückenlehnenstütze Kappe 15x20 Rückenlehne Hinterer Zuggriffe Hauptrahmen Vorderer Zugseil Ø6x1080mm Hauptrahmen Kappe 30x60 Spanner Stift Ø10x116 Unterlegscheibe Ø5.5xØ12 Abdeckung Schraube M5x50 PVC- Ziehgriff Unterlegscheibe Sechskantschraube...
-
Page 15: Computer Bedienungsanleitung
6. COMPUTER BEDIENUNGSANLEITUNG 6.1. BLUETOOTH-FUNKTIONEN Arbeitsfrequenz: Der drahtlose Sender ist ein Bluetooth-4.0-Gerät. Die Arbeitsfre- quenz ist 2,4 GHz. Der Computer beginnt, die Zeitdauer der Bewegung zu erfassen und berechnet und erfasst die Geschwindigkeit, Entfernung sowie die durch die Bewegung verbrauchten Kalorien, sobald das Geschwindigkeitssignal empfangen wird. -
Page 16: Smartphone-App Bedienungsanleitung
6.2 SMARTPHONE-APP BEDIENUNGSANLEITUNG Sie können die App "Fitness Data" über den hier abgebildeten QR-Code herunterladen. Vorausset- zung für mobiles Gerät: Android 4.4 oder höher mit Bluetooth 4.0, iOS 8.0 oder höher. Bitte schalten Sie zuerst Ihre Bluetooth-Funktion auf Ihrem Gerät an. Android Android: Sie können im Google Play Store nach "Fitness Data"suchen, oder es über den QR-Code herunterladen. -
Page 17: Funktionen Des Computers
6.3. FUNKTIONEN DES COMPUTERS 1. Funktionsknopf: Modus / Zurücksetzen - Drücken zur Funktionsauswahl - 6 Sekunden lang gedrückt halten, um die Eingabe für Zeit, Entfernung und Kalorien zurückzusetzen. 2. Funktionen und Operationen: 1. SCAN: MODUS-Taste gedrückt halten bis “ ” auf der SCAN Position er- scheint. -
Page 18: Trainings-Pulswerte
Spezifikationen: AUTO SCAN alle 6 Sekunden ZEIT 00:00’~99:59’ GESCHWINDIGKEIT 0.1~99.9 KM/H FUNKTION DISTANZ 0.01~99.99 KM KALORIEN 0.1~999.9 kCAL WEGMESSER 0.1~999.9 KM PULS WERT 40~206 BPM BATTERIEART 2x AAA Batterien BETRIEBSTEMPERATUR 0°C ~ +40°C LAGERTEMPERATUR -10°C ~ +60°C 3. Ersetzen der Batterien: Öffnen Sie die Batterieabdeckung an der Gehäuseunterseite, um die Batterien zu ersetzen. -
Page 19: Aufwärmübungen
8. AUFWÄRMÜBUNGEN Aufwärmübungen sind wichtig, um die Muskeln für die Aktivität vorzubereiten und gleichzeitig das Verletzungsrisiko zu minimieren. Sie können sich aufwärmen wäh- rend 5-10 Minuten in einem leichten/zügigen Geh-Tempo , bevor Sie anhalten und ein paar einfache Dehnungsübungen ausführen sollten. (Wie in den untenstehenden Abbildungen gezeigt) Kniesehnen-Dehnung (stehend) Halten Sie Ihre Knie leicht gebeugt und lehnen sich langsam nach... - Page 20 Europäische Entsorgungsrichtlinie 2002/96/EG Entsorgen Sie Ihr Trainingsgerät in keinem Fall über den normalen Hausmüll. Entsorgen Sie das Gerät ausschließlich über einen kommunalen oder zugelassenen Entsorgungsbetrieb. Beachten Sie hierbei die aktuell geltenden Vorschriften. Erkundigen Sie sich im Zweifelsfall bei Ihrer Stadt- bzw. Gemeindeverwaltung nach einer sach- und umweltgerechten Entsorgungsmöglichkeit. Batterien / Akkus Gemäß...
- Page 22 3 simple steps for a fast and safe start: 1. scan the QR code 2. watch videos 3. start fast and safely Link to the videos: www.sportstech.de/qr/x150.html...
- Page 23 Dear customer, We are pleased you chose a device from the SPORTSTECH product range. With sports equipment from SPORTSTECH you get the highest quality and latest technology. In order to fully use the potential of your device and be able to enjoy it for many years, please read this manual carefully before starting up and beginning of training, and use the device according to the instructions.
- Page 24 TABLE OF CONTENTS 1. IMPORTANT SAFETY INFORMATION ................. 26 2. CHECK LIST ......................27 3. ASSEMBLY INSTRUCTION ..................29 4. EXPLODED VIEW ASSEMBLY DRAWING ..............32 5. PART LIST ......................33 6. METER MANUAL ....................35 6.1. BLUETOOTH FUNCTIONS ..................35 6.2.
-
Page 25: Important Safety Information
1. IMPORTANT SAFETY INFORMATION PLEASE KEEP THIS MANUAL IN A SAFE PLACE FOR REFERENCE. It is important to read this entire manual before assembling and using the Confidence Folding X Bike. Safe and efficient use can only be achieved if the Confidence Fol- ding X Bike is assembled, maintained and used properly. -
Page 26: Check List
Maximum weight of user 100kg, home use only. The equipment is not suitable for therapeutic use. Care must be taken when lifting or moving the Confidence Folding X Bike. Always use proper lifting techniques and/or use assistance. 2. CHECK LIST Description Scetch 55 / 15 /... - Page 27 Description Scetch M8 Spring washer M8 Cap nut PVC Washer Knob Lat pull handle Handle grip...
-
Page 28: Assembly Instruction
3. ASSEMBLY INSTRUCTION Remove all the part of your cycle from the carton and place them to the floor care- fully. Assembling your cycle is simple. Follow these instructions carefully and it should take you around 15-20 minutes. Step 1 ATTACH THE STABILIZERS The release knob (45) from the folded main frame (1) in the unplug, and then start open the machine, and attach pin (40) into the hole after the main frame (1) open. - Page 29 Step 2 ATTACH THE PEDAL • Assemble each pedal (12R&12L) to the crank . Pedal ”R” assemble with crank right side , Pedal ”L” assemble with crank left side : See the mark „R“ & „L“(right and left) on the pedals (126R&12L) and crank. NOTE: The right pedal „R“...
- Page 30 Step 4 ATTACH HANDLEBAR AND METER • Remove the pre-assembled 4 bolt (87) and 2 flat washer(75) ,2 curved washer (90), pvc washer (83) and spring washer (88) . from low of the handlebar (92). • Put handlebar (92) with 2 hand pulse (91), grip to the front post tube (55) and fas- ten bolt (87) ,flat washer (75) and curve washer (90), spring washer (90) and pvc washer (83).
-
Page 31: Exploded View Assembly Drawing
4. EXPLODED VIEW ASSEMBLY DRAWING... -
Page 32: Part List
5. PART LIST Description Information Qty No Description Information Carriage bolt M8X65 Adjustable nut Curved washer Ø8.5xØ18 Flat washer Ø10.5x20x2.0 Spring washer Ø8.5xØ14 M10x3.0 Head nut Small pulley Ø14x94 Adjustable nut Ø50 Belt 230J Rear stabilizer Ø50x395mm Belt 220J Front stabilizer Ø50x395mm Hex nut M8X20... - Page 33 Description Information Qty No Description Information End cap Ø25.4 Carriage bolt M8X75 Flat washer Ø8.5xØ18 Screw M6x40 Flat washer Ø6.5xØ14 Press wheel Back tube 15x20 Backrest Rear main frame Handle foam Front main frame Rope Ø6x1080mm 30x60 Tension Ø10x116 Flat washer Ø5.5xØ12 Cover Screw...
-
Page 34: Meter Manual
6. METER MANUAL 6.1. BLUETOOTH FUNCTIONS Working frequency: this wireless transmitter is a Bluetooth 4.0 device. Its working frequency is 2.4GHZ. The Bluetooth electronic watch starts to record the time of movement and calculates and records the speed , distance and calorie consumed of the movement when speed signal is received. -
Page 35: Cell-Phone App Operating Instructions
6.2 CELL-PHONE APP OPERATING INSTRUCTIONS You can download the app "Fitness Data"via the QR code shown here. Mobile device requirement: Android 4.4 or higher with Bluetooth 4.0, iOS 8.0 or higher. Please turn on the Bluetooth function on your device first. Android Android: You can search in the Google Play Store for "Fitness Data", or download via the QR Code. -
Page 36: Functions Of The Electronic Watch
6.3. FUNCTIONS OF THE ELECTRONIC WATCH 1. Function button: Mode / Reset - Press to select functions - Press for 6 seconds to reset time, distance and calories. 2. Functions and operations: 1. SCAN: Press MODE button until “ ” appears at SCAN position, monitor will rotate through the following functions: time, speed, distance, odo, calorie and pulse, each display will be hold 6 seconds. -
Page 37: Training Pulse Rate
3. How to replace the batteries: Please open the battery cover from the bottom housing then replace the batteries. 7. TRAINING PULSE RATE HEART RATE MAXIMUM TARGET ZONE COOL DOWN... -
Page 38: Warm-Up Exercise
8. WARM-UP EXERCISE Warm up exercise is important in preparing the muscles for activity whilst minimi- sing the risk of injury. You may choose to warm up with a light/brisk walking pace for 5-10 minutes before stopping and performing some simple stretches. (As shown in the pictures below). - Page 39 European Disposal Directive 2002/96/EG Never dispose your training device in your regular household waste. Dispose the device only at a local or approved disposal. Take care of the currently applicable regulations. If you have doubts contact your local authorities for information about a correct and environment friendly disposal option. batteries/rechargable batteries In accordance with the battery regulation you are legally obliged as an end user to return all used batteries.
- Page 41 Nuestros para usted! Construcción Utilizar Reducción En 3 sencillos pasos para un arranque rápido y seguro: 1. Escanear el código QR 2. Ver vídeos 3. Comienza rápido y seguro Enlace a los videos: www.sportstech.de/qr/x150.html...
- Page 42 Estimado cliente, Nos complace que haya elegido un dispositivo de la línea de productos SPORTSTECH. Con el equipo deportivo de SPORTSTECH usted obtiene la más alta calidad y la mejor tecnología. Con el fin de usar todo el potencial de su dispositivo y para que pueda disfrutarlo durante muchos años, por favor lea este manual cuidadosamente antes de comenzar a ejercitarse, y use el dispositivo...
- Page 43 CONTENIDO 1. INFORMACIÓN DE SEGURIDAD IMPORTANTE ............46 2. LISTA DE VERIFICACIÓN ..................47 3. INSTRUCCIONES DE ENSAMBLAJE ..............49 4. VISTA EN DESPIECE ....................52 5. LISTA DE PIEZAS ....................53 6. MANUAL DEL MEDIDOR ..................55 6.1. FUNCIONES BLUETOOTH ..................55 6.2.
-
Page 44: Información De Seguridad Importante
1. INFORMACIÓN DE SEGURIDAD IMPORTANTE POR FAVOR MANTENGA ESTE MANUAL EN UN LUGAR SEGURO PARA REFERENCIA FUTURA. Es importante leer la totalidad de este manual antes de ensamblar y usar la bicicleta plegable. Solo se podrá conseguir un uso efectivo y seguro si la bicicleta plegable se ensambla, se mantiene y se usa adecuadamente. -
Page 45: Lista De Verificación
El peso máximo del usuario es de 100kg, solo para uso doméstico. El equipo no es apto para uso terapéutico. Se debe tener cuidado al momento de levantar o mover la bicicleta. Siempre use técnicas de levantamiento adecuadas o busque ayuda. 2. - Page 46 Descripción Diagramma M8 Arandela elástica M8 Tuerca de sombrete Arandela plástica Perilla Manija Mango...
-
Page 47: Instrucciones De Ensamblaje
3. INSTRUCCIONES DE ENSAMBLAJE Saque todas las piezas de su bicicleta de la caja y ubíquelas sobre el suelo con cuidado. Ensamblar su bicicleta es fácil. Siga estas instrucciones cuidadosamente y el proceso le tomará cerca de 15-20 minutos. Paso 1 AJUSTE LOS ESTABILIZADORES Libere la perilla (45) de la estructura principal doblada (1), y luego comience a abrir la máquina, y ajuste el pin (40) en el agujero después de que la estructura principal (1) esté... - Page 48 Paso 2 AJUSTE EL PEDAL • Ensamble cada pedal (12R&12L) a la biela. El pedal ”R” se une con al biela del lado derecho, el pedal ”L” se une con la biela del lado izquierdo: Vea las marcas „R“ & „L“(derecha e izquierda) sobre los pedales (126R&12L) y la biela.
- Page 49 Paso 4 AJUSTE EL MANILLAR Y EL MEDIDOR • Retire los tornillos preensamblados (87), junto con 2 arandelas planas (75), 2 aran- delas (90), la arandela plástica (83) y la arandela elástica (88) de la parte baja del manillar (92). •...
-
Page 50: Vista En Despiece
4. VISTA EN DESPIECE... -
Page 51: Lista De Piezas
5. LISTA DE PIEZAS Descripción Información Ctd No Descripción Información Tornillo de cabeza M8X65 Tuerca ajustable redonda Arandela curva Ø8.5xØ18 Arandela plana Ø10.5x20x2.0 Arandela elástica Ø8.5xØ14 Tuerca M10x3.0 Tuerca de sombrete Polea pequeña Ø14x94 Tuerca ajustable Ø50 Correa 230J Estabilizador pos- Ø50x395mm Correa 220J... - Page 52 Descripción Información Ctd No Descripción Información Tornillo de cabeza Tapa de extremo Ø25.4 M8X75 redonda Arandela plana Ø8.5xØ18 Tornillo M6x40 Tuerca Arandela plana Ø6.5xØ14 Pomo Tubo posterior Tapa 15x20 Respaldo Estructura principal Espuma posterior Estructura principal Cuerda Ø6x1080mm frontal Tapa 30x60 Tensión Ø10x116...
-
Page 53: Manual Del Medidor
6. MANUAL DEL MEDIDOR 6.1. FUNCIONES BLUETOOTH Frecuencia de trabajo: Este transmisor inalámbrico es un dispositivo Bluetooth 4.0. Su frecuencia de trabajo es 2.4GHZ. El reloj electrónico Bluetooth comienza a registrar el tiempo de movimiento y calcula y registra la velocidad, distancia y calorías consumidas del movimiento al recibir la señal de velocidad. -
Page 54: Instrucciones De La Aplicación
6.2 INSTRUCCIONES DE LA APLICACIÓN Puede descargar la aplicación "Fitness Data" a través del código QR que se muestra aquí. Requisi- tos de dispositivos móviles: Android 4.4 o superior con Bluetooth 4.0, iOS 8.0 o superior. Primero active el Bluetooth en su dispositivo. Android Android: iOS: puede buscar "Fitness Data"... -
Page 55: Funciones Del Reloj Electrónico
6.3. FUNCIONES DEL RELOJ ELECTRÓNICO 1. Función de la tecla: Mode / Reset - Presione para seleccionar funciones - Presione durante 6 segundos para reiniciar el tiempo, la distancia y las calorías. 2. Funciones: 1. SCAN: Presione la tecla MODE hasta que aparezca “ ” en la posición SCAN, la pantalla cambiará... -
Page 56: Frecuencia Cardíaca Del Ejercicio
Especificaciones: ESCANEO cada 6 segundos AUTOMATICO TIEMPO 00:00’~99:59’ VELOCIDAD 0.1~99.9 KM/H FUNCIÓN DISTANCIA 0.01~99.99 KM CALORIAS 0.1~999.9 kCAL 0.1~999.9 KM FRECUENCIA 40~206 BPM CARDÍACA BATTERIEART 2x baterías AAA TEMPERATURA DE FUNCIONAMIENTO 0°C ~ +40°C TEMPERATURA DE ALMACENAJE -10°C ~ +60°C 3. -
Page 57: Ejercicios De Calentamiento
8. EJERCICIOS DE CALENTAMIENTO Los ejercicios de calentamiento son importantes para preparar los músculos para la actividad minimizando el riesgo de lesiones. Puede calentar con un paso normal y ligero durante 5-10 minutos antes de detenerse y puede realizar algunos estiramien- tos sencillos (como muestran las siguientes imágenes) Estiramiento de tendones (de pie) Mantenga sus rodillas ligeramente dobladas e inclínese hacia ade-... - Page 58 Directiva Europea de Residuos 2002/96/EG Nunca elimine su dispositivo de entrenamiento en su basura doméstica ordinaria. Elimine el dispositivo únicamente en un sitio de eliminación aprobado. Tenga en cuenta las normativas aplicables actualmente. Si tiene dudas contacte a las autoridades locales para conseguir información sobre una opción de eliminación adecuada y ecológica. Baterías/baterías recargables De acuerdo a la normativa de baterías usted está...
- Page 59 MANUEL FRANÇAIS...
- Page 60 3 étapes simples pour un démarrage ra- pide et sécurisé: 1. Scannez le code QR 2. Regarder les vidéos 3. Démarrez rapidement et en toute sécurité. Lien vers les vidéos: www.sportstech.de/qr/x150.html...
- Page 61 Cher client, Nous sommes ravis que vous ayez choisi un appareil de la gamme de produits SPORTSTECH. Avec les équipements sportifs de SPORTSTECH, vous obtenez la plus haute qualité et la meilleure technologie. Afin d'utiliser pleinement le potentiel de votre appareil et de pouvoir l'apprécier pendant de nombreuses années, lisez attentivement ce manuel avant l'utilisation et le début de votre entraînement et utilisez...
- Page 62 TABLE DES MATIÈRES 1. INFORMACIÓN DE SEGURIDAD IMPORTANTES ............66 2. LISTE DE VÉRIFICATION ..................67 3. INSTRUCTIONS DE MONTAGE ................69 4. EXPLOSÉ ......................72 5. LISTE DE PIÈCES ....................73 6. MANUEL DU COMPTEUR ..................75 6.1. FONCTIONS BLUETOOTH ................... 75 6.2.
-
Page 63: Información De Seguridad Importantes
1. INFORMACIÓN DE SEGURIDAD IMPORTANTES VEUILLEZ CONSERVER CE MANUEL DANS UN ENDROIT SÛR POUR RÉFÉRENCE. Il est important de lire l‘intégralité de ce manuel avant d‘assembler et d‘utiliser le vélo. L‘utilisation sûre et efficace ne peut être atteinte que si le vélo est assemblé, entretenu et utilisé... -
Page 64: Liste De Vérification
Poids maximal de l‘utilisateur 100 kg, usage domestique uniquement. L‘équipement n’est pas fait pour une utilisation thérapeutique. Des précautions doivent être prises lors de la levée ou du déplacement du vélo. Il faut toujours utiliser des techniques de levage appropriées et / ou utiliser l‘aide. 2. - Page 65 Description Qté Shéma M8 Rondelle à ressort M8 Ecrou borgné Rondelle PVC Bouton Poignée de traction latérale Poignée...
-
Page 66: Instructions De Montage
3. INSTRUCTIONS DE MONTAGE Retirez toute les pièces du carton et placez-les au sol avec soin. L‘assemblage est simple. Suivez ces instructions attentivement et cela devrait vous prendre environ 15-20 minutes. Étape 1 FIXEZ LES STABILISATEURS La poignée de déblocage (45) depuis le cadre principal plié (1) dans le débranchement, puis ouvrez la machine et fixez la broche (40) dans le trou après l‘ouverture du châssis principal (1). - Page 67 Étape 2 ATTACHER LA PÉDALE • Assemblez chaque pédale (12R & 12L) sur la manivelle. Pédale „D“ montée avec manivelle droite, Pédale „G“ montée avec manivelle gauche: Voir la marque „R“ et „L“ (droite et gauche) sur les pédales (126R & 12L) et manivelle. REMARQUE: La pédale droite „R“...
- Page 68 Étape 4 FIXER LE GUIDON ET LE COMPTEUR • Retirez les 4 boulons pré-assemblés (87) et 2 rondelles plates (75), 2 rondelles courbes (90), rondelles PVC (83) et rondelles à resoort(88) à partir du bas du guidon (92). • Placez le guidon (92) avec 2 pouls de main (91), serrez le tube avant (55) et fixez le boulon (87), la rondelle plate (75) et la rondelle courbe (90), la rondelle à...
- Page 69 4. VUE ÉCLATÉE...
-
Page 70: Liste De Pièces
5. LISTE DE PIÈCES Description Information Qté No Description Information Qté Boulon du chariot M8X65 Ecrou réglable Rondelle incurvée Ø8.5xØ18 Rondelle plate Ø10.5x20x2.0 Rondelle à ressort Ø8.5xØ14 Écrou M10x3.0 Tête d'écrou Petite poulie Ø14x94 Ecrou réglable Ø50 Ceinture 230J Rétroviseurs extéri- Ø50x395mm Ceinture 220J... - Page 71 Description Information Qté No Description Information Qté Embout Ø25.4 Ecrou du chariot M8X75 Rondelle plate Ø8.5xØ18 M6x40 Écrou Rondelle plate Ø6.5xØ14 Roue de pressage Tube arrière Casquette 15x20 Support Cadre principal Poignée mousse arrière Cadre principal Corde Ø6x1080mm avant Casquette 30x60 Tension Épingle...
-
Page 72: Manuel Du Compteur
6. MANUEL DU COMPTEUR 6.1. FONCTIONS BLUETOOTH Fréquence de fonctionnement: cet émetteur sans fil est un appareil Bluetooth 4.0. Sa fréquence de fonctionnement est 2.4GHZ. La montre électronique Bluetooth commence à enregistrer le temps de mouvement et calcule et enregistre la vitesse, la distance et le nombre de calories consommée par le mouvement lorsque le signal de vitesse est reçu. -
Page 73: Mode D'emploi De L'app
6.2 MODE D‘EMPLOI DE L‘APP Vous pouvez télécharger l'application "Fitness Data" via le code QR affiché ici Condition préalable pour appareil mobile: Android 4.4 ou supérieur avec Bluetooth 4.0, iOS 8.0 ou supérieur. Veuillez d'abord activer le Bluetooth sur votre appareil. Android Android: Vous pouvez rechercher "Fitness Data"... -
Page 74: Fonctions De La Montre Électronique
6.3. FONCTIONS DE LA MONTRE ÉLECTRONIQUE 1. Bouton de fonction: Mode / Réinitialisation - Appuyez pour sélectionner les fonctions - Appuyez pendant 6 secondes pour réinitialiser le temps, la distance et les calories. 2. Fonctions et opérations: 1. SCAN: Appuyez sur le bouton MODE jusqu‘à ce que „ “... -
Page 75: Fréquence D'impulsion Par Entraînement
Caractéristiques: AUTO SCAN Toutes les 6 secondes TEMPS 00:00’~99:59’ VITESSE 0.1~99.9 KM/H FONCTION DISTANCE 0.01~99.99 KM CALORIES 0.1~999.9 kCAL 0.1~999.9 KM D‘IMPULSION 40~206 BPM TYPE DE BATTERIE 2x AAA TEMPÉRATURE DE FONCTIONNEMENT 0°C ~ +40°C TEMPÉRATURE DE STOCKAGE -10°C ~ +60°C 3. -
Page 76: Exercice D'échauffement
8. EXERCICE D‘ÉCHAUFFEMENT L‘exercice d‘échauffement est important pour la préparation des muscles pour l‘acti- vité tout en minimisant le risque de blessure. Vous pouvez choisir de s‘échauffer avec un rythme de marche léger / rapide pendant 5-10 minutes avant d‘arrêter et d‘ef- fectuer quelques étirements simples. - Page 77 Directiva Europea de Residuos 2002/96/EG Nunca elimine su dispositivo de entrenamiento en su basura doméstica ordinaria. Elimine el dispositivo únicamente en un sitio de eliminación aprobado. Tenga en cuenta las normativas aplicables actualmente. Si tiene dudas contacte a las autoridades locales para conseguir información sobre una opción de eliminación adecuada y ecológica. Baterías/baterías recargables De acuerdo a la normativa de baterías usted está...
- Page 78 MANUALE D’USO ITALIANO...
- Page 79 Video Tutorial Il nostro per te! Montaggio Utilizzo Smontaggio 3 semplici passaggi per un inizio veloce e sicuro: 1. Scannerizza il QR-Code 2. Guarda il Video 3. Inizia ad allenarti! Link per il Video: www.sportstech.de/qr/x150.html...
- Page 80 Gentile cliente Siamo lieti che abbiate scelto un dispositivo della gamma SPORTSTECH. Con le attrezzature sportive di SPORSTECH potrete usufruire della più alta qualità e della più recente tecnologia. Per sfruttare a pieno il potenziale del dispositivo e poterlo utilizzare per molti anni, raccomandiamo di leggere attentamente questo manuale prima di iniziare l’allenamento e di utilizzare il dispositivo...
- Page 81 INDICE 1. INFORMAZIONI IMPORTANTI SULLA SICUREZZA ............86 2. CHECKLIST ......................87 3. ISTRUZIONI DI ASSEMBLAGGIO ................89 4. EXPLOSO ......................92 5. LISTA PEZZI ......................93 6. MANUALE MISURATORE ..................95 6.1. FUNZIONI BLUETOOTH ..................95 6.2. ISTRUZIONI PER L‘USO APP PER CELLULARE ............96 6.3.
-
Page 82: Informazioni Importanti Sulla Sicurezza
1. INFORMAZIONI IMPORTANTI SULLA SICUREZZA CONSERVARE QUESTO MANUALE IN UN POSTO SICURO PER ULTERIORE RIFERIMENTO. È importante leggere l‘intero manuale prima di assemblare e utilizzare la Cyclette X. Un uso sicuro ed efficiente può essere raggiunto solo se la Cyclette X è assemblata, mantenuta e utilizzata correttamente. -
Page 83: Checklist
Peso massimo per utente 100kg. Solo per uso domestico. L‘apparecchio non è adatto per uso terapeutico. Bisogna prestare attenzione quando si solleva o si sposta la Cyclette X. Utilizzare sempre tecniche di sollevamento e / o avvalersi di assistenza esterna. 2. - Page 84 Descrizione Qtà Schizzo M8 Rondella elastica M8 Dado Rondella in PVC Pomello Maniglia laterale Impugnatura...
-
Page 85: Istruzioni Di Assemblaggio
3. ISTRUZIONI DI ASSEMBLAGGIO Rimuovere tutte le parti dell’attrezzo dalla confezione e disporle con attenzione sul pavimento. Assemblare l’attrezzo è semplice. Seguite queste istruzioni attentamente e ci impiegherete dai 15 ai 20 minuti. Fase 1 COLLEGARE GLI STABILIZZATORI La manopola di rilascio (45) dal telaio principale ripiegato (1) nel staccare la spina, e quindi aprire la macchina, e collegare il perno (40) nel foro dopo che il telaio principale (1) aperto. - Page 86 Fase 2 FISSARE IL PEDALE • Collegare ogni pedale (12R e 12L) alla manovella. Assemblare il Pedale „R“ con la manovella lato destro, il Pedale „L“ con la manovella lato sinistro: controllare il marchio „R“ e „L“ (destro e sinistro) sui pedali (126R e 12L) e sulla manovella. NOTA: Il pedale destro „R“...
- Page 87 Fase 4 COLLEGARE MANUBRIO E MISURATORE • Rimuovere i 4 bulloni preassemblati (87) le 2 rondelle piatte (75), 2 rondella curve (90), la rondella in PVC (83) e la rondella elastica (88) dal basso del manubrio (92). • Montare manubrio (92) con 2 hand pulse (91), la presa per il tubo frontale (55) e fissare il bullone (87), la rondella piatta (75) e la rondella curva (90), la rondella elastica (90) e la rondella in PVC ( 83).
-
Page 88: Exploso
4. EXPLOSO... -
Page 89: Lista Pezzi
5. LISTA PEZZI Descrizione Informazione Qtà No Descrizione Informazione Qtà Bullone a testa M8X65 Dado regolabile tonda Rondella curva Ø8.5xØ18 Rondella piatta Ø10.5x20x2.0 Rondella elastica Ø8.5xØ14 Dado M10x3.0 Dado Puleggia piccola Ø14x94 Dado regolabile Ø50 Nastro 230J Sabilizzatrice Ø50x395mm Nastro 220J posteriore Stabilizzatore... - Page 90 Descrizione Informazione Qtà No Descrizione Informazione Qtà Tappo chiusura Ø25.4 Bullone testa piatta M8X75 Rondella piatta Ø8.5xØ18 Vite M6x40 Dado Rondella piatta Ø6.5xØ14 Ruota a pressione Tubo posteriore Tappo 15x20 Schienale Telaio posteriore Maniglia schiuma Telaio anteriore Corda Ø6x1080mm Tappo 30x60 Tensione Perno...
-
Page 91: Manuale Misuratore
6. MANUALE MISURATORE 6.1. FUNZIONI BLUETOOTH Frequenza di lavoro: questo trasmettitore senza fili è un dispositivo Bluetooth 4.0. La sua frequenza di lavoro è 2.4GHZ. L‘orologio elettronico Bluetooth inizia a registrare il tempo di movimento e calcola e registra la velocità, la distanza e calorie consumate nel movimento quando viene ricevuto il segnale di velocità. -
Page 92: Istruzioni Per L'uso App Per Cellulare
6.2 ISTRUZIONI PER L‘USO APP PER CELLULARE l'app "Fitness Data" è scaricabile qui col codice QR-Code mostrato in figura. Dovete però disporre di un apparecchio mobile quale: Android 4.4 oppure maggiore che possieda la funzione Bluetooth 4.0, iOS 8.0 o maggiore. In primo luogo attivate la funzione Bluetooth sul vostro telefono. -
Page 93: Funzioni Dell'apparecchio Orologio Elettronico
6.3. FUNZIONI DELL‘APPARECCHIO OROLOGIO ELETTRONICO 1. Tasto funzione: Modalità / Reset - Premere per selezionare le funzioni - Premere per 6 secondi per resettare tempo, distanza e calorie. 2. Funzioni e operazioni: 1. SCAN: Premere il tasto MODE fino a quando „ „... -
Page 94: Pulsazioni Di Allenamento
Specifiche tecniche: AUTO SCAN Ogni 6 secondi TEMPO 00:00’~99:59’ VELOCITA 0.1~99.9 KM/H FUNZIONE DISTANZA 0.01~99.99 KM CALORIE 0.1~999.9 kCAL 0.1~999.9 KM PULSAZIONI 40~206 BPM TIPO BATTERIE 2x Batterie AAA TEMPERATURA DI FUNZIONAMENTO 0°C ~ +40°C TEMPERATURA DI STOCCAGGIO -10°C ~ +60°C 3. -
Page 95: Esercizi Di Riscaldamento
8. ESERCIZI DI RISCALDAMENTO Gli esercizi di riscaldamento sono importanti per preparare i muscoli per l‘attività mi- nimizzando il rischio di lesioni. Si può scegliere di riscaldarsi a passo d‘uomo svelto / leggero per 5-10 minuti prima di fermarsi e di eseguire alcuni esercizi di stretching semplici. - Page 96 Direttive Europee 2002/96/EG per lo smaltimento Non gettare mai il tuo attrezzo sportivo nell’immondizia normale. Smaltisci l’attrezzo solo tramite un sistema locale o approvato. Tieni in conto le regole applicabili correntemente. Se hai dubbi contatta le autorità locali per informazioni circa le opzioni per uno smaltimento corretto ed ecosostenibile.
- Page 97 Verkauf durch / Distributed by / Distribuido por / Distribué / Distribuito da InnovaMaxx GmbH Potsdamer Platz 11 10785 Berlin +49 30 220 663 569 service@innovamaxx.de http://www.sportstech.de...
Need help?
Do you have a question about the X150 and is the answer not in the manual?
Questions and answers