Advertisement
Table of Contents
LOMANCO
BATH PRO
IMPORTANT!
•
Installation of Lomanco Vents should comply with all
local codes and standards.
•
Do not install roof jack on a flat roof.
•
Do not use roof jack on a dryer exhaust vent.
•
WARNING! Sharp edges are exposed during
installation. Use gloves and other appropriate safety
equipment to avoid injury.
INSTALLATION:
1. Determine the install location of the Lomanco Model BRV34 roof
jack. Comply with all local codes and standards.
2. Cut a hole in the roof to adequately accommodate the ductwork
diameter.
3. Affix ductwork a maximum of 3/4" above and parallel to the roof
surface. (Figure 1)
Figure 1 / Figura 1
3/4"
MAX.
3/4"
MÁX.
1,9 cm (0,75 po) max.
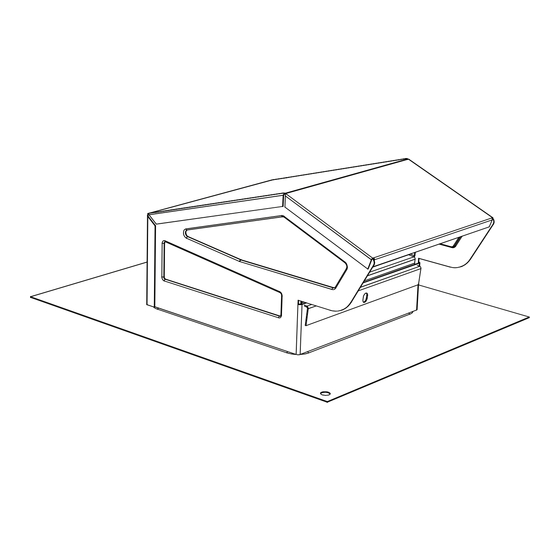
4. Position and center the roof jack over ductwork and mark the
outline of the flange. (Figure 2, Figure 3)
Figure 2 / Figura 2
Figure 3 / Figura 3
Roof Jack OUTLINE
CONTORNO de la cubierta para el techo
CONTOUR de la buse de toit
Find us on
Facebook
BATH PRO
EXHAUST FAN ROOF JACK
FOR 3" & 4" ROUND
TM
DUCTWORK
3/4"
MAX.
3/4"
MÁX.
1,9 cm (0,75 po) max.
CUT AREA
ÁREA DE CORTE
ZONE DE COUPE
1.800.643.5596 • Lomanco, Inc. • lomanco.com
Installation Instructions
TM
MODEL BRV34
Color Note: The black painted finish of the BRV34 can be used
as-is or as a primer coat for a color finish of your choice. Clean the
surface of all dirt, grease and oil before applying a color finish.
Use a high quality finish to best serve the conditions of your
application.
5. Cut shingles as shown allowing the shingles to fit around the
housing of the roof jack when installed. Apply roofing cement to
seal around the ductwork as shown below. (Figure 4)
Figure 4 / Figura 4
23/4"
7cm (2,75 po)
Roof Jack
OUTLINE
CONTORNO de la
cubierta para el techo
CONTOUR de la buse
de toit
13/4"
4.45cm (1,75 po)
6. Carefully slide the base of the roof jack under the shingles with
the screened opening pointing down towards the roof eave. Note
that some nails may have to be raised or removed to allow the
adapter to slide into place. Make sure the throat of the roof jack is
centered over the exposed ductwork. Fasten the base to the roof
decking with roofing nails located as shown below. (Figure 5)
Figure 5 / Figura 5
Roof Cement
CEMENTO PARA
TECHO
BITUME DE COLLAGE
7. Finish by sealing all seams and nails with roofing cement. Also
use roofing cement to fasten down loose edges of shingles. Make
certain the pest screen is in place.
ROOFING
CEMENT
CEMENTO PARA TECHO
BITUME DE COLLAGE
CUT AREA
ÁREA DE CORTE
ZONE DE COUPE
13/4"
4.45cm (1,75 po)
NAILS
CLAVOS
CLOUS
22160_0219
Subscribe on
YouTube
Advertisement
Table of Contents

Subscribe to Our Youtube Channel
Related Manuals for Lomanco Bath Pro BRV34


Summary of Contents for Lomanco Bath Pro BRV34
- Page 1 5. Cut shingles as shown allowing the shingles to fit around the housing of the roof jack when installed. Apply roofing cement to 1. Determine the install location of the Lomanco Model BRV34 roof seal around the ductwork as shown below. (Figure 4) jack.
- Page 2 1. Decida la ubicación para la instalación de la cubierta para el techo 1. Déterminer l’emplacement de l’installation de la buse de toit modelo BRV34 de Lomanco. Cumpla con todos los códigos y Lomanco de modèle BRV34. Se conformer à toutes les normes et normas locales tous les codes locaux.
Need help?
Do you have a question about the Bath Pro BRV34 and is the answer not in the manual?
Questions and answers