Table of Contents
Advertisement
Available languages
Available languages
Quick Links
Galea™ Life / Sistena Life
Methane/butane-propane gas detector
7756 78 / 7756 79
Technical data
230 V~
T
T E S
R N
L E A
7756 78
Méthane CH4
Butane C2H6
(town gas)
Propane C4H8
U
100 - 240 V~ 50/60 HZ
Ι
25 mA
2 A 250 V~ / Pmax. 60 VA
85 dB (A) à 1 m
Media In One by Legrand PLC
7756 79
9 % of the explosion threshold
30 mA
IP
IK
0°C ... + 40°C
1 X 2,5 mm² / 2 X 1,5 mm²
Detection thresholh :
32
04
EN 50 194
Advertisement
Table of Contents

Related Manuals for LEGRAND Galea Life 7756 78


Summary of Contents for LEGRAND Galea Life 7756 78
- Page 1 230 V~ 9 % of the explosion threshold 25 mA 30 mA T E S L E A 2 A 250 V~ / Pmax. 60 VA 85 dB (A) à 1 m Media In One by Legrand PLC EN 50 194...
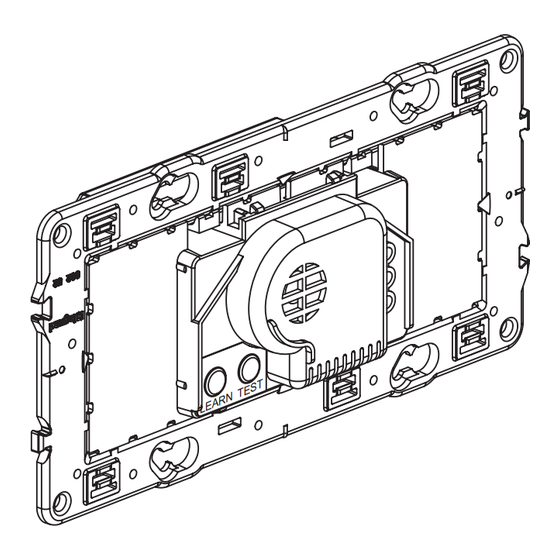
- Page 2 Description Buzzer Indicator light detection /fault (red/yellow) Indicator light LEARN (green) LEARN TEST power on Indicator light (green) LEARN key & TEST button CONTROL key on the second press...
- Page 3 Connection Installation instructions: The gas installation must be in conformity with applicable standards. The detector must not be installed above or below a sink or cooking appliance. It must not be installed near a door or window, or near a fan or a vent. It must not be installed in a cupboard or behind a curtain.
-
Page 4: Installation
Installation Cat. No. 7756 78 Methane gas Cat. No. 7756 79 Butane gas / propane gas Do not Install the 20 cm min. detector Cat. No. 775679 30 cm max near a door Install the detector Cat. No. 775678 higher than the highest opening 0,3 m max. -
Page 5: Operation
Operation Switch on The green «power on» indicator light lights up. The «detection/fault» indicator light flashes yellow/red for a few minutes and then goes out. (time required for the detector to initialise) Detection of gas The «detection/fault» red indicator light lights up and remains red, The integral buzzer sounds intermittently, The state of the internal relay changes, An In One scenario command is emitted by powerline carrier (CPL) to the In One... - Page 6 Do not open up, dismantle, alter or modify the device except where specifically required to do so by the instructions. All Legrand products must be opened and repaired exclusively by personnel trained and approved by Legrand. Any unauthorised opening or repair completely cancels all liabilities and the rights to replacement and guarantees.
- Page 7 Installation Accessory Cat. Nos 2-gang flush-mounting box Finish Cover plate Mechanism White 7810 43 7719 00 Dark bronze 7812 43 7719 10 Cover Soft Aluminium 7813 43 7719 20 Titanium 7814 43 7719 30 Pearl 7815 43 7719 40 T E S L E A Plate 2 x 1...
- Page 8 Instructions in case of alarm: Remain calm and do the following: - Extinguish all open flames, including on all smoking equipment - Switch off all gas appliances - Do not switch on or off any electrical appliances, including the gas detector itself - Close off the gas supply at the main control and/or (in the case of GPL supply) the storage tank - Open doors and windows to increase ventilation Do not use the telephone in the building where a gas leak is suspected.
- Page 9 Legend LEARN key : CONTROL key : LEARN Indicator light The indicator light The indicator light The indicator light The indicator light goes off blinks slowly blinks quickly flashes Learning scenario Transmitter LEARN indicator light Receiver(s) LEARN indicator light Open the scenario...
- Page 10 Learning scenario (continued) Transmitter LEARN indicator light Receiver(s) LEARN indicator light To add several products to the scenario, repeat operations for each receiver. Save the scenario The learning phase is completed. The gas solenoid valve will be operated and the gas circuit will be closed immediately when a gas leak is detected.
- Page 11 Modifying a scenario Transmitter LEARN indicator light Receiver(s) LEARN indicator light Open the scenario or to delete the product from the scenario, skip to...
-
Page 12: Deleting A Scenario
Modifying a scenario (continued) Transmitter LEARN indicator light Receiver(s) LEARN indicator light Save the scenario Deleting a scenario Delete all the scenarios linked to this product (on the transmitter) 10 s... -
Page 13: Troubleshooting
Troubleshooting Problem Cause Solution The Learn indicator light comes on for Learning is impossible. Install compatible products. 5 seconds. The Learn indicator light comes on for The number is memorised Delete the unused scenarios. 10 seconds. transmitters is greater than 32 The Learn indicator light no longer The learning mode closes after 10 Restart the learning. -
Page 14: Declaration Of Conformity
Declaration of conformity DECLARATION DE CONFORMITE DECLARATION OF CONFORMITY Nous déclarons que les produits satisfont aux dispositions de : W e dec l a r e that the p r oducts sat i sfy the p r ov i s i ons of : La Directive 1999/5/CE du Parlement européen et du Conseil du 9 mars 1999 "R&TTE"... - Page 15 230 V~ 9 % der Explosionsschwelle 25 mA 30 mA T E S L E A 2 A 250 V~ / Pmax. 60 VA 85 dB (A) in 1 m Entfernung Media In One by Legrand PLC EN 50 194...
- Page 16 Beschreibung Warnsumme Leuchtdiode Erkennung / Fehler (rot / gelb) Leuchtdiode LEARN (grün) LEARN TEST Leuchtdiode Spannungsanzeige (grün) LEARN-Taste TEST-Taste & BEDIENTASTE beim zweiten Drücken...
- Page 17 Anschluss Installationsvorschriften: Die Gasinstallation muss den geltenden Normen entsprechen. Der Gasmelder darf nicht ober- oder unterhalb eines Spülbeckens oder Kochgerätes installiert werden. Er darf weder in Tür- oder Fensternähe noch in der Nähe eines Lüfters oder einer Abluftöffnung installiert werden. Er darf weder in einem Schrank noch hinter einem Vorhang installiert werden.
- Page 18 Installation Art.-Nr. 7756 78 Methangas Art.-Nr. 7756 79 Butangas / Propangas Den Gasmelder min. 20 cm Art.-Nr. 7756 79 nicht in max. 30 cm Türnähe installieren Den Gasmelder Art.-Nr. 7756 78 oberhalb der höchstgelegenen Öffnung installieren max. 0,3 m...
- Page 19 Funktionsweise Inbetriebnahme Die Leuchtdiode «Spannungsanzeige» leuchtet grün auf. Die Leuchtdiode «Erkennung / Fehler» blinkt einige Sekunden lang gelb / rot auf und erlischt anschließend (für die Initialisierung des Gasmelders notwendige Zeit). Gaserkennung Die Leuchtdiode «Erkennung / Fehler» leuchtet rot auf. Der eingebaute Warnsummer gibt einen Intervallton ab.
- Page 20 Das Gerät vorbehaltlich besonderer, in der Betriebsanleitung angegebener Hinweise nicht öffnen, zerlegen, beschädigen oder abändern. Alle Produkte von Legrand dürfen ausschließlich von durch Legrand geschultes und anerkanntes Personal geöffnet und repariert werden. Durch unbefugte Öffnung oder Reparatur erlöschen alle Haftungs-, Ersatz- und Gewährleistungsansprü- che.
-
Page 21: Montage
Montage Art.-Nr. Zubehör Unterputz-dose 2-fach Finish Abdeckhaube Abdeckplatte Einsatz ultraweiß 7810 43 7719 00 Dark bronze 7812 43 7719 10 Abdeckhaube Soft Aluminium 7813 43 7719 20 Titanium 7814 43 7719 30 Perlmutt 7815 43 7719 40 T E S L E A Abdeckplatte 2 x 1... - Page 22 Anweisungen im Alarmfall: Die Ruhe bewahren und folgende Maßnahmen ergreifen: - Alle offenen Flammen, einschließlich auf allen rauchenden Materialien, löschen. - Alle Gasgeräte zudrehen. - Keine Elektrogeräte ein- oder ausschalten, einschließlich den Gasmelder selbst. - Die Gasversorgung am Haupthahn und/oder (bei einer Flüssiggasversorgung) den Lagertank schließen.
- Page 23 Zeichenerklärung LEARN-Taste : BEDIENTASTE : LEARN Leuchtdiode Die Leuchtdiode Die Leuchtdiode blinkt Die Leuchtdiode blinkt Die Leuchtdiode erlischt langsam schnell leuchtet auf Einlernen des Szenarios Sender LEARN Leuchtdiode Empfänger LEARN Leuchtdiode Das Szenario öffnen...
- Page 24 Einlernen des Szenarios (Fortsetzung) Sender LEARN Leuchtdiode Empfänger LEARN Leuchtdiode Um weitere Geräte zu dem Szenario hinzuzufügen, wiederholen Sie bitte für jeden Empfänger die Bedienabläufe Das Szenario speichern Der Einlernvorgang ist beendet - das Gasmagnetventil wird angesteuert und der Gaskreislauf unterbrochen, sobald ein Gasleck erfasst wird.
- Page 25 Ändern eines Szenarios Sender LEARN Leuchtdiode Empfänger LEARN Leuchtdiode Das Szenario öffnen oder Zum Löschen des Gerätes aus dem Szenario übergehen.
- Page 26 Ändern eines Szenarios (Fortsetzung) Sender LEARN Leuchtdiode Empfänger LEARN Leuchtdiode Das Szenario speichern Löschen eines Szenarios Alle mit diesem Gerät verknüpften Szenarien löschen (am Sender) 10 s...
-
Page 27: Fehler Und Fehlerbehebung
Fehler und Fehlerbehebung Fehler Ursache Fehlerbehebung Die Learn-Leuchtdiode leuchtet für 5 Einlernen ist unmöglich. Den Einlernvorgang mit kompatiblen Sekunden auf. Geräten durchführen. Die Learn-Leuchtdiode leuchtet für 10 Die Anzahl gespeicherter Sender liegt Nicht gebrauchte Szenarien löschen. Sekunden auf. bei mehr als 32. Beim Einlernen blinkt die Learn- Der Einlernmodus wird 10 Minuten Den Einlernvorgang erneut beginnen. -
Page 28: Declaration Of Conformity
Konformitätserklärung DECLARATION DE CONFORMITE DECLARATION OF CONFORMITY Nous déclarons que les produits satisfont aux dispositions de : W e dec l a r e that the p r oducts sat i sfy the p r ov i s i ons of : La Directive 1999/5/CE du Parlement européen et du Conseil du 9 mars 1999 "R&TTE"... - Page 29 230 V~ 9 % del umbral de explosividad 25 mA 30 mA T E S L E A 2 A 250 V~ / Pmáx. 60 VA 85 dB (A) a 1 m Media In One by Legrand CPL EN 50 194...
- Page 30 Descripción Timbre Indicador detección / fallo lumisimo (rojo / amarillo) Indicador LEARN lumisimo (verde) LEARN TEST Indicador presencia tensión lumisimo (verde) Botón LEARN Botón TEST & Botón de ACCIONAMIENTO al pulsar por segunda vez...
- Page 31 Empalme Consignas de instalación : La instalación de gas debe ser conforme con las normas vigentes. El detector no debe instalarse encima o debajo de un fregadero o un aparato de cocción. No debe instalarse cerca de una puerta o una ventana, ni cerca de un ventilador o una boca de ventilación.
-
Page 32: Instalación
Instalación Ref. 7756 78 Gas metano Ref. 7756 79 Gas butano / gas propano No instalar el detector 20 cm min. ref. 7756 79 cerca de una 30 cm max. puerta Instalar el detector ref. 7756 78 más arriba que el marco más elevado 0,3 m max. - Page 33 Funcionamiento Puesta en tensión El indicador luminoso «presencia de tensión» se ilumina en verde El indicador luminoso «detección / fallo» parpadea en amarillo/rojo durante varios minutos, después se apaga. (tiempo necesario para el inicio del detector) Detección de gas El indicador luminoso «detección / fallo» se ilumina en rojo fijo, El timbre integrado emite un sonido intermitente, El relé...
- Page 34 No abrir, desmontar, alterar o modificar el aparato salvo que esto se indique específicamente en las instruc- ciones. Todos los productos Legrand deben ser abiertos y reparados exclusivamente por personal formado y habi- litado por Legrand. Cualquier apertura o reparación no autorizada anula la totalidad de las responsabilidades, derechos a sus- titución y garantías.
-
Page 35: Montaje
Montaje Referencias accesorios Caja de empotrar doble acabado Embellecedor placa Mecanismo Blanco 7810 43 7719 00 Bronze Oscuro 7812 43 7719 10 Embellecedor Aluminio Claro 7813 43 7719 20 Titanio 7814 43 7719 30 Blanco Perla 7815 43 7719 40 T E S L E A Placa 2 x 1... - Page 36 Consignas en caso de alarma : Remain calm and do the following: - Mantener la calma y efectuar las siguientes acciones : - Apagar todas las llamas desnudas, incluidos todos los materiales humeantes - Cerrar todos los aparatos de gas - No poner en marcha ni apagar ningún material eléctrico, incluido el mismo detector de gas - Cerrar la alimentación de gas con el accionamiento principal de gas o (con un suministro de GPL) la cuba de almacenamiento...
- Page 37 Leyenda Botón LEARN: Botón de ACCIONAMIENTO : LEARN Indicator lumisimo El indicador luminoso El indicador luminoso El indicador luminoso El indicador luminoso se apaga parpadea despacio parpadea rápido parpadea Aprendizaje del escenario Emisor Piloto LEARN Receptor(es) Piloto Piloto LEARN Abrir el escenario...
- Page 38 Aprendizaje del escenario (continuación) Emisor Piloto LEARN Receptor(es) Piloto Piloto LEARN Para añadir varios productos al escenario, repetir para cada receptor las operaciones y 4. Grabar el escenario El aprendizaje se ha terminado: la electroválvula gas se accionará y el circuito de gas se cerrará en cuanto se detecte una fuga de gas.
- Page 39 Modificación de un escenario Emisor Piloto LEARN Receptor(es) Piloto Piloto LEARN Abrir el escenario o Para suprimir el producto del escenario, pasar a 6.
- Page 40 Modificación de un escenario (continuación) Emisor Piloto LEARN Receptor(es) Piloto Piloto LEARN Grabar el escenario Borrado de un escenario Borrar todos los escenarios relacionados con este producto (en el emisor) 10 s...
-
Page 41: Problemas Y Soluciones
Problemas y soluciones Problema Causa Solución El indicador luminoso Learn se El aprendizaje es imposible. Instalar productos compatibles. enciende durante 5 segundos. El indicador luminoso Learn se El número de emisores memorizados Suprimir los escenarios inutilizados. enciende durante 10 segundos. es superior a 32. -
Page 42: Declaración De Conformidad
Declaración de conformidad DECLARATION DE CONFORMITE DECLARATION OF CONFORMITY Nous déclarons que les produits satisfont aux dispositions de : W e dec l a r e that the p r oducts sat i sfy the p r ov i s i ons of : La Directive 1999/5/CE du Parlement européen et du Conseil du 9 mars 1999 "R&TTE"... - Page 43 230 V~ 9 % do limite de explosividate 25 mA 30 mA T E S L E A 2 A 250 V~ / Pmáx. 60 VA 85 dB (A) a 1 m Media In One by Legrand PLC EN 50 194...
- Page 44 Descrição Sinalizador acústico Sinalizador de detecção /defeito (vermelho/amarelo) LEARN Sinalizador de (verde) LEARN TEST presença de tensão Sinalizador de (verde) Botão LEARN Botão TEST & Tecla COMANDO premindo 2vezes...
-
Page 45: Esquema De Ligações
Esquema de ligações Instruções de instalação : A instalação de gás deve estar em conformidade com as normas en vigor. O detector não deve ser instalado sobre ou sob a bancarda da cozinha ou fagão. Não deve ser instalado na proximidade de portas ou janelas, nem perto de ventiladores ou saídas de ar. - Page 46 Instalação Ref. 7756 78 Gás methano Ref. 7756 79 Gás butano / Gás propano O detector ref. 7756 79 20 cm min. não deve ser instalado 30 cm max. na proximidade de portas O detector ref. 7756 78 deve ser instalado acima do vão da janela mais elevada...
- Page 47 Funcionamento Ligação à rede eléctrica O sinalizador de «presença de tensão» acende-se (verde). O sinalizador de «detecção / defeito» pisca (amarelo / vermelho) durante vários minutos, apagando-se em seguida. (Tempo necessáro para a activação do detector) Detecção de gás O sinalizador de «detecção / defeito» acende-se (vermelho), O sinalizador acústico emite um sinal intermitente, O contacto de saída muda de posição,...
-
Page 48: Instruções De Segurança
Não abrir, desmontar, alterar ou modificar o aparelho salvo especificação em contrário nas instruções do produto. Todos os produtos Legrand só devem ser abertos e reparados exclusivamente por pessoal formado e auto- rizado pela Legrand. Qualquer abertura ou reparação não autorizada cancela todas as responsabilidades, direitos de substituição e garantias. - Page 49 Montagem Referências de acessórios Caixa de aparelhagem dupla Acabamento montagem embebida Espelho Quadro Mecanismo Branco 7810 43 7719 00 Dark Bronze 7812 43 7719 10 Espelho Soft Alumínio 7813 43 7719 20 Titânio 7814 43 7719 30 Pérola 7815 43 7719 40 T E S L E A...
- Page 50 Instruções em caso de alarme: Manter a calma e proceder como se indica: - Não fazer lume e apaguar quaisquer chamas - Fechar todos os aparelhos que utilizem gás - Não ligar nem desligar os aparelhos eléctricos (incluindo o próprio detector) - Fechar as válvulas de segurança do contador e de corte do redutor, ou da garrafa de gás - Ventilar o local, abrindo todas as portas e janelas Não utilizar o telefone na zona onde se suspeita da existência de uma fuga de gás.
- Page 51 Legenda Botão LEARN: Tecla COMANDO : LEARN Sinalizador luminoso O sinalizador luminoso O sinalizador luminoso O sinalizador luminoso O sinalizador lumi- apaga-se pisca lentamente pisca rapidamente noso acende-se Memorização do cenário Emissor Sinalizador LEARN Receptor(es) Sinalizador LEARN Abrir o cenário...
- Page 52 Memorização do cenário (continuação) Emissor Sinalizador LEARN Receptor(es) Sinalizador LEARN Para associar outros produtos ao cenário, repetir para cada receptor as operações e 4. Gravar o cenário O procedimento de memorização do cenário termina: a electroválvula gás será comandada e o circuito de gás fechado logo que seja detectada uma fuga.
- Page 53 Modificação de um cenário Emissor Sinalizador LEARN Receptor(es) Sinalizador LEARN Abrir o cenário ou Para suprimir o produto do cenário voltar à 6.
- Page 54 Modificação de um cenário (continuação) Emissor Sinalizador LEARN Receptor(es) Sinalizador LEARN Gravar o cenário Supressão de um cenário Suprimir todos os cenários ligados a este produto (no emissor) 10 s...
-
Page 55: Problemas E Soluções
Problemas e soluções Problema Causa Solução O sinalizador LEARN acende-se Não é possível efectuar o Instalar produtos compatíveis. durante 5 segundos. procedimento de memorização. O sinalizador LEARN acende-se O número de emissores associados é Suprimir os cenários em excesso. durante 10 segundos. superior a 32. -
Page 56: Declaração De Conformidade
Declaração de Conformidade DECLARATION DE CONFORMITE DECLARATION OF CONFORMITY Nous déclarons que les produits satisfont aux dispositions de : W e dec l a r e that the p r oducts sat i sfy the p r ov i s i ons of : La Directive 1999/5/CE du Parlement européen et du Conseil du 9 mars 1999 "R&TTE"... -
Page 57: Parametry Techniczne
230 V~ 9 % granicy wybuchowości 25 mA 30 mA T E S L E A 2 A 250 V~ / Moc maks. 60 VA 85 dB (A) a 1 m Media In One by Legrand PLC EN 50 194... - Page 58 Część opisowa Brzęczyk wykrycia zalania Kontrolka (czerwona) LEARN Kontrolka (zielona) LEARN TEST obecności napięcia Kontrolka (zielona) Przycisk LEARN Przycisk TEST & Przycisk STEROWANIA uaktywniany przy drugim naciśnięciu...
- Page 59 Przyłączanie Instrukcje dotyczące instalacji: Instalacja gazowa musi spełniać obowiązujące normy. Czujnik nie powinien być instalowany nad ani pod zlewem czy urządzeniem służącym do gotowania. Nie powinien być montowany w pobliżu drzwi i okien, wentylatora czy kanału wentylacyjnego. Nie powinien być umieszczany w szafach ani za zasłonami.
- Page 60 Instalacja Symb. 7756 78 Gaz metan Symb. 7756 79 Gaz butan / gaz propan Nie montować czujnika 20 cm min. symb. 7756 79 w 30 cm maks. pobliżu drzwi Zainstalować czujnik symb. 7756 78 powyżej najwyższych ościeży 0,3 m maks.
- Page 61 Działanie Podłączenie do prądu Kontrolka «obecności napięcia» zapala się na zielono Kontrolka «wykrycia/błędu» miga na żółto/czerwono przez kilka minut, a następnie gaśnie (czas konieczny na inicjalizację czujnika). Wykrywanie gazu Kontrolka «wykrycia/błędu» zapala się na czerwono. Wbudowany brzęczyk emituje przerywany dźwięk, Wewnętrzny przekaźnik zmienia stan, Polecenie ze scenariusza In One jest emitowane przez prąd nośny (PLC) do produktu lub produktów In One przypisanych w czasie programowania.
- Page 62 Nie otwierać, nie demontować ani nie modyfikować urządzenia, jeśli nie ma na ten temat specjalnej wzmianki w instrukcji. Wszystkie produkty Legrand mogą być otwierane i naprawiane wyłącznie przez pracowników przeszkolo- nych i upoważnionych przez Legrand. Każde otwarcie lub naprawa dokonane bez odpowiedniego upoważnienia zwalnia Legrand od wszelkiej odpowiedzialności, powoduje utratę...
- Page 63 Montaż Symbole akcesoriów Puszka ścienna dwupunktowa Wykończenie Espelho Quadro Mechanizm Arktic 7810 43 7719 00 Choco 7812 43 7719 10 Pokrywa Metalic 7813 43 7719 20 Tytan 7814 43 7719 30 Opalis 7815 43 7719 40 T E S L E A Płytka 2 x 1...
- Page 64 Instrukcje na wypadek alarmu: Zachować spokój i wykonać następujące czynności: - Zgasić wszystkie nieosłonięte płomienie, w tym wszystkie materiały dymiące - Wyłączyć wszystkie urządzenia gazowe - Nie włączać lub ani nie wyłączać żadnych urządzeń elektrycznych w tym również samego czujnika gazu - Zamknąć...
- Page 65 Legenda Przycisk LEARN: Przycisk STEROWANIA : LEARN Kontrolka Kontrolka gaśnie Kontrolka miga wolno Kontrolka miga szybko ontrolka błyska Zapamiętywanie scenariusza Nadajnik Kontrolka LEARN Odbiornik(i) Kontrolka LEARN Otworzy_ scenariusz...
- Page 66 Zapamiętywanie scenariusza (ciag dalszy) Nadajnik Kontrolka LEARN Odbiornik(i) Kontrolka LEARN Aby dodac kilka produktów do scenariusza, dla kaýdego odbiornika powtórzyc operacje i 4. Zapisac scenariusz Zapamietywanie jest zakonczone : elektrozawór gazowy bedzie sterowany, a obieg gaz zostanie zamkniety w momencie wykrycia wycieku gaz.
- Page 67 Modyfikacja scenariusza Nadajnik Kontrolka LEARN Odbiornik(i) Kontrolka LEARN Otworzy_ scenariusz lub Aby usunąć produkt ze scenariusza, przejść do 6.
- Page 68 Modyfikacja scenariusza (ciag dalszy) Nadajnik Kontrolka LEARN Odbiornik(i) Kontrolka LEARN Zapisac scenariusz Usuwanie scenariusza Usunąć wszystkie scenariusze powiązane z tym produktem (na nadajniku) 10 s...
-
Page 69: Problemy I Ich Rozwiązywanie
Problemy i ich rozwiązywanie Problem Przyczyna Rozwiązanie Kontrolka Learn świeci się przez 5 Zapamiętywanie jest niemożliwe. Zainstalować kompatybilne produkty sekund. Kontrolka Learn świeci się przez 10 Liczba zapisanych nadajników jest Usunąć nieużywane scenariusze. sekund. większa niż 32. W czasie zapamiętywania kontrolka Przy braku czynności, tryb Ponownie rozpocząć... -
Page 70: Deklaracja Zgodności
Deklaracja zgodności DECLARATION DE CONFORMITE DECLARATION OF CONFORMITY Nous déclarons que les produits satisfont aux dispositions de : W e dec l a r e that the p r oducts sat i sfy the p r ov i s i ons of : La Directive 1999/5/CE du Parlement européen et du Conseil du 9 mars 1999 "R&TTE"...
Need help?
Do you have a question about the Galea Life 7756 78 and is the answer not in the manual?
Questions and answers