Behringer NX3000 Quick Start Manual
Ultra-lightweight 6000-watt 4-channel class-d power amplifier with smartsense loudspeaker impedance compensation
Hide thumbs
Also See for NX3000:
- Quick start manual (24 pages) ,
- Quick start manual (44 pages) ,
- Quick start manual (36 pages)
Advertisement
Quick Links
.СЗГЗ'-'
0
uick Start Guide
X6000/ X3000/ X1 ООО
Ultra-Lightweight 6000/3000/1 ООО -Watt Class-D Power Amplifier with
SmartSense Loudspeaker Impedance Compensation
X4-6000
Ultra-Lightweight 6000-Watt 4-Channel Class-D Power Amplifier with
SmartSense Loudspeaker Impedance Compensation
X6000D/ X3000D/ X1000D
Ultra-Lightweight 6000/3000/1 ООО -Watt Class-D Power Amplifier with
DSP Control and SmartSense Loudspeaker Impedance Compensation
A54-00001-85312
о p
behringer
Advertisement

Related Manuals for Behringer NX3000


Summary of Contents for Behringer NX3000
- Page 1 Ultra-Lightweight 6000/3000/1 ООО -Watt Class-D Power Amplifier with SmartSense Loudspeaker Impedance Compensation X4-6000 Ultra-Lightweight 6000-Watt 4-Channel Class-D Power Amplifier with SmartSense Loudspeaker Impedance Compensation X6000D/ X3000D/ X1000D Ultra-Lightweight 6000/3000/1 ООО -Watt Class-D Power Amplifier with DSP Control and SmartSense Loudspeaker Impedance Compensation behringer A54-00001-85312...
-
Page 2: Legal Disclaimer
LAB GRUPPEN, LAKE, TANNOY, TURBOSOUND, manufacturer, or sold with This symbol, wherever it appears, TC ELECTRONIC, TC HELICON, BEHRINGER and BUGERA the apparatus. When a cart alerts you to the presence of uninsulated are trademarks or registered trademarks of MUSIC Group... - Page 3 LAB GRUPPEN, LAKE, TANNOY, TURBOSOUND, le advierte sobre instrucciones operativas Al transportarel equipo, TC ELECTRONIC, TC HELICON, BEHRINGER у BUGERA у de mantenimiento que aparecen en la tenga cuidado para evitar son marcas comerciales о marcas registradas documentation adjunta.
-
Page 4: Garantie Limitee
LAB GRUPPEN, LAKE, TANNOY, TURBOSOUND, d'utilisation et d'entre ! Tien importantes travail recommandes TC ELECTRONIC, TC HELICON, BEHRINGER et BUGERA dans la documentation fournie. Lisez les consignes de par le fabricant ou sont des marques ou marques deposees de MUSIC Group securite du manuel d'utilisation de I'appareil. - Page 5 Standvorrichtungen, TANNOY, TURBOSOUND, TC ELECTRONIC, TC HELICON, auszuschlieBen, darf die Gerateabdeckung Stative, Halter oder Tische, BEHRINGER und BUGERA sind Warenzeichen oder bzw. Gerateruckwand nicht abgenommen werden. die vom Hersteller benannt eingetragene Warenzeichen der MUSIC Group IP Ltd. Im Innern des Gerats befinden sich keine vom Benutzer oder im Lieferumfang ©...
-
Page 6: Garantia Limitada
TANNOY, TURBOSOUND, TC ELECTRONIC, TC HELICON, especificados pelo Atengao BEHRINGER e BUGERA sao marcas ou marcas fabricante ou vendidos De forma a diminuir о risco de choque registradas do MUSIC Group IP Ltd. © MUSIC Group сото... - Page 7 Quick Start Guide...
- Page 8 X6000/ X3000/ X1000/ X4-6000/ X6000D/ X3000D/ X1000D NX6000/NX3000/NX1000/NX4-6000/NX6000D/NX3000D ® Step 1: Hook-Up Full band recording to computer (single amplifier/stereo mode) Grabacion en ordenador de un grupo musical completo (un unico amplificador/modo stereo) Enregistrement d'un groupe de musiciens sur un ordinateur (un seul ampli/mode stereo) ЕБ...
- Page 9 Quick Start Guide NX1000D Hook-up DJ Hook-up Conexion para montaje de DJ Configuration DJ DJ Setup Conexao para DJ й О о О ,o О o| О о XM8500 □ О □□□ |Д| ООО О с о о _9® МИ 9® HPX6000 1:131:1: □...
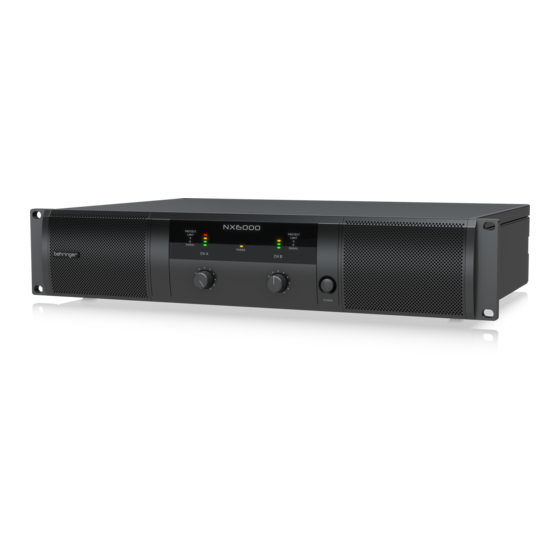
- Page 10 X6000/ X3000/ X1000/ X4-6000/ X6000D/ X3000D/ X1000D NX6000/NX3000/NX1000/NX4-6000 Controls NX3000/NX1000 NX6000 NX4-6000...
- Page 11 Quick Start Guide @ Step 2: Controls RACK EARS secure the unit into a rack OUTPUTS connect the amplifier to the CROSSOVER switch chooses between speakers using professional speaker cables three modes: FULLRANGE, LE (low frequency using four attaching screws and washers with twist-locking plugs.
- Page 12 X6000/ X3000/ X1000/ X4-6000/ X6000D/ X3000D/ X1000D NX6000/NX3000/NX1000/NX4-6000 Controls ® Paso 2: Controles ESCUADRAS PARA COLOCACIO E RACK Las tomas OUTPUTS conectan el amplificador El interrupter CROSSOVER le permite elegir Coloque esta unidad en un bastidor rack con los altavoces por medio de cables de entre tres modos: FULLRANGE, LF (crossover usando los cuatro tornillos у...
- Page 13 Quick Start Guide ® Etape 2: Reglages POIG EES Fixez I'ampl ificateur au boitier Les sorties OUTPUTS permettent de CROSSOVER Ce selecteur permet de choisir entretrois modes : FULLRANGE, LF (filtre Rack en utilisant quatre vis et rondell es connecter I'ampli a des enceintes avec des cable pour haut-parleurs professionnels dotes basses frequences) et HF (filtre hautes (non fournies).
- Page 14 X6000/ X3000/ X1000/ X4-6000/ X6000D/ X3000D/ X1000D NX6000/NX3000/NX1000/NX4-6000 Controls ® Schritt 2: Bedienelemente RACK-HALTERU GE Montieren Sie das Die AUSGA GE verbinden den Verstarker El CROSSOVER-Schalter wa hit zwischen liber professionelle Lautsprecherkabel und Gerat mit vier Befestigu ngsschrauben und drei Modi: FULLRANGE, LF (Low Frequency...
- Page 15 Quick Start Guide ® Passo 2: Controles OUTPUTS conectam о amplificador aos Os interruptores CROSSOVER escolhem entre RACK EARS Fixe a unidade a um rack alto-falantes usando cabos de aIto-falantes tres modos: FULLRANGE (alcance completo), usando quatro parafusos e buchas (chaves profissionais com plugues com trava de torrjao.
- Page 16 X6000/ X3000/ X1000/ X4-6000/ X6000D/ X3000D/ X1000D NX6000D/NX3000D/NX1000D Controls ш ш ш ЙВ ® NX3000D/NX1000D NX6000D...
- Page 17 LED will light and the unit will automatically and control over parameters via computer. mute the channel until the error is no longer Please visit behringer.com to download DSP detected, after which the PROTECT LED will control software for your computer. The USB switch off and the amp will behave normally.
- Page 18 El piloto PROTECT traves del ordenador. Visite nuestra pagina fijacion de rosea. le indica que se ha producido un error web en behringer.com para descargarse algunos programas de control DSP operativo (pico de corriente, recalentamiento, etc.). Cuando se produzca esta situacion, parasu ordenador.
- Page 19 (surtension, surchauffe, etc.). Si un probleme ordinateur. Consultez le site behringer. com apparait, la LED PROTECT s'allume et le canal pour telecharger le logiciel de gestion DSP r --------------------------- \ correspondant est automatiquement coupe sur votre ordinateur.
- Page 20 Stecker mit Drehverriegelung mit Eingangsverstarkung. Die PROTECT LED Firmware und Parametersteuerung mittels den Lautsprecherboxen. zeigt an, dass ein Betriebsfehler aufgetreten Computer. Bitte besuchen Sie behringer.com , ist (Uberspannung, Uberhitzung usw.). c --------------------------- \ urn die DSP-Steuerungssoftware fiir Ihren Beim Auftreten eines Betriebsfehlers leuchtet Computer herunterzuladen.
- Page 21 Favor, verificaro site ocorrer, о LED PROTECT acendera e a unidade Behringer.com para baixar о software de habilitara automaticamente о modo mute do controle de DSP para о seu computador. canal ate que о erro nao seja mais detectado, ®...
- Page 22 X6000/ X3000/ X1000/ X4-6000/ X6000D/ X3000D/ X1000D NX6000/NX3000/NX1000/NX4-6000 Getting started ® Step 3: Getting ® Make sure the amplifier and your ® Adjust the INPUT CONTROLS to set sound source are turned OFF. the input levels. started If the LIMIT LEDs light up continuously, ®...
-
Page 23: Amp Mode
Quick Start Guide NX6000D/NX3000D/NX1000D Getting started ® Power on the amplifier by pressing И) En Mode Graphic, tournez le bouton SELECT ® On the PE screen, deploy up to 8 the POWER button. The startup screen pour choisir la voie active et le numero de module different parametric equalizer filters to will appear on the LCD display. - Page 24 X6000/ X3000/ X1000/ X4-6000/ X6000D/ X3000D/ X1000D NX6000D/NX3000D/NX1000D Getting started ® Step 3: Getting ® On the DE screen, you may ® On the DELAY screens, you may deploy Dynamic E modules (up to 2 per |J compensate for phase cancellation started stereo channel) to monitor designated problems in your system by altering...
-
Page 25: Save Preset
Quick Start Guide On the Limit screen, you may To exit to the top-level DSP screen, ® implement your own threshold press the EXIT button. (Threshfoldj), release (Rtime), and hold Para volver a la primera (Hold) settings using the built-in limiters. pantalla DSP, pulse el boton EXIT. -
Page 26: Horizontal Bi-Amping
X6000/ X3000/ X1000/ X4-6000/ X6000D/ X3000D/ X1000D NX6000/NX3000/NX1000/NX4-6000 Bi-amping @ Step 4: Bi-amping (ED Bi-amping splits a signal into upper and E) Bi-amplificador Horizontal 0 Bi-amplificador lower frequency bands, and then assigns each Horizontal usa urn amplificador iNUKE para processar frequency band to separate speaker cabinets. - Page 27 ® Set the subwoofer to do amplificador HF para os pinos 14-/1- da saida professional twist-locking connectors "BIAMPING" mode. On BEHRINGER from each amplifier's CH A output to a esquerda do painel, enquanto a saida CH В (24-/2-) subwoofers, the LF amplifier's signal on connector distribution panel.
- Page 28 X6000/ X3000/ X1000/ X4-6000/ X6000D/ X3000D/ X1000D NX6000/NX3000/NX1000/NX4-6000 Bi-amping ® Step 4: Bi-amping Coloque о subwoofer no modo "BIAMPING" ® REMARQUE: Si vos Subwoofers sont equipes (bi-am plifica^ao). 0 sinal do amplificador LF nos uniquement des broches 1+/1-, vous pouvez les pinos 2+/2- comandara о...
- Page 29 Quick Start Guide Digital Snake SI 6 X32 Compact NX3000 NX3000 31520 PRO B1800X PRO B1800X PRO Rack-mounted Distribution Panel Panel de distribucion de montaje en rack Panneau de distribution montable en Rack Im Rack montiertes Verteilerfeld Painel de Distribui^ao montado em rack...
- Page 30 X6000/ X3000/ X1000/ X4-6000/ X6000D/ X3000D/ X1000D NX6000/NX3000/NX1000/NX4-6000 Bi-amping ® Step 4: Bi-amping Vertical Bi-amping Configurez le filtre actif externe de maniere a Vertical bi-amping deploys a single amplifier per separer le signal autours de 100 Hz. stereo side. An external crossover splits the orjginal ®...
- Page 31 Quick Start Guide Tanto no amplificador esquerdo quanto @ Set the subwoofer into no direito, coloque о interruptor CROSSOVER na "BIAMPING" mode. posigao FULLRANGE (alcance complete). GD Ajuste el subwoofer al > modo "BIAMPING". ROSSOVER ES Placez les Subwoofers en mode "BIAMPING". Г...
- Page 32 X6000/ X3000/ X1000/ X4-6000/ X6000D/ X3000D/ X1000D NX6000/NX3000/NX1000/NX4-6000 Bi-amping...
- Page 33 Quick Start Guide...
- Page 34 X6000/ X3000/ X1000/ X4-6000/ X6000D/ X3000D/ X1000D NX6000D/NX3000D/NX1000D Bi-amping ШЗ Step 4: Bi-amping @ Choose the BIAMP1 setting on the ® Set the subwoofer into Amp Mode screen. BIAMPING mode. ПЭ Elija el ajuste BIAMP1 en la pantalla ® Ajuste el subwoofer al ОШ...
- Page 35 Quick Start Guide (Л) En el canal A#1, elija el tipo de filtro pasa-altos ® Im Kanal B#1 wahlen Sie einen entsprechenden (HPtype: BUT6, BUT12, BES12, etc.) у ajuste la Tiefpass-Filtertypus aus (LPtype: BUT6, BUT12, frecuencia de corte (H Pfreq) aproximadamente a BES12, etc.) und stellen die Cutoff Frequenz (LPfreq) 100 Hz.
- Page 36 X6000/ X3000/ X1000/ X4-6000/ X6000D/ X3000D/ X1000D NX6000D/NX3000D/NX1000D Bi-amping...
- Page 37 Quick Start Guide...
-
Page 38: Specifications
X6000/ X3000/ X1000/ X4-6000/ X6000D/ X3000D/ X1000D Specifications NX6000 NX4-6000 NX6000D NX3000D Maximum Output Power Stereo/4-channel 20 per channel, stereo — 4x1600W 2X1500W 40 per channel, stereo 2x3000W 4x860W 2x900W 80 per channel, stereo 2x1600W 4x440W 2x440W Bridge connection — 2x3000W 3000 w —... - Page 39 Quick Start Guide NX6000 NX3000D NX6000D NX4-6000 System л 2 x combo jacks 2 x combo jacks Inputs 4 x combo jacks Input impedance 10 kO unbalanced, 20 kO balanced Outputs 2 x locking-style professional speaker connectors 4 x locking-style professional 2 x locking-style professional speaker connectors speaker connectors...
- Page 40 X6000/ X3000/ X1000/ X4-6000/ X6000D/ X3000D/ X1000D NX3000 NX1000D NX1000 Maximum Output Power Stereo /4-channel 2 0 per channel, stereo 2X1500W 2x500W 4 per channel, stereo 2x900W 2x300W 8 per channel, stereo 2x440W 2x160W Bridge connection 3000 W 1000 W...
- Page 41 Quick Start Guide ЛУ1 NX3000 NX1000D NX1000 Г System Inputs 2 x combo jacks Input impedance 10 kO unbalanced, 20 kO balanced Outputs 2 x locking-style professional speaker connectors Output circuit type Class D Distortion <0.05% <0.1% <0.05% Frequency response...
- Page 42 "Support" de nuestra ist. Sollte Ihr Land nicht aufgelistet sein, priifen Sie pagina web behringer.com . En caso de que su pais no bitte, ob Ihr Problem von unserem „Online Support" gelost werden kann, den Sie ebenfaI Is auf behringer.com aparezca en ese listado, acceda a la seccion "Online Support"...
- Page 43 Quick Start Guide FEDERAL COMMU ICATIO S COMMISSIO COMPLIA CE I FORMATIO <3 BEHRI GER NX6000/NX3000/NX1000/NX4-6000/ NX6000D/NX3000D/NX1000D -------------------------------------------------------------------------------------------------------------------------------------------------------------------- / Responsible Party Name: MUSIC Group Services V Inc. <33 Address: 5270 Procyon Street Las Vegas, V 89118 Phone Number: +1 702 800 8290...
- Page 44 Dedicate Your Life to MUSIC behringer.com behringer...
Need help?
Do you have a question about the NX3000 and is the answer not in the manual?
Questions and answers