Table of Contents
Advertisement
Advertisement
Table of Contents

Subscribe to Our Youtube Channel
Summary of Contents for Leprecon LP-X24
- Page 1 LP-X24 and LP-X48 Users Manual...
- Page 3 LP-X24 and LP-X48 Users Manual...
- Page 4 Leprecon. Leprecon® is a registered trademark of Leprecon LLC. All other brand and product names are trademarks or registered trademarks of their respective holders.
-
Page 5: Table Of Contents
To Delete a Moving Light Instrument from the System.........................51 To Reserve and Un-reserve DMX Channels ..........................51 Dimmer Patch .......................................52 To Create a New Dimmer Patch ..............................53 To Copy a Dimmer Patch................................54 To Change which Patch is Active ..............................55 To Delete a Patch ..................................56 LP-X24 and LP-X48 Users Manual... - Page 6 To Create a New Show .................................63 To Back up a Show to Floppy Disk ...............................64 To Restore a Show ..................................65 Transferring a Show from an LP-X48 to an LP-X24........................66 The Erase Menu....................................66 To Erase the Stack ..................................66 To Erase Custom Patches ................................67 To Erase Playbacks ..................................68...
- Page 7 Creating Focus Effects..................................181 Shape Parameters ..................................181 Linear Effect Parameters ................................182 Random Motion Effect Parameters.............................183 To Create a Focus Effect ................................183 Sequencing the Lights in an Effect ..............................185 Sequencing Parameters ................................186 To Sequence an Effect ................................186 LP-X24 and LP-X48 Users Manual...
- Page 8 Appendix B: MIDI Protocol Specification MIDI Message Formats..................................211 MIDI System Reset Message ..............................211 MIDI Controller Channel Messages ............................211 MIDI Message Output ..................................212 MIDI Message Input ....................................212 Example of a MIDI Message Sequence..............................213 LP-X Controller Channel Identities..............................213 Glossary..................................215 Index..................................221 LP-X24 and LP-X48 Users Manual...
-
Page 9: Introduction
The LP-X48 has quick fader/button access to 48 dimmers and 48 moving light fixtures. As with the LP-X24, show sizes can vary but are limited to 1024 DMX channels. The numeric keypad provides access to additional dimmers and fixtures. The shows built on the LP series consoles may be simple or complex. -
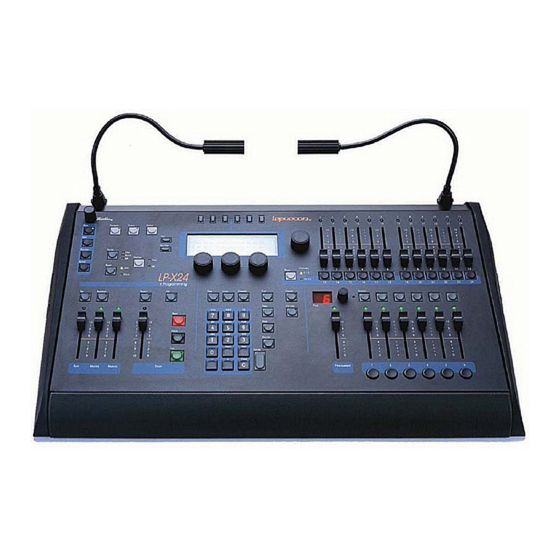
Page 10: Board Layout
Video, keyboard and mouse support Weight 29 lbs. (boxed) 36 lbs. (boxed) Height, Width, Depth (in inches) 4.75" x 26.5" x 18" 4.75" x 36.5" x 18" Board Layout The LP-X series consoles consist of seven distinct sections. LP-X24 and LP-X48 Users Manual... - Page 11 Switch between solo and add functions. • Display Section: This section includes the LCD display, four selection wheels (left, right, center and side), six softkeys for menu selection, a Yes button and a No/Escape button. LP-X24 and LP-X48 Users Manual...
- Page 12 Master Section: Includes the Master fader, the Manual fader and the Blackout button. Also includes two chase rate controllersthe Rate fader and a Tap button. • Stack Section: Includes Back, Hold and Go buttons, the Stack cross-fader, the On button and the Select button. LP-X24 and LP-X48 Users Manual...
- Page 13 • Manual Scene Section: On the LP-X24 (shown below), this section includes 12 Manual Scene Faders, Bump buttons for each and the Bank switching button. Bump buttons are also used for moving light fixture selection. When this is the case, we refer to the buttons as ML Selects.
-
Page 14: Power Up And Down Sequences
Bank switching button. • Playback Section: Includes the Page selector and display, Playback select buttons, faders and bumps, and the Programmer fader. The LP-X24 (shown below) has six playbacks. The LP-X48 (not shown) has twelve playbacks. Power Up and Down Sequences When the LP-X arrives from the factory, it will be set to operate on 110V current. -
Page 15: To Power Down The Lp-X
The LP-X also autosaves information whenever you put the board into Run mode. See "To Modify the Auto Save Interval" beginning on page 198 for complete details. LP-X24 and LP-X48 Users Manual... -
Page 16: Display Modes
The image below is a sample LP-X Video Setup Mode screen. The screen that you see will vary depending upon whether you were in Run, Record or Setup at the time you switched to Video Mode. LP-X24 and LP-X48 Users Manual... -
Page 17: Orientation To Lcd Mode
100% amber blue congo blue Delay Fade 0:00.0 0:00.0 One or more of the wheels will assist you in utilizing the functions and features on the display. In this case, all four wheels are useful: LP-X24 and LP-X48 Users Manual... -
Page 18: Orientation To Video Mode
Mode with just a few pointers. Mode Buttons: The Mode Buttons correspond to the buttons in the Mode Controller Section of the console itself. The Playback, Stack and Scene buttons are only displayed in Run and Edit mode. Mode Buttons LP-X24 and LP-X48 Users Manual... - Page 19 Underlined Items: When an item is underlined, clicking on it provides access to additional functions that are uniquely associated with the item. For example, the image below is of the Moving Light Programmer screen. LP-X24 and LP-X48 Users Manual...
- Page 20 Color Effects Clicking the None for the color effects opens the Effects List for colors, as shown below. Label Chase Clicking another underlined item, for example Label Chase, opens the Effects Programmer, as shown below. LP-X24 and LP-X48 Users Manual...
-
Page 21: Conventions Used In This Manual
"remembered" by the LP-X. You must move the fader to the position that matches the remembered value before changes of fader position will have any effect. Once you have "matched" the value, subsequent changes of fader position will affect the output value of the light. LP-X24 and LP-X48 Users Manual... -
Page 22: Using The Keypad
Introduction For example, the LP-X24 has one set of faders in the Manual Scene section of the console, but pressing the Bank button changes the faders from numbers 1 through 12 to numbers 13 through 24. Assume that you set fader 1 to a level of 50%. You then press the Bank button so that you are controlling faders 13 through 24. -
Page 23: Conventional Channel Input
You may press the Channel key and specify one or a range of channels and then set their levels. You use the buttons Level, Channel, Thru, And and Except to do this. Level on some consoles is the @ key. LP-X24 and LP-X48 Users Manual... - Page 24 The screen below shows the level assignment for channels 1 through 5 at the level 75%. Conventional Channel Input Chan ## [Thru ##] [Except ##]] [And ##] CHAN 1 THRU 5 Level 75 Press Enter to save the level assignment. Press No/Esc to cancel the level assignment. LP-X24 and LP-X48 Users Manual...
- Page 25 Recording new scene 01 02 03 04 05 06 07 08 09 10 11 12 75 75 75 75 13 14 15 16 17 18 19 20 21 22 23 24 Fade Level Select 0:00 LP-X24 and LP-X48 Users Manual...
-
Page 27: Chapter One: Quick Start
On the LP-X24, the twelve faders can be switched between a low and high bank, giving twenty-four control channels for conventional instruments. On the LP-X48, the twenty- four faders can be switched between a low and high bank, giving forty-eight control channels for conventional instruments. -
Page 28: Moving Light Select Buttons
Moving Light Select Buttons When programming moving light looks, instruments may be selected using the conventional channel Bump buttons. As with the faders, these twelve (LP-X24) or twenty-four (LP-X48) Moving Light Select buttons (ML Selects) are switched between high and low instrument banks. -
Page 29: Distinct Theatrical Stack
How do I… …put moving lights into the board? On the LP-X24, DMX channels 1 through 100 are reserved for conventional lights by default when a new show is created. On the LP-X48, DMX channels 1 through 200 are reserved for conventional lights by default when a new show is created. -
Page 30: Create Groups Of Instruments
Each slot is assigned to an ML Select, so you have a total of 24 or 48, depending upon your board type. For the LP-X24, there are 12 slots in the first bank and 12 slots in the second bank. For the LP-X48, there are 24 slots in the first bank and 24 slots in the second bank. - Page 31 4. Assign lights to the group by pressing the ML Select button for each. Save Edit Group CYBERS #1 Cyberlight #2 Cyberlight 5. Press the Save softkey. Edit Delete Group List CYBERS <2> Empty Empty Empty Empty Empty LP-X24 and LP-X48 Users Manual...
-
Page 32: Strike My Lamps
Filter (Dim/Both/ML) button. In this section we discuss the techniques for recording both moving and conventional lights. 1. Put the LP-X into the following modes for recording: Button/Fader Setting Modes Record and Scene Display LP-X24 and LP-X48 Users Manual... - Page 33 Label Recording new scene No Change No Dowse Defaults Intensity: 100% amber blue congo blue Delay Fade 0:00.0 0:00.0 You see the following screen when the Beam labels are displayed (by pressing the Beam softkey). LP-X24 and LP-X48 Users Manual...
- Page 34 You select the five lights on the right side of the stage. The label Pink appears in the display, indicating that all five lights have that color in common. You select that label. You deselect the lights. LP-X24 and LP-X48 Users Manual...
-
Page 35: Set Fade Times
Recording new scene No Change No Dowse Defaults Intensity: 100% belly fade off-center c Delay Fade open 0:00.0 0:00.0 You may also set them while you are editing looks. 1. Put the board into Edit/Playback mode. LP-X24 and LP-X48 Users Manual... - Page 36 The Edit Scene Timing screen is designed for both conventional and moving lights. Some of the featuresfor color, beam and focusapply to moving lights only. 4. Set the fade times for each property. 5. Press the Yes button when you are done. LP-X24 and LP-X48 Users Manual...
-
Page 37: Play Back Looks
In LCD mode, you must additionally raise the fader for the playback. 3. Press the Chase softkey. 4. Use the Tap button or the Chase Rate fader to set the chase rate. 5. To convert the chase back into a scene list, press the Unchse button. LP-X24 and LP-X48 Users Manual... -
Page 38: Record Scenes To The Stack And Play Them Back
Twenty-four “virtual” Instrument Selects. That is to say that there are twenty-four additional Instrument Selects accessible only through the software On the LP-X48: Corresponding Instrument Select Buttons Bank 1—Instrument Select buttons 1-6 Bank 1—Instrument Select buttons 7-12 Bank 1—Instrument Select buttons 13-18 LP-X24 and LP-X48 Users Manual... - Page 39 Remove a moving light from a cue by clearing it. See “Clearing Settings” on page 41 for details. Manage Labels/Label Picker In Video Mode, the ML Programmer makes it significantly more convenient to select, create, edit, rename and delete labels. LP-X24 and LP-X48 Users Manual...
- Page 40 The Attribute Overrides section of the screen displays all attributes for all selected instruments. In other words, with eight instruments selected, even if only four of them have the attribute Effects 1, the attribute appears in the list. LP-X24 and LP-X48 Users Manual...
- Page 41 You may only increase its intensity. This is because of the highest-takes-precedence nature of intensity values in the LP-X. Other important notes about Live Override Mode: • The Programmer starts out in a cleared state with nothing selected. LP-X24 and LP-X48 Users Manual...
- Page 42 (1) In Run Playback mode, click or press the Live Override menu item. The ML or Conventional Programmer appears, depending upon which was the last selected. You may toggle between these two programmers using the Conventional Programmer and Moving Light Programmer menu items. LP-X24 and LP-X48 Users Manual...
-
Page 43: Console And Keyboard Buttons
Items that are Still Controlled Only from the Console: Some functions are still controlled only from the console. They do not have a Video Mode counterpart. • Bump and Filter buttons • Playback and Stack Select buttons LP-X24 and LP-X48 Users Manual... - Page 44 Arrow keys work in number boxes, as well as Page Up and Page Down. • In text boxes, you may use the Backspace, Delete, Home, End and Arrow keys. In number boxes, you may not use any of these keys except Delete. LP-X24 and LP-X48 Users Manual...
-
Page 45: Clearing Settings
(2) Click or press the Name button. The Name Playback dialog box appears. (3) Enter a name for the playback scenelist and then click or press Ok. The name now appears in the playback scenelist list. LP-X24 and LP-X48 Users Manual... -
Page 47: Chapter Two: Setup Essentials
View DMX line assignments and reserve DMX channels. Lock Lock a show, preventing recording. Misc Used for a variety of miscellaneous features such as setting MIDI In and MIDI Out channels and setting the time. LP-X24 and LP-X48 Users Manual... -
Page 48: The Instrument Menu
DMX line assignment locates a moving light instrument at a specific DMX address. The LP-X24 drives one DMX line with 512 channels. By default, the first 100 DMX channels are reserved for conventional lightsa setting that can be changed if desired. -
Page 49: The Lp-X Instrument Library
The Instrument List screen appears. Resrve Instrument List Empty Empty Empty Empty Empty Empty 2. Press the Add softkey. Use the side wheel to scroll to an empty slot if the Add softkey is not visible. LP-X24 and LP-X48 Users Manual... - Page 50 ML Select button in the Manual Scene section of the console. On the LP-X24, Slots 1 through 12 correspond to ML Select buttons 1 through 12 in bank 1. Slots 13 through 24 correspond to ML Select buttons 1 through 12 in bank 2.
- Page 51 7. Press the Save softkey to save your settings. The LP-X offers the opportunity to add another of the same instrument into the system. It automatically sets the slot and DMX values to the next available. LP-X24 and LP-X48 Users Manual...
-
Page 52: To Edit A Moving Light Instrument
Use this procedure if you want to change the name or DMX assignment for an instrument that you have already added into the system. 1. From the Setup Mode screen, press the Inst softkey. The Instrument List screen appears. LP-X24 and LP-X48 Users Manual... -
Page 53: To Move A Moving Light To A Different Slot
5. Invert the pan or tilt as desired. 6. When you are done, press the Save softkey. To Move a Moving Light to a Different Slot 1. From the Setup Mode screen, press the Inst softkey. The Instrument List screen appears. LP-X24 and LP-X48 Users Manual... - Page 54 ML Select button for the slot. 5. Press the Yes key to complete the move. Edit Move Delete Resrve Instrument List 1 Empty 2 #2 Cyberlight 121 Cyberlight 3 #1 Cyberlight 101 Cyberlight 4 Empty 5 Empty 6 Empty LP-X24 and LP-X48 Users Manual...
-
Page 55: To Delete A Moving Light Instrument From The System
To Reserve and Un-reserve DMX Channels By default, the LP-X reserves DMX channels 1 through 100 (LP-X24) or channels 1 through 200 (LP-X48) for conventional lights. You may prefer to reserve more, fewer or different channels for conventional lights. Use this procedure to make such changes. -
Page 56: Dimmer Patch
Another common use is to allow the operator to build a logical layout of the dimmers on the control board regardless of the dimmer circuit that is used. For example, all lighting from the left side of the stage might be LP-X24 and LP-X48 Users Manual... -
Page 57: To Create A New Dimmer Patch
The Default patch is 1:1 with channels 1 through N set to 100% intensity. The first N channels are mapped, where N is the number of hardware and "virtual" faderscurrently 96 (LP-X24) or 192 (LP-X48). 2. Press the New softkey. -
Page 58: To Copy A Dimmer Patch
1. From the Setup Mode screen, press the Patch softkey. The Patch List screen appears. Copy Patch List Default [ACTIVE] 2. Press the Copy softkey. Enter a patch name Name: Patch 02 Yes / No LP-X24 and LP-X48 Users Manual... -
Page 59: To Change Which Patch Is Active
1. From the Setup Mode screen, press the Patch softkey. The Patch List screen appears. The active patch has the word [ACTIVE] after it. 2. Using the side wheel, select the patch you want to activate. 3. Press the Apply softkey. LP-X24 and LP-X48 Users Manual... -
Page 60: To Delete A Patch
The Patch List screen appears. 2. Using the side wheel, select a patch to edit and then press the Edit softkey. Note that the Edit softkey will not be available when the default patch is selected. LP-X24 and LP-X48 Users Manual... - Page 61 You use the buttons Dim, Level, Channel, Thru, And and Except to create the patching assignment. Level on some consoles is the @ key. On the LP-X48, pressing the Dim button toggles between DMX Line A and DMX Line B. LP-X24 and LP-X48 Users Manual...
- Page 62 16, 17, 18, 19, 22, 23, 24, and 25 to channel 1 at the level 75%. The screen below shows the channel assignment for dimmers 1 through 5 to channel 1 at the level 75%. LP-X24 and LP-X48 Users Manual...
-
Page 63: Viewing Channel Assignments By Dimmer Or By Channel
The Patch List screen appears. 2. Using the side wheel, select a patch to edit and then press the Edit softkey. Note that the Edit softkey will not be available when the default patch is selected. LP-X24 and LP-X48 Users Manual... -
Page 64: To Delete A Channel Assignment
The Patch List screen appears. 2. Using the side wheel, select a patch to edit and then press the Edit softkey. Note that the Edit softkey will not be available when the default patch is selected. LP-X24 and LP-X48 Users Manual... -
Page 65: Control Features
To use Control Features Control features are only available for instruments that have DMX line assignments in the show that is currently open. 1. From the Setup Mode screen, press the CtrlF softkey. The Control Features screen appears. LP-X24 and LP-X48 Users Manual... - Page 66 Studio Color has the control features Home and Lamp Off. The Cyberlight Mode 2 has the control feature Home. With instruments of both types selected, only the control feature Home appears in the Available Control Features list. LP-X24 and LP-X48 Users Manual...
-
Page 67: Show Maintenance
Update Erase Lock Misc Setup Mode Software Version: 1.01.10FxD Prev Build Date: Sep 13 2001 16:38:39 Show Version: 1.01 Lib Version: 51 CPU Version: D 2. Press the Show softkey. The Show Maintenance screen appears. LP-X24 and LP-X48 Users Manual... -
Page 68: To Back Up A Show To Floppy Disk
To Back up a Show to Floppy Disk 1. From the Setup Mode screen, use the side wheel to scroll to the second menu. 2. Press the Show softkey. The Show Maintenance screen appears. 3. Press the Backup softkey. LP-X24 and LP-X48 Users Manual... -
Page 69: To Restore A Show
Yes / No 4. Insert a show disk into the disk drive and press Yes. The LP-X has a progress indicator that informs you which show file is being restored and when the operation is complete. LP-X24 and LP-X48 Users Manual... -
Page 70: Transferring A Show From An Lp-X48 To An Lp-X24
There are very few issues that you will have to address if you need to transfer a show from an LP-X48 to an LP-X24. The LP-X24 will not delete any information. It ignores information above channel 96 and on DMX Line B. -
Page 71: To Erase Custom Patches
To Erase Custom Patches 1. From the Setup Mode screen, use the side wheel to scroll to the second menu. 2. Press the Erase softkey. The Erase screen appears. 3. Press the Patch softkey. LP-X24 and LP-X48 Users Manual... -
Page 72: To Erase Playbacks
To Erase a Show 1. From the Setup Mode screen, use the side wheel to scroll to the second menu. 2. Press the Erase softkey. The Erase screen appears. 3. Press the Show softkey. LP-X24 and LP-X48 Users Manual... - Page 73 Setup Essentials Chapter Two Clear Show? Are you sure you want to delete everything in the show? Yes / No 4. Press the Yes key to confirm clearing the show. Press No/Esc to cancel the operation. LP-X24 and LP-X48 Users Manual...
-
Page 75: Chapter Three: Conventional Light Programming
LED above the Manual fader indicates the fader’s position. Blackout Button The Blackout button has the same effect as bringing down the Master fader and is handy for blacking out the entire stage suddenly. Blackout is a toggle switch; pressing it LP-X24 and LP-X48 Users Manual... - Page 76 Master Fader. Bank Button The LP-X24 provides twelve faders in the Manual Scene section of the board. The Bank button effectively doubles the number of faders by permitting you to switch between controlling faders 1 through 12 and faders 13 through 24.
-
Page 77: Recording And Playing Back Conventional Light Looks
DIM or BOTH Bump Any setting Up (typically full on) Master Fader Manual Fader Up (typically full on) Up (typically full on) Programmer Fader 2. Raise the manual scene faders for the lights in the first look. LP-X24 and LP-X48 Users Manual... - Page 78 Note: If you raised Manual Scene Fader 1, for example, and now want to include the lights on Manual Scene Fader 13 (LP-X24) or 25 (LP- X48), you will need to bring the fader down to the zero level and then raise it. This is called match and grab.
-
Page 79: To Play Back Conventional Light Looks
Setting Modes Run and Playback or Scene Display Filter Bump Any setting Up (typically full on) Master Fader Manual Fader Any setting Down Programmer Fader 2. Raise the playback to the desired level (typically 100%). LP-X24 and LP-X48 Users Manual... -
Page 80: Manual Scene Fader Bump Buttons
Bump buttons is determined by the setting on the Bump Master in the Mode Controller Section. When the Bump Master is set to Add, pressing a Bump button automatically adds the light into the look at 100%. LP-X24 and LP-X48 Users Manual... -
Page 81: Modifying Conventional Light Looks
DIM or BOTH. Should be set to BOTH if you have any moving light information recorded with the scene. Any setting Bump Up (typically full on) Master Fader Down (typically zero) Manual Fader Programmer Fader The LP-X displays the following message: LP-X24 and LP-X48 Users Manual... - Page 82 Whether or not you see the level changes on stage will be determined by the level of the Programmer Fader and the levels to which the lights are set in other active playbacks. LP-X24 and LP-X48 Users Manual...
-
Page 83: To Modify A Conventional Light Look When You Are Running A ShowBlind Edit
DIM or BOTH. Should be set to BOTH if you have an moving light information recorded with the scene. Any setting Bump Master Fader Up (typically full on) Down (typically zero) Manual Fader Down Programmer Fader The LP-X displays the following message: LP-X24 and LP-X48 Users Manual... - Page 84 Note that these changes will not be visible in the lights, regardless of the positions of the Master Fader and Manual Fader. All edits are done blind. The level changes will be reflected in the LEDs for the Manual Scene Faders. LP-X24 and LP-X48 Users Manual...
-
Page 85: Overriding Conventional Light Looks At Run Time
To do this, bring all Manual Scene Faders to zero for the current bank. Press the Bank Switch button. Raise all faders to 100% and lower them to zero. 3. Now raise the Manual Fader to the desired leveltypically 100%. LP-X24 and LP-X48 Users Manual... - Page 86 You cannot lower the intensity of lights using this procedure. 5. When you are done, lower the Manual Fader to zero. 6. Zero out all Manual Scene Faders using the technique described in step 2. LP-X24 and LP-X48 Users Manual...
-
Page 87: Chapter Four: Moving Light Programming
Scholars have traced the term “gobo” to the Italian term for an idiot, translated as “dim bulb”. We are unsure of the significance of this fact. Suffice to say that the gobo has been around about as long as instruments with lenses. LP-X24 and LP-X48 Users Manual... - Page 88 Generally, stepper motors are used to set the mirror position, with an XY axis for pan and tilt. Some instruments use a single 8-bit value for mirror position; other instruments use a 16-bit value. This information is significant only for ensuring that the LP-X set-up for an instrument is correct. LP-X24 and LP-X48 Users Manual...
-
Page 89: The Moving Light Library
1. A list of the attributes for the fixture and the property with which each attribute is grouped. For example, the Intellabeam 8 Channel has eight attributes. Attribute Property Affected Color Wheel 1 Color Shutter Beam Gobo Wheel 1 Beam Iris Beam Speed Beam Focus Tilt Focus Dimmer Intensity LP-X24 and LP-X48 Users Manual... -
Page 90: Getting Started
Button and Fader Settings for Moving Light Recording You put the LP-X into the following modes for moving light recording: LP-X24 and LP-X48 Users Manual... -
Page 91: Selecting Moving Lights For Programming
This is indicated by a blinking LED in the ML Select. • The second time you press the ML Select, the light remains in the look but is deselected for programming. This is indicated by a glowing (not blinking) LED in the ML Select. LP-X24 and LP-X48 Users Manual... -
Page 92: Selecting Moving Lights For Programming Using The Select Instruments Screen
You use this selection technique when you are programming moving lights that have been assigned to virtual slotsthat is, moving lights that have been assigned to slots that are higher than number 24 (LP-X24) or 48 (LP-X48). 1. In Record mode with the display set to ML, press the Fixture button. -
Page 93: Taking Moving Light Instruments Out Of A Scene Using The Select Instruments Screen
You use this clearing technique when you are programming moving lights that have been assigned to virtual slotsthat is, moving lights that have been assigned to slots that are higher than number 24 (LP-X24) or 48 (LP-X48). 1. In Record mode with the display set to ML, press the Fixture button. - Page 94 In "No Dowse" mode, you see all lights in the look whether they are selected or not. Toggle between these two modes when you are recording moving lights by pressing the side wheel. LP-X24 and LP-X48 Users Manual...
-
Page 95: Recording Moving Light Looks
0:00.0 Recording Moving Light Looks You record a look or a series of looksa scene listto a playback. On the LP-X24, there are six playbacks and twenty pages for each, so you may record up to 120 scene lists. On the LP-X48, there are twelve playbacks with twenty pages for each, so you may record up to 240 scene lists. - Page 96 Delay Fade 0:00.0 0:00.0 You see the following screen when the Beam labels are displayed (by pressing the Beam softkey). Note that when you press the Beam softkey once, the softkey label LP-X24 and LP-X48 Users Manual...
- Page 97 Working with Moving Light Attributes" beginning on page 137 for complete details. 5. Select the desired color, beam and focus labels. Press the Color softkey. Use the left wheel or the Plus (+) and Minus (-) keys in the numeric keypad to make your selection. LP-X24 and LP-X48 Users Manual...
- Page 98 Intensity: 100% Focus_001 Focus_002 Focus_003 Delay Fade Focus_004 0:00.0 0:00.0 6. Set the desired intensity by turning the side wheel. 7. Select the desired page and then press the Select button for the desired playback. LP-X24 and LP-X48 Users Manual...
- Page 99 9. To record the next look, repeat steps 4 and 5 and then press the Playback Select for the same page and playback. The LP-X displays that it saved the information to the new look. LP-X24 and LP-X48 Users Manual...
-
Page 100: To Record A Look With More Than One Moving Light
Fade 0:00.0 0:00.0 2. Select lights for programming. Please refer to "Selecting Moving Lights for Programming" beginning on page 87 for information about the various ways in which you may select a light for programming. LP-X24 and LP-X48 Users Manual... - Page 101 You have ten moving lights in the look. You want the five lights on the right side of the stage to be pink. You want the five lights on the left side of the stage to be blue. LP-X24 and LP-X48 Users Manual...
- Page 102 Blue and Light Blue appear in the display. You select Dark Blue. Blue Pink Studio Studio Spot Spot Dark Pink Blue Techno Techno Blue Pink Studio Studio Spot Spot Dark Pink Blue Techno Techno Blue Pink Studio Studio Spot Spot LP-X24 and LP-X48 Users Manual...
-
Page 103: Playing Back Moving Light Looks
2. Raise the playback to the desired level (typically 100%). The LP-X displays the first look that you recorded to the playback. In Playback mode, you see which playbacks are active and what step number each is on. LP-X24 and LP-X48 Users Manual... -
Page 104: Modifying Moving Light Looks
1. Start by ensuring that all buttons and faders are in the proper positions. Button/Fader Setting Modes Edit and Scene Display Filter ML or BOTH Bump Any setting Up (typically full on) Master Fader Any setting Manual Fader LP-X24 and LP-X48 Users Manual... - Page 105 3. Select the desired instrument or instruments and modify the look. For example, select an instrument, press the Focus softkey and the select the desired Focus label. For example, select several instruments, press the Color softkey and select the desired Color label. LP-X24 and LP-X48 Users Manual...
-
Page 106: To Modify A Conventional Light Look When You Are Running A ShowBlind Edit
Please select a scene to edit using the playback & stack select buttons. 2. Press the Select button for the playback repeatedly until you reach the look you want to edit. The LP-X displays information for that look of the playback. LP-X24 and LP-X48 Users Manual... -
Page 107: Overriding Moving Light Looks At Run Time
Record mode. It is an advanced skill. To Override a Look 1. Start by ensuring that all buttons and faders are in the proper positions. Button/Fader Setting Modes Display Filter Bump Any setting Up (typically full on) Master Fader LP-X24 and LP-X48 Users Manual... - Page 108 5. When you are ready, bring up the Programmer Fader to the desired level. The settings for the selected lights override the looks on the playbacks. 6. When you are done, lower the Programmer Fader to zero. 7. Return to Run mode. LP-X24 and LP-X48 Users Manual...
-
Page 109: Clearing A Playback
1. Put the board into Record mode. 2. Hold down the Clear button. 3. Press the Select button for the playback that you want to clear. The LP-X asks you to confirm clearing the information from the playback. LP-X24 and LP-X48 Users Manual... -
Page 110: Clearing A Playback While In Edit Mode
PG 01 PB 02 (6) PG 03 PB 06 (28) 2. Use the side wheel to select the playback you want to clear. 3. Press the Erase softkey. The LP-X asks you to confirm clearing the playback. LP-X24 and LP-X48 Users Manual... -
Page 111: Copying A Look
Display Filter ML, Dim or Both (depending upon how much you want to copy) Bump Any setting Up (typically full on) Master Fader Manual Fader Any setting Programmer Fader The LP-X displays the following message: LP-X24 and LP-X48 Users Manual... -
Page 112: Copying A Playback
With Both selected, all information for the look is copied. Copying a Playback Use this procedure to copy all scenes from one Page/Playback to another. To Copy a Playback 1. Put the board into Edit/Playback mode. LP-X24 and LP-X48 Users Manual... - Page 113 5. Press the Yes key or the Copy softkey to complete the operation. Press the No/Esc key to cancel the operation. If you have selected a page/playback that already has information recorded on it, the LP-X displays the following message: LP-X24 and LP-X48 Users Manual...
-
Page 114: Automating A Show
Start Delay on the Color property. • Fade Time is the duration during which the intensity of the light will change from the current level to the new level. The Fade Time starts at the end of the start delay. LP-X24 and LP-X48 Users Manual... - Page 115 Intensity, the look would be initiated and then two seconds later, the intensity would begin to change from its previous setting to the new setting. The transition (fade) to the new intensity would take one second. LP-X24 and LP-X48 Users Manual...
-
Page 116: Automated Versus Manual Initiation Of Scenes
Programmer is cleared. For more information, please see "To Modify Hold Time, Delay or Fade Defaults" beginning on page 198. 1. Record a series of looks to a playback. LP-X24 and LP-X48 Users Manual... - Page 117 0:00.0 ColrFx Beam Focus Attrib Label Recording new scene No Dowse No instruments selected. Intensity: 100% Delay Fade 0:00.0 0:00.0 Recording Moving Light Looks" beginning on page 90. 2. Put the board into Edit/Playback mode. LP-X24 and LP-X48 Users Manual...
- Page 118 5. Using the side wheel, select a look to automate. 6. Press the Time softkey. Inten Color Beam Focus Edit Scene Timing Hold Delay Fade Intensity 0:00.0 0:00.0 Color 0:00.0 0:00.0 Beam 0:00.0 0:00.0 Focus 0:00.0 0:00.0 LP-X24 and LP-X48 Users Manual...
-
Page 119: Automation Shortcuts
You may set the Hold Time for a look from the Edit Scenelist screen by turning the center wheel or by pressing the center wheel, entering the Hold Time on the numeric keypad and pressing the Enter key. LP-X24 and LP-X48 Users Manual... -
Page 120: Unlooping And Relooping A Scene List
This is called "looping". It applies whether a scene list is automated or not. You can unloop and reloop scene lists as required for your show. LP-X24 and LP-X48 Users Manual... -
Page 121: To Unloop And Reloop A Scene List
Erase Edit Scenelist Hold 5. Press the Unloop softkey. Time Move Loop Erase Edit Scenelist Hold 6. To reloop the scene list, press the Loop softkey. 7. When you are done, press the Yes key. LP-X24 and LP-X48 Users Manual... -
Page 122: Moving And Deleting Looks In A Scene List
5. Press the Move Up or Move Down softkey to move the selected look into the desired position. Time Move Move Unloop Erase Edit Scenelist Hold 6. Repeat steps 4 and 5 until all looks are moved into the desired positions. LP-X24 and LP-X48 Users Manual... -
Page 123: To Delete A Look From A Scene List
The LP-X48 has forty-eight manual faders—twenty-four in Bank 1 and twenty-four in Bank2. In certain cases it will be desirable to have extra control channels. The LP-X24 has seventy-two "virtual" channelsthat is, channels that exist in the board's software but do not have corresponding faders. - Page 124 Up (typically full on) Up (typically full on) Programmer Fader 2. Using the side wheel, display channels with numbers higher than 24 (LP-X24) or 48 (LP-X48). Recording new scene 25 26 27 28 29 30 31 32 33 34 35 36...
- Page 125 Advanced Programming and Editing Techniques Chapter Five LP-X24 and LP-X48 Users Manual...
-
Page 127: Chapter Six: Creating Moving Light Labels
To Create a Color or Beam Label 1. Put the LP-X into the following modes for moving light recording: Button/Fader Setting Modes Record and Scene Display Filter Bump Any setting Up (typically full on) Master Fader LP-X24 and LP-X48 Users Manual... - Page 128 The screen that is displayed will vary depending upon the number of attributes the light has for the property. In the case of the Studio Color 250, there are four attributes for the Color property: Color 1 function, Color mix Cyan, Color mix Magenta and Color mix Yellow. LP-X24 and LP-X48 Users Manual...
- Page 129 To select No Change, enter a value outside the device's range256 or greater. See "No Change" beginning on page 85 for complete details about this option. 7. When you are done, press the SaveAs softkey. LP-X24 and LP-X48 Users Manual...
- Page 130 11. If desired, update the label and press the SaveAs softkey to create a new label. 12. When you are done, press the No/Esc button. The LP-X displays the label or labels that you created. LP-X24 and LP-X48 Users Manual...
-
Page 131: To Create A Focus Label
Button/Fader Setting Modes Record and Scene Display Filter Any setting Bump Up (typically full on) Master Fader Any setting Manual Fader Programmer Fader The LP-X displays the Moving Light Programmer. 2. Press the Focus softkey. LP-X24 and LP-X48 Users Manual... - Page 132 Please select some instruments to work with. One or more of the same fixture type selected: Create Focus: Technobeam No labels available. Use Create to make a new label of this type. A mixture of fixture types selected: LP-X24 and LP-X48 Users Manual...
- Page 133 Note that some instruments do not have a Focus (edge) attribute, so changing the Focus value will have no effect on the look of the light. 7. When you are done, press the SaveAs softkey. LP-X24 and LP-X48 Users Manual...
- Page 134 11. If desired, update the label and press the SaveAs softkey to create a new label. 12. When you are done, press the No/Esc button. The LP-X displays the label or labels that you created. LP-X24 and LP-X48 Users Manual...
-
Page 135: To Copy A Label
The LP-X displays the Moving Light Programmer. 2. Press the Color, Beam or Focus softkey. 3. Press the Label softkey. Create Edit Delete Rename Color: Studio Color 250 congo blue cyan dark magenta green indigo LP-X24 and LP-X48 Users Manual... - Page 136 Please enter a name for the new label. Label Name: Color_001 Yes / No 7. Enter a name for the new label. 8. Press the Yes key to confirm the operation. Press No/Esc to cancel the operation. LP-X24 and LP-X48 Users Manual...
-
Page 137: Editing Labels
1. Put the LP-X into the following modes for moving light recording: Button/Fader Setting Modes Record and Scene Display Filter Bump Any setting Up (typically full on) Master Fader Manual Fader Any setting Programmer Fader The LP-X displays the Moving Light Programmer. LP-X24 and LP-X48 Users Manual... -
Page 138: To Rename A Label
4. Select the label that you want to rename. If you do not see the label, you may need to restrict the instrument selection. The ML Programmer only shows the labels that the selected instruments share in common. 5. Press the Rename softkey. LP-X24 and LP-X48 Users Manual... -
Page 139: To Delete A Label
4. Select the label that you want to delete. If you do not see the label, you may need to restrict the instrument selection. The ML Programmer only shows the labels that the selected instruments share in common. 5. Press the Delete softkey. LP-X24 and LP-X48 Users Manual... - Page 140 Creating Moving Light Labels Delete Label? Are you sure you want to delete this label for all selected fixture types? Yes / No 6. Press Yes to delete the label. Press No/Esc to cancel the operation. LP-X24 and LP-X48 Users Manual...
-
Page 141: Overriding A Label
2. Select a light (or several lights of the same type) for programming. Please refer to "Selecting Moving Lights for Programming" beginning on page 87 for information about the various ways in which you may select a light for programming. LP-X24 and LP-X48 Users Manual... - Page 142 Press the Focus softkey. Use the left wheel or the Plus (+) and Minus (-) keys in the numeric keypad to make your selection. Color Beam FocsFx Attrib Label Recording new scene No Change No Dowse Defaults Intensity: 100% Focus_001 Focus_002 Focus_003 Delay Fade Focus_004 0:00.0 0:00.0 LP-X24 and LP-X48 Users Manual...
-
Page 143: Color Wheel
Effects 1 If the Focus property was previously selected, you see a screen that looks something like this (depending upon the focus attributes for the light). Color Beam Focus Labels Recording new scene Focus Tilt LP-X24 and LP-X48 Users Manual... - Page 144 In cases where there are more than three attributes, use the side wheel to scroll through attributes. 6. If desired, do one or more of the following: LP-X24 and LP-X48 Users Manual...
-
Page 145: To Reset Moving Light Attributes
1. Put the LP-X into the following modes for moving light recording: Button/Fader Setting Modes Record and Scene Display Filter Bump Any setting Up (typically full on) Master Fader Manual Fader Any setting Programmer Fader LP-X24 and LP-X48 Users Manual... -
Page 146: Working With Attributes In Edit Mode
"To Override a Moving Light Attribute" beginning on page 137. You will only need to complete steps 4 through 7. 6. To reset attributes for the property you selected, hold down the Clear button and press the Attrib softkey. LP-X24 and LP-X48 Users Manual... -
Page 147: Chapter Nine: Chases
1. Put the LP-X into the following modes for editing: Button/Fader Setting Modes Edit and Playback Display Filter Bump Any setting Up (typically full on) Master Fader Manual Fader Any setting Down (typically zero) Programmer Fader The LP-X displays the Edit Playback screen. LP-X24 and LP-X48 Users Manual... - Page 148 6. To set the rate for the chase, adjust the Rate fader or tap the Tap button. If you know the rate of the chase (in beats per minute), using the Rate fader is the easiest way to set the rate. LP-X24 and LP-X48 Users Manual...
-
Page 149: To Set The Number Of Chase Loops
2. Using the side wheel or the + (Plus) and – (Minus) keys, select the page and playback of the scene list that you want to convert from a chase back to a scene list. 3. Press the Edit softkey. LP-X24 and LP-X48 Users Manual... -
Page 150: To Convert A Chase Back Into A Scene List
1. Put the LP-X into the following modes for editing: Button/Fader Setting Modes Edit and Playback Display Filter Bump Any setting Up (typically full on) Master Fader Any setting Manual Fader Down (typically zero) Programmer Fader The LP-X displays the Edit Playback screen. LP-X24 and LP-X48 Users Manual... -
Page 151: Working With Chases At Run Time
During run time, you may decide to chase or unchase a scene list on a playback. This is easily done without switching into Edit mode. To Chase or Unchase a Scene List at Run Time 1. Put the LP-X into the following modes for playback: Button/Fader Setting Modes Run and Playback Display LP-X24 and LP-X48 Users Manual... - Page 152 1 PG 1 Step: 1 of 7 2 Inactive 3 Inactive 4 Inactive 5 Inactive 6 PG 1 Step: 1 of 2 4. Press the Chase softkey to convert the scene list on the selected playback to a chase. LP-X24 and LP-X48 Users Manual...
-
Page 153: To Pause A Chase At Run Time
To Create a Scene List for a Dark Move Chase 1. Put the LP-X into the following modes for moving light recording: Button/Fader Setting Modes Record and Scene Display Filter ML or BOTH Any setting Bump LP-X24 and LP-X48 Users Manual... - Page 154 Note that dark move chases work best at slower rates which permit the light to complete its beam, color and focus position changes during each dark step. This rate will vary amongst the different types of lights. LP-X24 and LP-X48 Users Manual...
-
Page 155: Chapter Ten: Stacks
You may set Start Delay and Fade In for Color, Beam and Focus during recording if desired. Or, you may wait until the entire stack is recorded and then apply automation in Edit/Stack mode. 3. Press the stack's Select button to record the look to the stack. LP-X24 and LP-X48 Users Manual... -
Page 156: Playing Back The Stack
The term “dipless” describes a method of handling intensity that does not disturb the level of lights with identical settings in the current and upcoming scenes. LP-X24 and LP-X48 Users Manual... -
Page 157: Go, Back And Hold Buttons
You may switch from using the stack's Cross Fader to using the buttons by pressing any button. The Stack's Cross Fader To move from the outbound step to the inbound step, instead of pressing Go, move the stack's Cross Fader from one end of its travel to the other. LP-X24 and LP-X48 Users Manual... -
Page 158: Fading Versus Snapping
When you press the Back button, Color, Beam and Focus fade to their previous settings and then hold. To Play Back the Stack 1. Put the LP-X into the following modes for playback: Button/Fader Setting Modes Run and Stack Display LP-X24 and LP-X48 Users Manual... - Page 159 3. To play back the first step using the stack's Cross Fader, move the fader from one end of the fader's travel to the other. Change Stack Status: ACTIVE Manual Out: Fade: Fade: Next: 4. To play back the first step using the buttons, press the Go button. LP-X24 and LP-X48 Users Manual...
-
Page 160: Editing Stacks
To Change Moving Light or Conventional Looks in a Stack This operation can be done live or blind. 1. Put the LP-X into the following modes for editing: Button/Fader Setting Modes Edit and Scene Display ML or Dim Filter ML, Dim or Both LP-X24 and LP-X48 Users Manual... -
Page 161: To Insert A Step Into A Stack
Use this procedure to insert a blank step into a specific location in the stack or to copy a stack step and insert in a specific location in the stack. 1. Put the LP-X into the following modes for editing: LP-X24 and LP-X48 Users Manual... - Page 162 If you want to insert a blank stack step, you may skip this step. 3. Press the Insert softkey. The LP-X displays the Insert Stack Step screen. Copy Blank Insert Stack Step Insert a copy of step 1.0 Insert As LP-X24 and LP-X48 Users Manual...
-
Page 163: To Delete A Step From A Stack
Edit and Stack Display ML or Dim Filter ML, Dim or Both Any setting Bump Master Fader Up (typically full on) Any setting Manual Fader Down (typically zero) Programmer Fader The LP-X displays the Edit Stack screen. LP-X24 and LP-X48 Users Manual... -
Page 164: To Clear The Stack
1. Put the LP-X into the following modes for recording: Button/Fader Setting Modes Record and Scene Display ML or Dim Filter ML, Dim or Both Bump Any setting Any setting Master Fader Manual Fader Any setting Any setting Programmer Fader LP-X24 and LP-X48 Users Manual... -
Page 165: Automating A Stack
In Fade—time for the inbound look to fade in. • Hold Time—total time before the execution of the next step. The following illustration shows an Out Fade of three seconds, an In Fade of six seconds and a Hold Time of ten seconds. LP-X24 and LP-X48 Users Manual... -
Page 166: To Automate The Stack
4. Set an In Fade for the step. You may turn the center wheel to do this. You may also press the center wheel, enter the In Fade on the numeric keypad and then press the Enter key. LP-X24 and LP-X48 Users Manual... -
Page 167: To Automate Moving Light Properties
The LP-X displays the Edit Stack Step: X screen (where X represents the number of the stack step that you selected in step 2). 4. Press the Timing softkey. The LP-X displays the Edit Scene Timing screen. LP-X24 and LP-X48 Users Manual... -
Page 168: Advanced Techniques
1. Put the LP-X in Edit and Stack mode. The LP-X displays the Edit Stack screen. 2. Use the side wheel or the Plus (+) and Minus (-) keys to select a step to re-link. LP-X24 and LP-X48 Users Manual... -
Page 169: Changing Steps At Run Time
1. With the stack playing back from Run and Stack mode, press the Change softkey. Change Apply Stack Status: ACTIVE Auto Out: Fade: 0:03.9 Hold 0:00.9 0:08.9 Fade: Next: 0:02.0 Fade: Next Step In Fade Out Fade 0:02.0 0:02.0 LP-X24 and LP-X48 Users Manual... -
Page 170: Changing Steps At Run TimeShort Cut
2. Use the side wheel or the Plus (+) and Minus (-) keys to select a step to link to a playback. 3. Press the Edit softkey. The LP-X displays the Edit Stack Step X screen (where X represents the number of the stack step that you selected in step 2). LP-X24 and LP-X48 Users Manual... - Page 171 Enter key. 6. Press the Yes button. Edit Scene Insert Delete Edit Stack Link: 2.0 Slave Pg: 1 Pb: 1 Link: 3.0 Link: 0.0 Hold In Fade Out Fade 0:02.0 0:02.0 LP-X24 and LP-X48 Users Manual...
-
Page 173: Chapter Eleven: Moving Light Effects
0:00.0 to 9:59.9. The fade should be less than or equal to the rate. Rate Specify how long to hold on each label. The range of rates is from 0:00.1 to 9:59.9. The rate should be greater than or equal to the fade. LP-X24 and LP-X48 Users Manual... -
Page 174: To Create A Wheel-Order Chase
3. Press the Color softkey twice. The Color Effects screen appears. Create Recording new scene Color Effects None of the selected instruments have effects. Press Create to add effects. 4. Press the Create softkey. LP-X24 and LP-X48 Users Manual... - Page 175 7. Adjust the Fade, Rate, Start Delay and Loops parameters as desired. Use the side wheel to display the Loops parameter. 8. When you are ready, record the effect to a playback by pressing its Playback Select button. LP-X24 and LP-X48 Users Manual...
-
Page 176: To Create A Label Chase (Non-Wheel-Order)
The LP-X displays the Moving Light Programmer. 2. Select the lights that you want to include in the effect. See "Selecting Moving Lights for Programming" beginning on page 87 for complete details about selecting lights. LP-X24 and LP-X48 Users Manual... - Page 177 Press Create to add effects. Create Recording new scene Beam Effects None of the selected instruments have effects. Press Create to add effects. 4. Press the Create softkey. The Choose an effect screen appears. LP-X24 and LP-X48 Users Manual...
- Page 178 The Color Effect: Label Chase or Beam Effect: Label Chase screen appears and all selected lights begin executing the effect. Remove Move Param Recording new scene Beam Effect: Label Chase cubes gatlin gun groovy jack lenticular LP-X24 and LP-X48 Users Manual...
- Page 179 You may also move the wheel to select a label, then hold down and turn the wheel to move the label up or down. 10. Adjust the Fade, Rate, Start Delay and Loops parameters as desired. Press the Param softkey to display the parameters. LP-X24 and LP-X48 Users Manual...
- Page 180 12. Make additional changes to the effect and then save them by pressing the Save softkey. The Save softkey is only available when you are in Parameter view. LP-X24 and LP-X48 Users Manual...
- Page 181 You remove light C from the effect. Both lights A and B have a label for the color purple. The LP-X displays this label in the removed label list. Remove Move Param Recording new scene Color Effect: Label Chase blue purple white LP-X24 and LP-X48 Users Manual...
-
Page 182: Creating Iris Flick Effects
1. Put the LP-X into the following modes for moving light recording: Button/Fader Setting Modes Record and Scene Display Filter ML or BOTH Any setting Bump Master Fader Up (typically full on) Any setting Manual Fader Programmer Fader The LP-X displays the Moving Light Programmer. LP-X24 and LP-X48 Users Manual... - Page 183 5. Using the left wheel, the side wheel or the Plus (+) and Minus (-) keys, select Iris Flick. 6. Press the Create softkey. The Beam Effect: Iris Flick screen appears and all selected lights that have an iris attribute begin executing the effect. LP-X24 and LP-X48 Users Manual...
- Page 184 8. When you are ready, record the effect to a playback by pressing its Playback Select button. Save Record: PG 1 PB 1 Step: 1 Beam Effect: Iris Flick Open Fade Open Hold Close Fade 0:05.0 0:00.0 10:00:0 LP-X24 and LP-X48 Users Manual...
-
Page 185: Creating Focus Effects
Specify what point in the shape should be its starting point. The range is from 0 to 100%. The default is 0. Direction If a shape is executing in the wrong direction, you can reverse its travel. Values are CW (clockwise) and CCW (counterclockwise). The default is LP-X24 and LP-X48 Users Manual... -
Page 186: Linear Effect Parameters
The default is INF (Infinite), meaning that the effect will execute as long as the look is active. The range of loops is from .5 to 999.5 or INF. LP-X24 and LP-X48 Users Manual... -
Page 187: Random Motion Effect Parameters
1. Put the LP-X into the following modes for moving light recording: Button/Fader Setting Modes Record and Scene Display Filter ML or BOTH Any setting Bump Master Fader Up (typically full on) Any setting Manual Fader Programmer Fader The LP-X displays the Moving Light Programmer. LP-X24 and LP-X48 Users Manual... - Page 188 5. Using the left wheel, the side wheel or the Plus (+) and Minus (-) keys, select a focus effect. 6. Press the Create softkey. The Focus Effect: screen appears and all selected lights begin executing the effect. Shown below is the Focus Effect: Polygon screen. LP-X24 and LP-X48 Users Manual...
-
Page 189: Sequencing The Lights In An Effect
You set an iris flick effect on ten lights. The iris flick has a loop count of 1. The open fade is set to 1 second and the close fade is set to 1 second. You set the interval to LP-X24 and LP-X48 Users Manual... -
Page 190: Sequencing Parameters
1. After saving your initial effect parameters to a playback, press the Seq softkey. The Effect Sequence screen provides you with controls to set the order in which the lights will start executing the effect and to set the interval between the lights. LP-X24 and LP-X48 Users Manual... -
Page 191: Editing Effects
Use the following procedure to make changes to an effect after you have already saved it to a playback. To Load and Edit an Effect 1. In Record mode, press the Color, Beam or Focus softkey twice. LP-X24 and LP-X48 Users Manual... -
Page 192: To Remove A Light From An Effect
3. Hold down the Clear button and press the property's softkey again. From the Effects screen: 1. Select the light or lights that you want to remove from an effect by pressing their ML Select buttons. LP-X24 and LP-X48 Users Manual... -
Page 193: Overriding Attributes In Effects
So you use the attribute screen to override the gobo setting. For example, if you set a focus effect, you may also want to sharpen the edge (focus). You use the attribute screen to override this, too. LP-X24 and LP-X48 Users Manual... -
Page 194: To Override An Attribute
137 for complete details on overriding attributes. 3. Press the Save softkey when you are done. 4. To remove the attribute overrides, with the light selected hold down the Clear key and press the Attrib softkey. LP-X24 and LP-X48 Users Manual... -
Page 195: Chapter Twelve: Other Setup Features
Software Version: 1.01.10FxD Prev Build Date: Sep 13 2001 16:38:39 Show Version: 1.01 Lib Version: 51 CPU Version: D 2. Press the Lock softkey to lock the LP-X. 3. Press the Unlock softkey to unlock the LP-X. LP-X24 and LP-X48 Users Manual... -
Page 196: The Group Menu
Group key and then pressing the ML Select button to which the group is assigned. ML Select LEDs change to display group information when the Group button is held down. You may need to switch banks to reach the group. LP-X24 and LP-X48 Users Manual... -
Page 197: To Create A Group
Empty Empty 2. Using the side wheel, select a group and then press the Add softkey. You may also press the corresponding ML Select button to jump to a slot. The Edit Group screen appears. LP-X24 and LP-X48 Users Manual... - Page 198 Save Edit Group CYBERS #1 Cyberlight #2 Cyberlight 5. Press the Save softkey. Edit Delete Group List CYBERS <2> Empty Empty Empty Empty Empty LP-X24 and LP-X48 Users Manual...
-
Page 199: Alternate Method For Selecting Fixtures
Thru key, enter the highest number in the range, and then press the Plus (+) key on the keypad. Press the Yes key to confirm the operation. Press No/Esc to cancel the operation. LP-X24 and LP-X48 Users Manual... -
Page 200: To Edit A Group
Press No/Esc to cancel the operation. To Edit a Group 1. From the Setup Mode screen, press the Group softkey. The Group List screen appears. Edit Delete Group List CYBERS <2> Empty Empty Empty Empty Empty LP-X24 and LP-X48 Users Manual... -
Page 201: To Delete A Group
You also modify the default auto save interval from this screen. The default values are: Timing Default Value Stack In Fade (seconds) Stack Out Fade (seconds) Auto Save Interval (minutes) Hold Time Delay (Intensity, Color, Beam, Focusall separately set) Fade (Intensity, Color, Beam, Focusall separately set) LP-X24 and LP-X48 Users Manual... -
Page 202: To Modify Stack In Fade And Stack Out Fade
To Modify Hold Time, Delay or Fade Defaults 1. From the Setup Mode screen, press the Defalt softkey. The Show Defaults screen appears. 2. Press the Timing softkey. The Default Scene Timing screen appears. LP-X24 and LP-X48 Users Manual... -
Page 203: The Dmx Menu
1. From the Setup Mode screen, use the side wheel to scroll to the second menu. 2. Press the DMX softkey. The DMX screen appears. Resrve 001 - 100 <100> Default Reserved 101 - 512 <412> Open 3. Press the Resrve softkey. LP-X24 and LP-X48 Users Manual... -
Page 204: To Un-Reserve Dmx Addresses
4. Use the side wheel to select which reserve item in the list you want to delete. 5. Press the Delete softkey. The Update Menu You will use the Update menu when Leprecon releases a new version of the LP-X's program or library. To Update the LP-X Program 1. -
Page 205: To Update The Lp-X Library
3. Insert a floppy disk with the LP-X library update into the floppy disk drive. You may have obtained the update on a floppy disk from Leprecon. You may have received it via email and copied it onto a floppy disk. Or you may have downloaded it from the Leprecon web site (www.leprecon.com) and copied it onto a floppy disk. -
Page 206: The Miscellaneous Menu
Motion of Playback Faders • Button press of Solo/Add Bump buttons • Button press of Conventional Light Bump buttons • Changes of the Page selection • Except + Select button combination (to move backward in a scene list) LP-X24 and LP-X48 Users Manual... -
Page 207: To Receive Midi Signals
Moving light devices that are not included in the LP-X library can be added at any time. You will need information from the manufacturer that specifies the DMX channel assignments for the attributes of the devices. LP-X24 and LP-X48 Users Manual... -
Page 208: To Create A New Moving Light Device
4. The default manufacturer for the device is Unknown. Use the keypad to enter the manufacturer. 5. Use the center wheel to specify the focus type. Available options are 8 bit, 16 bit and Mixed. 6. Use the right wheel to specify the number of channels for the device. LP-X24 and LP-X48 Users Manual... - Page 209 The left column shows a list of all the attribute names from all of the fixtures that are currently loaded into the system. An attribute name followed by <C> is a color attribute. An attribute name followed by <B> is a beam attribute. An attribute name LP-X24 and LP-X48 Users Manual...
- Page 210 128 as the default focus value for pan or tilt. Save Name Create Attribute: MY DEVICE Attribute Name: Gobo wheel 2 <B> Channel: Iris <B> Min Value: <F> Max Value: Pan fine <F> Default Value: Shutter <B> LP-X24 and LP-X48 Users Manual...
-
Page 211: To Edit A Moving Light Device
Then follow steps 9 through 11 from the procedure given in the section "To Create a New Moving Light Device" beginning on page 204. 5. To edit an attribute of the moving light device, select the attribute and press the Edit softkey. LP-X24 and LP-X48 Users Manual... - Page 212 6. To delete an attribute from the moving light device, select the attribute and press the Delete softkey. The LP-X asks you to confirm the operation. 7. Press Yes to complete the operation. Press No/Esc to cancel the operation. LP-X24 and LP-X48 Users Manual...
-
Page 213: Appendix A: Maintenance And Repair
Maintenance and Repair Handling It is a good idea to invest in a properly designed flight case. Your Leprecon dealer can provide case, and several popular case manufacturers have specifications for Leprecon consoles. The case should be sturdy enough to resist punctures, and contain at least one inch of foam padding around the console. -
Page 215: Midi Message Formats
Channel message before sending the first Controller Channel message. The Controller Channel (byte 2) is the low order channel value. The actual extended controller channel referenced by the message is: Extended Channel = ((Last High Order Channel) * 127) + Low Order Channel) LP-X24 and LP-X48 Users Manual... -
Page 216: Midi Message Output
Reset message, the LP-X performs the following actions: 1. puts unit into RUN mode 2. shows the conventional scene channel display 3. clears all button presses 4. zeroes the internal value of all faders 5. enables bank 0 faders and buttons LP-X24 and LP-X48 Users Manual... -
Page 217: Example Of A Midi Message Sequence
FADER_17 PLAYBACK_02 FADER_18 PLAYBACK_03 FADER_19 PLAYBACK_04 FADER_20 PLAYBACK_05 FADER_21 PLAYBACK_06 FADER_22 FADER_01 FADER_23 FADER_02 FADER_24 FADER_03 FADER_BUMP_VIRTUAL FADER_04 KEYPAD_EXCEPT FADER_05 PLAYBACK_SELECT_01 FADER_06 PLAYBACK_SELECT_02 FADER_07 PLAYBACK_SELECT_03 FADER_08 PLAYBACK_SELECT_04 FADER_09 PLAYBACK_SELECT_05 FADER_10 PLAYBACK_SELECT_06 FADER_11 PLAYBACK_BUMP_01 FADER_12 PLAYBACK_BUMP_02 LP-X24 and LP-X48 Users Manual... - Page 218 PLAYBACK_BUMP_03 FADER_BUMP_09 PLAYBACK_BUMP_04 FADER_BUMP_10 PLAYBACK_BUMP_05 FADER_BUMP_11 PLAYBACK_BUMP_06 FADER_BUMP_12 BLACK_OUT_BUTTON FADER_BUMP_13 STACK_ON_BUTTON FADER_BUMP_14 BACK_BUTTON FADER_BUMP_15 HOLD_BUTTON FADER_BUMP_16 GO_BUTTON FADER_BUMP_17 STACK_SELECT FADER_BUMP_18 FADER_BUMP_01 FADER_BUMP_19 FADER_BUMP_02 FADER_BUMP_20 FADER_BUMP_03 FADER_BUMP_21 FADER_BUMP_04 FADER_BUMP_22 FADER_BUMP_05 FADER_BUMP_23 FADER_BUMP_06 FADER_BUMP_24 FADER_BUMP_07 ENCODER_PAGE FADER_BUMP_08 LP-X24 and LP-X48 Users Manual...
-
Page 219: Glossary
The term “dipless” describes a method of handling intensity that does not disturb the level of lights with identical settings in the current and upcoming scenes. Cue: See Look. LP-X24 and LP-X48 Users Manual... - Page 220 Group: A group is a convenient functional set of instruments. An instrument can be a member of multiple groups. The user creates groups to facilitate selecting multiple instruments for programming. A group can consist of instruments of different personalities and manufacturer types. Handle: See Fader. LP-X24 and LP-X48 Users Manual...
- Page 221 Moving Light: A special class of light fixtures that have programmable properties. Unlike conventional lights (dimmers) that have only the property level , moving lights have four properties—color, beam, focus and intensity. LP-X24 and LP-X48 Users Manual...
- Page 222 Timed Fade: A pre-programmed event that performs a crossfade from one scene to another. Usually this is triggered by the board operator with a switch that invariably is called a Go button. Timed fades in the LP-X are performed in the Stack section. Xfade: See Crossfade . LP-X24 and LP-X48 Users Manual...
- Page 223 (zoom). Controlling the beam size with the iris maintains the intensity as the area of coverage changes. Zooming the fixture concentrates the light into a larger or smaller area with a corresponding change in illumination. LP-X24 and LP-X48 Users Manual...
-
Page 225: Index
Playback Select Button..........24, 70 Reserving DMX Channels..........200 Setup Button............... 43 Un-Reserving DMX Channels...........200 Solo Bump Button............... 71 DMX Line Assignment ..........44 Stack On Button ..............34 DMX Mode..............45 Tap Button .............. 8, 34, 144 LP-X24 and LP-X48 Users Manual... - Page 226 Used in ML Programming........... 85 Overriding a Conventional Look........80, 102 Page Roller .................70 Playing Back Conventional Light Looks....74, 76, 78 Programming Virtual Channels .........119 Recording Conventional Light Looks ........71 Hold Time............110, 162 Solo Button .................71 LP-X24 and LP-X48 Users Manual...
- Page 227 Focus Effect Screen............184 Patch Group List Screen ............26, 193 Erasing ................. 66, 67 Insert Stack Step Screen ..........158 Playback Instrument List Screen ..........25, 45 Automation ............... 113 Iris Flick Effect Screen ............179 Clearing a Playback..........105, 106 LP-X24 and LP-X48 Users Manual...
- Page 228 Reserving DMX Channels .......... 52, 200 Show Defaults ............198, 199 Warranty ..............212 Un-Reserving DMX Channels .......... 200 Viewing Channel Assignments by Channel ......59 Wheel Order Chase ...........169 Viewing Channel Assignments by Dimmer......59 Wheels.................15 Show Backup................64 LP-X24 and LP-X48 Users Manual...
Need help?
Do you have a question about the LP-X24 and is the answer not in the manual?
Questions and answers