Advertisement
Table of Contents
Assembly, Installation, & Use Instructions
The information in this document is subject to change without notice.
© Copyright Springfree® Trampoline Inc. 2005, 2015. All rights reserved.
706304
Advertisement
Table of Contents

Subscribe to Our Youtube Channel
Related Manuals for Springfree FLEXRHOOP Series


Summary of Contents for Springfree FLEXRHOOP Series
- Page 1 Assembly, Installation, & Use Instructions The information in this document is subject to change without notice. © Copyright Springfree® Trampoline Inc. 2005, 2015. All rights reserved. 706304...
- Page 2 WARNING Read the warnings on this page and those contained in the User Guide before you assemble and use the trampoline and enclosure. No somersaults or flips. Landing on No more than one person at a time. the head or neck can cause serious Multiple jumpers increase the chances injury, paralysis, or death, even when of loss of control and collision and can...
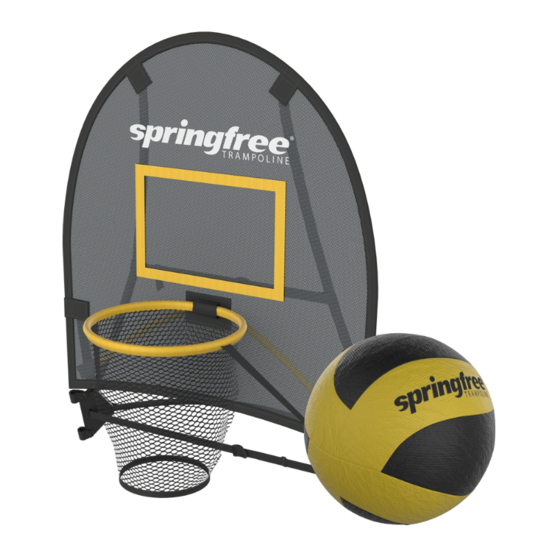
- Page 3 Parts List Quantity Parts List Quantity Backboard Bolts & Nuts Stability Rod and Brackets Short Rods Plastic Clamps Basketball and Pump Allen Key Spare Parts (cable ties, bolt and nut) WARNING - Two people are recommended for assembly. NOTE - Ball colors and pattern depicted above may differ from actual.
- Page 4 NOTE - Check that the plastic sleeves covering the net rods are intact and free from cracks or damage. If they are damaged, contact Springfree Trampoline to order replacements BEFORE installing the FlexrHoop.
- Page 5 Locate the backboard and stabilising rod and brackets and place them on the lowered net. You will first need to bow the stabilising rod until it is the same width as the backboard. To do this, take hold of one of the brackets and gently push the other bracket up against a firm surface. With your free hand, pull the strap.
- Page 6 Starting on one side, locate a short rod and slide it into a short sleeve, with the black endcap going into the sleeve first. Insert the other end of the short rod so that it is firmly seated into the hole on the top of the stabilising bracket.
- Page 7 On the rim, there are two straps with snaps at the end. Pull the ends of these straps down and under the bottom edge of the backboard and attach to the snaps on the back of the backboard as shown. Orient the bottom of the backboard so that it is on the inside of the net, and the stabilizing rod and brackets are on the outside of the net.
- Page 8 NOTE - Take care to align the plastic clamps so that they are facing the same direction. The nut will only fit one side of the plastic clamp and when fully assembled, should face the center of the trampoline with the bolt head facing outward. NOTE - As you fasten the bolts through the stabilising brackets and plastic clamps, take care not to snag the net with the Allen key.
- Page 9 In order to attach the second stabilising bracket to the “mounting rod”, you may need to loosen or tighten the strap until the bracket aligns with the plastic clamps. Align the top hole of the stabilising bracket with the top plastic clamp and fasten with a bolt. Repeat for the bottom hole and clamp.
- Page 10 After the net is fully raised, locate and adjust the two straps on the back of the backboard until the hoop is perpendicular to the mat. Congratulations! You have successfully completed the assembly of your Springfree FlexrHoop. Be sure to review all warnings and precautions with all users before use.
Need help?
Do you have a question about the FLEXRHOOP Series and is the answer not in the manual?
Questions and answers