Advertisement
Available languages
Available languages
Quick Links
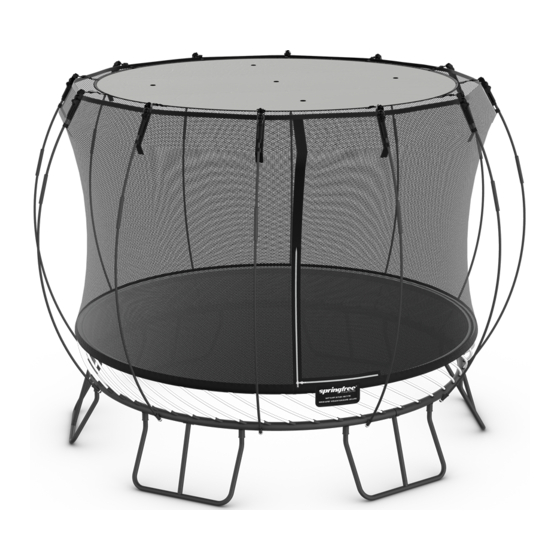
Trampoline
Sunshade
T H E S M A R T T R A M P O L I N E
Assembly & Use Instructions
The information in this document is subject to change without notice.
© Copyright Springfree® Trampoline Inc. 2005, 2017. All rights reserved.
2
1
WARNING - Keep the area around the trampoline clear of people or pets during Sunshade assembly.
Standing inside the trampoline enclosure, take hold of one of the black net rods and bend it back towards
your body.
Apply pressure along the length of the bracket until it snaps into place and is firmly seated against the rod.
Carefully apply pressure along the length of the bracket until it is firmly seated against the rod. Take care
not to let the pocket material bunch unevenly under the bracket.
NOTE - Double check that all the brackets are firmly a ixed to the rod. If they are not fully in place, you
could damage your trampoline or Sunshade.
WARNING
Read the warnings on this page and those
contained in the User Guide before you assemble
TM
and use this accessory and the trampoline.
If you anticipate severe weather, take
down the Sunshade and store in a safe
location. In extreme weather, lower the
enclosure, and consider moving the
trampoline to a sheltered location or
disassembling the trampoline
completely. It is the responsibility of
the user to safely secure the trampo-
line during inclement weather.
Never attempt to remove a black net
rod from its net pocket or disengage
(unlock) the rod sleeve while the black
net rod is under tension.
Do not leave the Sunshade installed on
the trampoline if the wind is gusting
over 20mph (32kph). Wind damage to
0-6
the Sunshade or trampoline is not
covered by the warranty.
?
Your trampoline model may di er from
the one shown, however the steps and
warnings remain the same.
711303
3
TOP VIEW
DOORWAY
Lay out the Sunshade flat on the mat with the silver side facing up.
Locate the yellow
tag on the edge of the shade. Standing inside the trampoline enclosure, the yellow
tag should align with the first net rod to the RIGHT of the entrance.
Take hold of the plastic end of the strap directly above the yellow
90° and slide it down through the opening at the top of the bracket.
Continue working your way around the enclosure and installing all the straps.
To remove the shade, twist the plastic end of the strap and li it out of the bracket.
TIP - Throughout this manual, certain images contain parts that have been colored orange. This is
meant to bring specific attention to a particular part and is not a representation of their actual color.
WARNING
The Springfree Sunshade should NOT
A.
Keep small children at least 25 (7.5 m) away while
be relied upon as the only form of
assembling the trampoline; they could be injured by
ultraviolet radiation (UVR) protection.
improperly assembled rods releasing and ejecting
Prolonged UVR exposure can cause eye
from the frame.
and skin damage and chronic or even
B.
The owner and supervisors of the trampoline are
fatal, health problems. The shade
responsible to make all users aware of practices
cannot protect you from indirect or
specified in the User Guide.
reflected UVR.
C.
The Springfree Sunshade is only for use on Spring-
free trampolines.
As a precaution against unexpected
D.
Do not intentionally make contact with the
weather, do not leave the Sunshade
Sunshade while jumping.
installed on the trampoline over night
E.
Do not hang, kick, cut or climb on the Sunshade.
or when unsupervised, or when you are
F.
Do not assemble or install the Sunshade in windy or
away for extended periods of time.
inclement weather.
G.
Wear protective clothing that covers as much of your
body as possible and is made of lightweight, closely
Entrapment and choking hazard
woven material with a UPF at least 50. A broad
possible for children under 6 years of
brimmed hat that shields your face, neck, and ears is
age.
also strongly recommended.
H.
Apply SPF 30+ or higher broad-spectrum sunscreen
liberally to dry skin, at least 20 minutes before sun
4
1
2
3
tag. Twist the plastic end of the strap
Once the shade is full installed, inspect the top of the net between each of the net rods.
If the net is drooping or if the shade is sagging, tighten or loosen the adjustable straps until the top of the
net and the shade are flat.
TIP - When adjusting the straps, be sure to adjust all sides evenly so that the shade is positioned
above the center of the mat.
1
Read the warnings on this page and those
contained in the User Guide before you assemble
and use this accessory and the trampoline.
exposure. Reapply every two hours when outdoors
or a er swimming, towel drying, perspiring heavily
or washing.
I.
Consider wearing close fitting sunglasses with an
eye protection factor (EPF) greater than 9.
J.
In heavy snow or wind, your Sunshade could invert
or collapse and may injure jumpers or damage the
trampoline. The trampoline should not be used in
inclement weather, particularly if the shade is
installed.
K.
In regions where heavy snowfall may occur, snow
must not be allowed to accumulate on the shade as
the weight may cause the structure to collapse.
The Sunshade has a central water drain, however,
L.
water can pool at the perimeter of the shade if the
trampoline is not positioned on a flat and level
surface. Pooling water may damage the Sunshade,
Part
distort the Sunshade fabric, and could cause the
A.
Sunshade
perimeter rod to break.
B.
Sunshade storage bag
M.
Do not expose the shade or any part of the trampo-
line to open fire.
Lay out the parts as shown. If you are missing any parts please contact Springfree Trampoline directly.
NOTE - If you are not sure which trampoline model you have, refer to the serial number stickers on
your frame or the tags on the edge of your mat or net.
5
With two people holding either side of the shade, have one person carefully rotate their side of the shade
by 180°, creating a figure of eight shape. The rod around the edge of the shade is very flexible, so don't
worry about it breaking.
Then take one half of the figure of eight and carefully fold it over against the other, forming a circle.
Again, with two people holding either side of the circle, have one person rotate their side of the shade
by 180°, creating a smaller figure of eight.
As before, take one half of the figure of eight and carefully fold it over against the other. You should now
have a circle comprised of four overlapped loops.
Insert the shade into the storage bag.
NOTE - The Sunshade brackets do not need to be taken down each time you remove the shade.
Leave them in place for faster assembly and disassembly in the future.
WARNING - If you anticipate severe weather, the Sunshade should be taken down and stored in a
safe location.
A
C
B
Quantity
Part
Quantity
1
C.
Bracket
1
R54 ,O77, O92
8
R79, R132, S113, S155
12
1
2
3
4
5
Advertisement

Related Manuals for Springfree Sunshade


Summary of Contents for Springfree Sunshade
- Page 1 If the net is drooping or if the shade is sagging, tighten or loosen the adjustable straps until the top of the NOTE - The Sunshade brackets do not need to be taken down each time you remove the shade.
- Page 2 Appliquez généreusement de la crème solaire SPF du trampoline au feu. Votre modèle de trampoline peut modèle de trampoline. Si des pièces vous manquent, veuillez contacter directement Springfree Trampoline. di¬érer de celui illustré, mais les étapes 30+ sur votre peau au moins 20 minutes avant de de démontage restent les mêmes.
Need help?
Do you have a question about the Sunshade and is the answer not in the manual?
Questions and answers
can i use the sunshade if the basketball hoop is installed (large oval)