
Subscribe to Our Youtube Channel
Related Manuals for Beretta HYDRONIC UNIT LE 6


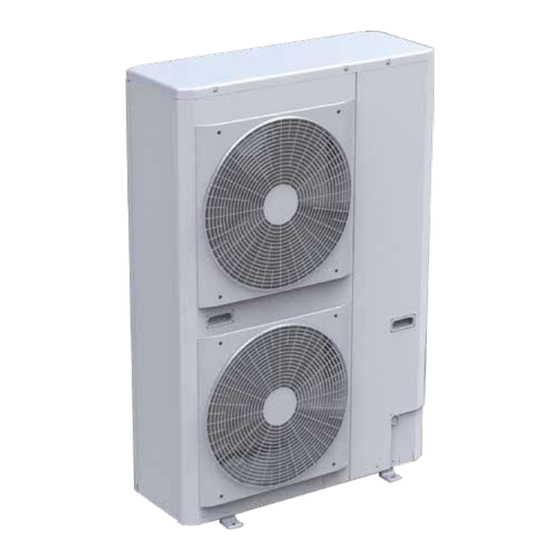
Summary of Contents for Beretta HYDRONIC UNIT LE 6
- Page 1 Instructions for installation Installationsvejledning HYDRONIC UNIT LE 4 | LE 6 | LE 8 | LE 12 LE 15 | LE 12 T | LE 15 T Instructions for installation Installationsvejledning...
- Page 2 HYDRONIC UNIT LE Dear client, Denne manual indeholder de nødvendige informationer for Thank you for choosing a BERETTA product. korrekt installation af varmepumpen. This booklet provides the information necessary for a correct and simple installation, without questioning your expertise and technical competence.
-
Page 3: Table Of Contents
HYDRONIC UNIT LE CONTENTS GENERAL General warnings ................................. 5 Basic safety rules ................................. 6 Description ..................................7 Identification ..................................7 Technical Data ..................................9 Performance based on the climatic zone ..........................11 Electrical data ..................................11 Operating conditions ................................. 12 Overall dimensions ................................ - Page 4 HYDRONIC UNIT LE INDHOLDSFORTEGNELSE GENERELT Generelt ....................................5 Sikkerhedsregler ................................... 6 Beskrivelse ................................... 7 Identifikation ..................................7 Tekniske data ..................................9 Ydeevne baseret på klimazone ............................11 Elektriske data ..................................11 Drift betingelser .................................. 12 Dimensioner ..................................13 Ledningsdiagram ................................14 Køle kredsløbs diagram ..............................
-
Page 5: General
“off” parationer eller vedligeholdelse udføres af kvalificererede and close the stop taps. Call the BERETTA Technical As- installatører. Der må ikke foretages ændring af apparatet, sistance Service immediately, or other professionally quali- da det kan medføre farlige situationer. -
Page 6: Basic Safety Rules
HYDRONIC UNIT LE BASIC SAFETY RULES SIKKERHEDSREGLER This appliance must not be used by children and unaided Produktet må ikke betjenes af børn eller andre ukyndige. disabled persons. Kabinettet på varmepumpen må ikke åbnes før strømmen Do not open the access covers to perform any mainte- er slukket på... -
Page 7: Description
The technical label shows all the appliance's technical and ne. Denne label må ikke fjernes. performance data. If it gets lost, ask for a copy from the BERETTA Technical Assistance Centre. Hvis labelen mangler vanskeliggøres identifikation, instal- lation og service af produktet. - Page 8 HYDRONIC UNIT LE Automatic air vent valve Automatisk luftudlader Temperature probe Temperatur føler Safety valve (output 1/2’) Sikkerhedsventil ½’ Recirculation pump Cirkulationspumpe Cap to release pump seizure Dæksel på pumpe Flow meter Flowmåler Expansion tank Ekspansionsbeholder 4 - 6 - 8 12 - 15 4 - 6 - 8 12 - 15...
-
Page 9: Technical Data
HYDRONIC UNIT LE TECHNICAL DATA HYDRONIC HYDRONIC HYDRONIC HYDRONIC HYDRONIC HYDRONIC HYDRONIC UNIT Model UNIT LE UNIT LE 4 UNIT LE 6 UNIT LE 8 UNIT LE 12 UNIT LE 15 LE 12 T 15 T Performance in heating mode Nominal capacity (1) 5,76 7,16... -
Page 10: Tekniske Data
HYDRONIC UNIT LE TEKNISKE DATA HYDRONIC HYDRONIC HYDRONIC HYDRONIC HYDRONIC HYDRONIC HYDRONIC UNIT Model UNIT LE UNIT LE 4 UNIT LE 6 UNIT LE 8 UNIT LE 12 UNIT LE 15 LE 12 T 15 T Varmefunktion Nominel ydelse (1) 5,76 7,16 11,86... -
Page 11: Performance Based On The Climatic Zone
HYDRONIC UNIT LE PERFORMANCE BASED ON THE CLIMATIC ZONE LEISTUNGSWERTE IN BEZUG AUF DIE KLIMAZONE HYDRONIC HYDRONIC HYDRONIC HYDRONIC HYDRONIC HYDRONIC HYDRONIC Model / Modell UNIT LE UNIT LE UNIT LE 4 UNIT LE 6 UNIT LE 8 UNIT LE 12 UNIT LE 15 12 T 15 T... -
Page 12: Operating Conditions
HYDRONIC UNIT LE OPERATING CONDITIONS DRIFT BETINGELSER Heat pump optimal operation when producing DHW For optimal funktion af varmepumpen ved produktion af should have an outdoor air temperature that does not ex- varmt vand i sommerfunktion, må udetemperaturen ikke ceed 30°C. overstige 30°C. -
Page 13: Overall Dimensions
HYDRONIC UNIT LE 12 - 15 13 9 OVERALL DIMENSIONS / DIMENSIONER Model 12 T 15 T Model Overall dimensions / Dimensioner Empty weight Netto vægt 1363... -
Page 14: Wiring Diagrams
HYDRONIC UNIT LE WIRING DIAGRAMS LEDNINGSDIAGRAM Fabriksmonteret Wiring of the manufacturer ---- Monteret ved installation ---- Wiring of the installer Kompressor motor Compressor motor Blæsermotor Fan motor Omskiftet ventil (4 vejs) Reversing valve (4 way) Temperaturføler lavtryksrør Temperature probe low pressure pipe Temperaturføler ekstern enhed Temperature probe external unit Temperaturføler højtryksrør... - Page 15 HYDRONIC UNIT LE HYDRONIC UNIT LE 4 POWER/HYDRONIC UNIT LE 4 FORBINDELSESDIAGRAM 1P.C.BOARD CN300 CN700 1PMV CN503 THERMOSTAT FOR COMPRESSOR 10CF CN502 11CF CN501 12CF CN500 CN805 CN701 CN806 P31 P30 P03 P10 P02 1MCC1530 230V 1~ 50Hz HYDRONIC UNIT LE 4 CONTROL / HYDRONIC UNIT LE 4 FORBINDELSESDIAGRAM 1LWT 20CF 24CF...
- Page 16 HYDRONIC UNIT LE HYDRONIC UNIT LE 6 Power / HYDRONIC UNIT LE 6 FORBINDELSESDIAGRAM 1P.C.BOARD CN300 CN700 1PMV CN503 THERMOSTAT FOR COMPRESSOR 10CF CN502 11CF CN501 12CF CN500 CN805 CN701 CN806 P31 P30 P03 P10 P02 1MCC1530 230V 1~ 50Hz...
- Page 17 HYDRONIC UNIT LE HYDRONIC UNIT LE 8 POWER / HYDRONIC UNIT LE 8 FORBINDELSESDIAGRAM 46CF 1P.C.BOARD CN300 47CF 40CF CN700 1PMV 48CF CN503 THERMOSTAT FOR COMPRESSOR 49CF CN502 50CF CN501 41CF 51CF CN500 CN805 CN701 CN806 P31 P30 P33 P32 P10 P02 42CF 45CF...
- Page 18 HYDRONIC UNIT LE 12 POWER/ HYDRONIC UNIT LE HYDRONIC UNIT LE 12 FORBINDELSESDIAGRAM P17 P18 CN09 CN01 CN10 1P.C.BOARD CN11 CN02 17CF CN03 CN13 CN05 CN06 CN04 11CF 14CF P R B 20CF 21CF 23CF 12CF 15CF 18CF CN01 CN04 CN800 CN03 CN600...
- Page 19 HYDRONIC UNIT LE 15 POWER/ HYDRONIC UNIT LE HYDRONIC UNIT LE 15 FORBINDELSESDIAGRAM 10CM 11CM 63CF 64CF 65CF CN400 CN200 CN201 CN202 1PCB (WHITE) 75CF CN300 (WHITE) CONTROL P.C. BOARD MCC1571 66CF CN609 (BLUE) SW804 SW801 SW800 CN610 (YELLOW) 67CF SW803 CN604 T25A,250V~...
- Page 20 HYDRONIC UNIT LE 12 T/15T Power / Hydronic Unit LE 12 T/15 T Forbindelsesdiagram HYDRONIC UNIT LE POSISTER 21CF 20CF CN05 CN10 CN851 CN06 CN16 CN101 1P.C.BOARD CN07 CN17 MCC1600 CN18 NOISE FILTER 1IPDU BOARD CN19 CN04 CN20 MCC1596 COMPRESSOR CN08 CN11 CN211...
-
Page 21: Refrigerating Circuit Diagram
HYDRONIC UNIT LE REFRIGERATING CIRCUIT DIAGRAM / KØLE KREDSLØBS DIAGRAM Plate heat exchanger / Pladeveksler... -
Page 22: Installer
HYDRONIC UNIT LE INSTALLER INSTALLATØR PRODUCT DELIVERY LEVERING AF PRODUKTET Preliminary instructions Foreløbige instruktioner We recommend the packaging only be removed when the Placer produktet ved installationsstedet før udpakning. appliance has been placed at the installation point. Fjern omhyggeligt alle strips fra produktet. Carefully remove any adhesive strips on the appliance. -
Page 23: Installation
HYDRONIC UNIT LE INSTALLATION INSTALLATION Preliminary instructions Preliminære instruktioner The installation position should be decided by the system Producentens afstandskrav skal overholdes og produktet designer or by an expert and should take into account tech- skal placeres i overensstemmelse med gældende regler nical requirements and current standards and legislation. - Page 24 HYDRONIC UNIT LE 1000 1000 1500 2000...
-
Page 25: Hydraulic Connections
HYDRONIC UNIT LE HYDRAULIC CONNECTIONS FORBINDELSER TIL VARMEANLÆG Preliminary instructions Instruktion The selection and the installation of the components of Valg og installation af anlæg skal foretages af aut.installa- the system is referred to the expertise of the installer, who tør. - Page 26 HYDRONIC UNIT LE Model Water flow rate Nominal water flow rate 0,20 0,28 0,34 0,57 0,57 0,71 0,71 System volume per model Maximum system pressure Water charge pressure Maximum elevation Model Vandflow Nominel Vandflow 0,20 0,28 0,34 0,57 0,57 0,71 0,71 mín System vandindhold pr model...
-
Page 27: Condensate Discharge Connection
HYDRONIC UNIT LE CONDENSATE DISCHARGE CONNECTION TILSLUTNING TIL KONDENSUDLEDNING Provide for lifting the unit off the floor: Afstandskrav til underlag: 20 mm without conveying the condensation dis- 20mm uden kondensafløb charge. 90-100 mm med kondensafløb. 90 - 100 mm to permit the conveyance of the con- ... - Page 28 HYDRONIC UNIT LE Mandatory items: Vigtigt: The use of an omnipolar magnetothermnic switch, lock- Brugen af en flerpolet magnetetothermnic kontakt, låsbar able line disconnector, conforming to CEI-EN (contacts ledningsafbryder i overensstemmelse med CEI-EN (kon- open by at least 3 mm), with adequate disconnection takterne åbner mindst 3 mm), med tilstrækkelig strømaf- power and differential protection in compliance with the bryder og forskellig beskyttelse i overensstemmelse med...
- Page 29 HYDRONIC UNIT LE Unit Varmepumpe Control panel Kontrol panel OFF (open contact) - ON (closed contact) OFF/ON Cooling (open contact)/Heating(closed contact) Køle (åben kontakt) Opvarmning (lukket kontakt) Normal (open contact)/Eco (closed contact) Normal (åben kontakt) Eco (lukket kontakt) 3-way valve (only N-10 for spring models) (18-N: Power supply; 10: 3-vejs ventil (kun for N10 forårsmodellen) (18N: Power;...
- Page 30 HYDRONIC UNIT LE 4 - 6 - 8 12 - 15 Forklaring: Legend: A Position 4 led/inverter diagnostic board (12 – 12T – 15 – A Position 4 Led/Inverter diagnostics board (12 - 12T - 15 - 15T) 15T) B LED GMC position/Diagnostic board B LED GMC position/Styreprint C Installation terminal strip C Installationsklemrække...
-
Page 31: Control Panel
HYDRONIC UNIT LE CONTROL PANEL KONTROL PANEL The control panel makes it possible to carry out all the regu- Kontrolpanelet gør det muligt at ændre indstillinger så varme- lations needed for the appliance to function, and to display pumpen fungere optimalt, samt viser de vigtigste parameter og the main parameter values and the alarms. -
Page 32: Charging The System
HYDRONIC UNIT LE CHARGING THE SYSTEM UDLUFTNING AF SYSTEMET Preliminary instructions Indledende instruktioner Do not open the access covers to perform any mainte- Afbryd strømforbindelsen før afmontering af kappen og før nance or cleaning operation before having disconnected rengøring eller servicering af varmepumpen (afbryderen the appliance from the main power supply, by positioning skal stå... -
Page 33: Adjustment Of The Circulation Pump
Udluftnings funktionen aktiveres efter 3 sekunder i mindst 10 min. Ændring i fabriksindstillingerne må kun udføres af aut. For any change in the factory settings please contact BERETTA Technical Service. installatør. Mode with variable pressure differential Mode med variabelt differentieret tryk... -
Page 34: Technical Assistance Centre
Preliminary instructions Indledende instruktioner The first commissioning of the appliance should be car- Den første opstart skal foretages af aut. installatør. ried out by the BERETTA Technical Assistance Centre. Kontroller: Check that: Sikkerhedsbetingelserne er overholdt All the safety conditions have been respected ... -
Page 35: System Drainage
HYDRONIC UNIT LE Frostvæske Frost temperaturer (*) -4°C -9°C -15°C -23°C Kapacitet 0,996 0,991 0,983 0,974 Korrektions faktor Input 0,990 0,978 0,964 1,008 Tryktab 1,003 1,010 1,020 1,033 (*) Note: Temperatur værdierne er gennemsnitlige Henviser altid til temperaturværdien for den specifikke model Preliminary instructions Indledende instruktioner Deactivate the appliance exclusively from the control panel. -
Page 36: Extraordinary Maintenance
HYDRONIC UNIT LE Cleaning Rensning Do not open the access covers to perform any mainte- Varmepumpens strømforsyning skal være afbrudt før nance or cleaning operation before having disconnected frontpanelet fjernes for service eller rengøring. Varmepum- the appliance from the mains electricity network, by posi- pens kabinet rengøres med en opvredet klud med sæbe. - Page 37 HYDRONIC UNIT LE Compressor Kompressor The compressor is installed on the unit already filled with oil Enhedens kompressor leveres med påfyldt olie og er forseglet. and sealed. Hvis kompressoren skal udskiftes, skal der anvendes den originale In case of breakages, if the compressor can be repaired, use ESTER OLIE VG74 (VG68 for the 12kW-15kW) a.
-
Page 38: Command
HYDRONIC UNIT LE STYRING COMMAND STYREPANELET CONTROL PANEL Taster Keys ZONE ZONE LÅS BLOCK MODE MODE PILE OP Up arrow PILE NED Down arrow NAT (Tryk ‘N’ Go) night (Touch 'N' Go) Ikke hjemme (Tryk ‘N’ go) Away from home (Touch 'N' Go) Hjemme (Tryk ‘N’... - Page 39 HYDRONIC UNIT LE Symbols Symboler Not used Anvendes ikke Not used Anvendes ikke System off System slukket Air temperature inside the room Rumtemperatur ZONE ZONE Not used Anvendes ikke Cooling mode Køle MODE Time Outdoor temperature Udetemperatur Day of the week Ugedag Alarm Alarm...
-
Page 40: Functions
HYDRONIC UNIT LE FUNCTIONS FUNKTIONER Setting current date and time Indstilling af dato og tid Adjusting the time and date is necessary when the machine Indstilling af tid og dato er nødvendig ved første opstart. is used for the first time. Tryk på... - Page 41 HYDRONIC UNIT LE - Set the desired temperature. - Indstil den ønskede temperatur - The triangular icon above the key flashes. - Det trekantede ikon over tasten blinker. To change mode: Ændring af mode: - Press the mode key. - Tryk på mode tasten - Select the operating mode.
- Page 42 HYDRONIC UNIT LE - Press the Period key. - Tryk på periode tasten for at fortsætte - Check the set times. - Kontroller den valgte tid - Press the Period key to proceed. - Tryk på periode tasten for at fortsætte If the settings are incorrect: Hvis indstillingerne ikke er korrekte: - “- -”...
- Page 43 HYDRONIC UNIT LE Temporary change of the programming Midlertidig ændringer i programmeringen While the unit is in use, it might be necessary to change its Når varmepumpen er i brug kan det være nødvendigt midler- tidig at ændre dens programmering. programming temporarily.
- Page 44 HYDRONIC UNIT LE To deactivate: - Hold GEM tasten inde i 10 sekunder - Keep the Lock key pressed for 10 seconds. - Ikonet signalere at varmepumpen med frekvens reduktion slukker. - The icon signalling the Heat pump with frequency reduc- tion is active switches off.
- Page 45 HYDRONIC UNIT LE Heating Opvarmning Cooling Køling Outdoor temperature Udetemperatur Water temperature Fremløbstemperatur °C °C Fan Coil °C °C °C °C...
- Page 46 HYDRONIC UNIT LE Customised climate curves Tilpassede varmekurver Parameters 112 and 117 set to zero allow to include a cus- Parametrene 112 og 117 indstillet til 0 giver mulighed for at tilføje tomised curve in the control. en tilpasset kurve i styringen. The pictures show which parameters in the installer configu- Billedet viser hvilke parametre i installatør konfigurations tabel- ration table must be set to create the customised climate...
- Page 47 HYDRONIC UNIT LE Reset of installer parameters Nulstil installatør parametre To enter: For ændring: - Press the Zone key and the Lock key concurrently for 10 Hold Zone tasten og GEM tasterne inde samtidigt i 10 se- seconds. kunder - The number 899 is displayed in the Temperature area of - Tallet 889 vises i temperatur området på...
-
Page 48: Faults
HYDRONIC UNIT LE FAULTS FEJL Preliminary instructions Foreløbige instruktioner In the presence of operating faults, the unit is put into a Ved driftfejl, går varmepumpen på nødprogram og safety condition and its use is blocked. blokeres. The safety shutdown can be due to a random situation. Driftstoppet kan have flere årsager. - Page 49 HYDRONIC UNIT LE ONLY FOR HYDRONIC UNIT LE 12 MODELS KUN FOR UNIT LE 12 MODELLER In these models, the faults are signalled through the indicators På disse modeller, vises fejl på inverterprintet og på styrepa- on the inverter board and on the control panel. nelet.
- Page 50 HYDRONIC UNIT LE Only for Hydronic Unit LE 15 - 12T/15T models Kun for Hydronic Unit LE 15 – 12T/15T modeller In these models, the faults are signalled through the indicators På disse modeller, vises fejl på inverterprintet og på on the inverter board and on the control panel.
- Page 51 HYDRONIC UNIT LE Display 2 LED indikator Fejltype (Ved tryk på SW800) Current Error Last Error Normal drift(ingen fejl) Aktueller Fehler Letzter Fehler SW803 SW803 Fremløbstemperaturføler fejl (TD) Veksler temperatur føler fejl (TE) Veksler temperatur føler fejl (TL) Udeføler fejl(TO) Fejl i luftindtagsføler (TS) Fejl i køletemperaturen føler (TH) Føler ledningsfejl (TE og TS)
-
Page 52: Table Of User Parameters And Functions
HYDRONIC UNIT LE TABLE OF FUNCTIONS AND USER PARAMETERS Function Parameter Description Icon Value range value Mode This parameter allows you to select the mode Current mode 0. Off 2. Cooling 3. Heating Homeantifreeze This parameter enables the ambient antifreeze option when the system antifreeze: is off: 1. -
Page 53: Funktionstabel Og Brugerparametre
HYDRONIC UNIT LE FUNKTIONSTABEL OG BRUGERPARAMETRE Funktion Parametre Beskrivelser Ikon Værdiom- Indstillet råde værdi Mode Med dette parameter vælges mode Nuværende mode 0. OFF 1. Køling 2. Opvarmning Rum antifrost Med dette parameter vælges antifrost, når systemet er OFF: Antifrost 1. -
Page 54: Table Of Installer Parameters And Functions
HYDRONIC UNIT LE TABLE OF FUNCTIONS AND INSTALLER PARAMETERS Default Function Parameter Description Value range value value Code used to set the type of system: 1. Heat pump with fixed water temperature (clean contacts) 2. Heat pump with set-up of the climate curve (clean contacts) 3. - Page 55 HYDRONIC UNIT LE Default Function Parameter Description Value range value value Min heating water Code used to select the minimum outdoor temperature of the heating climate curve. 20°C 60°C 35°C temperature Max heating water Code used to select the maximum outdoor temperature of the heating climate curve. 20°C 60°C 55°C temperature...
-
Page 56: Table Of Factory Parameters And Functions
HYDRONIC UNIT LE Default Function Parameter Description Value range value value Code used to select the output connected to PIN 5 of the terminal board Alarm/ ambient air 1. Alarm signal temperature reached 2. Signal that the air temperature set point has been reached External heat source This code is used to set the outside air temperature threshold value below which only -20°C... -
Page 57: Funktionstabel Og Installatør Parametre
HYDRONIC UNIT LE FUNKTIONSTABEL OG INSTALLATØR Standard Set vær- Funktioner Parametre Beskrivelse Værdiområde værdier dier Kode anvendes til indstilling af fremløbet: 1. Varmepumpe med fast temperatur 2. Varmepumpe med opsætning af varmekurve 3. Varmepumpe med kontrolpanel kontrol System konfiguration 4. Monoblock Comfort med kontrolpanel som termostat 5. - Page 58 HYDRONIC UNIT LE Standard Set vær- Funktioner Parametre Beskrivelse Værdiområde værdier dier Koden anvendes til at vælge minimum udetemperatur på varmekurven, afhænger af i hvilket land systemet er installeret Min fremløbstemperatur Koden anvendes til at vælge min. fremløbstemperatur for varmekurven 20°C 60°C 35°C...
-
Page 59: Fabriksindstillinger Og Funktioner
HYDRONIC UNIT LE Standard Sæt Funktioner Parametre Beskrivelse Værdiområde værdier værdier Udetemperatur Denne koden anvendes til indstilling af udetemperaturens værdi under hvilken kun den grænse for ekstern -20°C 65°C -20°C eksterne varmekilde fungerer ifølge algoritmen (stop af varmepumpe) varmekilde Koden anvendes til indstilling af hvilken temperatur kontrolpanelet skal vise i temperatur zonen 1.Rumtemperatur 2.Fremløbstemperatur (fra LWT føleren) - Page 60 This document cannot be considered a contract in relation to third parties. Beretta forbeholder sig til enhver tid uden videre retten til ændring af karakteristikker og data i dette dokument for udvikling af produktet. Dette dokument gælder ikke som dokumentation overfor tredjepart.
Need help?
Do you have a question about the HYDRONIC UNIT LE 6 and is the answer not in the manual?
Questions and answers