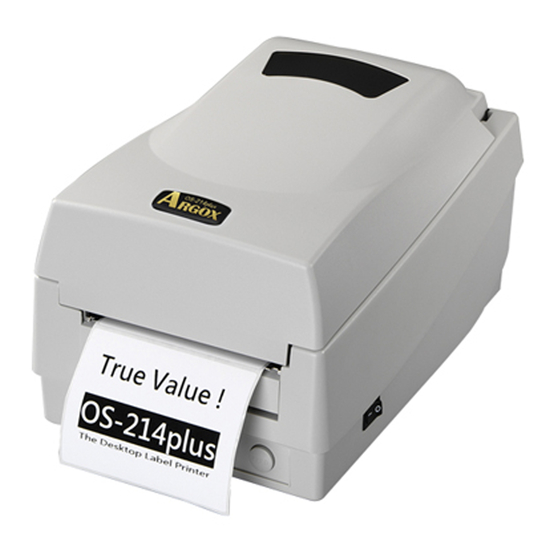
Contents Open the printer package……………………………………………………………..………………..3 Package Contents……………………………………………………………………………………………3 Printer construction:OS-2130D/OS-2130DE………………………………………….………..4 Front view……………………………………………….………………………………………………………4 Back view……………………………………………….……………………………………………….………5 Internal view I……………………………………….………………………………………………..……...5 Internal view II………………………………….…………………….……………………………..……….6 Printer construction OS-214plus/OS-314plus/OS-214NU/OX-100/OX-120D4……..6 Front view……………………………………………….……………………………………………….………6 Back view……………………………………………….……………………………………………….……….8 Internal view I……………………………………….……………………………………………………….10 Internal view II………………………………….…………………….…………………………………….11 Connect the power supply…….…………………….……………………………………………………11 Installation paper roll….…………………….…………………………………………………………….12 Mounting ribbon….…………………….……………………………………………………………………13 Printer operation…………………………………………………………………………………………14 Print paper correction and settings……………………………………………………………………14 Reset the printer to default………………………………………………………………………………15...
Open the printer package 1, Open the top cover of the printer and check that all components are intact. 2, In addition to the printer, please also check if you have received the following accessories. If any items are missing, please contact your local dealer. Package Contents OS-2130D/OS-2130DE:...
Internal view II Connect the power supply 1. Be sure to switch the power switch to the off position (down) to perform the following operations. 2. Plug the AC power cord into the power supply. 3. Plug the power supply's power connector into the printer's power connection slot. 4.
Installation paper roll 1, Open the top cover to expose the roll 2, Remove the paper shaft paper supply end 3, Load the paper roll from left to right into 5, Lay the paper roll to the left. the paper shaft. 6, Move the tabs from left to right to 4, Re-clamp the paper shaft into the paper close the paper.
Mounting ribbon Note: This section is not suitable for OS-2130D, OS-2130DE, OX-120D and thermal mode printing modules. 1,Open the top cover to expose the 2,Open the print head module by paper supply end. pressing the two white release latches on the rear sides. 3,Open the print head module to expose 5,Attach the leading edge of the the ribbon supply end.
When the printer starts printing, immediately release the feed button. Note: If the printer uses the Argox PPLB printer language, the printer enters the dump mode after printing the configuration label. In the dump mode, all characters are printed in 2 columns.
● Reset printer to defaults 1, Turn on the printer and wait for more than 5 seconds. 2, Press the (Feed) button for about 10 seconds, wait for the (Power) light and (Ready) light turned off. 3, When the (Power) light is on again, release the Feed button. 4, The (Ready) light will then light up.
Page 16
● The Ready light will flash when the printer is turned on. When using an Ethernet model, the Ready light will flash for a few seconds until the Ethernet card is ready. ● Once the printer receives data from the host computer, the Ready light will begin to flash.
Page 17
Troubleshoot with indicator lights and buzzer indication diagnostics. LED indicator: Power and Ready lights flash at the same frequency Power light Ready light Light up Light up Extinguished Extinguished Possible problem Solution Note If you use a continuous ●Check label path label roll, set (continuous Paper sensor cannot ●Check the label...
Page 18
Led light: only Power light flash Power light Ready light Light on Light on Extinguished Light on Possible problem Solution Note Check the serial port Serial communication transfer rate on the Only for serial ports output error system and printer. Check the cutter or The cutter is faulty or Only applicable when...
Page 19
OS-2130D, OS-2130DE Printer has a status monitoring function that displays status and error messages through the front panel indicators and the alert buzzer. Buzzer Situation LED light Description warning ●The two indicators flash simultaneously. ●The paper roll is not installed or used up.
● Printer communication Turn off the printer first. Plug the power cord into the outlet and connect the other end to the printer's power outlet. Connect the USB cable (or other transmission cable) to the printer and PC. Turn on the printer. If the printer supports Plug and Play and you have connected the printer using a USB cable, the WINDOWS New Hardware Wizard automatically detects the printer and displays a dialog for you to install the driver.
Page 21
5, Select model and instruction set - The 6, Select the printer's connection port following example is based on A-2240 and press (Next) PPLB. 7, Enter the printer name (for example: 8, Check all the data on the display. If ArgoxA-2240 PPLB), then select (do not the data is correct, click (End).
Need help?
Do you have a question about the OS Series and is the answer not in the manual?
Questions and answers