Table of Contents
Advertisement
Quick Links
Advertisement
Table of Contents

Related Manuals for Aram API-100


Summary of Contents for Aram API-100
- Page 1 -100 User Manual...
-
Page 2: Table Of Contents
Contents A. Components B. H/W Parts ⅰ. Both Sides ⅱ. Settings C. System Settings ⅰ. Download & Install ⅱ. How to connect with the program ⅲ Wi-Fi Combo D. Program Settings ⅰ. Device Certification E. Application ⅰ. Start Analysis ⅱ. Full Analysis Moisture Sebum Pore... -
Page 3: Components
Components API 100 Main body with skin lens Cradle Battery Charger USB cable Sebum paper 1 box Cleaning cloth A. Components... -
Page 4: H/W Parts
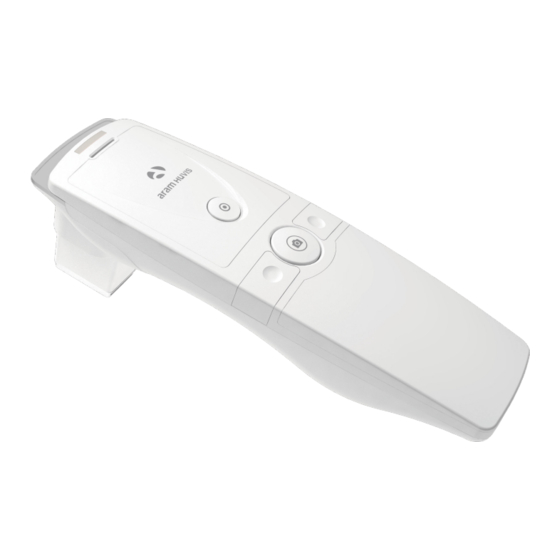
H/W Parts Both Sides Start, Analysis, Result Capture Mode up Mode down Battery cover External adaptor connection Power on & o LED light & lens B. H/W Parts - Both Sides... -
Page 5: Ⅱ. Settings
H/W Parts Settings Insert the battery Open the battery cover by pushing it down with finger. Insert the battery and gently press the battery into place. Close the cover. To turn on the power Press and hold “power” button. "Indicate LED" starts twinkling in blue light. When it stops, the device is ready to use. - Page 6 H/W Parts Settings Charger can be used for Amercian type & European type. The default is European type . Push the plug up. Then 220V European type is disassembled and you can see the 110V-220V American type inside of the charger. Choose the one you want to use and connect USB cable in adaptor.
-
Page 7: System Settings Ⅰ. Download & Install
System Settings Download & Install PC User Go to link on the browser as below. http://www.aramhuvis.com/downloads Install the program. Tablet device or Smartphone user iOS : Go to "App Store" and search "Solutionist" to download the program. Android : Go to "Google Play Store" and download it. C. -
Page 8: Ⅱ. How To Connect With The Program
System Settings How to connect with program First of all, check the Wi-Fi name and password which is described at back side of battery cover. Wi-Fi name & password must be same and the format is "API_XXXX". Turn on the device. While turning on the device, prepare PC, Tablet, Smartphone to run the S/W. -
Page 9: Ⅲ . Wi-Fi Combo
System Settings Wi-Fi Combo Wi-Fi Combo - It means user could use device and internet at the same time. - With this function, user can send an email a er analysis immediately. How to use? The device has AP(API_XXXX) to be connected with the program “Solutionist” by Wi-Fi. First of all, connect the device to AP to use it with “Solutionist”. - Page 10 System Settings Wi-Fi Combo Touch Settings. In “General Settings”, go to “Wi-Fi” and touch “Scan” button. The available Wi-FI lists appear. Among them, please choose the best signal Wi-Fi to connect it. During connect it, you can see the message saying that API device will be automatically disconnected and reboot.
- Page 11 System Settings Wi-Fi Combo When Wi-Fi is connected, please go to “Settings” page to set up the Wi-Fi connection. You can see now the Wi-Fi is connected. Please turn it o and connect with device AP code. (API_XXXX). The analyzer is connected with AP code. Then, run “Solutionist”...
-
Page 12: Program Settings
Program Settings General Settings Change the language, analysis mode and etc. Analysis Settings Set up the skin type and analysis parameter. Recommended Products Available for each analysis result. About Check the current version and update is available in Wi-Fi connection. D. -
Page 13: Ⅰ. Device Certification
Device Certification Solutionist program includes three programs. But when you start “Solutionist” program with API-100 device you can see the pop message saying that the program is compatible with only “SKIN” device. Touch “OK” button. Then you will see now only “SKIN”... - Page 14 Program Settings Device Certification Device certification is complete. Please touch “OK” button. When it is done, you could touch “Product Download” button to load in server. If you have the recommended product data in server, the product will be downloaded by clicking “Product download”.
-
Page 15: Application
Application Start Analysis Touch “Analysis” to start. Remote Control (Only Tablet) During analysis, you can control the device in "Solutionist" program. In screen, touch "Control Menu On" to activate "Remote". You can make use of this function in all analysis pages. E. -
Page 16: Crm
Application Input the information. - full name, email address, gender and age group Take picture of customer's face with built-in camera or use the picture you already have in device. Among the customer lists, select the client to check or start analysis. Check the customer information and analysis result list. -
Page 17: Moisture
Application Moisture Press "capture" button and when you hear "beep" sound, please put the sensor onto your skin and wait until you hear "beep" sound again. Moisture sensor The result will appear. To analyze the next step, touch the below button. -
Page 18: Sebum
Application Sebum Put the sebum paper onto the U-zone on the cheek then press it for 2~3 seconds. U-zone Place camera on the pink area and take picture. (U-zone) Put the sebum paper onto the T-zone on face, then press it for 2~3 seconds. Place camera on the pink area and take picture. -
Page 19: Pore
Application Pore Touch button to activate camera mode. Put the camera onto the skin and touch button to capture the image. Then touch button to analyze it. The result will appear. Touch "Compare" button to check the sample images as To analyze the next step, touch the below button. -
Page 20: Melanin
Application Melanin Touch button to activate camera mode. Put the camera onto the skin and touch button to capture the image. Then touch button to analyze it. The result will appear. Touch "Compare" button to check the sample images as To analyze the next step, touch the below button. -
Page 21: Clearness Of Pore (Cop)
Application Clearness of Pore (COP) Touch button to activate camera mode. Put the camera onto the skin and touch button to capture the image. Then touch button to analyze it. The result will appear. Touch "Compare" button to check the sample images as To analyze the next step, touch the below button. -
Page 22: Wrinkle
Application Wrinkle Touch button to activate camera mode. Put the camera onto the skin and touch button to capture the image. Then touch button to analyze it. The result will appear. Touch "Compare" button to check the sample images as To analyze the next step, touch the below button. -
Page 23: Sensitivity
Application Sensitivity Touch button to activate camera mode. Put the camera onto the skin and touch button to capture the image. Then touch button to analyze it. The result will appear. Touch "Compare" button to check the sample images as To check all the results, touch "Show All Results"... -
Page 24: Summary
Application Summary Check the result. Touch button or each parameter's name on pentagon graph. Once you select "Show Recommended Product", product image will pop up as Available to check product image. E. Application -Summary... -
Page 25: View Mode
Application View Mode In view mode, it is able to take pictures with capture button in many times. The user can select analysis parameter to take picture. images maximum. The user can mark the defect or concern according to the image with note function. E. -
Page 26: Warranty
Within warranty : Sending delivery(Buyer), repair cost and returning delivery(Aram). - If the product is broken by user's fault, repair cost could be charged. A er warranty : Sending delivery and repair cost(Buyer), returning delivery(Aram) How to send : - As sending a present from person to person by EMS or FEDEX. - Page 27 Warranty Service request form Date of Company purchase Contact person Address : Tel : Product name, serial no : Problems : Shipping address: 560, Dunchon-daero, Jungwon-gu, Seongnam-si, Gyeonggi-do, 13230, Rep. of KOREA E-mail : support@aramhuvis.com Tel : +82 70 4687 1712 / Fax : +82 31 732 6330 F.
- Page 28 560, Dunchon-daero, Jungwon-gu, Seongnam-si, Gyeonggi-do, 13230, Rep. of KOREA E-mail : info@aramhuvis.com...
Need help?
Do you have a question about the API-100 and is the answer not in the manual?
Questions and answers