Table of Contents
Advertisement
Available languages
Available languages
Advertisement
Chapters
Table of Contents

Related Manuals for asmodus Minikin Reborn


Summary of Contents for asmodus Minikin Reborn
- Page 1 BEDIENUNGSANLEITUNG MANUEL D‘UTILISATION USER MANUAL...
- Page 2 SPRACHEN / LANGUES / LANGUAGES Deutsch � � � � � � � � � � � � � � � � � � � � � � � � � � � � � � � � � � � � � � � � � � � � � � � � � � � � � � � � � � � � Français �...
- Page 3 Bitte lesen Sie die Bedienungsanleitung vor Gebrauch sorgsam durch, um eine korrekte Nutzung des Geräts zu gewähr- leisten. Verwenden Sie in Kombination mit diesem Produkt bitte nur originale bzw. empfohlene Produkte. Die InnoCigs GmbH & Co. KG leistet als offizieller Importeur dieses ASMODUS-Produkts keinen Service und/oder Gewährleistung bei der Nutzung mit nicht empfohlenen Produkten.
-
Page 4: Table Of Contents
Inhaltsverzeichnis Hinweise & Vorsichtsmaßnahmen ............. . . 03 Lieferumfang | Aufbau des Geräts . -
Page 5: Hinweise & Vorsichtsmaßnahmen
Hinweise & Vorsichtsmaßnahmen Personen unter 18 Jahren, Schwangere, stillende Mütter und Menschen mit Herz-Kreislauf-Erkrankungen dürfen dieses Produkt nicht verwenden. Nicht empfohlen für Nichtraucher. Das E-Zigaretten-Produkt darf nicht in die Hände von Kindern und Jugendlichen gelangen. Dieses Produkt entspricht den innerhalb der EU Dieses Produkt darf gültigen Bestimmungen für technische Geräte und darf nicht von Minderjährigen... - Page 6 Hinweise & Vorsichtsmaßnahmen Benutzerhinweise 1. Sollte Ihnen das Gerät heruntergefallen sein, überprüfen Sie bitte, ob sich keine Komponenten gelockert haben, ob kein Liquid austritt und ob kein Defekt an Ihrem Mundstück vorliegt. Sofern nach visueller Prüfung des Produkts kei- ne Anzeichen einer Beschädigung vorliegen, können Sie das Gerät weiterbenutzen. Bitte wischen Sie Ihr Mundstück zuvor aus hygienischen Gründen mit einem Tuch ab.
- Page 7 Hinweise & Vorsichtsmaßnahmen 6. Wenn Liquid mit Ihrer Haut in Berührung kommt, wischen Sie es schnellstmöglich ab und reinigen Sie die Stelle anschließend gründlich mit klarem Wasser. 7. Wenn Sie versehentlich Liquid verschlucken, wenden Sie sich bitte an eine Vergiftungszentrale. Unter der Tele- fonnummer +49 (0)30 - 19 240 erreichen Sie Tag und Nacht den Giftnotruf der Charité...
-
Page 8: Lieferumfang | Aufbau Des Geräts
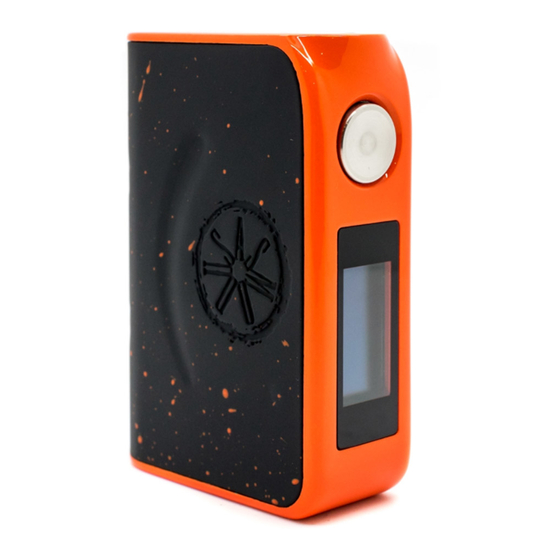
Lieferumfang & Aufbau des Geräts Lieferumfang 510er Anschluss 1x Minikin Reborn 168W (Akkuträger ohne 18650er Akkus) 1x Micro-USB-Ladekabel Magnetische Akku-Abdeckung 1x Bedienungsanleitung Feuertaste Micro-USB-Anschluss Head-Widerstand Akku-Ladestand Ausgangsspannung Ausgangsleistung Anzahl der Züge Tastensperre Betriebsmodus... -
Page 9: Eckdaten & Leistungsmerkmale
Eckdaten & Leistungsmerkmale Ausgabemodi VW | TC (COIL: SS316/SS317, TI, NI200) | TEMP | CURVE | TCR | TFR Ausgangsleistung 5 bis 168 Watt im VW-Modus | 5 bis 120 Watt im TC-Modus Widerstandsbereich 0,1 Ohm bis 2,5 Ohm Temperaturbereich 100°C bis 300°C | 212°F bis 572°F Eingangsspannung 6,4 Volt bis 9 Volt... -
Page 10: Bedienung Des Geräts
Betätigen Sie die Feuertaste fünf Mal schnell hintereinander (innerhalb von 3 Sekunden), um das Gerät einzuschalten und fünf Mal, um es wieder auszuschalten. Beim Einschalten erscheint das ASMODUS-Logo auf dem Display. Beim Ausschalten erscheint “SYSTEM OFF”. Wir empfehlen Ihnen, das Gerät während des Transports und bei längerer Nichtbenutzung auszuschalten. - Page 11 Bedienung des Geräts Sperren/Entsperren des Bildschirms oder der Feuertaste Es gibt drei Möglichkeiten, den Bildschirm und die Feuertaste zu (ent-)sperren. 1. Wischen Sie entlang des Bildschirms nach unten, um ihn zu Entsperren, zum Sperren drücken Sie die Feuertaste. 2. Drücken Sie drei Mal die Feuertaste, um den Bildschirm und die Feuertaste zu entsperren, drücken Sie die Feuertaste erneut drei Mal zum Sperren.
- Page 12 Bedienung des Geräts Einstellungen im CURVE-Modus Tippen Sie beim entsperrten Gerät auf den unteren Teil des Bildschirms (POWER/TEMP/CURVE/TCR/TFR), um das Hauptmenü aufzurufen. Tippen Sie auf das Untermenü “MODE” und wählen Sie “PWR” aus, um in den Betriebsmodus POWER zu gelangen. Tippen Sie anschließend auf “CURVE”, um das Menü...
- Page 13 Bedienung des Geräts Einstellungen im TCR-Modus Tippen Sie beim entsperrten Gerät auf den unteren Teil des Bildschirms (POWER/TEMP/CURVE/TCR/ TFR), um das Hauptmenü aufzurufen. Tippen Sie auf das Untermenü “MODE” und wählen Sie “TCR” (Temperature Coefficient of Resistance) aus. Drücken Sie anschließend auf “+” oder “-”, um den Wert zu erhöhen oder zu verringern.
- Page 14 Bedienung des Geräts Prüfen/Einstellen der Widerstandes Tippen Sie beim entsperrten Gerät auf den unteren Teil des Bildschirms (POWER/TEMP/CURVE/ TCR/TFR), um das Hauptmenü aufzurufen. Tippen Sie auf das Untermenü “RES”, um den Widerstand des Verdampferkopfes einzustellen. Tippen Sie auf “CHECK”, um den aktuellen Widerstandswert des Verdampferkopfes zu überprüfen.
- Page 15 Bedienung des Geräts Temperaturregelung Wenn der Bildschirm entsperrt ist, tippen Sie auf den aktuell angezeigten Temperaturwert in °C oder °F, um den Wert zu verändern. Drücken Sie auf “+” oder “-”, um den Wert zu erhöhen oder zu verringern. Durch Überschreiten bzw. Unterschreiten des maximalen bzw. geringstmöglichen Temperaturwertes in °C oder °F, wechseln Sie automatisch in die jeweils andere Temperaturein- heit.
- Page 16 Bedienung des Geräts Verwalten der Zuganzahl Tippen Sie beim entsperrten Gerät auf den unteren Teil des Bildschirms (POWER/TEMP/CUR- VE/TCR/TFR), um das Hauptmenü aufzurufen. Tippen Sie auf das Untermenü “SET UP” und anschließend auf “ ”, um die Zuganzahl zu verwalten. Tippen Sie auf “↑” oder “↓”, um das Limit der Zuganzahl zu erhöhen oder zu verringern.
- Page 17 Gerät mit einem internetfähigen PC. Lassen Sie die Feuertaste erst los, wenn auf dem Bildschirm “DOWNLOAD MODE” erscheint. Öffnen Sie die Upgrade-Software, um das Gerät entsprechend zu aktualisieren. Hinweis: Laden Sie Software und Softwarepakete bitte von unserer offiziellen Website www.asmodus.com herunter.
-
Page 18: Fehlermeldungen
Fehlermeldungen “HIGH ATOMIZER”: Der Widerstand des Verdampferkopfes ist zu hoch. “LOW ATOMIZER”: Der Widerstand des Verdampferkopfes ist zu gering. “ATOMIZER REMOVE”: Es kann kein Widerstand erkannt werden. “CHECK ATOMIZER”: Es kann kein Verdampferkopf erkannt werden. “ATOMIZER SHORT”: Es ist ein Kurzschluss aufgetreten. “HIGH BATTERY”: Die Akkuspannung ist zu hoch. -
Page 19: Gewährleistung & Service
Gewährleistungskonditionen der InnoCigs GmbH & Co. KG Das von Ihnen erworbene ASMODUS-Produkt wurde für Sie von der InnoCigs GmbH & Co. KG importiert. Sollte das Produkt nicht funktionieren oder in irgendeiner Weise defekt sein, so wenden Sie sich bitte direkt an den Fachhändler, von dem Sie das Produkt erworben haben. -
Page 20: Kontakt
Kontakt zu InnoCigs Kontakt zu Ihrem ASMODUS-Importeur InnoCigs GmbH & Co. KG Stahltwiete 23 22761 Hamburg | GERMANY Telefon: +49 (0) 40 – 22 86 729 0 Fax: +49 (0) 40 – 22 86 729 99 E-Mail: service@innocigs.com... - Page 21 Veuillez lire attentivement les instructions avant emploi afin de garantir une utilisation conforme de votre appareil. En combinaison avec ce produit, utilisez exclusivement des produits originaux et recommandés. En tant qu‘importateur officiel de ce produit ASMODUS, InnoCigs GmbH & Co. KG ne garantit aucun service après-vente et aucune garantie en cas d‘utilisation de produits non recommandés.
- Page 22 Table des matières Indications et mesures de précaution ............21 Étendue de la livraison | Structure de l‘appareil .
-
Page 23: Indications Et Mesures De Précaution
Indications et mesures de précaution Les personnes âgées de moins de 18 ans, les femmes enceintes, les mères allaitantes et les personnes souffrant de maladies cardiovasculaires ne doivent pas utiliser ce produit. Déconseillé aux non-fumeurs. Tenir cet accessoire pour cigarette électronique hors de portée des enfants et des adolescents. Ce produit répond aux dispositions applicables au Ce produit ne doit pas être sein de l‘Union Européenne concernant les appareils... - Page 24 Indications et mesures de précaution Recommandations d‘utilisation 1. Si vous avez fait tomber votre appareil, veuillez vérifier qu‘aucun composant ne se soit desserré, qu‘aucun liquide ne s‘écoule et que votre embout ne présente aucun défaut. Dans la mesure où, après un contrôle visuel, le produit ne présente aucun dommage, vous pouvez continuer de l‘utiliser.
- Page 25 Indications et mesures de précaution 7. Si vous avalez du liquide par mégarde, veuillez contacter un centre antipoison. Vous pouvez joindre à toute heure du jour et de la nuit le service d‘urgence antipoison de l‘hôpital universitaire de la Charité de Berlin au +49 30 - 19 240.
-
Page 26: Étendue De La Livraison | Structure De L'appareil
Étendue de la livraison | Structure de l‘appareil Connectique Étendue de la livraison 510 à ressort 1x Minikin Reborn 168W (box sans accus 18650) 1x Câble de recharge micro USB Compartiment batterie magnétique 1x Manuel d‘utilisation Bouton fire Port micro USB Résistance de l’atomiseur... -
Page 27: Données Clés Et Caractéristiques De Performance
Données clés et caractéristiques de performance Modes de sortie VW | TC (Coil: SS316/SS317, TI, NI200) | TEMP | CURVE | TCR | TFR Puissance de sortie de 5 à 168 watts en mode VW | de 5 à 120 watts en mode TC Plage de résistance de 0,1 à... -
Page 28: Utilisation De L'appareil
à nouveau. Lors de l‘allumage, le logo ASMODUS s‘affiche sur l‘écran. Quand vous éteignez l‘appareil, « SYSTEM OFF » s‘affiche. Nous vous recommandons d’éteindre l’appareil durant le transport et en cas de non-utilisation prolongée. - Page 29 Utilisation de l‘appareil Verrouiller ou déverrouiller l’écran ou bouton fire Il y a trois façons de verrouiller l’écran et/ou le bouton fire. 1. Essuyez le long de l’écran vers le bas pour le déverrouiller, pour verrouiller, appuyez sur le bouton fire. 2.
- Page 30 Utilisation de l‘appareil Réglage du mode CURVE Une fois l‘appareil déverrouillé, appuyez sur la partie inférieure de l‘écran (POWER/TEMP/CURVE/TCR/TFR) pour revenir au menu principal. Sélectionnez le sous-menu « MODE » et choisissez PWR pour accéder au mode de fonctionnement POWER. Sélectionnez ensuite « CURVE » pour accéder au menu de réglage des courbes.
- Page 31 Utilisation de l‘appareil Réglages en mode TCR Une fois l‘appareil déverrouillé, appuyez sur la partie inférieure de l‘écran (POWER/TEMP/CURVE/ TCR/TFR) pour revenir au menu principal. Sélectionnez le sous-menu « MODE » et choisissez « TCR » (Temperature Coefficient of Resistance). Puis appuyez sur « + » ou « - » pour augmenter ou diminuer la valeur souhaitée.
- Page 32 Utilisation de l‘appareil Vérification/réglage de la résistance Une fois l‘appareil déverrouillé, appuyez sur la partie inférieure de l‘écran (POWER/TEMP/CURVE/ TCR/TFR) pour revenir au menu principal. Sélectionnez le sous-menu « RES » pour régler la résistan- ce de la tête d’atomiseur. Appuyez sur « CHECK » pour vérifier la valeur de résistance actuelle de la tête d’atomiseur.
- Page 33 Utilisation de l‘appareil Réglage de la température Quand l‘écran est déverrouillé, appuyez sur la température actuelle affichée en °C ou en °F pour en modifier la valeur. Appuyez sur « + » ou « - » pour augmenter ou diminuer la valeur souhaitée. Si vous dépassez la température maximale ou la température minimale en degrés Celsius (°C) ou Fahrenheit (°F), vous basculez automatiquement dans la seconde unité...
- Page 34 Utilisation de l‘appareil Gestion du nombre de bouffées Une fois l‘appareil déverrouillé, appuyez sur la partie inférieure de l‘écran (POWER/TEMP/CURVE/TCR/ TFR) pour revenir au menu principal. Sélectionnez le sous-menu « SET UP » puis appuyez sur « » pour choisir le nombre de bouffées. Appuyez sur « »...
- Page 35 USB. Relâchez la touche d‘allumage uniquement quand le message « DOWNLOAD MODE » apparaît sur l‘écran. Ouvrez le logiciel de mise à jour pour actualiser l‘appareil. Remarque : Merci de télécharger les logiciels et les progiciels sur notre site officiel www.asmodus.com.
-
Page 36: Message D'erreur
Messages d‘erreur « HIGH ATOMIZER » : La résistance de la tête d‘atomiseur est trop élevée. « LOW ATOMIZER » : La résistance de la tête d‘atomiseur est trop basse. « ATOMIZER REMOVE » : Aucune résistance n‘est détectée. « CHECK ATOMIZER » : Aucune tête d’atomiseur n‘est détectée. «... -
Page 37: Garantie Et Service Après-Vente
Conditions de garantie d‘InnoCigs GmbH & Co. KG Le produit ASMODUS que vous avez acheté a été importé pour vous par InnoCigs GmbH & Co. KG. Si le produit ne fonctionne pas ou est défectueux, veuillez contacter le revendeur spécialisé auprès duquel vous avez acheté... -
Page 38: Contact
Contact d’InnoCigs Contactez votre importateur d’ASMODUS InnoCigs GmbH & Co. KG Stahltwiete 23 22761 Hambourg | ALLEMAGNE Téléphone : +49 (0)40 22 86 729 0 Fax : +49 (0)40 22 86 729 99 E-Mail : service@innocigs.com... - Page 39 ASMODUS Minikin Reborn Box Mod Information for the User Thank you for choosing this ASMODUS e-cigarette product! We place great value on high quality and safety standards across our entire range. We hope you enjoy vaping with your new e-cigarette product! Read the operating instructions carefully before use in order to ensure correct use of the device.
-
Page 40: Table Of Contents
Table of Contents Notes & Precautions ............... . . 39 Contents | Design of the Device . -
Page 41: Notes & Precautions
Notes & Precautions Persons under 18 years, pregnant women, nursing mothers and people with cardiovascular disease should not use this product. Not recommended for non-smokers. Please keep out of reach of children and minors. This product complies with EU require- This product must not ments on technical goods and may be be used by minors. - Page 42 Notes & Precautions User Instructions 1. If the device is dropped, you should check that there are no loose components, that there is no leakage of e-liquid, and that your mouthpiece is not damaged. If there are no signs of damage upon visual inspection of the product, you can continue using the device.
- Page 43 Notes & Precautions 7. If e-liquid is swallowed, contact your local poison control center. The Poison Emergency Call of the Charité University Hospital Berlin can be reached day and night by phone at +49 (0)30 - 19 240. In Austria, you can reach the 24h hot- line of the Vienna Poison Information Center by phone at +43 (0)1 - 406 43 43.
-
Page 44: Contents | Design Of The Device
Contents & Design of the Device Contents 510 Connector 1x Minikin Reborn 168W (Box Mod without 18650 Batteries) 1x Micro-USB Charger Magnetic Battery Cover 1x User Manual Fire Button Micro-USB Port Head Resistance Battery Charge Level Output Voltage Output Power... -
Page 45: Main Features & Performance
Main Features & Performance Output Modes VW | TC (Coil: SS316/SS317, TI, NI200) | TEMP | CURVE | TCR | TFR Power Output 5 to 168 Watts in VW Mode | 5 to 120 Watts in TC Mode Resistance Range 0.1 to 2.5 Ohm Temperature Range 100°C to 300°C | 200°F to 570°F... -
Page 46: Using The Device
Press the fire button five times in quick succession (within 3 seconds) to turn on the device and five times to turn it off again. When the unit is switched on, the ASMODUS logo appears on the display and „SYSTEM OFF“ appears when you switch it off. We recommend that you turn off your e-cigarette during transport and during long periods without use. - Page 47 Using the Device Lock / Unlock the Screen or the fire-button There are three possibilities to (un-)lock the screen or the fire-button. 1. Swipe down the screen to unlock it, press the fire-button to lock the screen. 2. Press the fire-button three times to unlock the screen and the fire-button, to lock the device press the fire-button again three times.
- Page 48 Using the Device Setting the CURVE Mode When the unit is unlocked, tap the bottom of the screen (POWER/TEMP/ CURVE/TCR/TFR) to enter the Main Menu. Tap the „MODE“ submenu and select PWR to enter the POWER mode. Then tap „CURVE“ to enter the curve-setting menu.
- Page 49 Using the Device Settings in TCR Mode When the unit is unlocked, tap the bottom of the screen (POWER/TEMP/CURVE/TCR/TFR) to enter the Main Menu. Tap the „MODE“ submenu and select „Temperature Coefficient of Resistance“ (TCR). Then, press „+“ or „-“ to increase or decrease the value. Press the Fire button to confirm the selection and exit. Settings in TFR Mode When the unit is unlocked, tap the bottom of the screen (POWER/TEMP/CURVE/TCR/TFR) to enter the Main Menu.
- Page 50 Using the Device Checking/setting the resistance When the unit is unlocked, tap the bottom of the screen (POWER/TEMP/CURVE/TCR/TFR) to enter the Main Menu. Tap the „RES“ submenu to set the resistance of the atomizer head. Tap „CHECK“ to check the current resistance value of the atomizer head. If it is correct, tap „YES“. If it is wrong, tap „NO“ to set the correct resistance value.
- Page 51 Using the Device Temperature Control When the screen is unlocked, tap the current temperature value in °C or °F to change the value. Then, press „+“ or „-“ to increase or decrease the value. By exceeding or falling short of the maximum or lowest possible temperature value in °C or °F, you automatically change to the other temperature unit.
- Page 52 Using the Device Managing the Number of Puffs When the unit is unlocked, tap the bottom of the screen (POWER/TEMP/CURVE/TCR/TFR) to enter the Main Menu. Tap the „SET UP“ submenu, then tap “ ” to manage the number of puffs. Tap „↑“ or „↓“ to increase or decrease the limit of the number of puffs.
- Page 53 Remove the batteries. Press the Fire button and connect the device connected to the USB cable with an Inter- net-compatible PC. Do not release the Fire button until „DOWNLOAD MODE“ appears on the screen. Open the upgrade software to upgrade the device accordingly. Note: Please download software and software packages from our official website www.asmodus.com.
-
Page 54: Error Messages
Error Messages „HIGH ATOMIZER“: The resistance of the atomizer head is too high. „LOW ATOMIZER“: The resistance of the atomizer head is too low. „ATOMIZER REMOVE“: No resistance can be detected. „CHECK ATOMIZER“: No atomizer head can be detected. „ATOMIZER SHORT“: A short circuit has occurred. „HIGH BATTERY“: The battery voltage is too high. -
Page 55: Warranty & Service
Warranty Terms of the InnoCigs GmbH & Co. KG The ASMODUS product you‘ve bought has been imported by the InnoCigs GmbH & Co. KG. If the product ceases functioning or is defective in any way, please contact the specialist retailer where you purchased the product. If you have any questions about the product‘s operation or its use, please do not hesitate to contact our customer service... -
Page 56: Contact
Contact to InnoCigs Contact to your ASMODUS Importer InnoCigs GmbH & Co. KG Stahltwiete 23 22761 Hamburg | GERMANY Phone: +49 (0) 40 – 22 86 729 0 Fax: +49 (0) 40 – 22 86 729 99 E-Mail: service@innocigs.com... - Page 58 Imported by: InnoCigs GmbH & Co. KG Stahltwiete 23 22761 Hamburg | GERMANY E-Mail: service@innocigs.com Phone: +49 (0) 40 - 22 86 729 0 Web: www.innocigs.com www.asmodus.com | Made in China...
Need help?
Do you have a question about the Minikin Reborn and is the answer not in the manual?
Questions and answers