
Related Manuals for Chicco Close to You Bedside Bassinet


Summary of Contents for Chicco Close to You Bedside Bassinet
- Page 1 Read all instructions BEFORE assembly and USE of product. KEEP INSTRUCTIONS FOR FUTURE USE. 3 in 1 Bedside Bassinet Owner's Manual IS0184E_01 ©2019 Artsana USA, INC. 07/19 www.chiccousa.com...
- Page 2 • Do not use accessories, spare parts, • On soft bedding. or any component not supplied or • Use ONLY the pad provided approved by Chicco as they may B. - Front Legs (long) by Chicco. Never add a pillow, make the product unsafe.
- Page 3 Parts List How to Assemble the Bedside Bassinet WARNING D. - Base Cover Before use, remove and dispose of any plastic bags and keep them out of reach of children to avoid the danger of suffocation. Failure to follow these warnings and instructions could result in serious injury or death.
- Page 4 How to Assemble the Bedside Bassinet How to Assemble the Bedside Bassinet “CLICK!” “CLICK!” “CLICK!” “CLICK!” 1B. Attach a Rear Leg (short) (C ) to 1A. Attach a Front Leg (long) (B)to base as shown, then attach other Rear base as shown, then attach other Leg.
- Page 5 2A. Line up the tab on the base to “CHECK!” the cutout on the Base Cover. Slide the Base Cover onto the Base. Make sure that the Chicco logo is on the same side as the Front Legs (Long), as shown. “CLICK!”...
- Page 6 How to Assemble the Bedside Bassinet How to Assemble the Bedside Bassinet 4A. Locate the three openings on bottom of the Bassinet and the 3 metal pins on top of the Base. Make sure that the openings a, b, c and pins 1, 2, 3 are going in the correct direction, as shown.
- Page 7 How to Assemble the Bedside Bassinet How to Assemble the Bedside Bassinet 6A. Remove the Handle Label before raising the sides. ATTENTION Keep this handle upright until all assembly steps are completed. 7. Lock the top rail latches. Press in on the button, as shown until the 6B.
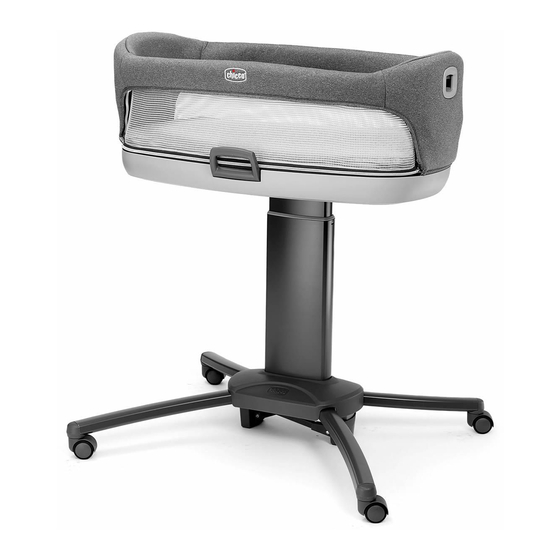
- Page 8 How to Assemble the Bedside Bassinet Using the Bedside Bassinet WARNING 9A. To raise the Bassinet, pull up on the Bassinet, as shown. After reach- FALL HAZARD - To help prevent falls, stop using the bassinet when infant begins ing desired height, push down on the to push up on hands and knees or weighs over 20lbs.
- Page 9 Using the Bedside Bassinet Bedside Bassinet Mode 10. To move the Bassinet, unlock the 11A. To use in the Bedside Bassinet brake. Rotate the handle down, as Mode. Raise the Bassinet above the shown until the UNLOCKED image top edge of the mattress and unlock is fully visible.
- Page 10 Bassinet Mode Changing Table Warnings WARNING WARNING FALL HAZARD : Children have suffered serious injuries after falling from DO NOT use this product to transport child from room to room. changing tables. Falls can happen quickly. • STAY within arm's reach of your child. 12.
- Page 11 Changing Table Mode Changing Table Mode 13A. Unlock both top rail latches. 14. Flip over the Mattress and Squeeze both latch buttons and push re-insert it into the bottom of the down to lower the top rail, as shown Bassinet. in 13B.
- Page 12 Softgoods Removal Changing Table Mode 15. Flip up all 4 flaps to create an area 16A. To remove the fabric, make sure to change your child. Then adjust the side rails are raised. On one end, to your desired height (refer to Step pull out the fabric tab tucked into the 9).
- Page 13 Softgoods Removal Softgoods Removal 16C. Guide the fabric up and around 16D. Mattress cover can be washed, the latch button area. Repeat for by removing the pad from the mat- the other end and remove the fabric tress cover. Undo the zipper and pull from the Bassinet frame.
- Page 14 Periodically check the bassinet for loose screws, worn parts, torn material or stitching. Replace or repair the parts as needed. Use only Chicco replacement parts. Keep the bassinet in a dry place. If bassinet becomes wet open bassinet and allow to dry completely.
- Page 15 For More Information If you have any questions or comments about this product, or are missing any of the parts please do not return this product to the store. Contact us in one of the following ways: (877)-424-4226 info.usa@artsana.com www.chiccousa.com 1826 William Penn Way Lancaster, PA 17601...
- Page 16 www.chiccousa.com...
Need help?
Do you have a question about the Close to You Bedside Bassinet and is the answer not in the manual?
Questions and answers