Table of Contents
Advertisement
Advertisement
Table of Contents

Related Manuals for Ismart LTC-A2001NV2

Summary of Contents for Ismart LTC-A2001NV2
- Page 1 Lecturer Tracking System V2 User Manual V1.0...
- Page 3 SAFETY NOTICE-IMPORTANT!!! The following important notes must be followed carefully to run the camera and respective accessories in total safety. The camera and relative accessories are called video system in this section. Before installing the camera, please read this manual carefully. Please follow installation instructions indicated in this manual during installation.
- Page 4 Warnings If you need to extend the power cable, please extend the power cable from the part 1 on below picture (220V/110V), do not extend from part 2 on below picture (DC12V), otherwise it will cause unexpected damage to the device.
-
Page 5: Table Of Contents
SETTING ----------------------------------------------------------------------- 8 ------------------------------------------------------------------- 8 SOFTWARE CONNECTION -------------------------------------------------------------- 9 LECTURER TRACKING CAMERA ----------------------------------------------------------- 16 BLACKBOARD WRITING SENSOR ISMART CMS APPLICATION SOFTWARE GUIDE --------------------------- 19 ------------------------------------------------------------------- 19 NETWORK CONNECTION ---------------------------------------------------------- 22 CLIENT SOFTWARE INSTRUCTION MENU SETTINGS ------------------------------------------------------------ 33 -------------------------------------------------------------------- 33 MENU CONFIGURATION... - Page 6 ------------------------------------------------------------------------------- 38 EXPOSURE ----------------------------------------------------------------------------------- 39 COLOR --------------------------------------------------------------------------- 40 TILT ZOOM ---------------------------------------------------------------------------------- 40 SYSTEM ---------------------------------------------------------------------------------- 41 STATUS ---------------------------------------------------------------------- 41 RESTORE DEFAULTS ANNEX 1 TECHNICAL SPECIFICATIONS ------------------------------------ 42 ANNEX 2 SIZE AND DIMENSION -------------------------------------------- 45 TROUBLESHOOTING -------------------------------------------------------- 46...
-
Page 7: About The Product
1&3 stream tracking camera image, 2&4 ABOUT THE PRODUCT stream full view camera image. 3 IP address is acquirable through iSmartCMS, default rtsp port is 554. Quick Guide The camera can be accessed and controlled via the following ways: 1 Make sure PC and the camera are in the ... -
Page 8: Features
VISCA protocol. Lecture recording device Characteristics & Functions can achieve audio & video of the camera through rtsp or rtmp. Lecturer Tracking Camera Featured Advantages Integrated with HD full view camera Features and HD tracking camera. Both HD Lecturer tracking system consists of a videos can be outputted up to lecturer tracking camera and optional 1080P60 simultaneously;... -
Page 9: Safety Notice-Important
Direct rectangular setting of detection tracking effect, tracking sensitivity is adjustable.; and blocking areas via mouse from the network video; Always output clear image when tracking horizontally or vertically, there is no focus issue; List of Parts Auto zoom capability during tracking; ... -
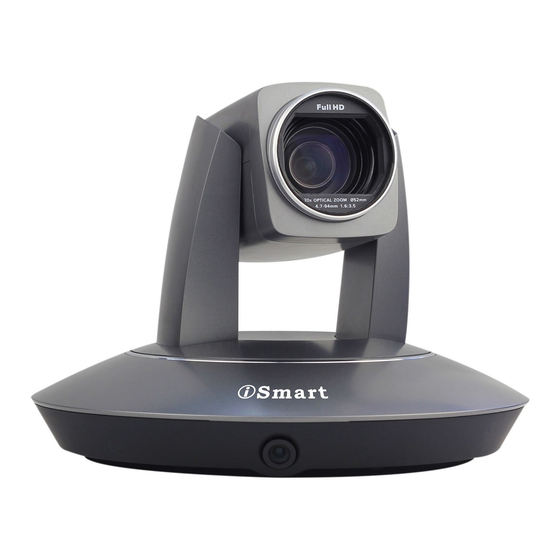
Page 10: Main Parts & Interfaces
Optional Blackboard Writing Sensor 1 Tracking Camera Blackboard Writing Sensor(1) 2 Full-View Camera Rear View Power Adapter (1) 3 Audio Input 4 Ethernet 5 HD-SDI 1 Interface (Tracking Camera) CD(1) 6 HD-SDI 2 Interface (Full-view Camera) 7 Control Interfaces (RS-485/RS-232) 8 Power Input (DC12V) Main Parts &... -
Page 11: Contents
Pin Definition of Control Port Blackboard Writing Sensor Pin Definition of Control Port Definition 232-TX 1.Camera head 232-RX 2.Adjusting ring 3.Power 485+ 485- 4.POE module (RJ45) -
Page 12: Dimensions
Dimensions Blackboard Writing Sensor Lecturer Tracking Camera Front View Side View Installation hole Bottom View... -
Page 13: Installation Instructions
Wall Mounts (Optional) INSTALLATION According to diameter and position of the 4 installation holes (as shown below) INSTRUCTIONS on the bracket, fix the bracket onto the installation position. For Camera Suggested height from the camera to floor is 2.4 meters; Suggested distance from the camera to the platform is 8 meters, and the installation position should be close to the central axis to get the best tracking result... -
Page 14: Setting
4 screws Take out Disc comes with the camera package, install “iSmart CMS” from the disc on your PC, turn on “iSmart CMS” , connect and add camera to the management device list, and enter into the main interface. Select... -
Page 15: Lecturer Tracking Camera
zooming times is also based on preset 1’s Once this button is clicked, main stream will automatically switch from tracking camera zooming times. to full view camera. Once configuration is Preset 0: It is a position that can be completed, main stream will return to configured to have the camera move to tracking camera again. - Page 16 Tracking Setting...
- Page 18 Basic parameters setting Zone Setting Basic The factory default setting of the camera is 1 (address), 9600bps, VISCA protocol, 1080p25 for tracking camera and full-view camera. Recommended to set the platform or podium as priority zone, the camera will detect object Position Calibration from this zone to start tracking accordingly.
- Page 19 Blocking zones: There are 8 blocking Keep tracking outside tracking zone: When it’s enabled, the camera will still track zones shown in green rectangle, they can be configured independently. The moving if the object is outside the tracking zone. objects inside the blocking zones of the Tracking Parameters full-view camera will not be detected and tracked while the tracking camera still tracks...
- Page 20 part of the Priority Zone, set the sensitivity movement of step onto / walk down the as high; otherwise, set it as low. podium was selected as detecting, network stream will auto switch & output between the full view camera video and tracking camera video based on the object’s movement of step onto / walk down podium.
- Page 21 send code during tracking; “PTZ motion When the internal switching rules is not /switching code at res mode” means that the applied, the blackboard writing sensor, and tracking camera always follows the target, the lecturer tracking camera send returning but in the process of following, it will send codes respectively according to the code once the camera moves or stops, customized switching code, every video can...
-
Page 22: Blackboard Writing Sensor
Blackboard Writing Sensor After it is installed, please capture the camera view and adjust the installation position till the camera view is fully covered the whole blackboard, shown as follows: (Code Send) Mode: choose to send codes via network or serial port; Connect Protocol: once “Network”... - Page 23 Basic incorrect detection, make sure boby (including head) of the lecturer does not enter the area when he is not writing on blackboard. Blocking zones: There are 8 blocking zones available in red rectangle to avoid interference to trigger, they can be configured independently.
- Page 24 Lecturer Tracking Camera IP Address: To set lecturer tracking camera’s IP address, then after the sensor detects writing action on the board, it will command the tracking camera to move to pre-defined position. Network Test: to test if the blackboard writing sensor and the lecturer tracking camera is connected in the network.
-
Page 25: Ismart Cms Application Software Guide
CMS Application Software Guide Network Connection Connect the camera to network with an Ethernet cable, power on the camera. LAN Connection Please refer to the above diagram, user1 and user 2 are in the same router, they are considered as... - Page 26 Please refer to the above diagram, user and the camera are in different routers, they are considered as in a WAN; in this condition, application software iSmartCMS can not search and find the camera automatically. User can still connect after below conditions are satisfied: (1) Set camera’s IP address as static IP address (2) Router of the LAN where camera is connected supports Port Mapping.
- Page 27 10320, so mapping of camera 2 with (IP 115.200.31.100 + port 10320) is established. In the "Managed Device" of the client software iSmart CMS, click "+ Add", enter the IP address 115.200.31.100 and port 10200 and other information, then the camera 1 can be accessed and...
-
Page 28: Client Software Instruction
Client Software instruction Search and list the camera Install and open the client software in PC, enter the main interface: If the camera and PC are in the same LAN, click “Start Search”, then searching starts and all online devices will be listed, as the picture shown below: To modify the device IP address, input the IP address, mask, gateway in the “Modify Network”... - Page 29 To control and preview a camera, first choose the device, modify its IP address as the IP address of the same LAN, then click “Add to Client” as the picture shown below. Please check that all IP addresses are in the same LAN. Remote Configuration Choose the camera in the device list, click “Remote Configuration”...
- Page 30 Upgrade: Click “Upgrade” menu to enter the main interface, as the picture shown above. Click … to search and load the updating firmware, then click “Upgrade” to start upgrading, do not power off the camera during upgrading ,after upgrading is completed, camera will reboot.
- Page 31 Network: Connect with: please choose from Static IP or dynamic IP address; IP address: input IP address for the device; Mask: input mask address for the device; Gateway: input gateway address for the device; DNS 1 server-prior, input DNS address for the device; ...
- Page 32 Streaming: Stream type: set the parameters of main stream, sub stream, third stream, fourth stream. Resolution: set among 4K(3840*2160), 1080P(1920*1080),720P(1280*720) .D1&QVGA(320*240), choose resolutions based on actual requirements and capability of device. The higher the resolution is, the better network requirements will be needed.
- Page 33 RTMP: In RTMP1 and RTMP2, main stream, sub stream, third stream, fourth stream can be chosen to stream.
- Page 34 Control: ● Password setting: if password is used, it is only after correct password is put that the camera can be accessed. Reboot: reboot the camera.
- Page 35 Transparent Transmission: ● Enable / Disable: enable / disable this feature; ● Protocol: choose from TCP / UDP protocols; ● Camera as: choose from Client or Server; ● IP: if set camera as Client, the IP address of the transmitted device should be inputted; if set camera as Server, there is no need to set IP address;...
- Page 36 Preview Click “Main View” to get into camera control and preview part as below. This interface includes three main parts: Device List, Device Control, Video Preview ●Device: It displays all online cameras added to “Device Management”.
- Page 37 Device Control: get control of the selected camera (camera name in blue). Video Preview: double click the camera in the list, main camera stream will be displayed in the preview frame; or right click the selected camera from the left column to get its main or substream video.
-
Page 39: Menu Settings
MENU SETTINGS Menu Configuration <VIDEO> SHARPNESS 0, 1, 2, 3, 4, 5, 6, 7, 8, 9, 10, 11, 12, 13, 14, 15 0, 1, 2, 3, 4, 5, 6, 7, 8, 9, 10, 11, 12, 13, 14 Refer to BRIGHTNESS Page 38 CONTRAST 0, 1, 2, 3, 4, 5, 6, 7, 8, 9, 10, 11, 12, 13, 14... - Page 40 <EXPOSURE> MODE FULL AUTO Refer to Page MANUAL GAIN 0, +2, +4, +6, +8, +10, +12, +14, +16, +18, +20, +22, +24, +26, +28,+30 SPEED 1/1, 1/2, 1/3, 1/6, 1/12, 1/25, 1/50, 1/75, 1/100, 1/120, 1/150, 1/215, 1/300, 1/425, 1/600, 1/1000,1/1250, 1/1750, 1/2500, 1/3500,...
- Page 41 <COLOR> WB MODE AUTO, ATW, ONE PUSH, INDOOR, OUTDOOR, MANUAL, Refer to Page SODIUM LAMP, FLUO LAMP SATURATION 0, 1, 2, 3, 4, 5, 6, 7, 8, 9, 10, 11, 12, 13, 14 0, 1, 2, 3, 4, 5, 6, 7, 8, 9, 10, 11, 12, 13, 14 <PAN TILT ZOOM>...
- Page 42 < SYSTEM > ADDRESS 1, 2, 3, 4, 5, 6, 7 Refer to Page PROTOCOL VISCA, PELCO-P, PELCO-D BAUDRATE 2400, 4800, 9600, 38400 VIDEO FORMAT 1080P60, 1080P50, 1080I60, 1080I50, 1080P30, 1080P25, 720P60, 720P50 MOUNT MODE STAND,CEILING RS485 PORT HALF-DUPLEX-1,HALF-DUPLEX-2 DISPLAY INFO ON,OFF LANGUAGE ENGLISH...
-
Page 43: Menu Explanation
Menu Explanation Submenus From main menu, navigate to select Main Menu <EXPOSURE> menu, press OK to enter. Press MENU button to enter / exit menu. ❶ ❸ <EXPOSURE> MODE FULL AUTO ❶ <MENU> EX-COMP ❷ VIDEO LEVEL EXPOSURE COLOR ANTI-FLICKER PAN TILT ZOOM ❷... -
Page 44: Video
Video Exposure VIDEO menu is used to change video value. EXPOSURE menu is used to adjust exposure value. <VIDEO> SHARPNESS <EXPOSURE> BRIGHTNESS MODE FULL AUTO CONTRAST EXP-COMP GAMMA MODE LEVEL 2DNR LEVEL 3DNR LEVEL ANTI-FLICKER WIDE DYNAMIC FV BRIGHTNESS FV SELECT BACK SELECT... -
Page 45: Color
SPEED: 1/1, 1/2, 1/3, 1/6, 1/12, 1/25, FV BRIGHTNESS: 0, 1, 2, 3, 4, 5, 6, 7, 8, 9, 1/50, 1/75, 1/100, 1/120, 1/150, 1/215, 10, 11, 12, 13, 14. 1/300, 1/425, 1/600, 1/1000, 1/1250, 1/1750, 1/2500, 1/3500, 1/6000, COLOR 1/10000s. -
Page 46: Pan/Tilt/Zoom
Pan/Tilt/Zoom System PAN/TILT/ZOOM is used to change <SYSTEM> ADDRESS pan/tilt/zoom value, available options: PROTOCOL VISCA BAUD RATE 9600 IR ADDRESS <PAN TILT ZOOM> VIDEO FORMAT 1080I50 PAN/TILT SPEED MOUNT MODE STAND D-ZOOM LIMIT RS485 PORT HALF-DUPLEX-1 PTZ TRIG AF LANGUAGE ENGLISH RATIO SPEED POWER UP ACTION... -
Page 47: Status
STATUS < STATUS> ADDRESS PROTOCOL VISCA BAUD RATE 9600 IR ADDRESS VIDEO FORMAT 1080P50 MOUNT MODE STAND FIRMWARE VER V3.0.00 BACK Display information (address, protocol, baud rate, IR address, video format, mount mode, image version and firmware version) of the current camera. -
Page 48: Annex 1 Technical Specifications
ANNEX 1 TECHNICAL SPECIFICATIONS LENS Tracking Camera Image Sensor 1/2.8” CMOS, 2.14MP Lens 4.7mm-94mm Iris F1.6-F3.5 Optical Zoom Digital Zoom Angle of view 59.5° -2.9° Focus Auto/Manual/ One push trigger Min. Illumination 0.5 Lux (30FPS), 0.1Lux (60FPS) Shutter 1/1 ~ 1/10,000 sec Gain Auto/ Manual White Balance... - Page 49 Pan Range -170° ~+170° Tilt Range -30° ~+90° Pan Speed 0.1° ~120° /s Tilt Speed 0.1° ~90° /s Preset Number Comm. Port RS-485, RS-232 WIFI interface 2.4G/ 5G WIFI (optional) Debug / upgrade interface 100M RJ45, POE optional Protocol PELCO-D, VISCA SDI Video Video Output HD-SDI (2 Channels)
- Page 50 Bit Rate 32Kbps-8Mbps Video Resolution 720p30,1080p30 Network Interface 10/100M Ethernet, POE (optional) Power Supply DC12V, POE <5W Power Consumption Working Temperature 0-40℃ ≤95% Working Humidity φ93mm*81mm Dimensions Net Weight 0.33KG...
-
Page 51: Annex 2 Size And Dimension
ANNEX 2 SIZE AND DIMENSION Blackboard Writing Sensor Front (supplied separately) Side Mounting Hole Bottom... -
Page 52: Troubleshooting
TROUBLESHOOTING Problem Possible Cause Solution Power supply failure Check power supply No action or image Power adapter damaged Replace power adapter after powered on Power cable connection got Check & reconnect loosen Check & reconnect power cable Not enough power supply No self-testing connection after powered on,... - Page 56 This user manual is only for reference, it is subject to change; please ask for the latest version from your supplier. CA/YF-LTCA2001NV2-ZD-010 Y06020900040...
Need help?
Do you have a question about the LTC-A2001NV2 and is the answer not in the manual?
Questions and answers