RF-KIT RF2K-S Operating And Installing Instructions
Power amplifier
Hide thumbs
Also See for RF2K-S:
- Assembly and adjustment instructions (16 pages) ,
- User manual (36 pages)

Subscribe to Our Youtube Channel
Related Manuals for RF-KIT RF2K-S


Summary of Contents for RF-KIT RF2K-S
- Page 1 Operating and Installing-Instructions .-. ..-. -..- -.- .. - .--. --- .-- . .-. .- -- .--. .-..-..-. Operating and installation instructions RF-KIT Power Amplifier RF2K-S...
-
Page 2: Table Of Contents
Table of contents 5. Using the device locally Turning device on/off 1. Explanation of symbols, Environment protection Congratulations on your purchase of a RF-KIT linear amplifier! User menu Explanation of symbols 5.2.1 Update RF-KIT devices offer innovative and reliable technology, functionality and Environment protection appealing design. -
Page 3: Explanation Of Symbols, Environment Protection
Keep these operating and installation instructions carefully. These Enumeration/List entry operating instructions contain important safety and operating Warnings are marked by a warning triangle. instructions for the use of the RF2K-S linear amplifier. Enumeration/List entry In addition, signal words indicate the nature level) When selling the device hand this document to the new owner. - Page 4 This can cause electric shock or burns! Operating and installation instructions RF-KIT Power Amplifier RF2K-S...
-
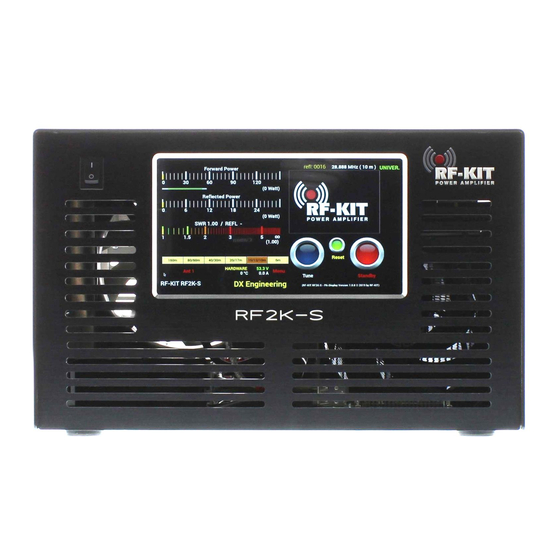
Page 5: Control Elements And Connections
ANT 1 Power On Extern Power jack 10 Fuse 11 Ground connector Rear panel: 12 Multifunction connector 13 LAN 14 Cooling fan 15 CAT USB 16 -55 dB output 17 Exciter input Operating and installation instructions RF-KIT Power Amplifier RF2K-S... - Page 6 Input exciter (transceiver) signal. (internally against 5 V and must be switched to GND) 3 - In C BCD band data input (internally against 5 V and must be switched to GND) Operating and installation instructions RF-KIT Power Amplifier RF2K-S...
-
Page 7: Preparing For Operation
50 Ω antennas or dummy load with 50 Ω lead and more than 2 kW rated power. 1x RF2K-S Power Amplifier ► Ground the device via the ground connector (11) at its back. 1x Power plug to assemble a country-specific AC power cord For best results, use a copper wire with large cross-section to connect ►... -
Page 8: Turning Device On/Off
Touching this switching area triggers a tuning process Indication area Personalization Text Switching area Menu An individualization text to be edited in the user menu (e.g. call sign) is displayed here Touching this switching area activates the user menu Operating and installation instructions RF-KIT Power Amplifier RF2K-S... -
Page 9: Update
Touching this switching area Touching this switching area closes the user menu; necessary and installs it automatically. reboots the device. subsequently the main screen will be displayed Operating and installation instructions RF-KIT Power Amplifier RF2K-S... - Page 10 „standby“ will Input box Personalization Text Switching area Display is switched on! start again. Touching this switching area switches Touchscreen (2) on / off Editing via a PC connected to the PA Operating and installation instructions RF-KIT Power Amplifier RF2K-S...
- Page 11 ► Touch the switching area Display is switched on!. ► Set the frequency 28,000 MHz on TRX (AM or CW), confirm the setting ► Touching „Yes“ switches Touchscreen (2) off. by touching „OK“. ► Touching „No“ keeps currently selected option. Operating and installation instructions RF-KIT Power Amplifier RF2K-S...
- Page 12 ► Use this virtual keyboard to create a Name (ANT x Name) for the choosen antenna. Switching area Close Touching this switching area closes the user menu; Switching area Number Connected Antennas subsequently the main screen will be displayed Operating and installation instructions RF-KIT Power Amplifier RF2K-S...
- Page 13 The input mask for a fixed IP address will be displayed: Edit VNC-Port Switching area Close Touching this switching area closes the user menu; Switching area Edit VNC-Password subsequently the main screen will be displayed Operating and installation instructions RF-KIT Power Amplifier RF2K-S...
- Page 14 ► Tap at Edit to assign a network password via the PC keyboard. settings. ► Pulldown menu Security: Select an encryption method. ► Tap at save, to confirm entries respectively at cancel, to discard settings. Operating and installation instructions RF-KIT Power Amplifier RF2K-S...
- Page 15 ► Tap at Backspace to erase the shown value. ► Enter the value for the VNC port via the virtual keyboard. ► Tap to Ready to confirm the entries or at cancel to discard entries and return to „LAN/WiFi/VNC“. Operating and installation instructions RF-KIT Power Amplifier RF2K-S...
-
Page 16: Status
Switching area Close Indication area Indication area Touching this switching area closes the user menu; performance data last reset on: operating data last reset on: subsequently the main screen will be displayed Operating and installation instructions RF-KIT Power Amplifier RF2K-S... -
Page 17: Rigcontrol
With this function selected, the PA provides the frequency data for the devices connected to it. Switching area Close Touching this switching area closes the user menu; subsequently the main screen will be displayed Operating and installation instructions RF-KIT Power Amplifier RF2K-S... - Page 18 In case of connection problems indication area CAT-Status shows „no frequency!“. Switching area Start Service Switching area Test CAT Switching area Close Touching this switching area closes the user menu; Indication area CAT-Status subsequently the main screen will be displayed Operating and installation instructions RF-KIT Power Amplifier RF2K-S...
- Page 19 ICOM Universal Switching area Yaesu Switching area Close Touching this switching area closes the user menu; subsequently the main screen will be displayed Operating and installation instructions RF-KIT Power Amplifier RF2K-S...
-
Page 20: Operation
If the antenna tuner is activated, but no valid tuning is stored yet for the used frequency, trans- Switching area Tune mitting is not possible! Pressing this switching area triggers a tuning process of the antenna Operating and installation instructions RF-KIT Power Amplifier RF2K-S... -
Page 21: Input Power For Tuning
► Stop to send. ► Tap at switching area Store to save the settings for the current antenna / frequency combination. Switching area Store flashes 2x briefly green to indicate the storing process. Operating and installation instructions RF-KIT Power Amplifier RF2K-S... -
Page 22: Automatic Tuning
The results of the tuning can be seen by the value for SWR displayed in indication area SWR. After successful tuning „Match!“ will be diplayed. Operating and installation instructions RF-KIT Power Amplifier RF2K-S... -
Page 23: Indication Area Segment-Size
SeGMeNTCeNTeR The deviation to f kHz, as displayed in (Dist:) in the SeGMeNTCeNTeR screenshot above. Therefore no transmission is possible without successful antenna tuning process. Operating and installation instructions RF-KIT Power Amplifier RF2K-S... -
Page 24: Bypass The Antenna Tuner
The antenna tuner is inserted into the transmit path! Mode „AUTO“ Mode „MAN“ ► Mode „MAN“: Tap at switching area Bypass (man) to bypass the antenna tuner. ► Mode „AUTO“: Tap at switching area Bypass, to bypass the antenna tuner. Operating and installation instructions RF-KIT Power Amplifier RF2K-S... -
Page 25: Technical Data
• Software update via internet • Remote Internet operation via PC, Tablet or cell phone Supports platforms such as Apple IOS, Android, Linux and Windows • External power/ON by applying +12 V Operating and installation instructions RF-KIT Power Amplifier RF2K-S... - Page 26 Operating and installation instructions RF-KIT Power Amplifier RF2K-S...
- Page 27 Operating and installation instructions RF-KIT Power Amplifier RF2K-S...
- Page 28 DX Engineering 1200 Southeast Ave. Tallmadge, OH 44278 USA .-. ..-. -..- -.- .. - .--. --- .-- . .-. .- -- .--. .-..-..-. Operating and installation instructions RF-KIT Power Amplifier RF2K-S...
Need help?
Do you have a question about the RF2K-S and is the answer not in the manual?
Questions and answers