Table of Contents
Advertisement
Quick Links
Advertisement
Table of Contents

Related Manuals for Simco CM5

Summary of Contents for Simco CM5
- Page 1 SIMCO (Nederland) B.V. PO Box 71 7240 AB Lochem, the Netherlands Telephone +31-(0)573-288333 +31-(0)573-257319 E-mail general@SIMCO.nl Internet http://www.SIMCO.nl Apeldoorn trade register no. 08046136 DC High-Voltage Generator CM5_UM_ 9752090319_GB_V0_9 1 / 67...
-
Page 2: Table Of Contents
6.2.2 CM5 with Anybus module (optional)................22 6.2.3 CM5 in Local mode, Remote mode or AdvOutC mode (optional)......23 Unlocking the locked menu ................... 24 The main menu ......................24 ... - Page 3 Connector connections ................58 Appendix VI Quick Init installation configuration examples ..........60 Appendix VII Examples - Changing the existing CM5 configuration ......... 62 Appendix VIII Advanced Current Control (optional) ............65 Appendix IX Advanced Output Control (optional) .............
-
Page 4: Preface
Preface This manual describes the installation and usage of the CM5. Any mention of a generator elsewhere in this user manual refers to the CM5. Charging bars and charging electrodes are referred to in this user manual as charging electrodes. -
Page 5: Introduction
Introduction The CM5 is a high voltage generator that is used to supply SIMCO charging bars/electrodes with a high voltage. This combination is called the CM5 electrostatic charging system. It is used to bond materials temporarily. The generator can either be operated manually or remotely (analogue or digital). Due to the digital bus the generator can be used in a serial network. -
Page 6: Operating Modes
2.1 Operating modes The generator has a number of different operating modes: Local mode The high voltage or output current of the generator is set using the keyboard. Remote mode The high voltage or output current of the generator is set and read via external analogue control signals. -
Page 7: Menu
Operation in Current Control mode When the generator is operating in the CC mode, the desired current is set on the generator. The generator now maintains the set current and adjusts this with a higher or lower output voltage. This method of control results in a constant ion current, or constant charging. -
Page 8: Safety
- Keep the generator free of dirt, dust and moisture in order to ensure its safe operation. - High voltages are dangerous, especially for people with a pacemaker. - Do not use the CM5 in an environment where there is a risk of fire or explosion. - Do not expose the CM5 to vibrations and knocks. -
Page 9: Technical Specifications
Bus module 1x Anybus connector. The Anybus module is optional. For the available networks and protocols, contact SIMCO (Nederland) B.V. or your local representative Additional options - Switching the high voltage on/off - Readout of the output voltage (absolute and... - Page 10 Environment: Industrial, internal use Temperature 0–55°C Installation Dust-free and vibration-free Protection class IP20 Mechanical: Dimensions CM5 30N (30P) CM5 60N (60P) Length (incl. high voltage connector) 340 mm 388 mm Width 272 mm 272 mm Height 108 mm 108 mm Weight 8.2 kg...
- Page 11 Figure 5: dimensions of the CM5 CM5_UM_ 9752090319_GB_V0_9 11 / 67...
-
Page 12: Installation
- Check that the details on the packing slip correspond to the details of the product received. - Check that the voltage shown on the rating plate corresponds to the (mains) voltage you intend to use. If you have any problems and/or doubts, please contact SIMCO or the SIMCO agent in your region. 5.2 Overview Position the generator in a clearly visible, easily accessible and stable location, on or close to the machine, and as close as possible to the charging bar or electrode. - Page 13 Figure 6: CM5 assembly holes CM5_UM_ 9752090319_GB_V0_9 13 / 67...
-
Page 14: Rotating The Front Panel 180
10. Reconnect the mains switch faston plugs (2x black to the top connection and brown/blue to the middle connection). 9. Fit the cover. 11. Reconnect the power cable and switch the generator back on. Brown Black Blue Black Figure 8: main switch connection of the CM5 CM5_UM_ 9752090319_GB_V0_9 14 / 67... -
Page 15: Connecting The Cm5
Plug the power cable into an earthed wall socket or connect the power cable. 5.6 External control signals On the back of the CM5 there is a 25-pin sub-D connector. This connector is intended for various external connections. A summary of these connections is given below. -
Page 16: Analogue Control Signals
Figure 9: wiring diagram for Remote HV on/off for the CM5 Note: Ensure that the external control is switched on using the configuration menu for the relevant operational mode. See section 6.14, menu 6300 and Appendix VII example 5. -
Page 17: Analogue Control Signal Remote Current Limit/Current Setpoint
Figure 10: wiring diagram for the Remote Setpoint U for the CM5 5.8.2 Analogue control signal Remote Current Limit/Current Setpoint To connect the control signal for the output current to be supplied, a voltage or current source must be connected between pin 2 and one of the earth pins 15, 16, 17, 18, 19, 24 and/or 25 as indicated in the diagram below. -
Page 18: Analogue Readout Signal Remote Output Voltage
4 and one of the earth pins 15, 16, 17, 18, 19, 24 and/or 25 as indicated in the diagram below. Figure 12: wiring diagram for the Remote Output U for the CM5 5.9.2 Analogue readout signal Remote Output Current... -
Page 19: Internal 12 V Supply Voltage
The generator has an internal electrically isolated power circuit that can be used to feed the digital control signals (see 5.7 and 5.11). Figure 14: wiring diagram for the external 12 V supply voltage for the CM5 5.11 Digital status signals For reporting the status of the generator, the following signals can be found on the 25-pin sub-D connector. -
Page 20: External Bus Supply Voltage
"sleep mode" message via the bus communication system when the generator supply voltage is switched off. An external supply voltage can be connected to the CM5, which allows the bus communication to be kept active when the generator is switched off. -
Page 21: Commissioning
When switching on the generator, the limit LED will flash for 2 seconds. After 2 seconds the background lighting on the display will slowly illuminate and information will be shown about the generator. This information includes: The generator type (e.g. “CM5-60N”) The firmware version The communication bus address In some cases additional information This information is displayed for 2 seconds and then the generator continues to start. -
Page 22: Cm5 As A Replacement For A Regular Ecm
(“Continuous”) or to switch the output voltage on and ] to confirm the choice off remotely via the external input (“External”). Then depress [ The CM5 can now be used as a replacement for an ECM. The main screen of the CM5 will then be displayed. ... -
Page 23: Cm5 In Local Mode, Remote Mode Or Advoutc Mode (Optional)
Set the following parameters: “Use as standard ECM” If the CM5 is being used as a replacement for an ECM, use the [ ] / [ ] keys to select until ] to confirm the choice the option “YES” flashes on the screen. Then depress [ . -
Page 24: Unlocking The Locked Menu
6.3 Unlocking the locked menu If the CM5 is configured as a replacement for the ECM during the Quick init, the menu is disabled from that moment. Access to the menu can be enabled by switching off the CM5, and ... -
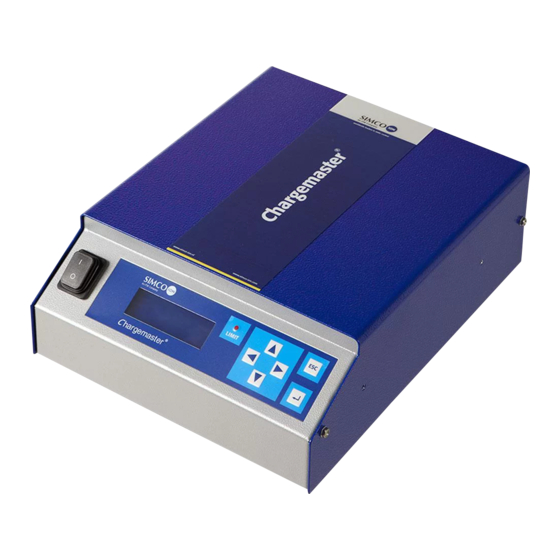
Page 25: Key Functions
When the generator is operated via the serial communication, this is called the ‘fieldbus’ mode (see section 2). 6.5 Key functions The keys on the CM5 are defined as follows: Change the Voltage/Current Setpoint/Select a menu item/Change a parameter. Change the Voltage/Current Setpoint/Select a menu item/Change a parameter. -
Page 26: Displaying The Current Voltage Setpoint/Current
10% higher to accommodate process fluctuations. 6.8 Keyboard lock The keyboard on the CM5 can be locked. Simultaneously depress the [◄] and [►] keys for about 1 second. The “ ” symbol appears on the screen. The keyboard is now locked. When the keyboard is locked it is not possible to change the Setpoint value of the generator. -
Page 27: Runbutton Mode
6.9 RunButton mode Note: the RunButton mode can only be used if the generator has been set as ‘Local Ext’, ‘Remote Ext’, ‘Fieldbus Bus’ or ‘Fieldbus Ext’. ] In order to activate the RunButton mode, simultaneously depress the [ESC] and [ keys for about 1 second. -
Page 28: Remote Control
Depress [ESC] for longer than 2 seconds to return to the first main menu item from any other menu item or parameter. In this case the [ESC] key acts like a HOME key. Note: If no keys are depressed for a period of 30 seconds, the system automatically returns to the main screen. -
Page 29: Limit Led Indicator
6.18 Pin 9 output as Arc Detect signal The CM5 generator can pass on detected arcs directly via this output to the target system. This output will be active for each detected arc. When the arc is rectified, this output signal will again become inactive. -
Page 30: Switching Arc Detection Protection On/Off
A situation may occur whereby the user password has been changed but this is unknown to the user. The CM5 allows the user password to be reset. Use the following procedure to do this. 1. Switch the generator off ([ 0 / l ] switch to the [ 0 ] position). -
Page 31: Quick Init Menu Structure
6.23 Quick init menu structure The ‘quick init’ menu structure of the CM5 is shown in the following diagram. 0001 Startup screen. This gives information about the generator type, the current firmware version, the set communication bus address and other relevant information about the generator. - Page 32 (only for the fieldbus mode) is used to switch the output voltage on and off via the fieldbus communication. CM5_UM_ 9752090319_GB_V0_9 32 / 67...
-
Page 33: Menu Structure
6.24 Menu structure The menu structure of the CM5 is shown in the following diagrams. 0001 Start-up screen showing information about the generator. 0010 Screen asking whether the user wants to reset the user password. Select “YES” to change the password. - Page 34 CM5_UM_ 9752090319_GB_V0_9 34 / 67...
- Page 35 Menu for changing the settings for the ‘Advanced Output Control’ operating mode. 7000 Menu for changing advanced generator settings. 8000 Menu for changing service settings (this menu can only be accessed by authorized SIMCO employees). CM5_UM_ 9752090319_GB_V0_9 35 / 67...
- Page 36 CM5_UM_ 9752090319_GB_V0_9 36 / 67...
- Page 37 1000 Menu option that shows the generator's current operating mode. By selecting the option, the operating mode of the generator can be changed. 2000 Menu option that shows the generator's current 'Control' mode. By selecting the option, the 'Control' mode of the generator can be changed. 3000 Menu for changing the settings for the ‘Local’...
- Page 38 6100 Set value of the Current Limit when the generator is operating in Advanced Output Control mode. 7000 Menu for changing advanced generator settings. 8000 Menu for changing service settings. CM5_UM_ 9752090319_GB_V0_9 38 / 67...
- Page 39 CM5_UM_ 9752090319_GB_V0_9 39 / 67...
- Page 40 6000 Menu for changing advanced generator settings. 6100 Submenu with general settings for the generator. 6110 Setting the keyboard lock. 6111 Unlock the keyboard. 6112 Lock the keyboard. 6120 Display the current user password. 6121 Change the user password. 6130 Display the communication bus address.
- Page 41 CM5_UM_ 9752090319_GB_V0_9 41 / 67...
- Page 42 6000 Menu for changing advanced generator settings. 6100 Submenu with general settings for the generator. 6200 Submenu for limiting the HV output. 6300 Submenu for the Remote HV on/off settings. 6310 Configuring the external on/off input mode. 6311 External control is disabled, and the high voltage that is entered is immediately set on the output.
- Page 43 CM5_UM_ 9752090319_GB_V0_9 43 / 67...
- Page 44 6000 Menu for changing advanced generator settings. 6100 Submenu with general settings for the generator. 6200 Submenu for limiting the HV output. 6300 Submenu for the Remote HV on/off settings. 6400 Submenu for the Advanced Output Control mode settings (this menu is only available if 1400 and 6780 are active).
- Page 45 CM5_UM_ 9752090319_GB_V0_9 45 / 67...
- Page 46 6000 Menu for changing advanced generator settings. 6100 Submenu with general settings for the generator. 6200 Submenu for limiting the HV output. 6300 Submenu for the Remote HV on/off settings. 6400 Submenu for the Advanced Output Control mode settings. 6500 Submenu for the display settings.
- Page 47 CM5_UM_ 9752090319_GB_V0_9 47 / 67...
- Page 48 6000 Menu for changing advanced generator settings. 6100 Submenu with general settings for the generator. 6200 Submenu for limiting the HV output. 6300 Submenu for the Remote HV on/off settings. 6400 Submenu for the Advanced Output Control mode settings. 6500 Submenu for the display settings.
-
Page 49: Functional Check
Functional check After switching on the generator, the limit LED light flashes for 1 to 2 seconds. The background lighting of the display then slowly illuminates and the following information is briefly displayed: the generator type, the firmware version, and in some cases the set bus address and other relevant information. -
Page 50: Maintenance
Switch on the high Display is on operating in remote voltage via the bus. To mode with the bus do this see the CM5 “ ” indicator off remote active. The interface description for output is not activated. the serial bus that is being used. - Page 51 The external remote Switch off the external function is enabled, but remote control (see there is no signal to menu 6300), or switch switch on the generator. the generator to local mode (see menu 1100), remote mode (see menu 1200) or send a signal to the external remote HV on/off input.
- Page 52 External remote mode is Send the generator for enabled. repair, see section 10. There is no bus The bus master is not Start up the bus master communication operational. or restart the system. Incorrect bus address Set the correct bus A “...
-
Page 53: Repairs
Anybus-Compact Com Profibus 69.72.70.xxxx Anybus-Compact Com CANopen Sealing caps Brackets Spare parts can be obtained from the agent in your region or from SIMCO (Nederland) B.V. SIMCO (Nederland) B.V. PO Box 71 7240 AB Lochem, the Netherlands Telephone +31-(0)573-288333 +31-(0)573-257319 E-mail general@SIMCO.nl... -
Page 54: Appendix I Factory Settings (After Resetting)
Appendix I Factory settings (after resetting) The CM5 has the following factory settings: Operating mode: Local Control mode: VC (=Voltage Control) Voltage setpoint: 0.0 kV Current limit: 2.5 mA (or 5.0 mA) Lock mode: Unlocked User password: Unchanged Bus address: User voltage limit: 60.0 kV (or 30.0 kV) -
Page 55: Appendix Ii Standard Settings (As Replacement For An Ecm)
Appendix II Standard settings (as replacement for an ECM) The CM5 has the following factory settings: Operating mode: Local Control mode: VC (=Voltage Control) Voltage setpoint: 0.0 kV Current limit: 2.5 mA (or 5.0 mA) Lock mode: Unlocked User password:... -
Page 56: Appendix Iii Standard Settings (Cm5 With Anybus Module)
Appendix III Standard settings (CM5 with Anybus module) The CM5 with Anybus module has the following factory settings: Operating mode: Fieldbus Control mode: VC (=Voltage Control) Voltage setpoint: 0.0 kV Current limit: 2.5 mA (or 5.0 mA) Lock mode: Unlocked... -
Page 57: Appendix Iv Operating Signal
Appendix IV Operating signal Power Operating Remote Local Fieldbus Remote External Limited Operating mode HV on/off setpoint setpoint setpoint remote button error mode HV on/off Local Disabled 0 kV setpoint Local Disabled ≥ 1 kV setpoint Local Disabled ≥ 1 kV setpoint Local Enabled... -
Page 58: Appendix V Connector Connections
Appendix V Connector connections Connector connections for the 25-pin sub-D connector at the rear of the generator: Pin 1 = External remote HV on/off + (plus) Pin 2 = Remote I setpoint Pin 3 = Remote U setpoint Pin 4 = Remote U output Pin 5 = Remote I output Pin 6 = 24 V DC input voltage (optional, power supply for fieldbus) Pin 7 = 12 V DC output voltage... - Page 59 CM5_UM_ 9752090319_GB_V0_9 59 / 67...
-
Page 60: Appendix Vi Quick Init Installation Configuration Examples
] Step 5: Depress [ . The following text appears: “[Initial setup]” “Remote HV on/off” “source: Continuous” ] Step 6: Depress [ . The CM5 generator will now start up in the set configuration. CM5_UM_ 9752090319_GB_V0_9 60 / 67... - Page 61 ] Step 6: Depress [ . The following text appears: “[Initial setup]” “Remote HV on/off” “source: Continuous” ] Step 7: Depress [ . The CM5 generator will now start up in the set configuration. CM5_UM_ 9752090319_GB_V0_9 61 / 67...
-
Page 62: Appendix Vii Examples - Changing The Existing Cm5 Configuration
. The following text appears: “Factory settings” “are restored.” ] or wait 2 seconds Step 8: Depress [ . The CM5 will then restart, after which the generator can be configured again using the Quick menu. CM5_UM_ 9752090319_GB_V0_9 62 / 67... - Page 63 Example 4: Changing the control mode from VC to CC. In the following example the control mode of the generator will be changed from Voltage Controlled (VC, Constant Voltage) to constant Current Control (CC). ] Step 1: Depress [ .
- Page 64 Example 5: Switching on the External Remote HV On/Off mode in order to be able to remotely switch the generator on and off via machine control. In this example the External Remote HV On/Off input is switched from Continuous mode to the mode controlled via the External input.
-
Page 65: Appendix Viii Advanced Current Control (Optional)
Appendix VIII Advanced Current Control (optional) Operational modes. The generator operates in an intelligent CC mode, with the ability to switch back to the stand-by state when no object is present below the connected electrodes. Operation in Advanced Current Control (AdvCC) mode. In the Advanced CC mode the generator will again operate in CC (Constant Current) mode. -
Page 66: Appendix Ix Advanced Output Control (Optional)
Appendix IX Advanced Output Control (optional) Operating modes In this mode the high voltage that is set depends on an analogue control signal, e.g. speed control of the machine. Operation in Advanced Output Control (AdvOutC) mode. In the Advanced Output Control mode the generator is engaged in voltage controlled charging (see VC mode). -
Page 67: Appendix X Factory Password
Appendix X Factory password Note Keep this document in a safe place. When resetting the user password you are asked to enter a factory password (see 6.22). This password is: 7240. CM5_UM_ 9752090319_GB_V0_9 67 / 67...
Need help?
Do you have a question about the CM5 and is the answer not in the manual?
Questions and answers