Table of Contents
Advertisement
Quick Links
OVERVIEW
WARNINGS
This product complies with the EMC
directive (89/336/EEC)
and the low-voltage directive
(73/23/EEC).
GETTING STARTED
IMPORTANT:
ACCESSING THE
ON SCREEN DISPLAY
Krell S–1000
S–1000
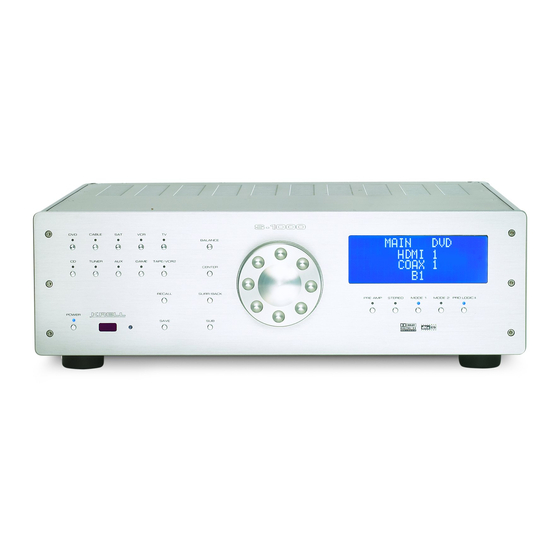
Thank you for your purchase of the Krell
home theater experience, integrating fully with the latest video displays and
audio/video source components. HDMI
ment of advanced Krell technologies including discrete Class A, direct-coupled cir-
cuitry with balanced outputs. A new, easy to access on-screen menu system
makes customization a snap.
The S–1000 features Dolby Digital 5.1, Dolby Digital EX, DTS-ES 6.1, DTS NEO:6,
and Dolby Pro Logic II processing, in addition to nine proprietary Krell Music
Surround modes. An RS-232 port insure compatibility with third party controllers
and allows upgrades to software via Flash memory for future surround sound for-
mats and design enhancements.
The S–1000 must be placed on a firm, level surface where it is not exposed to drip-
ping or splashing.
The ventilation grids on the top and bottom of the S–1000 must be unobstructed at
all times during operation. Do not place flammable material on top of or beneath the
preamplifier.
Before making connections to the S–1000, ensure that the power is off and other
components are in mute or stand-by mode. Make sure all cable terminations are of
the highest quality, free from frayed ends, short circuits, or cold solder joints.
THERE ARE NO USER-SERVICEABLE PARTS INSIDE AN S–1000.
The S–1000 Surround Preamp/processor offers a high degree of flexibility via an on-
screen menu system. To setup your S–1000 quickly:
1. Connect your S–1000 to the rest of the components in your system, using
Table 1 on page 4 as a guide. Please note:
On Screen Display (OSD). The S–1000 has three OSD outputs: component,
S-video, and composite. There is no OSD available from the HDMI
To View the Setup Menu. Connect any of the OSD outputs on the S–1000 to
the appropriate input on your video display. Press the remote control menu
key. The front panel display reads
simultaneously. Tune the video display input to match the selected OSD video
connection.
2. Enter the setup menu. The
3. Using the video display (OSD) and the remote, select
The
LISTENING ROOM SETUP
4. Select
The
SPEAKER SETUP .
available options and select your loudspeaker setup.
5. Select
SPEAKER DISTANCE
loudspeakers relative to your listening position.
6. Select
and calibrate the volume of your loudspeakers.
SPEAKER LEVEL
Please contact your authorized dealer, distributor, or Krell if you have any ques-
tions not addressed in this quick setup guide.
Krell Industries, Inc. • 45 Connair Road • Orange, CT 06477-3650 USA
TEL 203-298-4010 • FAX 203-891-2028 • E-MAIL krell@krellonline.com
WEB SITE http://www.krellonline.com
SURROUND
PREAMP/PROCESSOR
WITH HDMI
Quick Setup Guide
®
S–1000. The S–1000 delivers a seamless
video switching rounds out a full comple-
TM
and all OSD outputs activate
MENU MODE
screen appears on the video display.
MAIN MENU
LISTENING ROOM SETUP
screen appears.
screen appears. Scroll through the
SPEAKER SETUP
and enter information about the placement of your
TM
TECHNOLOGY
TM
output.
.
1
Advertisement
Table of Contents

Summary of Contents for Krell Industries S-1000
-
Page 1: Getting Started
Please contact your authorized dealer, distributor, or Krell if you have any ques- tions not addressed in this quick setup guide. Krell S–1000 Krell Industries, Inc. • 45 Connair Road • Orange, CT 06477-3650 USA TEL 203-298-4010 • FAX 203-891-2028 • E-MAIL krell@krellonline.com WEB SITE http://www.krellonline.com... -
Page 2: Front Panel
Operational Mode. When the Provides status messages for tapes, and compares the out- encoded material, including power/stand-by button is S-1000 operations, including put signal of an analog tape laser discs, videotapes, televi- pressed, the LED illuminates volume and balance level, recorder to an audio source. - Page 3 S –1000 Front Panel and Remote Functions continued INDIVIDUALIZED appears on the front panel PROCESSOR 29 Menu Key CHANNEL TRIM display. Press the surr/back FUNCTIONS Accesses the setup menu The center, surr/back, and sub button again. appears 25 Save Button/Key and on-screen menu display.
- Page 4 Figure 3 The S–1000 Back Panel 46 49 S-VIDEO COMPONENT VIDEO COMPOSITE VIDEO POWER HDMI 1 HDMI 2 HDMI 3 HDMI 4 HDMI OUT Processor 12VDC 12VDC OUT MULTI-CHANNEL INPUTS ANALOG AUDIO OUTPUTS RC-5 ANALOG AUDIO INPUTS TAPE DIGITAL AUDIO 50/60 Hz RS-232 NO USER SERVICEABLE PARTS INSIDE...
-
Page 5: Back Panel
BACK PANEL ANALOG AUDIO VIDEO INPUTS BACK PANEL OUTPUTS AND INPUTS AND OUTPUTS REMOTE CONTROL CONNECTIONS 34 Balanced Analog 46 S-video Outputs 54 Comm Port RS-232 Audio Outputs Two S-video outputs with Connector Eight balanced analog audio DIN connectors. The main S- Sends operational instruc- channel outputs, with XLR video output (labeled OSD... -
Page 6: System Configuration
SYSTEM STEP 1 Connect the S–1000 to your system, using Table 1 on page 4 as a guide. You are CONFIGURATION ready to configure the S–1000 through the interactive on-screen menus in the setup QUICK SETUP menu. For best performance, configure the loudspeakers before playing music. Please note: On Screen Display (OSD). - Page 7 System Configuration STEP 4 continued Quick Setup, continued CRSOVR Crossover selections are 120, 100, 80, 60, and 40 Hz. The standard crossover set- ting is 80 Hz. Choose the crossover frequency appropriate for your loudspeakers. The frequencies below the crossover frequency are sent to the subwoofer if a sub- woofer is present;...
- Page 8 © 2007 by Krell Industries, Inc. All rights reserved. Krell ® is a registered trademark of Krell Industries, Inc., and is restricted for use by Krell Industries, Inc., its subsidiaries, and authorized agents. v 07.2 “DTS”, “DTS Digital Surround”, “DTS ES Extende Surround”, and “Neo:6”...


Need help?
Do you have a question about the S-1000 and is the answer not in the manual?
Questions and answers