
Subscribe to Our Youtube Channel
Related Manuals for Innogy SmartHome RST 2.0


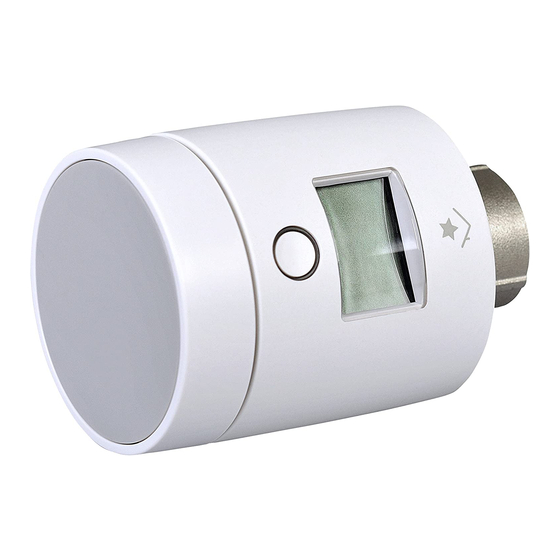
Summary of Contents for Innogy SmartHome RST 2.0
- Page 1 DE Heizkörperthermostat Seite 2 EN Radiator thermostat Page 12 Thermostat de radiateur Page 22 NL Radiatorthermostaat Pagina 32...
-
Page 2: Table Of Contents
Herzlichen Glückwunsch! Mit dem innogy Heizkörperthermostat haben Sie ein bewährtes Gerät für Ihr SmartHome erworben. Anhand dieser Anleitung können Sie das Thermostat schnell und leicht montieren und in Betrieb nehmen. Noch schneller geht‘s allerdings über die innogy SmartHome App, erhältlich per Download im App Store von Apple oder im Google Play Store. - Page 3 (Mo– Fr 8–20 Uhr · Sa 8–14 Uhr) SmartHome Community https://innogy.com/community Facebook https://facebook.com/innogysmarthome Helfer vor Ort: innogy friends von mila Erfahrene und geprüfte SmartHome User kom- men zu Ihnen und helfen bei Montage und Einrichten Ihre SmartHome Weitere Infos: https://innogy.mila.com...
-
Page 4: Gefahrenhinweise
Gefahrenhinweise Bei Sach- oder Personenschäden, die durch unsachgemäße Hand- habung oder das Nichtbeachten der Sicherheitshinweise verur- sacht werden, übernehmen wir keine Haftung. In solchen Fällen erlischt jeder Gewährleistungsanspruch! Für Folgeschäden über- nehmen wir keine Haftung! Öffnen Sie das Gerät nicht. Es enthält keine durch den Anwender zu wartenden Teile. -
Page 5: Funktion
Achten Sie darauf, sich nicht die Finger zwischen den Adapterhälf- ten einzuklemmen! Reinigen Sie das Gerät mit einem trockenen Tuch, das bei starken Verschmutzungen leicht angefeuchtet sein kann. Verwenden Sie zur Reinigung keine lösemittelhaltigen Reinigungsmittel. Achten Sie darauf, dass keine Feuchtigkeit in das Geräteinnere gelangt. Jeder andere Einsatz als in dieser Bedienungsanleitung beschrie- ben ist nicht bestimmungsgemäß... -
Page 6: Montieren Und Einbinden
Montieren und Einbinden Drehen Sie das mechanische Thermostat bis zum Endanschlag nach links. Schrauben Sie die Über- wurfmutter vollständig vom Gewinde. Legen Sie die Batterien (Typ AA) polrichtig ein. War- ten Sie, bis der Stift ganz zurückgefahren ist. In die- ser Zeit erscheint im Display A1. -
Page 7: Bedeutung Der Symbole
Bedeutung der Symbole Im Display werden neben der Temperatur auch Status- symbole angezeigt. Sie informieren über die aktuelle Situation des Heizkörperthermostats. Symbol Bedeutung Zeigt an, dass die Batterien erschöpft sind. Bitte wechseln Sie umgehend die Batterien. Zeigt ein offenes Fenster an. Dieses Symbol erscheint, wenn der Tür- und Fenstersensor eine geöffnete Fensterstellung registriert hat. -
Page 8: Funktionstest
Funktionstest Nach dem polrichtigen Einlegen der Batterien erscheint im Display entweder ein Symbol oder die Zieltemperatur. Wird im Display nichts oder F4 angezeigt, sind die Batte- rien leer bzw. nahezu entladen und müssen ausgetauscht werden. Eine rot blinkende LED bei gleichzeitiger Anzeige von F2 signalisiert einen zu großen Abstand zwischen Steuerstift und Ventil. -
Page 9: Technische Daten
Technische Daten Gerätebezeichnung RST-2 Stromversorgung 2 x LR06 (Mignon/AA) Batterielebensdauer bis zu 2 Jahre Funkfrequenz 868,3 MHz Max. Sendeleistung 10 mW Freifeldreichweite ca. 100 m Empfängerklasse SRD category 2 Wirkungsweise Typ 1 Anschluss M30 x 1,5 mm Display Schutzart IP20 Umgebungstemperatur 0 °C bis +55 °C Verschmutzungsgrad... -
Page 10: Allgemeiner Hinweis
Allgemeiner Hinweis Hiermit erklärt die eQ-3 AG, dass sich dieses Gerät in Übereinstimmung mit den grundlegenden Anforderun- gen und den anderen relevanten Vorschriften der Richtli- nie 2014/53/EU befindet. Die vollständige Konformitäts- erklärung finden Sie unter: www.eq-3.de/service/downloads.html eQ-3 AG, Maiburger Str. 29 26789 Leer Deutschland Entsorgungshinweis... - Page 11 4. Ausgabe Deutsch 03/2019 Dokumentation © 2011-2019 innogy SE, Deutschland. Alle Rechte vorbehalten. Für Fehler technischer oder drucktechnischer Art und ihre Folgen übernehmen wir keine Haftung. Alle Warenzeichen und Schutzrechte wer- den anerkannt. Änderungen im Sinne des technischen Fortschritts kön- nen ohne Vorankündigung vorgenommen werden.
- Page 12 SmartHome. These instructions will help you mount and commission the thermostat quickly and easily. Even faster is the innogy SmartHome App, available for download from Apple‘s App Store or the Google Play Store. If you already own the app, simply click on the plus sign in the upper right corner of the Home screen and wait for the device to show up in the search.
- Page 13 (Mo– Fr 8 o‘clock - 20 o‘clock Sa 8 o‘clock - 14 o‘clock) SmartHome Community https://innogy.com/community Facebook https://facebook.com/innogysmarthome On site helper: innogy friends of mila Experienced and qualified SmartHome users come to you and help you install and integrate your SmartHome. Further information: https://innogy.mila.com...
-
Page 14: Safety Note
Safety note We accept no liability for material damage or personal injury caused by improper hand ling or by disregarding safety instructions. In such cases any warranty claims shall lapse. We accept no liability for consequential damage. Do not open the device. It does not contain any parts to be serviced by the user. -
Page 15: Function
If damage is discovered on the existing thermostat, the valve or the heating pipes, please consult a specialist. Make sure that your fingers do not get caught between the adapter halves! Clean the device with a dry linen cloth, which you can moisten slightly to remove stubborn dirt. -
Page 16: Installing And Integrating
Installing and integrating Disassemble the mechanical thermostat by turning it to the left as far as it will go. Unscrew the union nut until you can remove it from the thread. Wait until the pin is fully retracted and A1 appears on the display. -
Page 17: Meaning Of The Symbols
Meaning of the symbols In addition to the temperature, status symbols are also shown in the display. They inform about the current situ- ation of the radiator thermostat. Symbol Meaning Shows that the batteries are worn out. Please change the batteries immediately. Displays an open window. -
Page 18: Function Test
Function test After the batteries have been inserted with the correct polarity, either a symbol or the target temperature appears on the display. If the display shows nothing or F4, the batteries are empty or nearly discharged and must be replaced. A red flashing LED with simultaneous display of F2 indicates too large a distance between control pin and valve. -
Page 19: Technical Data
Technical data Name of device RST-2 Batteries 2 x LR06 (Mignon/AA) Battery service life up to 2 years Radio frequency 868,3 MHz Max. transmission power 10 mW Free field range approx. 100 m Receiver class SRD category 2 Mode of operation Type 1 Connection M30 x 1,5 mm... -
Page 20: General Information
General information eQ-3 Entwicklung GmbH hereby declares that this device meets the basic requirements and the other relevant reg- ulations laid down in Directive 2014/53/EC. You can find the complete declaration of conformity at: www.eq-3.de/service/downloads.html eQ-3 AG, Maiburger Str. 29 26789 Leer Germany Information about disposal... - Page 21 4th English edition 03/2019 Documentation © 2011-2019 innogy SE, Germany. All rights reserved. We accept no liability for errors of a technical or typographical nature or their consequences. All trademarks and property rights are recognised. Changes in response to technical progress can be made without prior notice.
- Page 22 Félicitations! Avec le thermostat de radiateur innogy, vous avez acheté un appareil éprouvé pour votre SmartHome. Ces instruc- tions vous aideront à monter et à mettre en service le thermostat rapidement et facilement. Mais c’est encore plus rapide avec l’innogy SmartHome App, disponible en téléchargement sur l’App Store...
- Page 23 (Lun – Ven 8 h - 20 h · Sam 8 h - 14 h) SmartHome Community https://innogy.com/community Facebook https://facebook.com/innogysmarthome Un assistant sur place : innogy friends de mila Des utilisateurs expérimentés et certifiés SmartHome viennent chez vous et vous aident pour le montage et l’installation de votre SmartHome.
-
Page 24: Remarques Relatives Aux Risques Potentiels
Remarques relatives aux risques potentiels Nous excluons toute responsabilité en cas de préjudices maté- riels ou corporels liés à un maniement non conforme ou au non-respect des remarques relatives à la sécurité. Dans ce type de cas, tout droit de garantie expire ! Nous déclinons toute responsabilité... -
Page 25: Fonction
tion autre (sur des systèmes de refroidissement, chauffage au sol, etc) n’est pas autorisée et peut provoquer d’importants dommages. En cas de dommages visibles sur le thermostat existant, sur la vanne ou sur les tuyaux de chauffage, veuillez consulter un spécialiste. -
Page 26: Installation Et Intégration
Installation et intégration Démontez le thermostat mécanique en le tournant vers la gauche jusqu’en butée. Dévissez entièrement l‘écrou-raccord du filetage. Attendez que la tige soit complètement revenue au point de départ et que A1 apparaisse sur l‘écran. Quand la tige est complètement revenue au point de départ A2 apparaît sur l‘écran. -
Page 27: Signification Des Symboles
Signification des symboles En plus de la température, des symboles d‘état sont éga- lement affichés à l‘écran. Ils informent sur la situation actuelle du thermostat du radiateur. Symbol Explication Signale que les piles sont vides. Changez immédiatement les piles. Signale une fenêtre ouverte. Ce symbole est affiché... -
Page 28: Test De Fonctionnement
Test de fonctionnement Après avoir inséré les piles avec la polarité correcte, un symbole ou la température de consigne s’affiche à l’écran. Si l’écran n’affiche rien ou F4, les piles sont vides ou presque déchargées et doivent être remplacées. Une LED rouge clignotante avec affichage simultané... -
Page 29: Caractéristiques Techniques
Caractéristiques techniques Désignation de l’appareil RST-2 Piles 2 x LR06 (Mignon/AA) Durée de vie de la pile 2 ans maximum Fréquence radio 868,3 MHz Puissance max. à 10 mW l‘emission champ libre env. 100 m Portée en Classe de réception SRD category 2 Fonctionnement Type 1... -
Page 30: Généralités Sur La Télécommande
Généralités sur la télécommande La société eQ-3 Entwicklung GmbH déclare que le pré- sent appareil est conforme aux critères fondamentaux et autres règles applicables de la Directive 2014/53/CE. Vous trouverez la déclaration de conformité intégrale sur le site : www.eq-3.de/service/downloads.html eQ-3 AG, Maiburger Str. - Page 31 4ème édition française 03/2019 Documentation © 2011-2019 innogy SE, Allemagne. Tous droits réservés. Nous déclinons toute responsabilité pour les erreurs typographiques ou d’impression ainsi que pour les conséquences en découlant. Nous reconnais- sons tous les droits de protection et les marques.
- Page 32 SmartHome aangeschaft. Deze instruc- ties helpen u om de thermostaat snel en eenvoudig te monteren en in bedrijf te stellen. Maar het gaat nog sneller met de innogy SmartHome App, te downloaden in de App Store van Apple of de Google Play Store.
- Page 33 (Ma - Vrij 8 uur - 20 uur · Zat 8 uur - 14 uur) SmartHome Community https://innogy.com/community Facebook https://facebook.com/innogysmarthome Hulp ter plaatse: innogy friends van mila Ervaren en geverifieerde smarthome gebruikers komen naar u toe en helpen u bij de montage en het opzetten van uw smarthome. Meer informatie: https://innogy.mila.com...
-
Page 34: Gevarenaanduidingen
Gevarenaanduidingen Wij stellen ons niet aansprakelijk voor materiële schade of let- selschade die is veroorzaakt door oneigenlijk gebruik of door het niet naleven van de veiligheidsinstructies. In dergelijke gevallen vervalt elk recht op garantie! Voor gevolgschade stel- len wij ons niet aansprakelijk! Het apparaat niet openen. -
Page 35: Functie
Let erop dat uw vingers niet tussen de twee adapterdelen wor- den ingeklemd! Reinig het apparaat met een droge linnendoek dat u bij sterke verontreiniging licht vochtig mag maken. Gebruik voor het rei- nigen geen oplosmiddelhoudende schoonmaakmiddelen. Let erop dat er geen vocht het apparaat binnendringt. Elk andere toepassing dan het in deze bedieningshandleiding omschreven gebruik is in strijd met de voorschriften en leidt tot uitsluiting van de garantie en aansprakelijkheid. -
Page 36: Monteren En Aansluiten
Monteren en aansluiten Demonteer de mechanische thermostaat door deze tot aan de aanslag naar links te draaien. Schroef de wartelmoer geheel van de schroefdraad. Wacht totdat de regelstift helemaal naar binnen is gegaan en er op de display A1 wordt weergegeven. Wanneer de pen helemaal naar binnen is gegaan, wordt er op de display A2 weergegeven. -
Page 37: Betekenis Van De Symbolen
Betekenis van de symbolen Naast de temperatuur worden in het display ook status- symbolen weergegeven. Zij informeren over de huidige situatie van de radiatorthermostaat. Symbol Betekenis Geeft aan dat de batterijen leeg zijn. Vervang onmiddellijk de batterijen. Geeft aan dat er een raam geopend is. Dit symbool verschijnt bij een geopend raam- contact of bij sterke temperatuurdaling (bij- voorbeeld door een open raam). -
Page 38: Functietest
Functietest Na het plaatsen van de batterijen met de juiste polariteit verschijnt op het display een symbool of de gewenste temperatuur. Als het display niets of F4 toont, zijn de batterijen leeg of bijna leeg en moeten ze worden vervangen. Een rode knipperende LED met gelijktijdige weergave van F2 duidt op een te grote afstand tussen de stuurpen en de klep. -
Page 39: Technische Gegevens
Technische gegevens Naam van het apparaat RST-2 Batterijen 2 x LR06 (Mignon/AA) Levensduur batterij maximaal 2 jaar Radiofrequentie 868,3 MHz Max. zendervermogen 10 mW Vrije-veldbereik ca. 100 m Ontvangerklasse SRD category 2 Werking Type 1 Aansluiting M30 x 1,5 mm Display Beschermingsgraad IP20... -
Page 40: Algemene Informatie
Algemene informatie Hiermee verklaart eQ-3 Entwicklung GmbH dat dit appa- raat in overeenstemming is met de eisen en de andere relevante bepalingen van richtlijn 2014/53/EG. De volle- dige conformiteitsverklaring vindt u op: www.eq-3.de/service/downloads.html eQ-3 AG, Maiburger Str. 29 26789 Leer Duitsland Verwijderingsinstructies Dit apparaat mag niet als huishoudelijk afval worden... - Page 41 4e uitgave Nederlands 03/2019 Documentatie © 2011-2019 innogy SE, Duitsland. Alle rechten voorbehouden. Wij zijn niet aansprakelijk voor technische of druktechnische fouten of de gevolgen daarvan. Alle handelsmerken en industriële eigendoms- rechten worden gerespecteerd. Wijzigingen n.a.v. technische vooruitgang kunnen wor- den aangebracht zonder voorafgaande bekendmaking.
Need help?
Do you have a question about the SmartHome RST 2.0 and is the answer not in the manual?
Questions and answers