
Related Manuals for ROC LL1GBQ24-B26CG


Summary of Contents for ROC LL1GBQ24-B26CG
- Page 1 Manual for Use, Installation and Maintenance Condensing wall mounted gas boiler Suitable for: Installer ● Adjustment Personnel ● Maintainer ● PIN.NO : 0063CR7770...
-
Page 2: Table Of Contents
Contents 1. Overview......3 4.9 Minimum distance of 1.1 Reading advices....3 installation and maintenance..17 1.2 Customer care....4 4.10 Dimension of flue 1.3 Advice for the installer...4 mounting hole .......18 1.4 CE symbol......5 4.11 Installation of 2. Safety regulations....6 inlet/exhaust flue....19 2.1 Usage condition....6 4.12 Pipe installation.....23 2.2 Installation and adjustment 4.13 Power connection..24... -
Page 3: Overview
1. Overview 1.1 Reading advices These instructions are suitable for ROC wall mounted gas boilers.To ensure the correct installation, adjustment and maintenance. Please read carefully the general information provided in this instruction, and keep it well. To the user Please ensure you have this complete boiler manual. It provides a record for your boiler adjustment, which provides important information for the installation of after-sales engineering personnel . -
Page 4: Customer Care
1.2 Customer care ROC, as a leading manufacturer of domestic and commercial water heating appliances, is committed to providing high quality products and good after sales service. Maintenance The manufacturer’s guarantee starts from the purchase date. The guarantee is invalidated if the boiler is not installed in accordance with the recommendations made herein or in a manner not approved by the manufacturer. -
Page 5: Ce Symbol
This boiler is designed to produce domestic hot water. It should be connected to a heating system and a distribution network for domestic hot water, both of which must be compatible with its performance and power levels. Unless specified, the usage purpose of the boiler is strictly limited .The manufacturer can not take responsibility for any damage caused by improper, incorrect and unreasonable usage of the appliance or by the failure to comply with the instructions given in this manual. -
Page 6: Safety Regulations
2. Safety regulation 2.1 Usage condition This boiler is only for indoor installation, domestic heating and domestic hot water supply.In addition to this, other installation and usage do not meet the requirement. The normal usage requirement for boiler is: power supply is 230V ~ /50Hz, Power supply capacity is more than10A, there must be a really grounded socket. -
Page 7: When Making Modification Work Around The Gas Boiler
Boiler adjustment and maintenance can only be carried out by a specialist authorized by ROC distributor. Parts replacement must be used original spare parts. This is a necessary condition for boiler warranty and maintenance. 2.5 Far from inflammable and explosive materials Do not use or store any flammable or explosive materials (such as gasoline, paper or... -
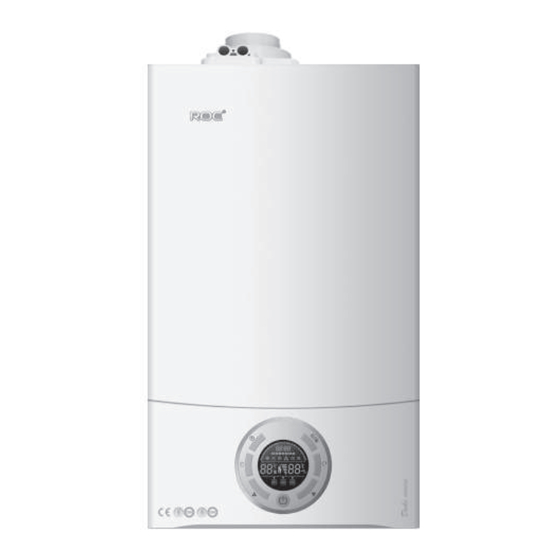
Page 8: Product Description
3. Product description 3.1 Control panel 1.Timing 2.Function switch 3.Up 4.ON/OFF (Power) 5.Information indication display 6.Down 7.Reset 8.Mode 3.2 Display Time week Heating timing Operation state Fire class Heating Hot water temperature indication temperature Heating operation state selection Indoor Winter mode Malfunction Timing Anti-freeze... -
Page 9: Inner Structure
3.3 Inner structure 1. Flue temperature sensor 12. Overheat protector 2. Heat exchanger 13. Heating temperature sensor 3. Burner 14. Expansion tank 4. Ignition needle 15. Back water temperature sensor 5. Flame detection needle 16. Safety relief valve 6. frequency conversional fan 17. -
Page 10: Overall Dimension And Outlet Position Map
3.4 Overall dimension and outlet position map Unit LL1GBQ24-B26CG A. Gas B. Domestic hot water C. Cold water D. Heating back water inlet E. Heating water outlet... -
Page 11: Technical Data
3.5 Technical data LL1GBQ24-B26CG Model Gas boiler type Domestic condensing gas boiler Gas boiler type Gas type Using gas 2H-G20-20 mbar No x level Capacity Nominal heat input (Qn) 24.8 Nominal heat output (Pn) 24.0 Nominal condensing output (50/30°C) 26.0... -
Page 12: Boiler Installation
4. Boiler installation 4.1 Reference standard In Europe, all boiler installation and adjustment should be performed by professional authorized by ROC company according to actual installation standards, and make sure it is compliance with safety and health standards. Hazardous Substances Control Regulations The material used in the production of this boiler is harmless and requires no special care during maintenance. -
Page 13: Water Supply
4.5 Water supply The boiler is only suitable for sealed systems. The maximum working pressure for the boiler is 6bar. All fittings and pipework for the boiler should be of the same standard. If there is a possibility of the incoming mains pressure exceeding 6bar, particularly at night, then a suitable pressure limiting valve must be fitted. -
Page 14: System Controls
To prevent this problem ,it is necessary to use the pipes with an “oxygen proof barrier”. If pipes of this kind are not used, keep the system separate by installing heating exchangers of those with a specific system water treatment. IMPORTANT Failure to carry out the water treatment procedure will invalidate the boiler guarantee. -
Page 15: Condensate Discharge
Condensate Discharge The condensate discharge pipe from the boiler must have a continuous fall of 2.5° and must be inserted by at least 50mm into a suitable acid resistant pipe –e.g. plastic waste or overflow pipe. The condensate discharge pipe must have a minimum diameter 22mm, must have a continuous fall and can be installed to prevent freezing. -
Page 16: Install The Boiler
4.6 Install the boiler Please check that you are familiar with the installation requirement before commencing work. The installation accessories described in the following list are included in the boiler package: Boiler Box: Gas boiler Hanging plate Installation bag: Expansion screws (used to fix the hanging plate) coaxial 1m terminal flue Flue Box:... -
Page 17: Minimum Distance Of Installation And Maintenance
4.9 Minimum distance of installation and maintenance Both the installation and maintenance of the boiler must keep at least the following distance(refer to picture 5.2) --Bottom distance 400mm --Side distance 200mm --Top distance 400mm --Front distance 500mm Picture 5.2 minimum distance of installation and maintenance. We advise that the minimum distances from inflammable materials is 500 mm. -
Page 18: Dimension Of Flue Mounting Hole
4.10 Dimension of flue mounting hole The boiler should be installed on the vertical, flat, and solid load-bearing walls. Check the load-bearing capacity of all fasteners. Hole opening position of flue which installs the air filter. Determine the position of installing the inlet / exhaust balanced flue and mark it on the wall.(see picture 5.3) Tips:... -
Page 19: Installation Of Inlet/Exhaust Flue
4.11 Installation of the inlet/exhaust flue In addition to boiler , ROC distributor also supply a variety of treatment options for terminal installation of inlet/exhaust flue. Without these terminals, the boiler can not operate. When the user buy flue himself, please read the installation manual which the flue is attached carefully. -
Page 20: Flue System
Flue system Standard 1000mm flue system includes: 1. Seal for horizontal flue duct and external wall 2. 90° elbow 3. 30mm flue clamp 4. 48mm flue clamp 5. Internal trim ring 6. External wall seal Standard flue installation Flue Clamp Minimum length=500mm... - Page 21 Note: The flue shall not contact with or close to flammable material, and must not pass through the walls or building structures made of flammable material. When replacing an old boilers, the flue system also must be changed. Important Ensure that the flue is not blocked. Ensure that the flue is installed and fixed in accordance with below these instructions.
- Page 22 Picture 5.6 The boiler has been fixed on the wall ,and fix the flue rubber ring inside the flue connector, and insert elbow into flue sleeve and then rotate it to required position. Tip: in the vertical axis of flue, the elbow can rotate with 360° Before installing the flue, ensure the maximum length of flue ducting does not exceed 5m (see picture 5.6),and consider all of elbows and its bend.
-
Page 23: Pipe Installation
4.12 Installation of pipework Gas pipework connection Note: Please ensure that labels used on the package and the technical nameplate on the boiler is corresponds with regulation of countries using this kind boilers, and that the gas category designed for this boiler is corresponds to available gas category in the country where will use this kind boiler. -
Page 24: Power Connection
Safety relief valve The heating safety relief valve port must be connected with floor drainage by using pipe, otherwise when the safety relief valve discharge water ,it may injury the passerby and articles. The boiler manufacturer will not take any responsibility for this. 7m frequency conversional pump.curve 4.13 Power supply connection The boiler uses the power of 230 V ~ /50Hz. - Page 25 Please obey the following steps when operate the gas boiler: ----Do not touch the boiler with parts of the body that are wet or damp and/or bare feet; ----Do not pull the power wires. ----Do not expose the boiler to the sun and rain directly, unless it is specified clearly.
-
Page 26: Boiler Adjustment
5. Boiler adjustment Warning: The boiler can only be used for domestic hot water and indoor heating! The boiler was designed for indoors installation according to the current laws and regulations ,so it cannot be installed and used outdoors. If the boiler is installed in outdoor environment, it will cause bad operation and even damage of boiler. -
Page 27: Check The Circuit And Power
5.1 Check the circuit and power Check if the power and voltage meet the requirements, if the power polarity is correct, if the earth connection is correct and the resistance to ground is normal. Any problems with the power supply will lead to improper working and even damage of the boiler, and it may injury the operator. -
Page 28: Examination Before Start
Please read <<manual for installation and maintenance>> and <<User , s Guide>> carefully before using. If you have any question , please call the ROC distributor. Open the valve of pipe Confirm the cold water inlet valve was open. Means of exam: open the tap of D.H.W. - Page 29 Adding water to equipment When you notice that the pressure is below 1.0-1.2 bar on the pressure gauge , you have to add water to the equipment. When the equipment begin to work, maybe there are some air storage in the system.
-
Page 30: Start Operation
5.5 Start operation The installer is responsible for conducting the first ignition and guide the user how to use the appliance. The gas pressure must be checked when conducting the first ignition. Warning: Do not put the equipment into operation until the inlet / outlet balanced pipe is installed (the length of the flue must be appropriate). - Page 31 Operation mode setting method Operation mode setting : when the gas boiler is turned on under the non-malfunction state, softly touch the mode button to switch operation mode, it is divided into three modes: Sleep mode - after entering the mode, the heating temperature work according to the original set temperature value of 80%.
-
Page 32: Control Operation Parameter
5.6 Control operating parameters 1.Screen Icon Description (no screen indication in the OFF state) Time week Heating timing Operation state Fire class Heating Hot water temperature indication temperature Heating operation state selection Indoor Summer Winter mode Malfunction Timing Anti-freeze temperature control mode The function of operation buttons on Panel [ON / OFF] button... - Page 33 Summer mode icon :When you choose Summer mode, it will indicate. Heating icon : When heating works, it will indicate. Hot water icon : It will be dynamic indication when it receives the hot water flow signal. Otherwise it will not indicate. Sleep mode icon : It will indicate when it enters the sleep mode.
-
Page 34: Flue Gas Analysis
flue fixing cover and seal ring. When making flue gas analysis or power adjustment, CO in the gas and fan speed value shall comply with the following table: LL1GBQ24-B26CG Heat input Maximum heat input 9.2±0.2 Minimum heat input 8.8±0.2... - Page 35 The smoke temperature uses Flue gas temperature in normal (reference value) °C combustion condition Flue gas flow volume in normal About 550g/min combustion condition Flue gas temperature in minimum (reference value) °C combustion condition Flue gas flow volume in minimum About 100g/min combustion condition Flue gas overheat protection...
-
Page 36: Maintenance Precautions
6. Maintenance precautions Installation and maintenance of the gas boiler must be performed by the installer/engineer according to the operation instructions of the manufacturer and local current standard operation rules. Note Professional skill worker are those who have specialized technical skills in the manufacture and maintenance of heating and domestic hot water equipment, Professional skill worker should have the qualification certification of using national and local statutory and the manufacturer's authorization. -
Page 37: Anti-Freeze Function
6.1 Anti-freeze function The gas boiler has anti-freeze function. If the gas and power is on, when the heating water temperature is below 5 °C the boiler will start to work automatically, and heat the water in the system to about 30 °C Warning... -
Page 38: Operation Failure Cause And Settlement
6.2 Operation failure cause and settlement Malfunction Malfunction Code meaning Malfunction reason code type Air pressure or air speed malfunction Resume Flue malfunction flue thermocouple disconnects. automatically Resume Heating NTC NTC open circuit and short circuit. automatically malfunction Shower NTC Resume NTC open circuit and short circuit. -
Page 39: Gas Boiler Dismantling Instruction
7. Gas boiler dismantling instruction 7.1 Basic dismantling Basic dismantling Tools time: 3min Use screw driver to take Lift the plastic panel Rotate the electrical out the two screws of from bottom. box downwards bottom plate. Basic dismantling Tools Remove the upper and lower eight screws on the side plate and the two Unscrew the 4 screws... - Page 40 Basic dismantling Tools Unscrew the 4 screwson the front of the side plate Dismantle the side plate...
-
Page 41: Circuit Component
7.2 Circuit component Electrical box operation Tools time: 4min Take out the electrical Take out the screws on both sides of electrical box box back cover upward. Fuse replacement Tools time: 4min Open the Electrical Remove the fuse box as shown above... - Page 42 PCB replacement Tools time: 6min Operate Electrical Dismantle the 4 Remove the PCB box as shown above screws on the PCB Display replacement Tools time: 13min Dismantle the 3 screws on Remove the cover the back of display cover. of display...
- Page 43 Display replacement Tools Dismantle the 4 screws on Take out the rear cover Take out the display the rear cover of display.
-
Page 44: Water System
7.3 Water system... - Page 45 Safety valve dismantling Tools time: 5min Take out the safety Take out the safety valve clip valve manually. Air exhaust valve dismantling Tools time: 2min Take out the air exhaust valve manually.
- Page 46 Plate heat exchanger dismantling Tools time: 3min Dismantle the 2 screws Separate the bottom on plate heat exchanger Take out the plate heat plate and water system by 5mm internal six exchanger downward. as shown above. angle screwdriver...
-
Page 47: Combustion System
7.4 Combustion system Combustion system dismantling Tools Dismantle the 2 installation screws of ignition needle and flame detection needle as shown above, then take out the ignition needle and detection needle manually. Combustion system dismantling Tools Unscrew the two screws on heating temperature sensor and take the temperature sensor out. - Page 48 Fan dismantling Tools time: 8min Following basic Dismantle the connection Dismantle the 4 nuts dismantling method of the gas pipe by 24mm connected with fan by dismantle the combustion spanner, take out the fan after 8mm spanner. chamber sealing cover dismantling the gas pipe.
- Page 49 Burner dismantling Tools time: 12min Dismantle the 8 screws Dismantle the 3 screws on the top of burner Take out the burner on the burner cover. cover. Heat exchanger dismantling Tools time: 23min Take out the clip of heating inlet and outlet water pipe, then unscrew heating inlet and outlet water pipe Dismantle the 5 screws on...
- Page 50 Heat exchanger dismantling Tools Dismantle the 4 screws whi ch th e h ea t exchanger connects with the bottom plate, Take out the condensate then take out the water drainage bellows whole heat exchanger.
-
Page 51: Maintenance Plan
7.5 Maintenance plan Plate heat exchanger Maintenance interval: when necessary Method: evaluate the D.H.W. performance Safety valve Maintenance interval: yearly. Method: visual inspection/clean if necessary Water flow volume sensor Maintenance interval: yearly. Method: visual inspection/clean if necessary/check the water flow volume Expansion tank Maintenance interval: yearly. - Page 52 Maintenance interval: yearly. Methods: visual inspection/clean if necessary. Main heat exchanger Maintenance interval: yearly. Methods: visual inspection/clean if necessary Condensate water collector Maintenance interval: yearly (or after cleaning the main heat exchanger). Method: visual inspection/clean if necessary (add water before replacement). Pump Maintenance interval: yearly after the first ignition.
-
Page 53: Diagram
8. Power connection diagram... - Page 54 Memo...
- Page 55 Memo...
- Page 56 The user's manual can be translated to the official language of destination country,not limited ony English version.
Need help?
Do you have a question about the LL1GBQ24-B26CG and is the answer not in the manual?
Questions and answers