Table of Contents

Summary of Contents for Topaz Systems GemView 10
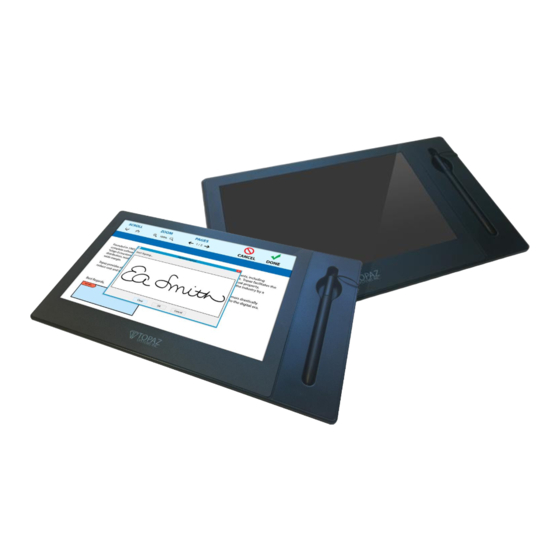
- Page 1 User Manual & Software Set-Up ® GemView 10 & 10 Touch Tablet Display TD-LBK101VA-USB-R & TD-LBK101VT-USB-R Copyright © 2019 Topaz Systems Inc. All rights reserved. For Topaz Systems, Inc. trademarks and patents, visit www.topazsystems.com/legal.
-
Page 2: Table Of Contents
GemView 10 & 10 Touch Tablet Display User Manual Table of Contents Compliance Information ......................4 Important Safety Instructions ....................5 Copyright Information ......................6 Introduction ..........................6 Packing List ..........................6 Product Overview ........................7 Front and Side View ........................7 Rear View ............................ - Page 3 GemView 10 & 10 Touch Tablet Display User Manual Table of Contents Product Specification ......................19 Screen ..........................19 Interactive Electromagnetic Pen ................... 20 Appendix ..........................21 Replace the Pen Tip ......................21 www.topazsystems.com Back to Top...
-
Page 4: Compliance Information
GemView 10 & 10 Touch Tablet Display User Manual Compliance Information This device complies with part 15 of FCC Rules. Operation is subject to the following two conditions: (1) this device may not cause harmful interference, and (2) this device must accept any interference received, including interference that may cause undesired operation. -
Page 5: Important Safety Instructions
GemView 10 & 10 Touch Tablet Display User Manual Important Safety Instructions DO NOT place objects on top of the device, as objects may scratch the screen. DO NOT expose the device to dirty or dusty environments. DO NOT place the device on an uneven or unstable surface. -
Page 6: Copyright Information
GemView 10 & 10 Touch Tablet Display User Manual Copyright Information Topaz Systems, Inc. shall not be liable for technical or editorial errors or omissions contained herein; nor for incidental or consequential damages resulting from furnishing this material, or the performance or use of this product. In the interest of continuing product improvement, Topaz Systems, Inc. -
Page 7: Product Overview
GemView 10 & 10 Touch Tablet Display User Manual Product Overview Front and Side View 1. Display and electromagnetic pen touch area 2. Tether hole 3. Kensington lock hole 4. Pen holder slot www.topazsystems.com Back to Top... -
Page 8: Rear View
GemView 10 & 10 Touch Tablet Display User Manual Rear View 5. USB connector 6. Large and small supports (x2), can be extended or retracted 7. Rubber foot pad (x4) 8. Product label Note: Please don't open the enclosure; contact service personnel for any problem. -
Page 9: Installation
GemView 10 & 10 Touch Tablet Display User Manual Installation Connect Tablet Display to PC To begin, follow the steps listed below to connect your GemView Tablet Display: 1. Connect the tablet display to the PC using the USB cable, as shown below. -
Page 10: Connect Pen To Tablet Display
GemView 10 & 10 Touch Tablet Display User Manual Connect Pen to Tablet Display If your pen is not already connected to the tablet display, follow these instructions: 1. Loop one end of the pen tether through the eye at the end of the pen. - Page 11 GemView 10 & 10 Touch Tablet Display User Manual After configuring the tablet display, you may test it as follows: 1. Click the identify button; the number 1 should appear on the main display and the number 2 should appear on the tablet display.
-
Page 12: Install Gemview Tablet Display Driver
GemView 10 & 10 Touch Tablet Display User Manual Install GemView Tablet Display Driver Note: If you are using your computer in a Citrix environment, please refer to the document GemView Tablet Displays in Citrix XenDesktop Environments. If you are... - Page 13 GemView 10 & 10 Touch Tablet Display User Manual 2. In the Tablet Display Properties window that opens, notice that the Pen tab is selected. Write on the GemView Tablet Display with the pen and the current pressure will show as a green bar.
- Page 14 GemView 10 & 10 Touch Tablet Display User Manual 3. Click the Mapping tab to display the screen below. Select the number of the tablet display from the drop down list. The numbering of the monitors follows that in the Windows display settings.
-
Page 15: Install Bundled Topaz Software
7. Navigate among the pages in a document Zoom document pages in and out Mounting Information The GemView 10 can be mounted on counters, desks, walls, and many other surfaces through its Kensington security slot holes. www.topazsystems.com Back to Top... -
Page 16: Gemview 10 Touch Tablet Display Set-Up
1. The GemView 10 Touch Tablet Display (GemView 10T) looks and performs like the standard GemView 10 Tablet Display, but it responds to finger touch input in addition to pen input. Follow the installation instructions provided earlier in this manual, then continue below. - Page 17 GemView 10 & 10 Touch Tablet Display User Manual 3. Your PC screen(s) and the GemView 10T screen will turn white and the following message will appear on one of them: 4. Selecting the GemView 10T: a. If the screen on which the message appears is the GemView 10T, touch it with your finger;...
-
Page 18: Troubleshooting
GemView 10 & 10 Touch Tablet Display User Manual Troubleshooting Screen Problems Problems Recommended actions • No picture Check whether USB cables at computer end and screen end are connected properly. • Try to use another USB interface of the computer. -
Page 19: Product Specification
GemView 10 & 10 Touch Tablet Display User Manual Product Specification Screen Display Model 10.1 inch TFT LCD, LED backlight 8H tempered glass; Anti-scratch, anti-glare, and Screen Type anti-fingerprint coating Resolution 1280 x 800 160 cd/m 2 (typical) / 200 cd/m 2 (max.) -
Page 20: Interactive Electromagnetic Pen
GemView 10 & 10 Touch Tablet Display User Manual Interactive Electromagnetic Pen Model Technique Electromagnetic Action Area Full screen Technical Specifications Resolution 5080 LPI (lines per inch) Tracking Velocity 200 PPS (dots per second) Pressure Sensing 2048 Levels Accuracy Rating ±... -
Page 21: Appendix
GemView 10 & 10 Touch Tablet Display User Manual Appendix Replace the Pen Tip If the pen tip is too short or exists the sharp edge, it can be replaced to the back-up tip. Please replace according to the following steps: Pull out the pen tip from electromagnetic pen straightly with tool.
Need help?
Do you have a question about the GemView 10 and is the answer not in the manual?
Questions and answers