
Subscribe to Our Youtube Channel
Related Manuals for CHCNAV LT700H


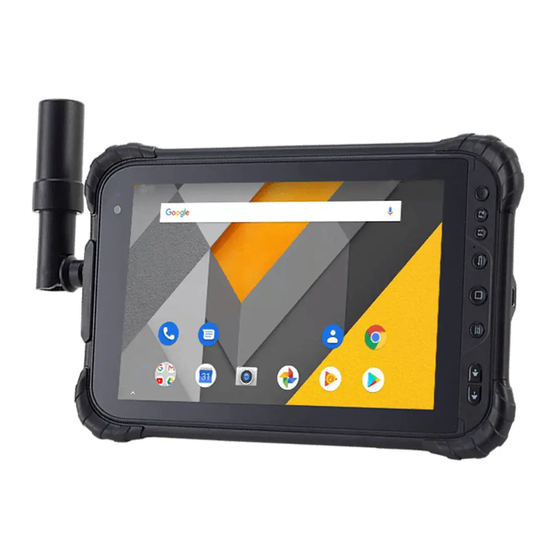
Summary of Contents for CHCNAV LT700H
- Page 1 LT700H RTK ANDROID TABLET User Guide Mapping & Geospatial | October 2019 Make your work more efficient...
-
Page 2: Table Of Contents
3.12 Edit F1/F2 Function Key ................... 25 Getting Start with LandStar 7 ................... 26 4.1 LandStar7 Installation ....................26 4.2 Connect the LT700H to internet ................27 LT700H RTK ANDROID TABLET USER GUIDE | 2019-10 P a g e | 2... - Page 3 Table of Content 4.3 Create a project ......................27 4.4 Connect to the LT700H GNSS Module ............... 32 4.5 CORS / RTK Network Correction Login ..............33 4.6 Survey ........................36 4.7 Sky Plot ........................38 LT700H RTK ANDROID TABLET USER GUIDE...
-
Page 4: Preface
Preface Preface Copyright Copyright 2019 CHCNAV | Shanghai Huace Navigation Technology Ltd. All rights reserved. The CHCNAV and CHC Navigation are trademark of Shanghai Huace Navigation Technology Limited. All other trademarks are the property of their respective owners. Trademarks All product and brand names mentioned in this publication are trademarks of their respective holders. -
Page 5: Ce Interference Statement
Declaration of Conformity: Hereby, Shanghai Huace Navigation Technology Ltd. declares that this LT700H is in compliance with the essential requirements and other relevant provisions of Directive 2014/53/EU. A copy of the Declaration of conformity can be found at Shanghai Huace Navigation Technology Ltd. -
Page 6: Introduction
Your feedback about this Getting Started Guide will help us to improve it in a future revision. Please e-mail your comments to support@chcnav.com. 1.3 Safety Information This manual describes CHCNAV LT700H RTK Tablet. Before using the LT700H, please make sure that you have read and understood this Getting Started Guide, as well as the safety requirements. -
Page 7: Use And Care
CAUTION - A Caution alerts you to a possible risk of serious injury to your person and/or damage to the equipment. 1.5 Use and Care The LT700H is designed to withstand the rough environment that typically occurs in the field. However, the LT700H is high-precision electronic equipment and should be treated with reasonable care. -
Page 8: Overview
2 Overview 2.1 Features LT700H is a high-end GNSS RTK tablet under Android 8.1 OS. Its dust and waterproof level is IP67 and it can survive 1.5 m fall onto concrete. With 8000 mAh Li-ion battery, it can continuously work up to 12 h. The LT700H tracks GPS + GLONASS + GALILEO + BEIDOU (for details refer to 3.10.2 Select the Constellation Combination.) -
Page 9: Specifications
Storage temperature: -30 °C to +70 °C Sensors ▪ NFC: Support ▪ G-sensor: Support ▪ Light sensor: Support ▪ Distance sensor: Support ▪ E-compass: Support ▪ Gyroscope: Support LT700H RTK ANDROID TABLET USER GUIDE | 2019-10 P a g e | 9... -
Page 10: Front View
Power on: Press the button for 1-2 seconds, the Power Indicator will turn on and the boot screen will appear. The LT700H will enter the operating system after 30 seconds. Power off: Press the button for 1-2 seconds, the [SELECT] dialogue box will pop up, select [Power off] to turn off the device. - Page 11 F1/F2 Function Button This key is a shortcut key to the preset function or menu. USB Type C This interface is used for battery charging and data transmission between LT700H and PC by using a USB cable. Volume button These two buttons are used for increasing / decreasing the volume.
-
Page 12: Back View
Overview 2.4 Back View 2.5 Top GNSS Antenna Connector LT700H RTK ANDROID TABLET USER GUIDE | 2019-10 P a g e | 12... -
Page 13: Bottom
Overview 2.6 Bottom 2.7 Installation SIM Card Slot Micro-SD Card Please insert the SIM card and the MicroSD card in the direction of the diagram. LT700H RTK ANDROID TABLET USER GUIDE | 2019-10 P a g e | 13... -
Page 14: Basic Operation
Refer to 2.7 Installation to find the SIM card and TF card slot, and then insert the cards into slots correctly. Before powering on LT700H, please make sure to fully charge the battery. Then long press the power button to turn on LT700H and enter its home screen. - Page 15 Click to see all the running apps and then you can close them by sliding them right or left. After powering on LT700H, click Settings—Network & Internet—SIM cards to turn on the SIM cards. LT700H RTK ANDROID TABLET USER GUIDE...
-
Page 16: Language & Input
[Add a language] to find the target language. 3.3 Set Date & Time Click [Settings] –[System]- [Date & time] and enter [Date & time] interface. LT700H RTK ANDROID TABLET USER GUIDE | 2019-10 P a g e | 16... -
Page 17: Display
You can also customize your time zone and choose whether to use the 24-hour format in this interface. 3.4 Display Click [Settings] – [Display] to enter Display interface. Click Advanced to view all the options. LT700H RTK ANDROID TABLET USER GUIDE | 2019-10 P a g e | 17... - Page 18 Brightness adjusting: Click Brightness level to adjust it according to your preference. Sleep: Click to optimize the inactivity time LT700H needs to close the screen. Font size: Click Font size to enter Font size interface and then Slide the green dot to change the font size.
-
Page 19: Wi-Fi
Click [Settings] – [Network & Internet] – [Wi-Fi] to switch on the button. After connecting Wi-Fi, the Network info Select Wi-Fi and type in its password to connect. can be checked. LT700H RTK ANDROID TABLET USER GUIDE | 2019-10 P a g e | 19... -
Page 20: Bluetooth
Find nearby devices and pair with it. 3.7 USB Connection For connection or data transmission between LT700H and PC, please use the USB data cable as shown below. Click [Settings] – [System] – [Developer options] – [USB debugging] to make sure this function... - Page 21 After USB data cable connecting with PC, wait until the Allow USB debugging dialogue pops up, and then click OK. You can also use third party software to manage the documents and data stored in LT700H and install software like GNSS Tool into it.
-
Page 22: Use Camera
Make sure that the battery is charged and installed in the receiver. Click to select recording the video or panorama mode. Click to take a photo. Camera Settings Click to configure related parameters. LT700H RTK ANDROID TABLET USER GUIDE | 2019-10 P a g e | 22... -
Page 23: Log In 4G
Then turn on Mobile data and click Data usage to see data usage. 3.10 Location 3.10.1 Turn on The Location Service Click [Settings] – [Security & Location] – [Location] – [On] to switch on location service. LT700H RTK ANDROID TABLET USER GUIDE | 2019-10 P a g e | 23... -
Page 24: Select The Constellation Combination
On the [Location] panel, the choose [Location Mode], and the user can choose the constellation/constellations. For LT700H, there are six options: ALL: The device will use all data to do the positioning. Note that this is the recommended setting to achieve optimal positioning performances. -
Page 25: Checking The Imei Number Of The Device
Basic Operation 3.11 Checking the IMEI Number of The Device Turn the LT700H on and enter the dialing panel, tap ‘*#06#’, the IMEI numbers show up automatically. 3.12 Edit F1/F2 Function Key The F1/F2 Function Key can be edited to launch the APPs in the device. -
Page 26: Getting Start With Landstar 7
Getting Start with LandStar 7 4.1 LandStar7 Installation 1. Open Google Play store and search for LandStar 7 2. Click [Install] and the installation process start; LT700H RTK ANDROID TABLET USER GUIDE | 2019-10 P a g e | 26... -
Page 27: Connect The Lt700H To Internet
Please select Wi-Fi or mobile network to enable Internet to allow a connection to your GNSS RTK Corrections Service provider. 4.3 Create a project (1) Power on the LT700H: Long press the power button for 3-5 seconds. (2) Launch the LandStar 7 software. LT700H RTK ANDROID TABLET USER GUIDE... - Page 28 Getting Start with LandStar 7 (3) Tap [Projects] - [Project] to create or open a project. (4) Tap [New] to create a new project. LT700H RTK ANDROID TABLET USER GUIDE | 2019-10 P a g e | 28...
- Page 29 (5) Input the project name, author and the time zone of working region. (6) Tap [Coordinate System] to choose the coordinate system of the project. (7) Tap [Add] to add pre-define coordinate system in the list. LT700H RTK ANDROID TABLET USER GUIDE | 2019-10 P a g e | 29...
- Page 30 (9) Select the proper coordinate system to use. (10) Tap [Select] to confirm. (11) Selected coordinate system is available in the pre-define list, tap [Select] to confirm. LT700H RTK ANDROID TABLET USER GUIDE | 2019-10 P a g e | 30...
- Page 31 Getting Start with LandStar 7 (12) Check the parameters of the coordinate system and tap [Accept] to confirm. (13) Tap [OK] to finish the project setting. LT700H RTK ANDROID TABLET USER GUIDE | 2019-10 P a g e | 31...
-
Page 32: Connect To The Lt700H Gnss Module
Getting Start with LandStar 7 4.4 Connect to the LT700H GNSS Module (1) Tap [Config] - [Connect]. (2) Select Manufacturer as [CHC], Device Type as [Local], Device Name as [LT700H], Connection Type as [Local]. LT700H RTK ANDROID TABLET USER GUIDE... -
Page 33: Cors / Rtk Network Correction Login
Getting Start with LandStar 7 (3) When connected to the LT700H GNSS, the message “Connected to receiver!” appears. 4.5 CORS / RTK Network Correction Login (1) Tap [Config] - [Work Mode] to create or accept a work mode. LT700H RTK ANDROID TABLET USER GUIDE... - Page 34 (4) Input the username and password of your NTRIP account. Note: If the selected mountpoint does not contain the RTCM 1021 - 1027 messages, leave the related RTCM message setting buttons set to “NO”. LT700H RTK ANDROID TABLET USER GUIDE | 2019-10 P a g e | 34...
- Page 35 Getting Start with LandStar 7 (5) Tap [Save]. (6) Input the name of the new work mode and tap [OK]. LT700H RTK ANDROID TABLET USER GUIDE | 2019-10 P a g e | 35...
-
Page 36: Survey
(9) Click [Ok]. 4.6 Survey (1) Wait until the software shows [RTD], [Float] or [Fix], which means the LT700H is using the GNSS correction data from RTK Network. LT700H RTK ANDROID TABLET USER GUIDE... - Page 37 Getting Start with LandStar 7 (2) Tap the [Survey] - [Map] to start your work. (3) Tap [Survey] icon to collect the points. LT700H RTK ANDROID TABLET USER GUIDE | 2019-10 P a g e | 37...
-
Page 38: Sky Plot
Getting Start with LandStar 7 4.7 Sky Plot Click Sky Plot and see how many satellites (including GPS, GLONASS, BDS, GALILEO and SBAS) the device is currently tracking. LT700H RTK ANDROID TABLET USER GUIDE | 2019-10 P a g e | 38... - Page 39 CHC Navigation Building D, NO. 599 Gaojing Road, Qingpu District, 201702 Shanghai, China Tel: +86 21 542 60 273 | Fax: +86 21 649 50 963 Email: sales@chcnav.com | support@chcnav.com Skype: chcnav_support Website: www.chcnav.com Make your work more efficient...
Need help?
Do you have a question about the LT700H and is the answer not in the manual?
Questions and answers