Table of Contents
Advertisement
Advertisement
Table of Contents

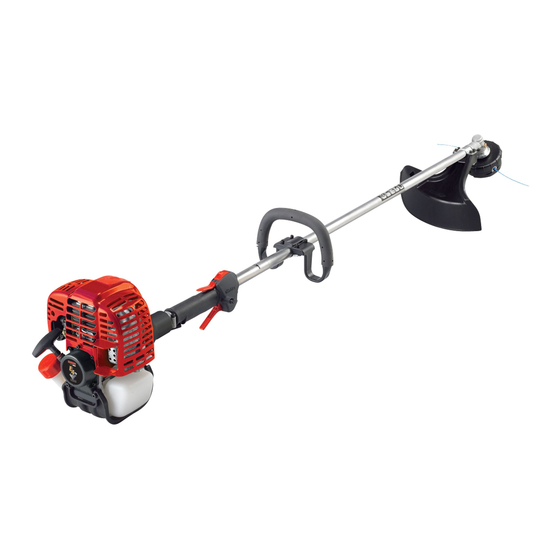
Summary of Contents for Swisher E4-S3000
- Page 1 SWISH ER OWNER'S/OPERATOR'S E4--$3000 FR|MMER Minimize the risk of injury to yourself and others! Read this manual and familiarize contents. when operating MAN UAL E4-$3000 yourself with the Always wear eye and hearing protection this unit. Part Number 81950 Rev.12/07...
-
Page 2: Table Of Contents
As an owner!op- eratoL you'll soon discover for yourself why Swisher is simply in a class by itseli!. The information contained in this owner's/ operator's manual... - Page 3 General Safety Instructions Work Safely Swisher trimmers operate at very high speeds and can do serious damage injury if they are misused or abused. allow a person without la_ainingor insh_uction to operate this unit! lk WARNING! Never make unauthorized attachment installations.
- Page 4 Always make sure the appropriate cutting attachment shield is correctly installed. If contact is made with a hard object, stop the engine and inspect the cutting or bounced attachment for damage. E4-S3000 Safety and Operation Information bels: Make sure all information undamaged and readable.
-
Page 5: Specifications
Federal Category hours (Extended). program-controlled Swisher E4 engine oil meets or exceeds these specifications and is recommended Engine and shaft assembly Cutting attachment Kit containing cutting attachment shield mounting bracket and hardware, this... -
Page 6: Assembly And Adjustments
Assemb|y and Adjustments Handle 1. Position the handle on the outer tube as shown. See Figure 3. 2. Install the mounting bracket with the socket head cap screws. Tighten the screws finger-tight ONLY at this time. 3. Ix)care the handle in the best position for operator comfort (usually about 10 inches ahead of the throttle assembly). - Page 7 Assembly and Adjustments Cutting Attachment Shield Head Cap __ Screw Bracket __-_-i Shim __ Cutting Attachment Retaining Mounting Plate Figure Install the Cutting Attachment 1. Insert the cutting attachment shield between the outer tube and the cutting attachment mounting plate. See Figure 9. It may be necessary to loosen the retaining nut and clamp screw to adjust cutting attach-...
-
Page 8: Install Trimmer Head
Mix only enough fuel for your immediate needs! If fuel must be stored longer than 30 days and Swisher E4 Engine Oil with fuel stabilizer is not used, it should first be treated with a fuel stabilizer such as STA-BIL... -
Page 9: Engine Fuel
Starting Engine WARNING! The cutting attachment rotate when the engine is started! Engine ignition is controlled by a two position switch mounted on the throttle housing labeled, "1" for ON or START and "O" for OFF or STOP. Slide the ignition switch to the "ON"... -
Page 10: Stopping The Engine
Swisher dealer for inspection, ALWAYS make sure the cutting attach- ment is properly installed and firmly tight- ened before operation. NEVER use a cracked or warped cutting attachment: replace it with a serviceable one. -
Page 11: Shoulder Strap
Make sure all hooks and adjustment devices are secure. Cutting GrassmUnits Your Swisher unit may be equipped with one of several Swisher trimmer head mod- els, each with features for specific applica- tions and/or operational requirements. For proper operation,... -
Page 12: Daily Maintenance
AND MAY HAVE A BEARING ON THE OUTCOME OF A WARRANTY CLAIM. Air Filter The E4 engine that powers your Swisher mod- el is a hybrid 4-stroke engine. As a hybrid, the engine is lubricated by oil mixed with the gasoline and air from the carburetor that... -
Page 13: Hour Maintenance
If damage, splitting or deteriora- tion is noted, the unit should be removed from service until it can be inspected or repaired by a Swisher-trained service technician. Grease Gear... - Page 14 Maintenance after first 139-hours, Combustion chamber should be decar- bonized, and the valve clearance should be adjusted. It is highly recommended that this is done by a Swisher-trained service technician. Valve Adjustment 1. Remove cylinder cover, rocker arm cover, and spark plug. Rotate the crankshaft while observing the piston through the spark plug opening.
-
Page 15: Long Term Storage
II Drain all the fuel from the fuel tank. All stored fuels should be stabilized a fuel stabilizer such as STA-BIL Swisher E4 Engine Oil with fuel stabilizer is not used. Speed-Feeff 375 LoadingInstructions PIN 78890-28000 Align Alinear... - Page 16 Troub|eshootin Guide What To Check Does the engine crank? YES 1 I NO Good compression? Does the tank contain fresh fuel of the proper grade? YES Jr Is fuel visible and moving [NO J Check for clogged fuel filter and/or vent. in the return line when priming? Is there spark at the spark...
-
Page 17: Troubleshooting Guide
Troubleshooting Guide Possible Cause Symptom Clogged air filter, Poor acceleration. Clogged fuel filter, Lean fuel/air Idle speed set too low. Switch turned Engine stops abruptly. Fuel tank empty, Clogged fuel filter, Water in the fuel, Shorted Ignition failure. Piston seizure. Ground (stop) wire is disconnected or [Engine difficult to shut off._... - Page 18 NOTES...
- Page 19 NOTES...
-
Page 20: Emission System Warranty
Ignition Coil m Flywheel Rotor 4. Catalytic Converter (if originally equipped) The emission control system for your particular Shindaiwa Corporation engine may also include certain related hoses and connectors. Swisher RO. Box 67 Warrensburg, MO 64093 Statement (Administered by Shindaiwa Corporation)


Need help?
Do you have a question about the E4-S3000 and is the answer not in the manual?
Questions and answers