
Subscribe to Our Youtube Channel
Related Manuals for SportTec 28099


Summary of Contents for SportTec 28099
- Page 1 Bedienungsanleitung Gymna Vibrationsplatte fitvibe medical Art.Nr.: 28099 zum Produkt … Vibrationsplatte zur Kategorie…...
-
Page 2: Table Of Contents
Contents SAFETY INFORMATION ........................9 Electrical Safety ..........................9 Prevention of Explosions ........................9 User Safety .............................9 Environmental Conditions for Transporting and Storing the Unit ...........9 Using the Unit..........................9 Conformity............................9 PARTS AND INSTALLATION ......................10 Parts and Standard Accessories ....................10 Optional "fitvibe" Accessories .......................10 Description of Control Elements and Accessories................10 Delivery Inspections........................11 Mains Voltage ..........................11... -
Page 3: Safety Information
SAFETY INFORMATION 1.1 Electrical Safety This unit may only be used in areas and facilities which comply with the relevant applicable legal regulations. The unit must be fitted with a shockproof (earthed) plug. 1.2 Prevention of Explosions This unit must not be used in areas where flammable gas or vapour may be found. 1.3 User Safety •... -
Page 4: Parts And Installation
PARTS AND INSTALLATION 2.1 Parts and Standard Accessories • Vibration Plate • Handrail, including 4 hexagonal nuts (self-locking), 4 spring washers and 1 socket spanner (SW 17) Control Unit • • Soft Mat • Hand-held remote Switch • Hand Straps (2) •... -
Page 5: Delivery Inspections
2.4 Delivery Inspections On delivery, inspect the unit to make sure that it has not been damaged during transport and that all accessories are intact and complete (see Section 2.1). Inform the supplier immediately in the event of any damage or missing items. Do not use the unit if it has been damaged. 2.5 Mains Voltage Your unit is suitable for use either with a mains voltage of 230 V, 50-60 Hz or 115 V, 50-60 Hz. -
Page 6: System Settings
2.8 System Settings The "fitvibe" unit features a multiplicity of system settings which allow you to finely tune the unit to your own specific requirements. However, when you start the unit for the first time you should take some time to study the pre-programmed settings before making any necessary changes. -
Page 7: Important Information Before Use
IMPORTANT INFORMATION BEFORE USE 3.1 "„When not to use ?“" - Contra indications Before starting vibration training, always make sure that the user does not or could not potentially suffer from any of the contra-indications listed below. If this is the case, do not start vibration training. In case of doubt, always consult expert medical advice from a doctor, specialist or "fitvibe"... -
Page 8: The First "Fitvibe" Training Session
3.4 The First “fitvibe” Training Session For the very first training session, it is important to get used to the plate’s vibrations. One way of doing this is to experience the unit’s vibration at a low frequency such as 20 Hz (over “Make your own” from the main menu this frequency can be selected), first with just one foot on the plate and then with the other foot. -
Page 9: Using Fitvibe
USING FITVIBE 4.1 Introduction The vibrating device “fitvibe” causes mechanical motions in three directions; the major vector is in the vertical direction. The fitvibe unit is extremely easy to use and the operating of the unit is clear and logical. Once you have become familiar with the functions of the various buttons and the rotary/push button, you should have no problems using the fitvibe. -
Page 10: Quick Start
4.2.7 Quick start Pushing the start/stop button allows starting the "fitvibe" immediately without passing the main menu. Therefore you’ll need to push the start/stop button three times. The "fitvibe" will then start at a frequency of 30 Hz. You can change this frequency during the exercise. If you want to change the vibrating settings you can do so after the first push using the rotary button (4.2.1). -
Page 11: Fixed "Training" Programs
4.6 Fixed "Training" Programs When you select the option “Training”, use the rotary/push button (11) to scroll through a number of screens until you come to a fixed training program, which corresponds your own personal training needs and fitness level. When you select the option “Training”... -
Page 12: Fixed "Relaxation" Programs
4.8 Fixed "Relaxation" Programs Relaxation exercises are set in the same way as the training exercise (Section 4.6), with the exception that there is no need to select a level or week number. This is because this information is not relevant for relaxation exercises. -
Page 13: Intensifying And Building Up The Training
4.10 Intensifying and building up the training Building up the training can be done in a variety of ways. The conditions can be gradually intensified by: increasing the frequency parameter of vibration extending the duration of the activity shortening the rest period raising the amplitude from low to high increasing the number of repetitions Increasing the difficulty of an exercise intensifies the exercise and its effects. -
Page 14: The Operation Of The Fitvibe With Chipcards
THE OPERATION OF THE FITVIBE WITH CHIPCARDS If a chip card reader is installed in the fitvibe, this is shown, when the appliance is switched on, by the following icon in the lower right-hand corner of the display window. chip card reader After pressing the combined turning-knob/press-button once, the “Insert Card”... -
Page 15: Operating The Fitvibe Appliance Using The "Timecard
When programming a PIN, it is absolutely essential that one identical PIN is used in the ICS software, in the card charging device and in the fitvibe appliance, respectively. Once a chip card has been programmed with a PIN, either by the ICS-Software or by the card charging device, the chip card PIN can no longer be changed. -
Page 16: Operating The Fitvibe Appliance Fitted With An Ics Chipcard Reader
5.2 Operating the fitvibe appliance fitted with an ICS chipcard reader The ICS chip cards bear the data for the self-designed training or treatment programme to be carried out using the fitvibe appliance. For this purpose, the easyTrain fitvibe software, which has to be installed in the computer, and the fitvibe card writer that goes with it are needed. - Page 17 This false step can be corrected within approx. 3 seconds by using the “Skip back” key to activate the last exercise. After 3 seconds have elapsed, it is no longer possible to activate the last exercise. The entire exercise sequence is thus completed. On removing the ICS chip card from the card reader of the fitvibe appliance, the display screen always returns to the “Insert Card”...
-
Page 18: Faults, Guarantee, Maintenance And Cleaning
FAULTS, GUARANTEE, MAINTENANCE AND CLEANING 6.1 Faults • THE UNIT WILL NOT SWITCH ON. Check and make sure that the mains power is on, that the mains switch is turned on and that the power cable and fuses are o.k. If the fuses have blown, you can change them yourself but you MUST use the same type of fuse. -
Page 19: Technical Data
TECHNICAL DATA The fitvibe unit is designed for Whole Body Vibration (WBV) training. • Frequency: 20 Hz - 60 Hz • Intensity (amplitude): low / high • Active time: 0 - 100 sec • Rest time: 0 - 100 sec •... - Page 20 Inhaltsverzeichnis SICHERHEITSASPEKTE.........................33 Elektrische Sicherheit ........................33 Explosionssicherheit ........................33 Anwendungssicherheit........................33 Klimatische Bedingungen für Transport und Lagerung ..............33 Verwendung des Gerätes ......................33 Konformität............................33 BESTANDTEILE UND MONTAGE....................34 Bestandteile und Standardzubehör des Vibrationsgerätes "fitvibe medical"........34 Optionales Zubehör des Vibrationsgerätes "fitvibe medical"............34 Beschreibung der Bedienelemente und des Zubehörs ..............34 Eingangskontrolle .........................35 Netzspannung..........................35 Das Montieren des Handgriffes an die Vibrationsplatte (Abbildung 1).........35...
-
Page 21: Sicherheitsaspekte
SICHERHEITSASPEKTE 1.1 Elektrische Sicherheit Das Gerät darf nur in Räumen und Einrichtungen verwendet werden, die den geltenden gesetzlichen Vorschriften entsprechen. Schließen Sie das Gerät über eine Schutzkontakt-Steckdose an. 1.2 Explosionssicherheit Das Gerät ist nicht zur Verwendung in Räumen geeignet, in denen sich brennbare Gase oder Dämpfe befinden. -
Page 22: Bestandteile Und Montage
BESTANDTEILE UND MONTAGE 2.1 Bestandteile und Standardzubehör des Vibrationsgerätes "fitvibe medical" • Vibrationsplatte • Handgriff, einschließlich 4 Sechskantmuttern (selbstsichernd), 4 Federscheiben und 1 Steckschlüssel (SW 17) • Bedieneinheit • Soft-Matte • Handschalter • Handbänder, 2 Stück • Fußbänder, 2 Stück •... -
Page 23: Eingangskontrolle
2.4 Eingangskontrolle Kontrollieren Sie, ob das Gerät beim Transport beschädigt wurde und ob das Zubehör intakt und vollständig vorhanden ist (siehe Absatz 2.1). Im Falle einer Beschädigung oder eines Mangels müssen Sie sofort Ihren Lieferanten benachrichtigen. Das Gerät darf im Schadensfall nicht verwendet werden. 2.5 Netzspannung Ihr Gerät ist entweder für eine Netzspannung von 230 V, 50-60 Hz oder 115 V, 50-60 Hz geeignet. -
Page 24: Sprachwahl
Das Systemeinstellungsmenü kann vom Hauptmenü aus erreicht werden, indem Sie die Taste der Systemeinstellungen drücken. Nacheinander können Sie mit dem kombinierten Dreh- und Druckknopf (11) die verschiedenen Menüoptionen auswählen. 2.8.1 Sprachwahl Sie haben die Wahl zwischen mehreren Sprachen. Nach Auswahl der Option Sprache können Sie mit dem Dreh-Druckknopf die gewünschte Sprache einstellen. -
Page 25: Wichtige Information Vor Der Anwendung
WICHTIGE INFORMATION VOR DER ANWENDUNG 3.1 "Nicht zu benutzen bei ?" – Kontraindikationen Bevor Sie mit der Vibrationsbehandlung starten, müssen Sie immer kontrollieren, ob der Benutzer an einer oder mehreren der unten stehenden Kontraindikationen leidet oder leiden könnte. Ist das der Fall, darf nicht mit der Vibrationsbehandlung begonnen werden. -
Page 26: Verwendung Der Soft-Matte
3.3 Verwendung der Soft-Matte Bei Übungen, bei denen man nicht mit den Füßen, sondern sich mit einem anderen Körperteil auf die Platte stützt, wie zum Beispiel mit den Händen oder dem Gesäß, muss man die mitgelieferte Soft-Matte (weiche Matte) auf die Platte legen, bevor man die Ausgangsposition einnimmt. Diese Soft-Matte wird in den Anweisungsabbildungen der Übungen auf dem Display durch eine schwarze Vibrationsplatte dargestellt. -
Page 27: Bedienung
BEDIENUNG 4.1 Einleitung Das Vibrationsgerät "fitvibe medical" erzeugt dreidimensionale mechanische Schwingungen mit dem Hauptvektor in vertikaler Richtung. Nach dem Start der Vibration schwillt die Frequenz, beginnend ab 20 Hz langsam bis zur eingestellten Frequenz an. Am Ende der aktiven Behandlungszeit wird die Frequenz langsam wieder bis 20 Hz abgeschwellt. -
Page 28: Schnellstart Mit Dem Start-Stopp-Schalter
Mit Hilfe einer der drei Start-Stopp-Tasten kann die Vibration von jeder Ausgangsposition aus gestartet und gestoppt werden. 4.2.7 Schnellstart mit dem Start-Stopp-Schalter Mit Hilfe des Start-Stopp-Schalters können Sie im Hauptmenü die Vibration ohne weiteres Auswählen direkt starten. Dafür müssen Sie den Start-Stopp-Schalter dreimal drücken und die Vibration startet mit einer Frequenz von 30 Hz. -
Page 29: Fest-Programme "Behandlung
4.6 Fest-Programme "Behandlung" Wenn Sie die Option Behandlung wählen, werden Sie über eine Anzahl Bildschirme – die Sie mit Hilfe des Dreh- Druckknopfes (11) durchlaufen können – zu einem festen Behandlungsprogramm geführt, welches auf Ihren individuellen Behandlungsbedarf und Ihr spezielles Behandlungsniveau abgestimmt sein sollte. -
Page 30: Fest-Programme "Entspannung
4.8 Fest-Programme "Entspannung" Entspannungsübungen werden ebenso eingestellt, wie das bei den Behandlungsübungen der Fall ist (Absatz 4.6), mit dem Unterschied, dass keine Auswahl des Niveaus und der Wochennummer vorgenommen werden muss, da dies bei den Entspannungsübungen nicht relevant ist. 4.9 Betriebsart "Selbst Übungen wählen" Ein fortgeschrittener Benutzer kann selbst individuelle Übungsparameter einstellen, und zwar über die Option Selbst Übungen wählen. -
Page 31: Erhöhung Der Behandlungsbelastung
4.10 Erhöhung der Behandlungsbelastung Die Erhöhung der Behandlungsbelastung kann auf verschiedene Art und Weise erfolgen. Die Behandlungsbedingungen werden stufenweise durch folgende Schritte verstärkt: Erhöhung der Vibrationsfrequenz Verlängerung der aktiven Zeit Verkürzung der Ruhezeit Erhöhung der Intensität von niedrig (low) nach hoch (high) Zunahme der Anzahl der Wiederholungen Die Erhöhung des Schwierigkeitsgrades der Übung führt auch zu einer Erhöhung der Behandlungsbelastung. -
Page 32: Betrieb Des Fitvibe Medical Mit Chipkarten
BETRIEB DES FITVIBE MEDICAL MIT CHIPKARTEN Wenn im fitvibe ein Chipkartenleser installiert ist, wird dies nach dem Einschalten des Gerätes in der rechten unteren Ecke des Bildschirmes mit dem Zeichen. Chipkartenleser angezeigt. Nach einmaligen Drücken des kombinierten Dreh- und Druckknopf erscheint der "Insert Card“-Bildschirm. Sie werden zum Einstecken der Chipkarte aufgefordert. -
Page 33: Betrieb Des Fitvibe-Gerätes Mit Der Zeitkarte ("Timecard")
Beginnen Sie immer mit der Programmierung der PIN auf den Chipkarten ! Die PIN des fitvibe-Gerätes kann jederzeit an die PIN der Chipkarten angepasst werden. Programmierung der Chipkarten-PIN mit Hilfe der ICS-Software oder im Kartenaufladegerät: - siehe die zur ICS-Software und zum Kartenaufladegerät zugehörigen Gebrauchsanleitungen - PIN-Eingabe oder -Änderung im fitvibe-Gerät: Die PIN-Eingabe/Änderung erfolgt menügeführt über das Display der Bedieneinheit. - Page 34 Dort können Sie zwischen "Training/Behandlung" oder "Nur Zeitkarte" wählen. Wenn auf Ihrer ICS- Chipkarte extra Trainings-/Behandlungszeit programmiert wurde, gelangen Sie nach Wahl von "Nur Zeitkarte" ins Hauptmenü analog zu Pkt.5.1 und weiter zu Pkt. 4 der Gebrauchsanleitung. Der Menüpunkt "Training/Behandlung" zeigt die aktuelle Übungsseriennummer und die Gesamtzahl der auf der ICS-Chipkarte enthaltenen Behandlungsserien an.
-
Page 35: Störungen, Garantie, Wartung Und Reinigung
STÖRUNGEN, GARANTIE, WARTUNG UND REINIGUNG 6.1 Störungen • DAS GERÄT LÄSST SICH NICHT ANSCHALTEN. Kontrollieren Sie, ob die Netzspannung vorhanden ist, der Netzschalter eingeschaltet ist, die Netzanschlussleitung und die Sicherungen in Ordnung sind. Sollten die Sicherungen nicht in Ordnung sein, können Sie diese selbst ersetzen. Sie dürfen dazu jedoch nur denselben Sicherungstyp verwenden, wie auf dem Typenschild angegeben ist. -
Page 36: Technische Daten
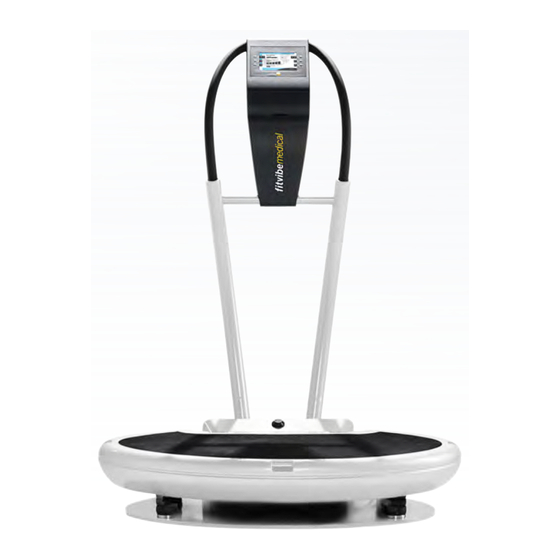
TECHNISCHE DATEN Das Vibrationsgerät "fitvibe medical" ist ein Gerät zur Ganzkörpervibration (Whole Body Vibration - WBV). • Vibrationsfrequenz: 20 Hz – 60 Hz • Intensität (Amplitude): high / low (hoch / niedrig) • Aktive Zeit: 0 – 100 sec • Ruhezeit: 0 –... - Page 37 Vibration plate Fixation points for hand and foot straps Start/Stop button on control panel Handrail support Height-adjustable handrail Control panel Display "System settings / Skip back" button "Back to Main Menu" button 10. "Skip forward” button 11. Combined rotary and push button for navigating menus and selecting parameter settings 12.
- Page 38 1. Vibrationsplatte 2. Befestigungspunkt für Hand- oder Fußband 3. Start-Stopp-Knopf am Pult 4. Handgriff-Halterung 5. Höhenverstellbarer Handgriff 6. Bedieneinheit 7. Display 8. Taste "Systemeinstellungen / Überspringen rückwärts" 9. Taste "Zurück zum Hauptmenü" 10. Taste "Überspringen vorwärts" 11. Kombinierter Dreh- und Druckknopf für Menü-, Parameterwahl und Parameter-Einstellungen 12.
- Page 39 1. Trilplaat 2. Fixatiepunt hand- of voetband 3. Start-stop knop zuil 4. Frame handensteun 5. In hoogte verstelbaar handvat 6. Bedieningszuil 7. Display 8. Toets Systeeminstellingen / Overslaan achterwaarts 9. Toets om terug naar het hoofdmenu te gaan 10. Toets Overslaan voorwaarts 11.
- Page 40 1. Plaque vibrante 2. Point de fixation pour la bande de main ou de pied 3. Bouton marche/arrêt sur le pupitre 4. Support de poignée 5. Poignée réglable en hauteur 6. Unité de commande 7. Affichage 8. Touche « Configuration du système / Retourner » 9.
- Page 41 Figure / Abbilung / Figuur / Figure 1 User Manual fitvibe medical, Version 01/2005 Gebrauchsanweisung fitvibe medical, Version 01/2005 Gebruiksaanwijzing fitvibe medical, Version 01/2005 Mode d’emploi fitvibe medical, Version 01/2005...
- Page 42 Figure / Abbilung / Figuur / Figure 2 User Manual fitvibe medical, Version 01/2005 Gebrauchsanweisung fitvibe medical, Version 01/2005 Gebruiksaanwijzing fitvibe medical, Version 01/2005 Mode d’emploi fitvibe medical, Version 01/2005...
- Page 43 ENGLISH …………………………………………………….. 7 DEUTSCH ……………………………………………………. 27 NIEDERLÄNDISCH …………………………………………. 47 FRANZÖSISCH ……………………………………………… 65...
- Page 44 User Manual m e d i c a l Pro Your local supplier is: fitvibe medical Pro User Manual, Version 01/2004...
- Page 45 Contents SAFETY INFORMATION ........................9 Electrical Safety ..........................9 Prevention of Explosions ........................9 User Safety .............................9 Environmental Conditions for Transporting and Storing the Unit ...........9 Using the Unit..........................9 Conformity............................9 PARTS AND INSTALLATION ......................10 Parts and Standard Accessories ....................10 Optional "fitvibe medical Pro" Accessories ...................10 Description of Control Elements and Accessories................10 Delivery Inspections........................11 Mains Voltage ..........................11...
-
Page 46: Safety Information
1. SAFETY INFORMATION 1.1 Electrical Safety This unit may only be used in areas and facilities which comply with the relevant applicable legal regulations. The unit must be fitted with a shockproof (earthed) plug. 1.2 Prevention of Explosions This unit must not be used in areas where flammable gas or vapor may be found. 1.3 User Safety •... -
Page 47: Parts And Installation
2. PARTS AND INSTALLATION 2.1 Parts and Standard Accessories • Vibration Plate • Handrail, including 4 hexagonal nuts (self-locking), 4 spring washers and 1 socket spanner (SW 17) • Control Unit • Soft Mat • Hand-held remote Switch • Hand Straps (2) •... -
Page 48: Delivery Inspections
2.4 Delivery Inspections On delivery, inspect the unit to make sure that it has not been damaged during transport and that all accessories are intact and complete (see Section 2.1). Inform the supplier immediately in the event of any damage or missing items. Do not use the unit if it has been damaged. 2.5 Mains Voltage Your unit is suitable for use either with a mains voltage of 230 V, 50-60 Hz or 115 V, 50-60 Hz. -
Page 49: Language Selection
2.8.1 Language Selection You can set the display to one of a variety of languages. Select the Language option and use the rotary/push button to select the language you want. 2.8.2 Contrast Use the Contrast option to adjust the contrast of the display. 2.8.3 Key Beep Use this option to turn the key beep on or off. -
Page 50: Important Information Before Use
3. IMPORTANT INFORMATION BEFORE USE 3.1 „Contra-Indications“ Before starting vibration treatment, always make sure that the user does not or could not potentially suffer from any of the contra-indications listed below. If this is the case, do not start vibration treatment. In case of doubt, always consult expert medical advice from a doctor, specialist or physiotherapist. -
Page 51: The First "Fitvibe Medical Pro" Treatment Session
3.4 The First “fitvibe medical Pro” Treatment Session For the very first treatment, it is important to get used to the plate’s vibrations. One way of doing this is to experience the unit’s vibration at a low frequency such as 20 Hz (over “Quick start” from the main menu this frequency can be selected), first with just one foot on the plate and then with the other foot. -
Page 52: Using "Fitvibe Medical Pro
4. USING "FITVIBE MEDICAL PRO" 4.1 Introduction The vibrating device “fitvibe medical Pro” causes mechanical motions in three directions; the major vector is in the vertical direction. After starting the machine, frequency will fade up from 20Hz to the fixed frequency. -
Page 53: The "Fitvibe Medical Pro" Control Buttons
The end of this manual contains a fold-out diagram of the unit. The numbers used in the following sections correspond to those in the diagram. 4.2 The “fitvibe medical Pro” Control Buttons 4.2.1 The Combined Rotary/Push Button The rotary/push button (11) on the control panel is used to control the majority of “fitvibe medical Pro s’ functions. -
Page 54: Using The Hand And Foot Straps
4.4 Using the Hand and Foot Straps Straps can be used to transfer the vibration to particular parts of the body, such as the hamstrings. The vibrations are transmitted via the non-elastic straps to the body parts concerned. Depending on the particular exercise they are fastened to the fixation points (2) on the vibration plate . -
Page 55: Program Structure
4.6 Program structure From the MAIN MENU, the above described schedule can be followed using the rotary (11) in order to arrive at a fixed treatment schedule, adapted at your preferences an level. After the main menu the following screens may appear before arriving in the treatment schedule. •... -
Page 56: The Exercise Screen
4.7 The Exercise Screen Rolling Number / Total Number of Exercises Screen Title Number of Relevant Exercise The parameters which Graphical Illustration of are set for the exercise the Initial Position are displayed on the right for this Exercise side of the screen Line for Displaying Messages and Instructions Instructions relating to... -
Page 57: Fitvibe Smart Card System
Increasing the difficulty of an exercise intensifies the exercise and its effects. This can be done in a variety of ways: - more difficult starting position, - progressing from static to dynamic exercises, - performing the dynamic exercises more rapidly, - increasing the stretching of the muscles. - Page 58 PIN input or change in the fitvibe apparatus: The PIN input/change is made via the menu in the display of the control unit. You get to the menu "PIN input" by quickly pressing the following keys one after the other: Step 1 Press the key "Back to main menu"...
-
Page 59: Faults, Guarantee, Maintenance And Cleaning
5. FAULTS, GUARANTEE, MAINTENANCE AND CLEANING 5.1 Faults • THE UNIT WILL NOT SWITCH ON. Check and make sure that the mains power is on, that the mains switch is turned on and that the power cable and fuses are o.k. If the fuses have blown, you can change them yourself but you MUST use the same type of fuse. -
Page 60: Technical Data
6. TECHNICAL DATA The "fitvibe medical Pro" unit is designed for Whole Body Vibration (WBV) treatment. • Frequency: 20 – 60 Hz • Intensity (amplitude): low / high • Active time: 0 - 100 sec • Rest time: 0 –100 sec •... - Page 61 Sport-Tec Physio & Fitness Lemberger Straße Pirmasens D-66955 Tel.: 0 63 31/14 80-0 Fax: 0 63 31/14 80-220 info@sport-tec.de www.sport-tec.de...
Need help?
Do you have a question about the 28099 and is the answer not in the manual?
Questions and answers