Table of Contents
Advertisement
Quick Links
Advertisement
Table of Contents

Related Manuals for Avtex L270DRS


Summary of Contents for Avtex L270DRS
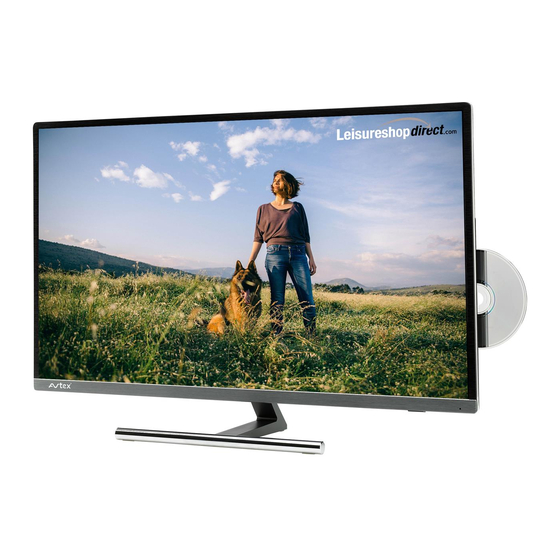
- Page 1 Model: L270DRS...
-
Page 2: Table Of Contents
Contents Viewing Recordings Introduction Pause Live TV Safety is important Digital text In the box Analogue teletext Safety information Common Interface Slot Electrical information HDMI/AV setup Instruction Battery safety guidelines DVD Operation Safety warnings Disc playback mode Parts identification JPEG file playing Front , side and above view DVD function settings Rear view... -
Page 3: In The Box
AVTEX TV Power cord 12 Volt DC lead... -
Page 5: Instruction
Instruction This equipment has been designed and manufactured to DON’T remove any fixed cover as this may expose meet international safety standards but, like any electrical dangerous voltages. equipment, care must be taken if you are to obtain the best DON’T obstr uct the ventilation openings of the equipment results and safety is to be assured. -
Page 6: Battery Safety Guidelines
Battery safety guidelines Used correctly, domestic batteries are a safe and dependable source of portable power. Problems can occur if they are misused or abused- resulting in leakage or, in extreme cases, fire or explosion. Here are some simple guidelines to safe battery use designed to eliminate any such problems. Take care to fi... -
Page 7: Safety Warnings
Safety warnings Use in a vehicle Note Moisture For use only when vehicle is Stationar y. • To reduce the risk of fire, electric shock or product damage, do not expose this unit to rain, moisture, • Read all the instructions carefully before using the unit dripping or splashing. - Page 8 Safety warnings Batteries • Batteries used in the remote control for this unit are easily swallowed by young children and this is dangerous. • Keep loose batteries away from young children and make sure that the battery holder tray is secure in the remote control.
-
Page 9: Parts Identification
Parts identification Front, side and above views Standby LED & Remote control sensor HDMI 1 Coaxial HDMI 2 12V/24V (ARC) PCMCIA card slot for external Conditional Access (C A) modules 2 USB jack 3 12V/24V DC input terminal 4 HDMI 1/HDMI 2 in socket. Refer to HDMI lead on p.13, p.21, p.22. , 5 Coaxial audio out 6 AV input 7 Headphone output terminal... -
Page 10: Rear View
Parts identification Disk in/out door 1. Power on/ OK Press to turn on TV. When TV is on press and hold (more than 2 seconds) to activate on-screen E-dial menu. 2. Vol -/ Menu Decrease volume. When on-screen E-dial menu is activate, choose to access OSD menu. -
Page 11: Remote Control
Parts identification Remote control When using the remote control, aim it towards the remote control sensor on the TV. "The function of some buttons will vary depending on the source being used digital TV(DTV) 1. Standby Switches the TV to standby. 2. -
Page 12: Installing The Batteries
Remote control... -
Page 13: Connecting The Tv
Operating the TV Connecting the aerial Connecting external devices The Quick Start guide shows the simplest and most Warning! Make sure the TV and all ancillary equipment are unplugged from the mains effective way of connecting to external devices. These before making any connections and alternate methods are listed below. -
Page 14: Operating The Tv
Operating the TV Switching on Tune Type Note: Unless otherwise stated, all references to buttons Scan Mode Network Scan Net work ID Auto refer to the remote control. Frequency Auto I Press the power switch on the left hand side of the TV Symbol(ks/s) Auto 2. -
Page 15: Tuning In Satellite Tv
Operating the TV Tuning in satellite TV For convenience your 270DRS Comes with a default channel list from first switch on, you are able to Press MENU and select Channel, highlight Auto Tuning edit and sor t this list to your own personal preference. If and press OK. -
Page 16: Frequently Asked Questions
Frequently Asked Questions For satellite setup... -
Page 17: Basic Operation
Operating the TV Basic operation Source selection TV channel selection Press the Source button to display the source menu.The following sources are available: CH /CH Press the buttons or use the Numeric buttons on the remote control to select a channel you require. Return Press the button to swap between the channel you are... -
Page 18: Favourite
Operating the TV Favourite(Digital TV only) Information You can enter the Favourite menu while watching a channel You can view the programme information for the channel you are watching by pressing the Info button. The following menu by pressing the button.The following menu will appear on is a typical example of the programme details that will be the screen:... -
Page 19: Menus
Operating the TV Tint - Allows you to increase or decrease the level of tint of the picture (only NTSC signal) Menus Colour Temperature - Allows you to change the colour tones of the screen.You can choose from the following The menus allow you to adjust and control the TV. -
Page 20: Channel Set U P
Operating the TV Programme Edit Channel Setup(Digital TV only) Press the PAGE+ PAGE- buttons to select a channel. This menu allows you to adjust the channels and the channel You can do the following to a Digital channel using the settings. -
Page 21: Tv Option
Change Password - Allows you to change the password: TV Options Note: The default password is 0000. 1.Enter the new password. This menu allows you to change the general settings for digital 2.Re-enter the new password to confirm it. The password is TV.The following options are available: now changed. -
Page 22: Time
Operating the TV HDMI CEC Function settings This menu allows you to change the following functions: HDMI CEC - Connect an ARC compatible sound system to the HDM12 and set the settings as below to use TV remote control to control volume and standby operation. Auto Standby - Allows you to select On/Off Auto TV on - Allows you to select On/Off Device control - Allows you to reset all TV settings back to the... -
Page 23: Electronic Programme Guide
Operating the TV Electronic Programme Guide The Electronic Programme Guide displays information about current and future programmes for the highlighted channel. To stop the recording at any time, press the STOP button on Guide Press the button to display the Electronic Programme the remote control. -
Page 24: Viewing Recordings
Operating the TV Viewing Recordings Pause Live TV To view any recorded programmes, press the List button To pause live TV, press the Time Shift button, the on the remote. (Depending on file size there can be a small programme will stop. To continue watching press the Play button and the programme will resume. -
Page 25: Analogue Teletext
Operating the TV Subtitle 1. To display subtitles while watching video , press Text button and go to page 888. The picture will be displayed and provided with subtitles, these will appear at the bottom of the screen. Text 2. Press the button to exit text mode. -
Page 26: Common Interface Slot
Operating the TV Common Interface Slot 3.Select the relevant digital channel 4.Detailed information on the Smart card in use is displayed. The Common Interface (Cl) slot is designed to accept the 5.Press the button to access the card menu.Refer to the Conditional Access Module (CAM) and Smart card in order to module instruction manual for setting details. -
Page 27: Pvr
Operating the TV Insert USB or HDD. Then enter SELECT DISK Operating the TV. If using a USB device, default disk name is DISK C: To format your memory device and create a PVR file, press If using a HDD, and HDD has two or more partitions, the system allows you to select C:/D: disk and so on by the MENU key on the remote . - Page 28 Operating the TV 3. FORMATTING File System Size PVR File System Type FAT32 PVR File System Size SETUP if you want to format disk, Please note all data will be lost. select star t to format, during formating, do not power off the TV, select EXIT cancel.
-
Page 29: Dvd
DVD Operation Compatible Disc Types Types Sizes Recorded Contents 12cm CD-DA: Digital audio 12cm VIDEO CD : Compressed digital audio+compressed digital video (dynamic picture) 12cm SVCD: Compressed digital audio+compressed digital video (dynamic picture) 12cm DVD: Compressed digital audio+compressed digital video (dynamic picture) NOTES Issues related to... -
Page 30: Disc Playback Mode
Disc playback mode STANDBY Disc playback 1. Press the button to turn on the device. 2. Press the button. EJECT The disc will be ejected.With label side facing away from you. 3. Press the button again to retract the disc. 4. - Page 31 Disc playback mode Disc playback mode I .Press the button during the playback to the stop the playback. PLAY 2.Press the button to start frame-by-frame playback. 3.Press the button again to resume to the playback. NOTE • The frame-by-frame playback function is only valid when playing DVD-discs. Information INFO Press the INFO button.
- Page 32 Disc playback mode PBC function 1..2..Use the PBC function for playing SVCD, VCD2.0 discs with PBC function enabled. 1. TV screen main menu: 1..2..Press the numeric button for selection. For example choose the main menu no I. 1.
- Page 33 Disc playback mode Language/audio channel selection Press the AUDIO button. You may select the desired language if you play a DVD or SVCD disc supporting multiple languages. DVD disc: Audio 1/2: English Audio 2/2: Russian AUDIO 1 AUDIO 2 SVCDdisc: AUDIO AUDIO 3 AUDIO 4...
- Page 34 Fast playback mode Fast playback You may fast forward or reverse to search for a certain point during playback. I . Press the button to start forward playback.Each time you press the button you switch the playback speed of DVD, SVCD, VCD, in the following sequence: 2.
-
Page 35: Jpeg File Playing
JPEG file playing JPEG(Joint Photographic Experts Group) is the most widely used picture compression and storage format today. Utilizing a high efficiency compression algorithm, JPEG compresses the original picture I5 to 20 times with excellent picture quality. JPEG is featuring small size data, convenient application and supported by most picture processing software, SO it is very fit to store photos. -
Page 36: Dvd Function Settings
DVD function settings General Audio Preference You may select TV Display, Screen, Saver, Downmix and OSD Lang. General Setup Page TV display: this is used to set the output picture ratio of this unit. TV Display Wide 4:3 Panscan Optional settings: 4:3/PS, 4:3/LB, 16:9; Default: 16:9 Ÿ... - Page 37 DVD function settings NOTE ● Audio, subtitle and disc menu language are only applicable to DVD disc. ● If the disc is not recorded with the language you selects, the unit will apply the language that the disc is recorded in. ●...
-
Page 38: Usb Operation
USB operation Usage of USB device USB refers to Universal Serial Bus. Most of USB devices on the market are USB2.0. Here are some common types of USB 2.0 devices: Monitors, Communication devices, Audio Human Input Device(HID), Mass storage drives etc. Most flash memory, USB HDD etc. -
Page 39: Troubleshooting
TROUBLESHOOTING To assist in locating possible faults use the help guide below. Troubleshooting No picture, no sound Check that TV is correctly plugged in. Check the TV is connected to a suitable power source. Check the electrical supply is turned on. Ensure that the TV is turned on. -
Page 40: Care And Maintenance
Guarantee Your AVTEX television is covered by a 3 year parts and labour guarantee.This means that if the television develops a fault during the guarantee period we arrange a repair free of charge.Your original receipt acts as your guarantee so please... -
Page 41: Specifications
Specifications of the TV that you have just purchased may vary from the information in this table due to technical innovations. Type: LED panel Panel Size: 27" Display size (mm): 597.6(H) x336.15(V) Pixel pitch (um): 311.25(H) x 311.25(V) Response time (ms): 12ms Brightness (cd/m2): Contrast ratio:... - Page 42 Features • Full HD • Electronic Programme Guide (EPG) • Two HDMI sockets • Wide Viewing Angle • DVD Combination • USB Interface • PVR record function Model: L270DRS...
Need help?
Do you have a question about the L270DRS and is the answer not in the manual?
Questions and answers