
Related Manuals for Sonardyne 6G ROVNAV 6


Summary of Contents for Sonardyne 6G ROVNAV 6
-
Page 1: Installation Guide
QUICK START GUIDE ROVNAV 6 INSTALLATION GUIDE To access more information on the ROVNav 6, download a QSG-IG-8310-A1 free QR code app on 08/2013 your Smartphone and then scan this code. 910-0003... - Page 2 Email: support@sonardyne.com Tel: +44 (0) 1252 872288 In emergency situations, the Sonardyne 24 hour helpline is answered during normal office hours - 08:00-17:00. Outside these hours, your call is automatically transferred to an agency who will log the details of your emergency and alert the appropriate Sonardyne personnel.
-
Page 3: Equipment Supplied
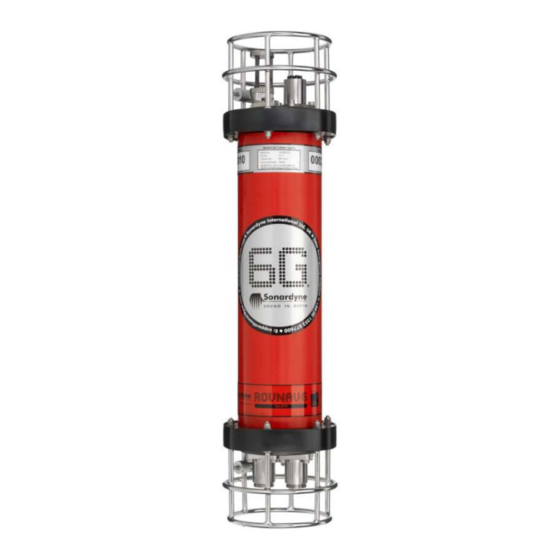
STEP 2 EQUIPMENT SUPPLIED 5 4 metre Remote Transducer Link Cable (31 1 Transportation case 8044) 2 ROVNav 6 6G Instrument Test Box (620-0187) - not 3 Remote Transducer shown 4 5 metres TCVR Power/Comms Dummy Plug (312-6005) - not shown Cable (312-8017) CD-ROMS (920-0000 and 920-2000) Drivers are required to enable operation of the Test Box. -
Page 4: Pre-Installation Checks
STEP 3 PRE-INSTALLATION CHECKS Before installation, it is recommended the ROVNav 6 is checked for operation. Check the Pressure Relief Vent Valve is flush with the end-cap. If the valve is found to be protruding refer to the ROVNav 6 User Manual UM-8310 for instructions on releasing the internal pressure. - Page 5 STEP 4 PRE-INSTALLATION CHECKS Remove the protective cover from the TCVR Comms & Power 8-Way AGP Male connection on the Remote End-cap and connect the 6G Instrument Test Box (Type 8300-066). Using a USB connection , connect the Test Box to a PC.
- Page 6 STEP 5 PRE-INSTALLATION CHECKS ACOUSTIC CHECK USING 6G TERMINAL LITE Carry out the acoustic check before installing the ROVNav 6 onto an ROV. Open the 6G Terminal Lite software by doubling clicking on the desktop icon. Click Connect. In the Select Port window select the correct port the PC is connected to and the Baud Rate from the drop down menu.
- Page 7 If the Range Test is unsuccessful Fail will appear next to the Range Test button. If Fail appears it is recommended the transceiver and attached device are moved and then the Range Test repeated. If the Range Test continues to fail contact the Sonardyne Support Team for assistance.
- Page 8 STEP 7 PRE-INSTALLATION CHECKS SENSOR CHECK USING 6G TERMINAL LITE SOFTWARE To carry out a check of the ROVNav 6 sensors proceed as follows: In the 6G Setup tab, click Check to perform a test of all sensors installed in the transceiver.
- Page 9 STEP 8 PRE-INSTALLATION CHECKS SENSOR CHECK USING 6G TERMINAL LITE SOFTWARE If all information has been gathered successfully Pass will appear. NOTE The inclination values refer to the roll then pitch in degrees. On completion of all tests to electrically disconnect the battery click Disconnect on the 6G Setup tab.
-
Page 10: Installing The Equipment
STEP 9 INSTALLING THE EQUIPMENT INSTALLING THE ROVNAV 6 AND REMOTE TRANSDUCER ONTO AN ROV Make sure the ROVNav 6 is acoustically and electrically isolated from the ROV body. The Remote Transducer Cable (312-8044) is limited to 4 metres in length. Position the Remote Transducer so it is no more than 4 metres and has a clear line-of-sight view of the target transponder. - Page 11 STEP 10 INSTALLING THE EQUIPMENT INSTALLING THE ROVNAV 6 AND REMOTE TRANSDUCER ONTO AN ROV Locate the Remote Transducer 4-Way AGP Cable (312-8044) onto the ROV, and secure in place. Make sure the cable will not become trapped when the ram is retracted.
- Page 12 STEP 11 INSTALLING THE EQUIPMENT INSTALLING THE ROVNAV 6 AND REMOTE TRANSDUCER ONTO AN ROV Position the ROVNav 6 onto the ROV so the Remote Transducer 4-Way AGP Cable (312-8044) can easily be connected to it. Secure the ROVNav 6 place.
- Page 13 ROV Mux the control room. NOTE It should be noted the ROVNav 6 does not require a Sonardyne Navigation Sensor Hub (NSH) or Surface Interface Unit (SIU) as it will often be powered by the ROV and serial communications will be multiplexed through the ROV umbilical.
- Page 15 Remove the connecting cables. Pack all components into the transportation container and store in a dry secure area. NOTE Battery reconnection will require an external power supply to initially power the unit. For further information on the ROVNav 6 go to: http://www.sonardyne.com/products/all-products/instruments/730-rovnav- 6.html.
- Page 16 T. +55 22 2123 4950 T. +65 6542 1911 T. +44 (0) 1252 872288 F. +55 22 2123 4951 F. +65 6542 6937 F. +44 (0) 1252 876100 sales@sonardyne.com brasil.sales@sonardyne.com asia.sales@sonardyne.com Houston, USA Aberdeen, UK 24/7 Emergency Hotline T. +1 281 890 2120 T.
Need help?
Do you have a question about the 6G ROVNAV 6 and is the answer not in the manual?
Questions and answers