Table of Contents
Advertisement
Advertisement
Table of Contents

Summary of Contents for Sunfire SRS210W-B
-
Page 1: Installation Instructions
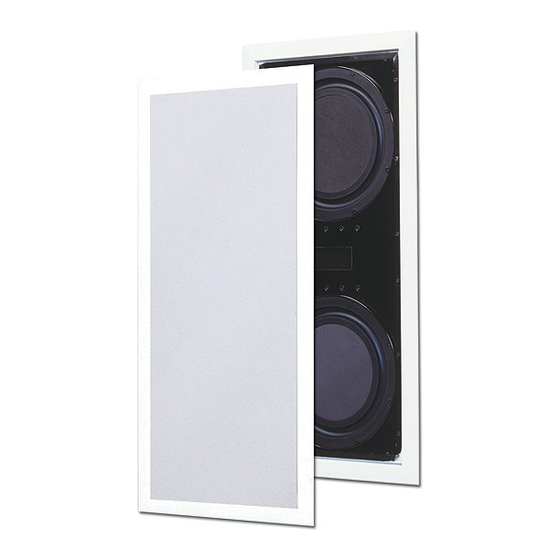
SRS–210W-C Cabinet SRS–210W-B Baffle SRS–210W-G Grille Installation Instructions... -
Page 2: Important Safety Instructions
10. Installation should only be performed by qualified and experienced professional installers. Refer to your Sunfire dealer. WARNING:THIS SUBWOOFER SYSTEM IS CAPABLE OF PRODUCING VERY HIGH SOUND PRESSURE LEVELS. YOU MUST TAKE EVERY PRECAUTION TO PROTECT YOUR HEARING FROM PERMANENT DAMAGE. -
Page 3: Table Of Contents
Framing ... 9 Cabinet installation ... 10 Wiring ... 11 Final rough-in ... 12 Horizontal mounting ... 14 Baffle installation ... 16 Grille installation ... 18 For more information on this and other Sunfire products, please visit our website: www.sunfire.com User's Manual... -
Page 4: Introduction
Introduction Thank you for purchasing this Sunfire SubRosa™ Subwoofer. We hope you enjoy it and the music it makes as much as we have enjoyed creating it for you. The breakthrough features of the subwoofer include: • I-BEAM™ anti-shake mechanism to reduce wall vibration •... -
Page 5: Unpacking
Your Sunfire subwoofer should reach you in perfect condition. If you do notice any shipping damage, please contact Sunfire immediately. Make sure that you keep your sales receipt. It is the only way to establish the duration of your Limited Warranty and it may come in useful for insurance purposes. -
Page 6: Dimensions
Dimensions Front View Side View Back View 44.500 in/ 1,130.3 mm 35.590 in/ 904 mm 8.830 in/ 224.3 mm 3.500 in 88.9 mm 26.76 in/ Front Cutout 679.7 mm required in wall to fit woofer assembly 11.784 in/ 299.3 mm User's Manual... -
Page 7: Location
Since your SubRosa subwoofer is de- signed to be professionally installed into your wall, engineering services from your Authorized Sunfire Dealer and/or outside acoustical resources should be consid- ered to ensure optimum performance. The SubRosa amplifier’s Auto EQ... -
Page 8: Using Two Subwoofers
Sunfire preamplifiers and receivers feature multiple subwoofer outputs for these applications. If your preamplifier has a single sub/LFE output, use a Y cable to split it into two outputs. -
Page 9: Framing
Framing Vertical mounting Due to residential construction meth- ods, vertical mounting of the cabinet is recommended. The subwoofer cabinet will fit between 2 x 4 inch studs on 16 inch centers. Horizontal mounting is also possible, but needs additional framing steps. See page 10 for horizontal mounting details. -
Page 10: Cabinet Installation
Cabinet Installation With the help of an assistant to lift the cabinet, check the fit of the cabinet into the framing. Use wood shims if there is any gap between the cabinet sides and the vertical studs. If it makes it easier, you can con- nect the wiring to the cabinet before you secure it in place. -
Page 11: Wiring
Wiring Install the speaker wires following all local codes for electrical wiring installation. Use class 2 wiring, and 12 gauge is recommended, 16 gauge is the minimum. Follow common low voltage practices like avoiding high voltage electrical wiring, or crossing them perpendicularly. -
Page 12: Final Rough-In
Final Rough-in Make sure the debris shield is fitted into the cabinet opening using the plastic push rivets supplied. This will prevent dust and sheetrock debris from entering the cabinet. Debris shield User's Manual... - Page 13 Sheetrock installation Apply glue to the framing surround- ing the cabinet. Also apply glue to the front surface of the cabinet, wherever it will be in contact with the sheetrock. Fit the sheetrock in place with sheetrock screws spaced 4 inches apart.
-
Page 14: Horizontal Mounting
Horizontal mounting In this position, the subwoofer's longest side is horizontal. This may be required for some installations, although it requires more framing work. The procedure for mounting is basically the same as the vertical mounting. The cabinet should be mounted off the floor as shown, to prevent nails from puncturing the cabinet during baseboard installation. - Page 15 With the help of an assistant to lift the cabinet, check the fit into the framing, and use shims if required. Wiring the subwoofer is the same as described previously, except that there is not much room to make the connections to the binding posts.
-
Page 16: Baffle Installation
Woofer baffle installation With the cabinet installed, and all the sheetrock, finishing and decorating done, the woofer baffle can be installed. The woofer baffle assembly consists of the following components already installed: • The baffle, upon which all the com- ponents are assembled •... - Page 17 Baffle installation procedure Remove the debris shield from the front of the in-wall cabinet. You can do this by cutting the cardboard with a sharp knife and pulling out the cardboard pieces and the plas- tic rivets holding it in place. Do not cut the two wires inside the cabinet, and do not remove any sound- proofing material.
-
Page 18: Grille Installation
Grille installation With the woofer baffle installed, and the subwoofer tested, the grille can now be installed. The grille assembly consists of the fol- lowing components: • The grille frame. This screws to the woofer baffle and holds the grille in place. - Page 19 For details regarding the operation of the subwoofer and the automatic equal- ization procedure, please refer to the user's guide that comes with the Sunfire SubRosa amplifier. © 2007 Sunfire Corporation. All rights reserved. Sunfire Corporation reserves the right to improve its products at any time.
- Page 20 SRS–210W-C Cabinet SRS–210W-B Baffle SRS–210W-G Grille Manual 913-142-00 Rev 7...


Need help?
Do you have a question about the SRS210W-B and is the answer not in the manual?
Questions and answers