Table of Contents
Advertisement
Series/Series/Seria
Victorian
, Pilar
& Bellini™
®
®
Write purchased model number here.
Escriba aquí el número del modelo comprado.
Inscrivez le numéro de modèle ici.
You may need/Usted puede necesitar/Articles dont vous pouvez avoir besoin:
For easy installation of your Delta
faucet you will need:
• To READ ALL the instructions completely
before beginning.
• To READ ALL warnings, care, and maintenance
information.
Para instalación fácil de su llave Delta
usted necesitará:
• LEER TODAS las instrucciones completamente
antes de empezar.
• LEER TODOS los avisos, cuidados, e
información de mantenimiento.
Pour installer votre robinet Delta
facilement, vous devez:
• LIRE TOUTES les instructions avant de débuter;
• LIRE TOUS les avertissements ainsi que toutes
les instructions de nettoyage et d'entretien;
To access additonal technical documents & product info, visit www.deltafaucet.com/p/Your-Model-Number-Here
(example: www.deltafaucet.com/p/9159T-DST)
Para acceder a documentos técnicos adicionales e información sobre el producto, visítenos en www.deltafaucet.
com/p/Your-Model-Number-Here (ejemplo: www.deltafaucet.com/p/9159T-DST)
Pour avoir accès à des documents techniques supplémentaires et à de l'information sur le produit, visitez www.delta-
faucet.com/p/Votre-numéro-de-modèle-ci (exemple : www.deltafaucet.com/p/9159T-DST)
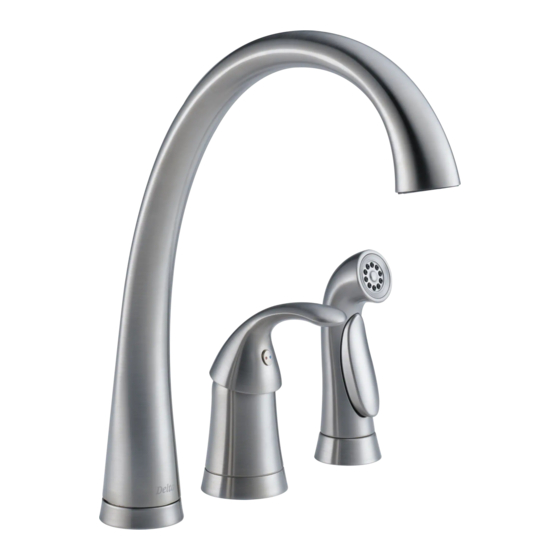
SINGLE LEVER WIDESPREAD
101897
KITCHEN FAUCETS
LLAVE DE AGUA, DE ALCANCE AMPLIO,
DE UNA PALANCA PARA COCINAS
ROBINETS À ENTRAXE LONG À UNE
POIGNÉE POUR ÉVIER DE CUISINE
1
1980-DST
155-sDST
?
www.deltafaucet.com
1-800-345-DELTA (3358)
customerservice@deltafaucet.com
11946-SD-DST
4380-SD-DST
T E FLO N
2/26/2018
Rev. A
Advertisement
Table of Contents

Related Manuals for Delta Pilar Series


Summary of Contents for Delta Pilar Series
- Page 1 Para acceder a documentos técnicos adicionales e información sobre el producto, visítenos en www.deltafaucet. www.deltafaucet.com com/p/Your-Model-Number-Here (ejemplo: www.deltafaucet.com/p/9159T-DST) 1-800-345-DELTA (3358) Pour avoir accès à des documents techniques supplémentaires et à de l’information sur le produit, visitez www.delta- customerservice@deltafaucet.com faucet.com/p/Votre-numéro-de-modèle-ci (exemple : www.deltafaucet.com/p/9159T-DST) 2/26/2018...
- Page 2 Delta ® Esta es la garantía exclusiva por escrito de Delta Faucet Company y la garantía no es transfer- ible. Delta Faucet Company no será responsable por cualquier daño a la llave de agua que resulte del mal uso, abuso, negligencia o mala instalación o mantenimiento o reparación incorrecta, incluy-...
- Page 3 1/8" Maintenance Cleaning and Care If faucet exhibits very low flow: If faucet leaks from spout outlet–SHUT OFF Care should be given to the cleaning of this product. A. Remove aerator (1) with supplied WATER SUPPLIES. Replace valve cartridge (3). Although its finish is extremely durable, it can be wrench (2) and clean , or When reinstalling parts, make sure bonnet nut (5) is...
- Page 4 Front Frente Avant Push valve to back of mounting hole. Empuje la válvula a la parte posterior del orificio de montaje. Poussez la soupape vers l’arrière du trou de montage Spout Installation Valve Installation If you are installing the faucet on a Stainless Steel or a thin sink use RP37490 Stablization Slide the gasket (1) up over tubes of valve assembly (2) Plate NOT SUPPLIED WITH FAUCET.
- Page 5 Slide tube end (1) into adapter (2) and secure with clip (3). Pull moderately on tube to Thread sleeve (1) over bonnet (2) and hand tighten. Place han- ensure connection has been made. dle (3) on stem (4) and secure with set screw (5). Install button (6) into set screw hole.
- Page 6 For Models With A Side Spray Note: If you prefer not to use side sprayer, skip this step and move to page 7. Mount spray support assembly (1) in far right hole in sink. HAND TIGHTEN Pull diverter clip (1) outward until loose; but, do not completely remove. ONLY.
- Page 7 Loop tubing (2) if it created. Delta is not responsible for tubing that is cut l Tubing is cut too short: buy a coupling union and a is too long.
- Page 8 Correct method Incorrect Installation Método Correcto Instalación Incorrecta Installation Incorrecte Bonne méthode Do not install sleeve Ensure cut is straight. upside down. No instale la manga Asegúrese que el corte Custom Fit Connections - Plastic Sleeve Installation Instructions boca abajo. esté...
- Page 9 For Models with Soap Dispenser Remove aerator (1) using supplied wrench (2) and move faucet handle (3) Remove nut (1) and separate head (2) from body (3). Insert body (3) and gasket to the full on mixed position. Turn on hot and cold water supplies (4) and (4) through selected hole in sink.
- Page 10 Setting The Handle Limit Stop (Optional) because it limits the amount of hot water in the mix; however, this handle limit stop This faucet includes an integrated handle limit stop that has two positions. Position 1, to the left, allows full handle motion (the full range between “all cold” to “all hot”). will not always prevent scalding because it does not compensate for incoming The faucet is set in position 1 in the factory.
- Page 11 101897 Rev. A...
- Page 12 101897 Rev. A...
Need help?
Do you have a question about the Pilar Series and is the answer not in the manual?
Questions and answers
Have a Delta Pilar kitchen faucet unit. The handle to turn water on and off doesn’t work, so no water coming out of faucet. What to do?
If the handle of a Delta Pilar kitchen faucet does not turn on the water, follow these steps:
1. Check the Water Supply – Ensure the water supply valves under the sink are fully open.
2. Inspect the Valve Cartridge – A faulty or clogged valve cartridge can prevent water from flowing. Shut off the water supply and replace the valve cartridge if needed.
3. Examine the Aerator – If there is very little or no water flow, remove and clean the aerator to clear any debris.
4. Verify Installation – Ensure all parts, including the bonnet nut and hose connections, are properly installed and tightened.
If the issue persists, professional plumbing service is recommended.
This answer is automatically generated