Gorenje DP7C Instructions For Use Manual
Hide thumbs
Also See for DP7C:
- Quick reference (5 pages) ,
- Manual (7 pages) ,
- Quick start manual (5 pages)
Table of Contents
Advertisement
Advertisement
Table of Contents
Troubleshooting

Related Manuals for Gorenje DP7C


Summary of Contents for Gorenje DP7C
- Page 1 DETAILED INSTRUCTIONS FOR USE OF A DRYER www.gorenje.com...
- Page 2 Life is complicated today. Let's make at least laundry care simple! Your new WaveActive dryer uses innovative technology and the latest achievements in laundry care to help you simplify your daily household chores. The WaveActive technology offers the gentlest care for any garment, with minimum creasing. Moreover, your new dryer is also friendly to the environment as it uses power in the most economical way possible.
-
Page 3: Table Of Contents
TABLE OF CONTENTS IMPORTANT SAFETY INSTRUCTIONS INTRODUCTION 14 DESCRIPTION OF THE DRYER 15 Technical information 16 Control unit PREPARING 18 INSTALLATION AND CONNECTION 20 Selecting the room THE DRYER 23 Adjusting the dryer feet BEFORE FIRST 24 Evacuation of humid air 25 Connecting to the power mains 26 Moving and transport after installation 27 BEFORE USING THE APPLIANCE FOR THE FIRST TIME... -
Page 4: Important Safety Instructions
IMPORTANT SAFETY INSTRUCTIONS SAVE THESE INSTRUCTIONS FOR FUTURE REFERENCE! WARNING – To reduce the risk of fire, electric shock, or injury to persons when using your appliance, follow basic precautions, including the following: 1. Read all instructions before using the appliance. 2. - Page 5 9. Do not use fabric softeners or products to eliminate static unless recommended by the manufacturer of the fabric softener or product. 10. Do not use heat to dry articles containing foam rubber or similarly textured rubber-like materials. 11. Clean lint screen before or after each load. 12.
- Page 6 Follow the instructions for correct installation of the Gorenje dryer and connection to the power mains (see chapter »INSTALLATION AND CONNECTION«).
- Page 7 To avoid danger, a damaged power cord may only be replaced by the manufacturer, a service technician, or an authorized person. After installation, the dryer should stand still for two hours before it is connected to the power mains. At least two persons are required to install the tumble dryer on top of a washing machine.
- Page 8 Always use the ducts or hoses supplied with the dryer. WARNING: As this is an evacuation dryer, it does not have a condensate tank. The handle has solely a decorative purpose and it is fixed; it is not intended for opening. If excessive force is applied, the handle may break.
- Page 9 Make sure the fibres do not accumulate around the dryer. Do not evacuate the air from the dryer through channels or ducts used for appliances or devices that use natural gas or other fuels for their operation. The appliance may not be in contact with a wall or adjacent furniture.
- Page 10 Clean the dryer filter after each drying cycle. If you have removed the filter, replace it before the next drying cycle. WARNING: Do not use any solvents or cleaning agents that could damage the dryer (please observe the recommendations and warnings provided by the manufacturers of the cleaning agents).
- Page 11 CHILD SAFETY Do not allow children to play with the dryer. Prevent your children and pets from entering the dryer drum. Before closing the dryer door and running the programme, make sure there is nothing except laundry in the drum (e.g. if a child climbed into the dryer drum and closed the door from the inside).
- Page 12 WARNING: DANGER OF HOT SURFACE The back of the dryer may get very hot during operation. Wait for the dryer to cool down completely before touching its back side. If you open the dryer door during the drying process, the clothes may be very hot and there is a risk of burning.
- Page 13 The dryer is protected with an automatic switch-off system in case of overheating. This system will switch off the dryer if the temperature is too high. If the net filter is clogged, the overheating automatic switch- off system may be activated. Clean the filter, wait for the dryer to cool down, and try running it again.
-
Page 14: Description Of The Dryer
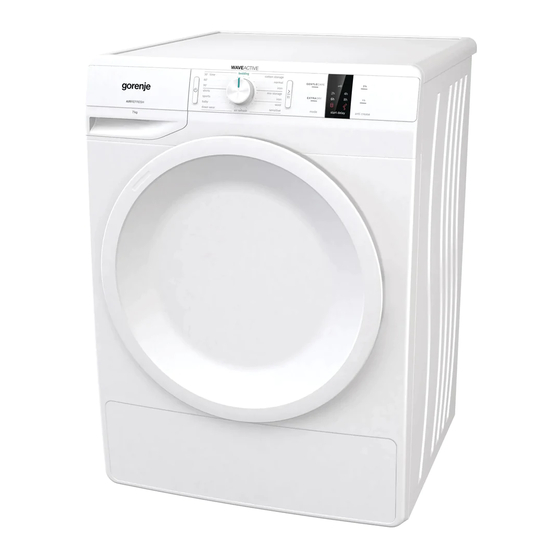
DESCRIPTION OF THE DRYER FRONT On/off button Programme selector knob Start/pause button Control unit Door Net filter Rating plate Air exhaust opening BACK Air exhaust opening Power cord Adjustable feet... -
Page 15: Technical Information
TECHNICAL INFORMATION (DEPENDING ON THE MODEL) Rating plate with basic information about the dryer is fitted on the front wall of the dryer door opening (see chapter »DESCRIPTION OF THE DRYER«). Width 23½" (600 mm) Height 33½" (850 mm) Dryer depth (a) 24½"... -
Page 16: Control Unit
CONTROL UNIT ON/OFF BUTTON PROGRAMME START/PAUSE BUTTON Switching the dryer on and SELECTOR KNOB Use this button to start or off. stop the programme. Upon start-up or during pause, the button light will flash; when the programme is started and in progress, it will be lit continuously. - Page 17 MODE (DRYING MODE) CLEAN THE FILTER ANTI CREASE symbol lighting 8a Anti crease time 4a EXTRADRY indicator light 4b GENTLECARE (LOWER TEMPERATURE) CHILD LOCK symbol lighting Press the positions 4+8 and START DELAY hold them for 3 seconds. Option to set a start delay...
-
Page 18: Installation And Connection
INSTALLATION AND CONNECTION WARNING: Install the clothes dryer according to the manufacturer’s instructions and local codes. WARNING: Clothes dryer installation must be performed by a qualified installer. WARNING: To reduce the risk of severe injury or death, follow all installation instructions. WARNING: Save these instructions. - Page 19 WARNING: • The appliance shall not be exhausted into a chimney, a wall, a ceiling, an attic, a crawl space, or a concealed space of a building; • Only rigid or flexible metal duct shall be used for exhausting; • In CANADA foil-type flexible ducts that comply with the UL 2158A, shall be used;...
-
Page 20: Selecting The Room
SELECTING THE ROOM 4" (10 cm) 2" (5 cm) 4" (10 cm) The dryer may not be in contact with a wall or adjacent furniture. For optimum dryer operation, we recommend observing the clearance from the walls as indicated in the figure. In case of failure to heed the required minimum clearance, the dryer may overheat. - Page 21 DRYER PLACEMENT If you also have a Gorenje dryer of corresponding (same) dimensions, it can be placed on top of the Gorenje washing machine; in this case, vacuum feet must be used. Alternatively, the dryer can be placed next to the washing machine (figures 1 and 3).
- Page 22 Do not place the dryer behind lockable or sliding door, or door with a hinge on the opposite side of the dryer door hinge. Install the dryer in such way that the door can always be freely opened. Do not place the dryer on a carpet with long fibres as this may impede air circulation.
-
Page 23: Adjusting The Dryer Feet
ADJUSTING THE DRYER FEET Level the dryer in longitudinal and traverse direction by rotating the adjustable feet which allow levelling by +/- ½" (+/- 1 cm). Use a spirit level and spanner No. 22. Floor on which the dryer is placed must have a concrete base. It should be clean and dry; otherwise, the dryer may slide. -
Page 24: Evacuation Of Humid Air
EVACUATION OF HUMID AIR The dryer has two humid air exhaust openings (options a/b). Close one of them with a cap and connect the air exhaust duct to the other one. The distance between the dryer and the air evacuation opening (ventilation opening, window) may not exceed 2 metres. -
Page 25: Connecting To The Power Mains
CONNECTING TO THE POWER MAINS After installation, the dryer should stand still for two hours before it is connected to the power mains; this allows the dryer to stabilize. This appliance must be grounded. In the event of malfunction or breakdown, grounding will reduce the risk of electric shock by providing a path of least resistance for electric current. -
Page 26: Moving And Transport After Installation
MOVING AND TRANSPORT AFTER INSTALLATION After every drying cycle, a small amount of condensed water will remain in the dryer. Switch on the dryer and choose one of the programmes, then let the appliance operate for approximately half a minute. This will pump out the remaining water and prevent damage to the dryer during transport. After transport, the dryer should be left to stand still for at least two hours before it is connected to the power mains. -
Page 27: Before Using The Appliance For The First Time
BEFORE USING THE APPLIANCE FOR THE FIRST TIME Make sure the dryer is disconnected from the power mains; then, open the door by pulling the left side of the door towards you (figures 1 and 2). Before using the dryer for the first time, clean the dryer drum using a soft damp cotton cloth and water (figure 3). -
Page 28: Drying Process, Step By Step
DRYING PROCESS, STEP BY STEP (1 - 6) STEP 1: HEED THE LABELS ON THE LAUNDRY Normal wash; Max. washing Max. washing Max. washing Hand wash Do not Sensitive laundry temperature temperature temperature only wash EXTRA HOT WARM COLD Bleaching Bleaching in cool water Bleaching not allowed Dry cleaning... -
Page 29: Step 2: Preparing For The Laundry Drying Process
STEP 2: PREPARING FOR THE LAUNDRY DRYING PROCESS Sort the laundry by type and thickness of the fabric (see PROGRAMME TABLE). Close the buttons and zips, tie any ribbons, and turn the pockets inside out. Place very sensitive clothes in a special-purpose laundry bag. (The special-purpose laundry bag is available as an optional accessory.) Drying laundry made of particularly delicate fabrics that may be deformed is not recommended. - Page 30 DRYING IN A BASKET (DEPENDING ON THE MODEL) Before the first drying cycle, remove the basket and all packaging from the drum. Laundry may only be dried in the basket when using the timed drying programme. (The basket is available for purchase as an optional accessory at the service centre.) Open the dryer door and insert the laundry.
- Page 31 SWITCHING ON THE DRYER Connect the dryer to the power mains by plugging in the power cord. Press the (1) ON/OFF button to switch on the dryer (figures 1 and 2).
- Page 32 LOADING THE DRYER Open the dryer door by pulling the left side of the door towards you (figure 1). Insert the laundry into the drum (after making sure the drum is empty) (figure 2). Close the dryer door (figure 3). Do not insert laundry into the dryer if it has not been wrung or spun (recommended minimum spinning cycle: 800 rpm).
-
Page 33: Step 3: Choosing The Drying Programme
STEP 3: CHOOSING THE DRYING PROGRAMME Choose the programme by rotating the programme selector knob (2) to the left or to the right (depending on the type of laundry and the desired level of dryness). See PROGRAMME TABLE. The programme selector knob (2) will not rotate automatically during operation. - Page 34 PROGRAMME TABLE Programme Max. Programme description Dryness levels load Cotton Storage 15,4 lb Use this programme for thicker non-sensitive cotton (Cupboard dry) (7 kg) laundry. After drying, it will be dry and ready to be stored in the cupboard. Normal * 15,4 lb Use this programme for thicker non-sensitive cotton (7 kg)
- Page 35 Programme Max. Programme description Dryness levels load Time 8,8 lb Use this programme for non-sensitive laundry that is (Timed drying program) (4 kg) still slightly moist and has to be thoroughly dried. In the 90´ time programme, remaining moisture is not detected 60´...
-
Page 36: Step 4: Drying Mode And Extra Functions
STEP 4: DRYING MODE AND EXTRA FUNCTIONS Adjust the settings by pressing the relevant function button (before pressing the (3) START/PAUSE button). Functions that can be changed or adjusted with the selected drying programme are partly lit (dimmed). Certain settings cannot be selected with some programmes. Such settings will not be lit, and the button will flash when pressed (see FUNCTION TABLE). - Page 37 GENTLECARE (LOWER TEMPERATURE) For delicate laundry. Lower temperature depends on the programme for which the function was selected. This setting can be adjusted before the start of the drying process. After the drying programme, this setting is not stored. START DELAY Desired time when the drying programme should start can be set in advance, which allows more flexibility.
- Page 38 ANTI CREASE If you do not intend or cannot remove the laundry from the dryer immediately after the completion of the drying cycle, we recommend using the (8) ANTI CREASE function which has to be selected before the start of the drying process.
- Page 39 CHILD LOCK To activate or deactivate the child lock, press the positions (4) MODE (DRYING MODE) and (8) ANTI CREASE simultaneously and hold them for at least 3 seconds until the symbol (7) lights up or goes off, respectively. If the child lock is activated, programme or additional functions cannot be changed.
- Page 40 EXTRA FUNCTION TABLE Programmes Cotton Storage (Cupboard dry) • • • • Normal • • • • Iron (Moist for ironing) • • • • Mix (Mixed laundry/Synthetics) Storage (Cupboard dry) • • • • Iron (Moist for ironing) • •...
-
Page 41: Step 5: Starting The Drying Programme
STEP 5: STARTING THE DRYING PROGRAMME Press the button (3) START/PAUSE. STEP 6: END OF THE DRYING PROGRAMME At the end of the drying programme, a red indicator light will light up, and the (3) START/PAUSE button light and ANTI CREASE (8a) time indicator, if activated or selected, will flash. Open the dryer door. -
Page 42: Interruptions And Changing The Programme
INTERRUPTIONS AND CHANGING THE PROGRAMME INTERRUPTIONS Interrupting the programme process Press the (3) START/PAUSE button to pause/resume a programme. To stop and cancel the drying programme, press the (3) START/PAUSE button and hold it for 3 seconds. The selected programme will stop, and the dryer will start to cool down. Cooling down time depends on the selected programme. - Page 43 PERSONAL SETTINGS MENU Switch on the dryer by pressing the (1) ON/OFF button. To open the personal settings menu, simultaneously press the positions (8) ANTI CREASE and (5) START DELAY and hold them for 3 seconds. The indicator lights (4a) EXTRADRY, (4b) GENTLECARE (LOWER TEMPERATURE), and (8) ANTI CREASE will light up on the display unit.
-
Page 44: Maintenance & Cleaning
MAINTENANCE & CLEANING Before cleaning, make sure to switch off the dryer and disconnect it from the power mains (unplug the power cord from the outlet). The dryer is fitted with a filtering system consisting of one filter. Net filter Air exhaust opening As this is an evacuation dryer, it does not have a condensate tank. -
Page 45: Cleaning The Net Filter In The Door
CLEANING THE NET FILTER IN THE DOOR Clean the net filter after each drying cycle. Lift the filter cover. Gently scrape the filter to remove the lint, i.e. the lining of fibres and threads, with your hand or with a cloth. If necessary, clean the filter housing and door gasket as... -
Page 46: Cleaning The Exhaust Duct
CLEANING THE EXHAUST DUCT Occasionally clean (vacuum) the interior of the air exhaust opening and the air exhaust duct. -
Page 47: Cleaning The Dryer
CLEANING THE DRYER Always disconnect the dryer from the power mains before cleaning. Clean the dryer exterior using a soft damp cotton cloth. Do not use any solvents or cleaning agents that could damage the dryer (please observe the recommendations and warnings provided by the manufacturers of the cleaning agents). Wipe all parts of the dryer with a soft cloth until dry. -
Page 48: Troubleshooting
TROUBLESHOOTING WHAT TO DO ...? Disturbances from the environment (e.g. the power grid) may result in various error reports (see TROUBLESHOOTING TABLE). In such case: • Switch off the dryer and wait at least one minute. • Switch on the dryer and repeat the drying programme. •... -
Page 49: Troubleshooting Table
TROUBLESHOOTING TABLE Problem/error Cause What to do? The machine will not • The main switch is not switched • Check whether the main switch is start. • There is no voltage in the power • Check the fuse. outlet. • Check if the power cord plug is correctly inserted into the power outlet. - Page 50 Problem/error Cause What to do? Laundry not dried • Filter is not cleaned. • Clean the filter (see chapter or drying takes too »CLEANING AND MAINTENANCE/ long Cleaning the net filter in the door«). • Dryer is placed in a closed room; •...
- Page 51 Problem/error Error description What to do? Control unit failure Disconnect the tumble dryer from The START DELAY signal lights (5) the power supply. flash 6 times. Call service centre. Control unit failure The START DELAY signal lights (5) flash 7 times. Control unit failure The START DELAY signal lights (5) flash 8 times.
-
Page 52: Servicing
In such cases, the costs of repair shall be charged to the user. TYPE: SP15/XXX MODEL: XXXXXX/X IPX4 Art.No.: XXXXXX Ser.No.: XXXXXXXX 220-240 V ~ XX Hz XX A X kg Pmax.: XXXX W XXXX W Additional equipment and accessories for maintenance can be viewed on our website at: www.gorenje.com. -
Page 53: Tips For Drying And Economic Use Your Dryer
TIPS FOR DRYING AND ECONOMIC USE YOUR DRYER The most economical way of drying is to dry the recommended amount of laundry in each batch (see PROGRAMME TABLE). Drying laundry made of particularly delicate fabrics that may be deformed is not recommended. Use of conditioner in the washing cycle is not necessary as the laundry is soft and smooth after drying in the dryer. -
Page 54: Disposal
DISPOSAL Packaging is made of environmentally friendly materials that can be recycled, disposed of, or destroyed without any hazard to the environment. To this end, packaging materials are labelled appropriately. The symbol on the product or its packaging indicates that the product should not be treated as normal household waste. -
Page 55: Typical Consumption Table
TYPICAL CONSUMPTION TABLE The table lists the values for drying time and power consumption for drying of a test batch of laundry with various spinning rpm in the washing machine. Programme 15,4 lb (7 kg) Cotton Standard Total 1000 3,98 Partial 1400 2,40... - Page 56 LOW STANDBY MODE If you do not run a programme or do anything else after switching on the dryer, the dryer will switch off automatically after 5 minutes to save energy. Indicator light on the (3) START/PAUSE button will flash. The display will be reactivated if you rotate the programme selector knob or press the (1) ON/ OFF button or open the dryer door.
Need help?
Do you have a question about the DP7C and is the answer not in the manual?
Questions and answers