Table of Contents

Subscribe to Our Youtube Channel
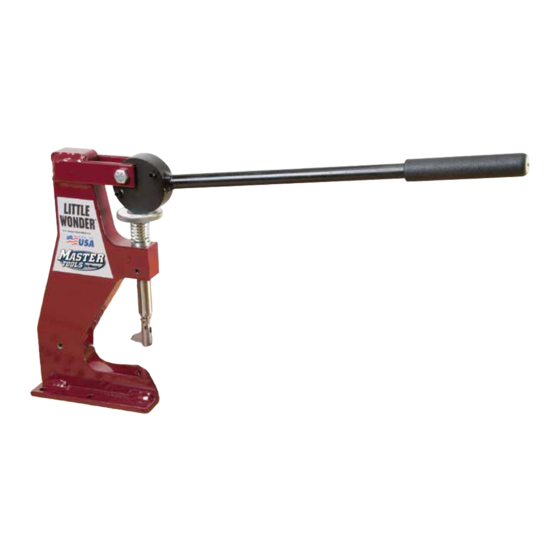
Related Manuals for Weaver Master Tools Little Wonder 2019

Summary of Contents for Weaver Master Tools Little Wonder 2019
- Page 1 Master Tools Little Wonder ® OWNER’S MANUAL 2019 Please call us with any product questions or for technical assistance. U.S. Design Patent #D632,318 7540 CR 201, PO Box 68 • Mt. Hope, OH 44660-0068 • 800-932-8371 or 330-674-1782 18-1497-SP-FLY...
- Page 2 www.weaverleathercraft.com www.weaverleathercraft.com...
- Page 3 Small Machine, Big Possibilities Congratulations on your purchase of the patented Master Tools Little Wonder . Handcrafted by our skilled crafts- ® people in Mt. Hope, Ohio, this ingenious machine is built using the finest materials, skilled American workmanship and finishing touches for dependable performance you can count on project after project. This hand-operated machine features a cam action arm that gives you extra leverage for quick and easy operation with just one hand.
-
Page 4: Table Of Contents
Table of Contents Page Unpack Your Box ..........5 Getting to Know the Little Wonder . -
Page 5: Unpack Your Box
Unpack Your Box The Master Tools Little Wonder comes completely assembled. ® You’ll find the following in your box: ➊ Master Tools Little Wonder Machine ® ➋ Driver Attachment for #104 Rivets ➌ Splash Anvil for #104 Rivets ➍ Guide ➎... -
Page 6: Getting To Know The Little Wonder
There are no implied warranties Driver Thumb Screw of any kind including merchantability or fitness for a particular purpose. Weaver Leather will in no event Driver be liable for any incidental or consequential damages whatsoever, nor for any sum in excess of the price received for the goods. -
Page 7: Quick-Start Guide
Quick-Start Guide SETTING #104 TUBULAR RIVETS WITH DRIVER AND SPLASH ANVIL THAT COME WITH THE MACHINE SPLASH SET RIVET See Pages 8 & 9 for complete instructions and troubleshooting tips You do not need to pre-punch holes in your material to set tubular rivets. -
Page 8: Setting #104 Tubular Rivets
Setting #104 Tubular Rivets You do not need to pre-punch holes in your material to set tubular rivets. To achieve the best results, we recommend testing a few rivets in some scrap leather using the troubleshooting tips on page 9 SPLASH as your guide. - Page 9 TROUBLESHOOTING TIPS Rivets should be approximately 1/8" longer for splash (or 1/16" 1/8" for Splash 1/16" for Cap longer for cap) than the thickness of the material used Proper Adjustment for Rivet with Cap WRONG WRONG CORRECT Problem: Bent rivet from Problem: Loose rivet from When testing with a cap, the too much pressure -OR-...
-
Page 10: Setting #104 Tubular Rivets
Setting #104 Tubular Rivets with Magnetic Driver Magnetic driver works with plated rivets only. It does not work with stainless steel, nickel brass or solid brass rivets. You do not need to pre-punch holes in your material to set tubular rivets. - Page 11 TROUBLESHOOTING TIPS Rivets should be approximately 1/8" longer for splash (or 1/16" 1/8" for Splash 1/16" for Cap longer for cap) than the thickness of the material used Proper Adjustment for Rivet with Cap WRONG WRONG CORRECT Problem: Bent rivet from Problem: Loose rivet from When testing with a cap, the too much pressure -OR-...
-
Page 12: Setting Crystals
Setting Crystals You do not need to pre-punch holes in your material to set 5/16" crystals. To achieve the best results, we recommend testing a few crystals in some scrap leather using the troubleshooting tips on page 13 as your guide. 1) Insert the anvil into the anvil adapter and secure with the set screw using a 5/32"... - Page 13 TROUBLESHOOTING TIPS Proper Adjustment for Crystals WRONG CORRECT Problem: Crystal is broken The crystal should be seated from too much pressure just slightly into leather with the prongs curled in on the Solution: Turn adjustment underside of the leather. A wheel clockwise to raise broken crystal means too much crystal setter attachment...
-
Page 14: Setting Spots
Setting Spots You do not need to pre-punch holes in your material to set spots. To achieve the best results, we recommend testing a few spots in some scrap leather using the troubleshooting tips on page 15 as your guide. 1) Insert the appropriate anvil and spot setter attachment for the spot you want to set (1/8", 3/16", 1/4", 5/16", 3/8"... - Page 15 TROUBLESHOOTING TIPS Spots should be seated just slightly into leather. Proper Adjustment for Spots WRONG WRONG CORRECT Problem: Loose spot with Problem: Spot is seated too The spot should be seated just prongs on the underside not far into leather slightly into leather with the curled in properly from not prongs curled in on the under-...
-
Page 16: Setting Grommets
Setting Grommets You will need to pre-punch a hole in your material to set a grommet. To achieve the best results, we recommend testing a few grommets in some scrap leather using the troubleshooting GROMMET SIZE HOLE SIZE tips on page 17 as your guide. 3/16"... - Page 17 TROUBLESHOOTING TIPS Proper Adjustment for Grommets WRONG CORRECT Problem: Bottom washer The bottom washer part of is smashed from too much grommet should be nicely pressure rolled under. If the bottom washer is smashed, it means Solution: Turn adjustment too much pressure was wheel clockwise to raise applied, so the driver will driver...
-
Page 18: Setting 15S4 Slide Loop Staples
Setting 15S4 Slide Loop Staples You do not need to pre-punch holes in your material to set staples. To achieve the best results, we recommend testing a few staples in some scrap leather. FOR SETTING DECORATIVE STAPLES WITH THE SPOT ANVIL LOOP ANVIL 1) Insert the spot anvil into the anvil adapter and secure the anvil... - Page 19 FOR SETTING STAPLES WITH THE LOOP ANVIL 1) Insert the loop anvil into the anvil adapter and secure the anvil with the set screw located at the front of the anvil adapter using a 5/32" Allen wrench (Figure 62). To give yourself room to see the loop anvil clearly, you’ll need to raise the driver by turning FIGURE 62 FIGURE 63...
-
Page 20: Setting Eyelets
Setting Eyelets You will need to pre-punch a hole in your material to set an eyelet. To achieve the best results, we recommend testing a few eyelets in some scrap leather using the troubleshooting tips below as your guide. 8 mm 10 mm 12 mm Important: Make sure the top/good side of leather is face down. -
Page 21: Setting 2205 Segma Snaps
Setting 2205 Segma Snaps You’ll need to pre-punch holes (3/16" for top of snap; 1/8" for 3) For bottom of snap, insert the 2B anvil into the anvil bottom of snap). Please note: The top of snap always has the nice adapter and secure with the set screw using a 5/32"... -
Page 22: Setting 2206 (Line 20) Snaps
Setting 2206 (#20 Line) Snaps You’ll need to pre-punch a 3/16" hole in your material to accommo- 3) For bottom of snap, insert the 2B anvil into the anvil adapter date the stem of the 2206 Snap. Please note: The top of snap always and secure with the set screw using a 5/32"... -
Page 23: Setting 4P (Line 24) Durable Snaps
Setting 4P (#24 Line) Durable Snaps Will not work with locking snaps You’ll need to pre-punch a 3/16" hole in your material to accommo- 3) For bottom of snap, insert the 2B anvil into the anvil date the stem of the 4P Durable Snap. Please note: The top of snap adapter and secure with the set screw using a 5/32"... -
Page 24: Setting Double Cap, Jiffy And Rapid Rivets
Setting Double Cap, Jiffy and Rapid Rivets Will not work with 1/4" 2200 rivets Holes need to be punched before setting; a 3/32" hole should work for all sizes. To achieve the best results, we recommend testing a few rivets in some scrap leather using the troubleshooting tips on page 25 as your guide. - Page 25 TROUBLESHOOTING TIPS Rivets should be approximately 1/16" longer than the thickness of the material used Proper Adjustment for Rivet with Cap WRONG WRONG CORRECT Problem: Bent rivet from Problem: Loose rivet from When testing, the rivet should too much pressure -OR- not enough pressure be straight and snug in the cap.
-
Page 26: Punching Holes
Punching Holes To achieve the best results, we recommend punching a few holes in some scrap leather using the troubleshooting tips on page 27 as your guide. 1) Secure the anvil with the set screw located at the front on the anvil Actual Size of Hole Punch Tubes adapter using a 5/32"... - Page 27 TROUBLESHOOTING TIPS The hole punch tube should pass all the way through the material while just touching the top of the anvil. This will ensure proper results and prevent damage to the tube. If you find the tube sticks to material during punching, buffing or polishing the end of the tube should resolve the issue.
-
Page 28: Maintenance
Maintenance To keep the Little Wonder in good working order, we ® recommend you regularly oil the cam (Figure 128) and the driver shaft (Figure 129) with Lily Stitching Oil. Just a light film of oil is recommended to keep this machine properly lubricated. -
Page 29: General Troubleshooting
General Troubleshooting Off Center Anvil FIGURE 130 If the anvil is off center, loosen the three set screws (Figure 130) on the adjustment collar. Move the anvil adapter so that it lines up with your snap or rivet and tighten the three screws on the adjustment collar. Note: These are all set correctly when manufactured. -
Page 30: Replacement Parts
Replacement Parts ➊ 65-6585 Brass Anvil ➋ 65-6637 Driver Thumb Screw ➌ 65-6638 Guide Thumb Screw ➓ ➍ 65-6648 Threaded Rod 65-6639 2" Knurled Adjustment Knob 65-6670 Spring for Rivet Driver ➐ ➎ 65-6643 Spring ➍ ➓ 65-6655 Driver Attachment ➎... -
Page 31: Attachments List
Little Wonder Attachments ® Expand this Handy Machine’s Capabilities with the Right Attachments for Your Needs FUNCTION ATTACHMENT DESCRIPTION SET #104 RIVETS WITH CAP 65-6455 Cap Anvil for #104 Rivets For use with the 65-6655 Driver Attachment for #104 Rivets (comes standard with machine) to set a #104 Rivet with a Cap, providing a nice, finished look on both sides... -
Page 32: Punching Holes
Little Wonder Attachments Cont. ® FUNCTION ATTACHMENT DESCRIPTION PUNCH HOLES 65-6193 Threaded Punch Handle Punches holes when used in combination with the 65-6615 Hole Punch Tubes and Actual Size of Hole Punch Tubes 65-6585 Brass Anvil (both shown below and sold separately) 65-6615 Hole Punch Tubes, Sizes 5-10, Punches holes when used in combination ⁄...
Need help?
Do you have a question about the Master Tools Little Wonder 2019 and is the answer not in the manual?
Questions and answers