
Related Manuals for Climecon CLEANMASTER Series

Summary of Contents for Climecon CLEANMASTER Series
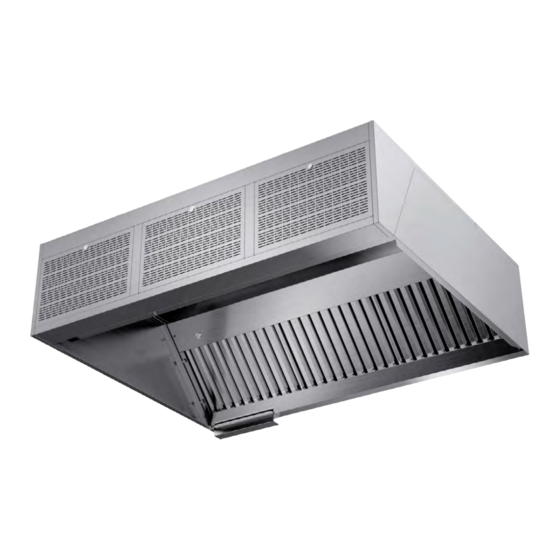
- Page 1 INSTALLATION, ADJUSTMENT, OPERATING AND MAINTENANCE INSTRUCTIONS OF CLEANMASTER® HOODS © Climecon Lämmittäjänkatu 4 A, FI-00880 HELSINKI, Finland · Telephone +358 20 198 6600, Fax +358 020 198 6609...
-
Page 2: Table Of Contents
6.2 Removing the grease filters ................9 6.3 Replacing the fluorescent tubes in the lights ..........9 6.4 Replacing the UV lamp ..................10 © Climecon Lämmittäjänkatu 4 A, FI-00880 HELSINKI, Finland · Telephone +358 20 198 6600, Fax +358 020 198 6609... -
Page 3: General
Warranty is subject to the condition of using Climecon spare parts and UV lamps. Only the original parts or the spare parts or UV lamps ordered from Climecon may be used in the device. The UV lamps should always be ordered from Climecon customer service (tel. -
Page 4: Warnings
(rupture of a pipe can cause quartz shards) The electrical connections of the CleanMaster® system may only be made by an authorized electrician. Only the Climecon spare parts and UV lamps may be used in the CleanMaster® system. © Climecon... -
Page 5: Content Of The Cleanmaster® Hood Delivery
(e.g. control wire Ölfex 4 x 1.5mm2) • Fasteners • Wires for the SlideSafe safety lock © Climecon Lämmittäjänkatu 4 A, FI-00880 HELSINKI, Finland · Telephone +358 20 198 6600, Fax +358 020 198 6609... -
Page 6: Instructions For Installation Of Cleanmaster® Hoods
Fix adjacent hoods to one another through the holes (E) in the upper edge of each hood, using M6 bolts and nuts. © Climecon Lämmittäjänkatu 4 A, FI-00880 HELSINKI, Finland · Telephone +358 20 198 6600, Fax +358 020 198 6609... -
Page 7: Installation Of The Air Flow Sensor
32 mm approx. 120 mm Figure 2. Installation direction of the air flow sensor Installation direction of the air flow sensor © Climecon Lämmittäjänkatu 4 A, FI-00880 HELSINKI, Finland · Telephone +358 20 198 6600, Fax +358 020 198 6609... -
Page 8: Installation Of The Ccm Control Unit
External control • The building automation has not given the permission for operation. A red light is lit in the control panel. © Climecon Lämmittäjänkatu 4 A, FI-00880 HELSINKI, Finland · Telephone +358 20 198 6600, Fax +358 020 198 6609... -
Page 9: Replacing The Uv-Lamp
Note! Attach the labels about UV lamp replacement and maintenance instructions of the hood, which were included in the delivery, to a visible place close to the CCM control unit. © Climecon Lämmittäjänkatu 4 A, FI-00880 HELSINKI, Finland · Telephone +358 20 198 6600, Fax +358 020 198 6609... -
Page 10: Installation Of Grease Filters And Locking The Slidesafe Safety Lock
NOTE! The CleanMaster® system will not start, when the SlideSafe safety lock has not been properly locked. © Climecon Lämmittäjänkatu 4 A, FI-00880 HELSINKI, Finland · Telephone +358 20 198 6600, Fax +358 020 198 6609... -
Page 11: Before You Start The Cleanmaster® System
After the start, the text «restart» appears on the display of the UV system, after which in about 60 seconds the starters of UV lamps become active (starting delay of the air flow sensor). © Climecon Lämmittäjänkatu 4 A, FI-00880 HELSINKI, Finland · Telephone +358 20 198 6600, Fax +358 020 198 6609... - Page 12 At this stage the faulty UV lamp should be checked and replaced, if necessary. New UV lamps should always be ordered directly from Climecon customer service! © Climecon Lämmittäjänkatu 4 A, FI-00880 HELSINKI, Finland · Telephone +358 20 198 6600, Fax +358 020 198 6609...
-
Page 13: Instructions For Adjustment Of Cleanmaster® Hoods
© Climecon Lämmittäjänkatu 4 A, FI-00880 HELSINKI, Finland · Telephone +358 20 198 6600, Fax +358 020 198 6609... -
Page 14: Table Of The K-Values Of Cleanmaster® Hoods
When the air flows change in the system, repeat the calibration of the air flow sensor. Figure 1. Calibration of the air flow sensor Adjusting screw Signal lights (red/green) © Climecon Lämmittäjänkatu 4 A, FI-00880 HELSINKI, Finland · Telephone +358 20 198 6600, Fax +358 020 198 6609... -
Page 15: Operating Instructions For Cleanmaster® Hoods
Text on the screen: lamp age exceeded The service hours of the UV lamp have been exceeded. Replace the old UV lamp with a new UV lamp ordered from Climecon. See the instructions for replacing the UV lamp in subsection 6.4. - Page 16 Text on the screen: lamp age exceeded The service hours of the UV lamp have been exceeded. Replace the old UV lamp with a new UV lamp ordered from Climecon. See the instructions for replacing the UV lamp in subsection 6.4.
-
Page 17: Instructions For Maitenance Of Cleanmaster® Hoods
The hoods can be cleaned with cleaning agents, which are suitable for cleaning stainless steel. Extremely strong alkali (pH > 11) should be avoided. The Climecon UV lamps do not need cleaning in case of normal use. -
Page 18: Removing The Grease Filters
Open the covering glass of the lights by opening the fixing screws. Replace the fluorescent tubes. Check that the gaskets are in good condition. Re-install the covering glass. © Climecon Lämmittäjänkatu 4 A, FI-00880 HELSINKI, Finland · Telephone +358 20 198 6600, Fax +358 020 198 6609... -
Page 19: Replacing The Uv Lamp
UV lamp lamps. counter clockwise. from the supports. Replace the UV lamp with a new lamp. Only Climecon Mount the new UV Attach the electrical connec- Install all the grease filters back into UV lamps may be used in the...
Need help?
Do you have a question about the CLEANMASTER Series and is the answer not in the manual?
Questions and answers